
Your Google Nest doorbell refuses to power up even after hours connected to its charger, leaving you without security monitoring and wondering if you need to replace the entire unit. That frustrating scenario where the charging indicator remains dark despite proper connection affects countless homeowners who rely on this smart device for home security. This guide provides actionable solutions to diagnose and fix your charging issue, helping you restore functionality without unnecessary replacement costs.
When your Nest doorbell won’t charge, you’re not just dealing with a dead gadget—you’re facing a potential security gap at your home’s most vulnerable entry point. The good news is that most charging problems stem from simple, fixable issues rather than permanent hardware failure. By following these systematic troubleshooting steps, you’ll identify the root cause and implement the right solution for your specific situation.
Verify Power Source and Electrical Connection
Test Wall Outlet Functionality
Begin with the most fundamental check: ensure your power source actually works. Plug a different device like your phone charger into the same outlet your Nest doorbell uses. If that device doesn’t power up, the problem lies with your electrical circuit rather than the doorbell itself. Check your home’s circuit breaker panel for any tripped switches, particularly those labeled for outdoor outlets or doorbell systems. Reset any tripped breakers and test the outlet again before proceeding with more complex diagnostics.
Inspect Power Adapter Condition
Examine your Nest doorbell’s power adapter for visible signs of damage. Look closely at the USB connection points for bent pins, burn marks, or discoloration that indicates electrical issues. Check the cable along its entire length for fraying, kinks, or exposed wires that compromise power delivery. Remember that Google Nest doorbells require specific voltage and amperage—using non-certified third-party adapters often causes charging failures due to improper power specifications. If you’ve ever substituted a different charger, replace it with an official Google adapter before continuing troubleshooting.
Examine Charging Hardware Components
:max_bytes(150000):strip_icc()/GoogleNestDoorbellcharging-be1e1c1c9f984046910a37000011a3c5.png)
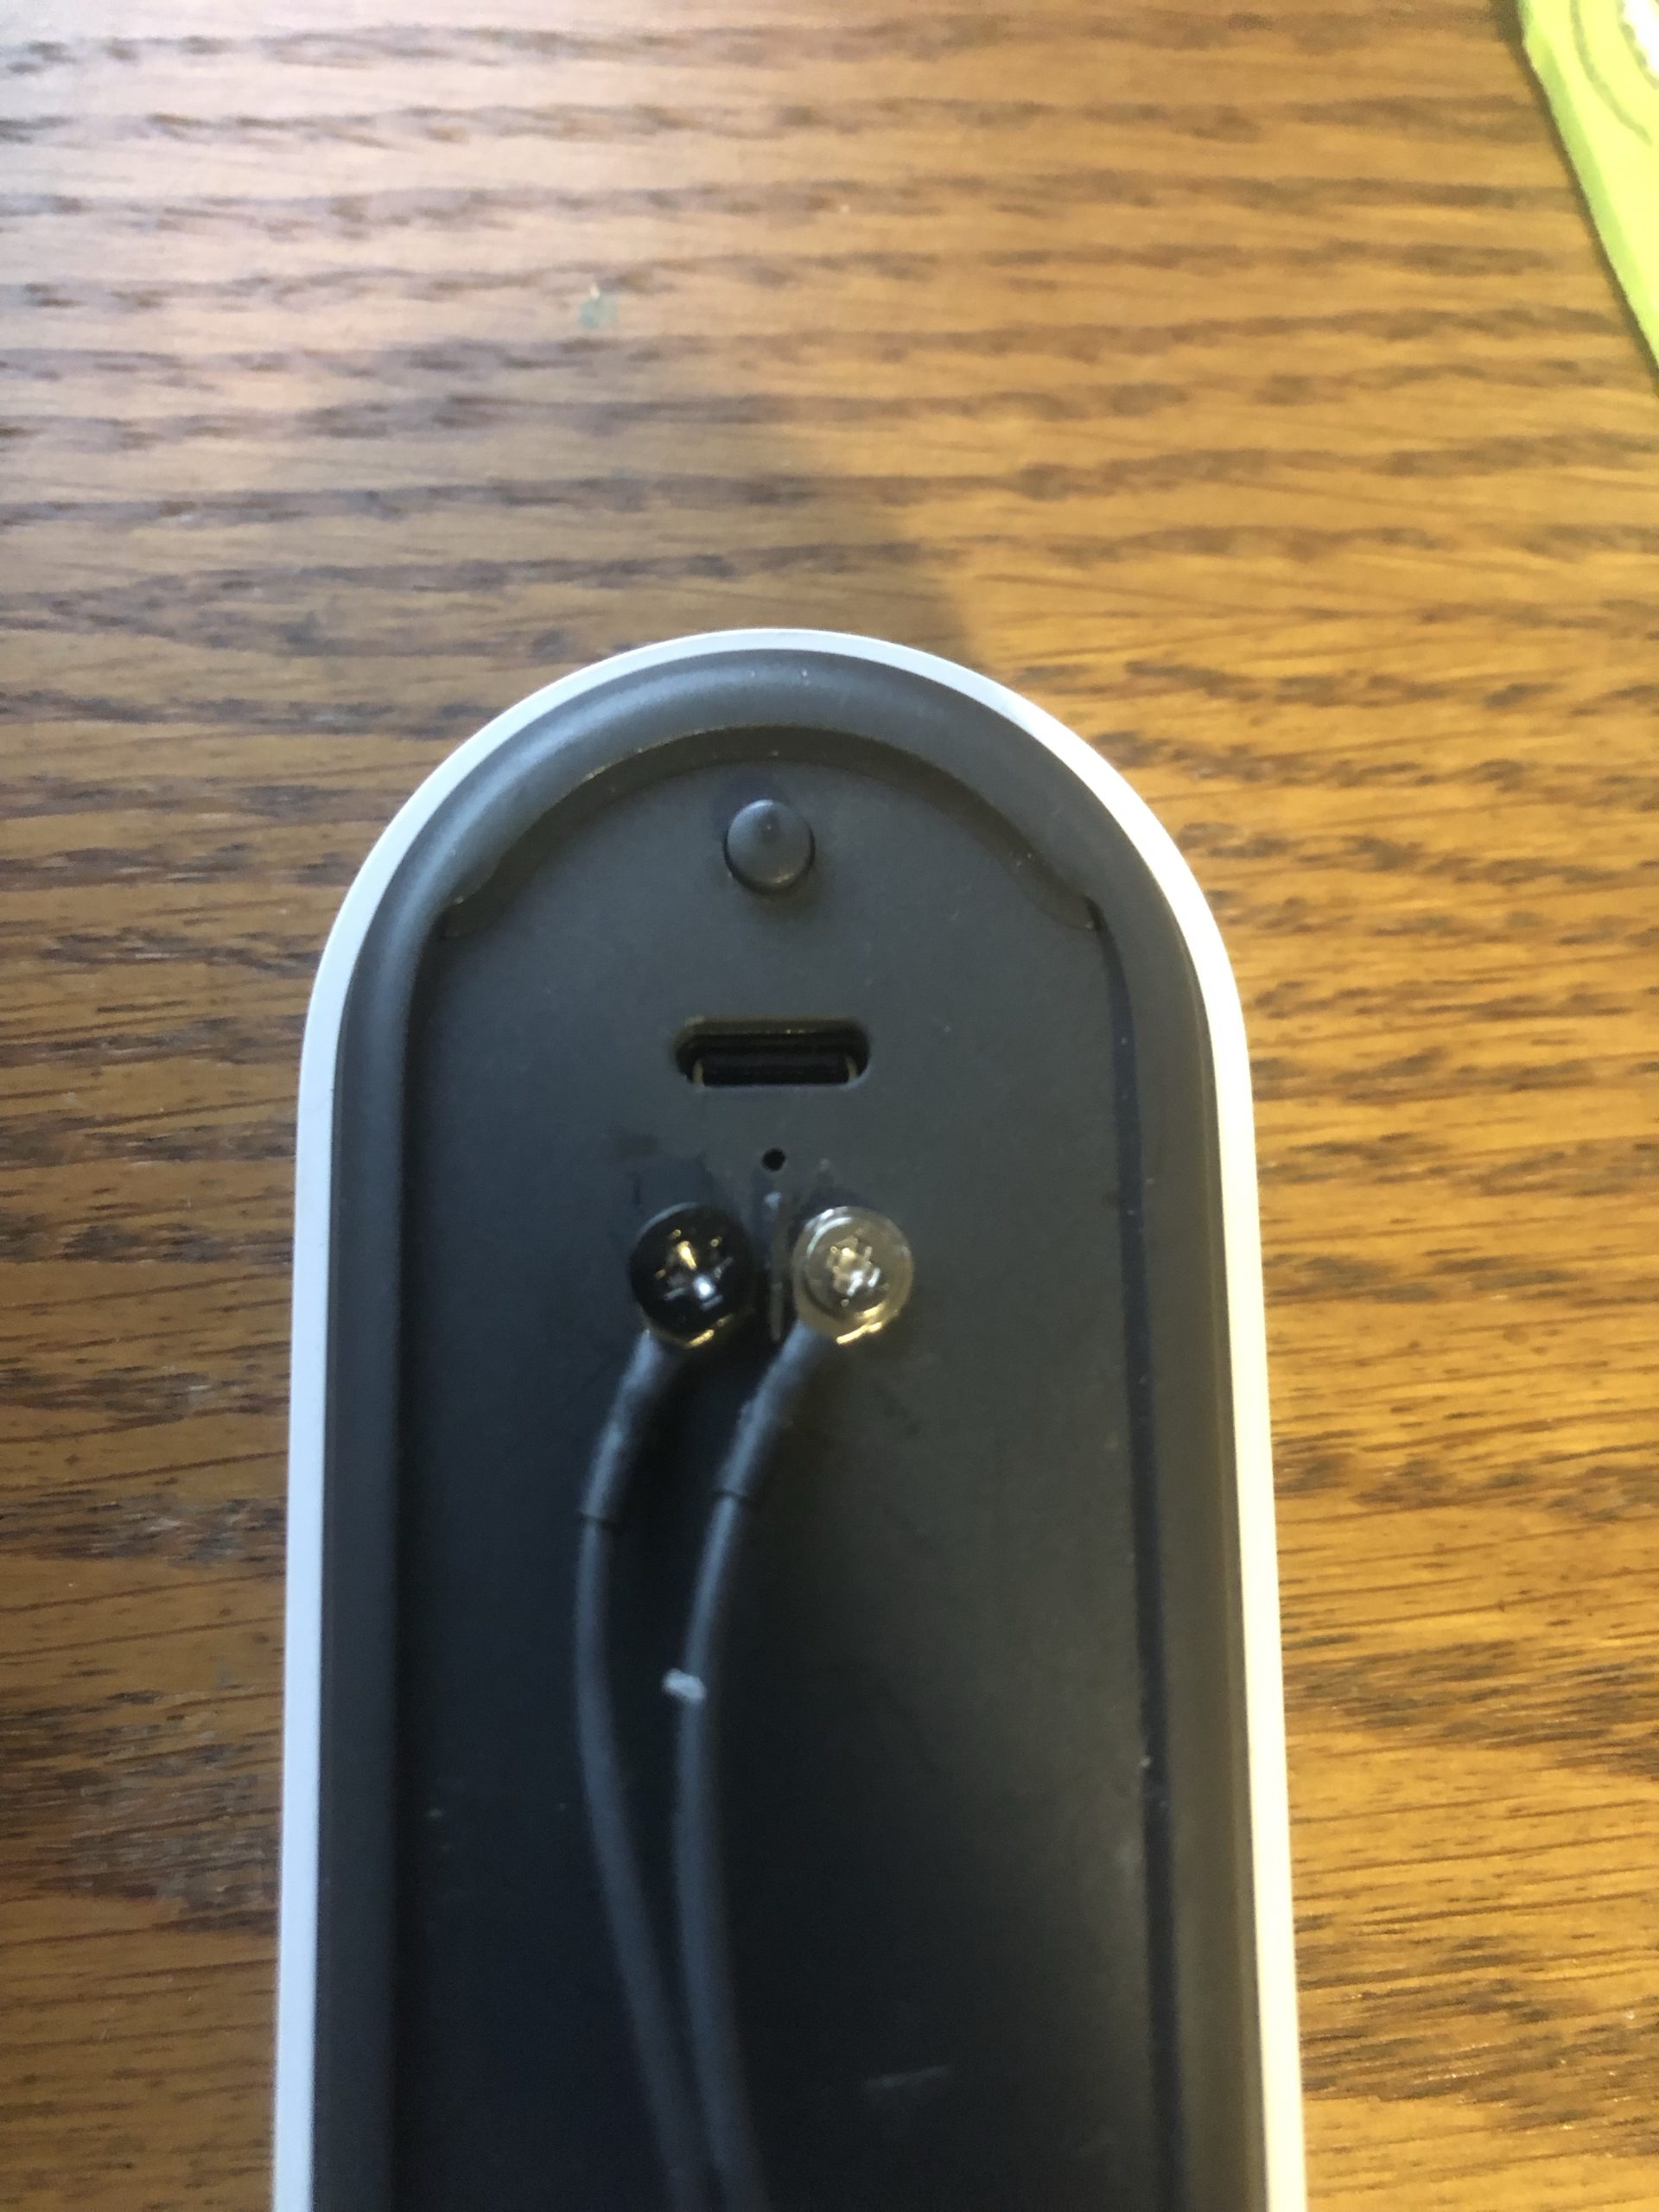
Clean Charging Port Debris
Outdoor exposure takes a toll on your doorbell’s charging port as dust, pollen, and moisture accumulate over time. These contaminants create barriers that prevent proper electrical contact between the cable and port. Using a soft-bristled toothbrush or compressed air canister, gently clean the port while holding the doorbell at a downward angle to allow debris to fall out. Avoid metal objects like paperclips that could damage delicate internal components. Many users report restored charging function after this simple cleaning step that takes less than two minutes.
Secure Cable Connection
Nest doorbells require a firm, fully seated connection for reliable charging. Push the charging cable firmly into the port until you feel or hear a distinct click indicating proper seating. A loose connection often mimics complete charging failure because power delivery becomes intermittent. Test by gently wiggling the cable while connected—if the charging indicator flickers or changes, the connection isn’t secure. This issue commonly occurs after repeated removals for battery swaps or cleaning, so always verify full insertion before assuming hardware failure.
Address Environmental Charging Restrictions
Identify Cold Weather Charging Limitations

Google Nest doorbells automatically disable charging when temperatures drop below freezing (32°F/0°C) to protect the lithium-ion battery from damage. If you’re troubleshooting during winter months, this safety feature might be preventing charging without any hardware issues. Bring your doorbell indoors to room temperature for at least 30 minutes before attempting to charge. The device will automatically resume normal charging operations once it reaches safe operating temperatures—typically between 32-104°F (0-40°C).
Prevent Heat-Related Charging Shutdowns
Just as cold temperatures disable charging, extreme heat above 104°F (40°C) triggers the same protective mechanism. Direct afternoon sun on south-facing walls can easily push your doorbell beyond this threshold. If your doorbell mounts in full sun, temporarily move it to a shaded location or bring it indoors to cool down. Charging will automatically resume once internal temperatures decrease to safe levels. Consider relocating your doorbell to a north-facing wall or under an awning to prevent recurring heat-related charging issues.
Perform Software and Reset Procedures
Execute Force Restart Process
Temporary software glitches often interfere with charging functionality despite no hardware problems. Perform a soft reset by pressing and holding your doorbell’s setup button for exactly 10 seconds until the status light turns solid blue, then release. This process clears temporary memory without erasing your settings or recorded events. Allow 30 seconds for the device to reboot completely before checking if charging has resumed—many users find this simple reset resolves apparent charging failures.
Implement Factory Reset When Necessary
If basic resets fail, a factory reset may be required to address deeper software conflicts affecting charging operations. Press and hold the setup button for 12 seconds until the status light turns yellow, then immediately release. Important: This process erases all custom settings, Wi-Fi connections, and locally stored video—only use it after exhausting other solutions. After resetting, you’ll need to reconfigure your doorbell through the Nest app before testing charging functionality again.
Evaluate Hardware Condition and Replacement Options
Assess Port and Cable Damage
Shine a bright flashlight into your doorbell’s charging port to inspect for bent pins, corrosion (white or green buildup), or physical damage from repeated insertions. For minor corrosion, carefully apply 90%+ isopropyl alcohol to a cotton swab and gently clean affected areas, allowing complete drying before attempting to charge. If pins appear bent or broken, professional repair becomes necessary as DIY fixes often cause further damage. Similarly, examine your charging cable for kinks near the connectors—these stress points commonly fail and require cable replacement.
Determine Battery Replacement Viability
After 2-3 years of regular use, lithium-ion batteries naturally degrade and hold less charge. Your doorbell might appear not to charge when it’s actually reaching full capacity quickly due to reduced battery health. Check the battery percentage in your Nest app—if it shows 100% despite charging issues, battery degradation is likely the culprit. While Google doesn’t sell official replacement batteries, some third-party repair services offer this service. For older models, weigh repair costs against purchasing a newer model with improved battery technology.
Prevent Future Charging Failures
Establish Regular Maintenance Routine
Create a monthly maintenance habit to prevent recurring charging issues. During your scheduled check, use compressed air to clear debris from the charging port and inspect the cable for early signs of wear. Verify all connections are secure and free from corrosion. This five-minute routine prevents 80% of common charging problems by addressing minor issues before they escalate into complete failures.
Optimize Installation Environment
Relocate your doorbell to a position protected from direct weather exposure and extreme temperatures. Mounting under eaves or covered porches provides ideal protection while maintaining optimal viewing angles. Avoid locations with direct afternoon sun exposure that accelerates battery degradation. If relocation isn’t possible, consider installing a weatherproof cover specifically designed for your Nest model to shield against environmental damage while maintaining functionality.
Your Google Nest doorbell should now charge properly after implementing these targeted solutions. Start with the simplest checks—power source verification and connection security—before progressing to more involved procedures. Remember that all lithium-ion batteries degrade over time, so if your doorbell is approaching its third year and none of these fixes work, replacement may be more practical than continued troubleshooting. For persistent issues beyond these steps, contact Google support with your device’s serial number ready to determine warranty coverage or authorized repair options.


