
That frustrating moment when your carefully planned wood door hanger ends up with splintered edges and uneven curves? You’re not alone. Mastering how to cut wood door hangers properly separates amateur attempts from professional-looking results. This guide cuts through the guesswork with field-tested techniques that prevent tear-out, minimize sanding time, and deliver clean edges every time you work with wood. Whether you’re crafting a “Welcome” sign for your farmhouse door or personalized gifts for friends, precise cutting transforms rough lumber into polished decor.
Most beginners make critical mistakes during the cutting phase that compromise their entire project. Using the wrong blade for your wood type, cutting too aggressively, or skipping transfer techniques leads to wasted materials and frustration. But with the right approach, you’ll achieve smooth contours that require minimal sanding. In this guide, you’ll discover exactly which saws deliver clean cuts for intricate shapes, how to transfer designs without distortion, and the counterintuitive trick that prevents wood splintering on the backside of cuts. Let’s turn your cutting struggles into confident craftsmanship.
Critical Safety Steps Before Cutting Wood Door Hangers
Skipping safety protocols when learning how to cut wood door hangers risks serious injury from kickbacks and flying debris. Always wear ANSI-approved safety glasses and a NIOSH-rated dust mask before touching your saw. Pine and plywood generate fine particulates that permanently damage lungs with repeated exposure. Set up your workstation outdoors or in a garage with cross-ventilation to prevent stain and finish fumes from accumulating.
Secure your work area by anchoring your saw to a stable surface and clearing clutter within a 3-foot radius. Check blades for sharpness and damage – dull blades force you to push harder, increasing kickback risk. Keep fingers at least 3 inches from cutting lines using push sticks for small pieces. Never wear gloves near moving blades as they can snag and pull hands into the saw path. These precautions take 2 minutes but prevent life-altering accidents during wood door hanger cutting.
Why Blade Sharpness Prevents Dangerous Kickbacks
Dull blades create excessive friction that causes wood to bind and violently eject from the saw. When cutting wood door hangers, replace jigsaw blades after 15 minutes of continuous use. A sharp blade glides effortlessly through 1/4″ plywood with minimal pressure – if you’re forcing the wood, stop and change the blade immediately. Test sharpness by making a small cut in scrap wood; clean shavings indicate sharpness while powdery sawdust means it’s time for a replacement.
Essential Cutting Tools for Wood Door Hangers

Choosing the wrong saw guarantees ragged edges that ruin your design. For how to cut wood door hangers successfully, match your tool to the project complexity. Intricate shapes like doves or snowflakes require an oscillating multi-tool with flush-cut blades for internal cutouts. Standard house-shaped hangers cut cleanly with a jigsaw using 10-12 TPI (teeth per inch) blades. Always use down-cut spiral blades for plywood to prevent splintering on the visible face.
Jigsaw vs. Scroll Saw: Which Wins for Door Hangers?
| Tool Type | Best For | Blade Speed | Curve Radius | Sanding Time |
|---|---|---|---|---|
| Jigsaw | Thick lumber (3/4″) | Variable (500-3000 SPM) | 1-2″ radius | High (15+ min) |
| Scroll Saw | Thin plywood (1/4″) | Fixed (1500 SPM) | 1/4″ radius | Low (5-8 min) |
| Band Saw | Straight cuts | Fixed speed | N/A | Medium |
For most DIYers, a corded jigsaw with orbital action delivers the best balance for cutting wood door hangers. The variable speed control (0-3000 strokes per minute) handles both pine boards and plywood. Set orbital action to position 1 for gentle curves and position 3 for straight cuts. Always clamp wood to a sacrificial board to prevent tear-out on the backside.
Designing a Cut-Ready Pattern for Wood Door Hangers
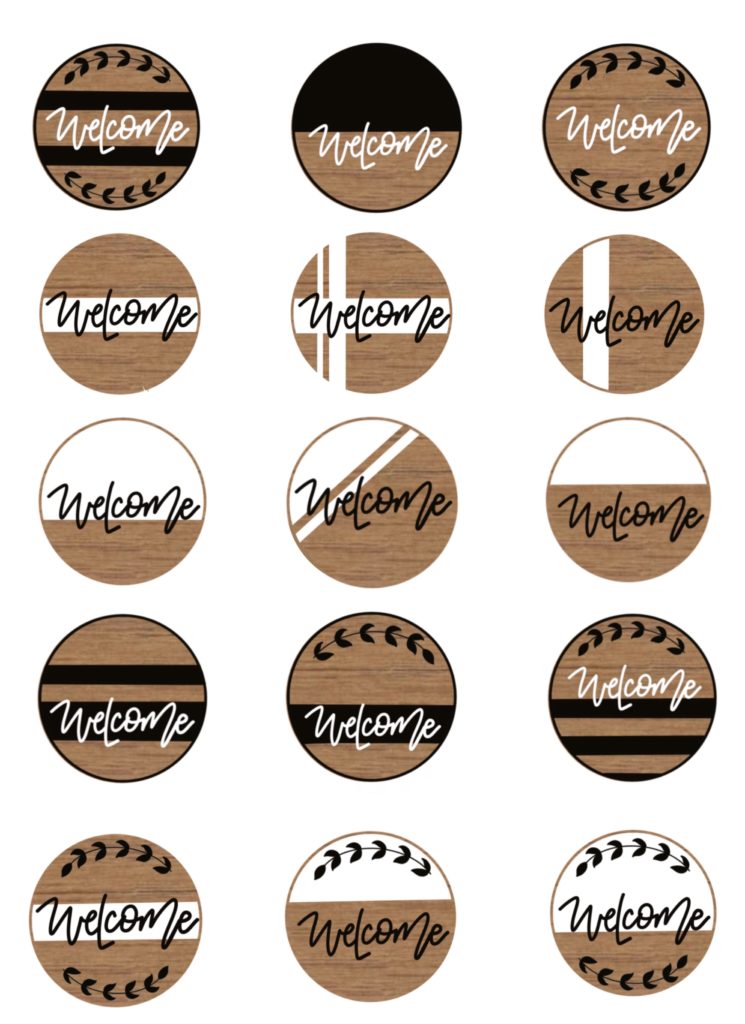
Complex designs with thin bridges between letters guarantee breakage during how to cut wood door hangers. Start with bold, simplified shapes like a 10″ tall house silhouette with 3/4″ thick walls. Avoid delicate details under 1/4″ wide – they snap during cutting or sanding. For text, use block fonts with minimum 1″ letter height and connect letters with 1/2″ crossbars.
Transferring Patterns Without Distortion
Print designs at actual size and tape them directly to your wood. Use carbon transfer paper (not regular graphite) for crisp lines that won’t smudge during cutting. For symmetrical shapes like hearts, fold the pattern vertically and trace half the design. When cutting internal shapes like the “O” in “HOME,” drill a 1/4″ starter hole inside the letter first – this gives your jigsaw blade room to maneuver without breaking corners.
Cutting Your Wood Door Hanger: Step-by-Step Guide
Securing Wood for Vibration-Free Cuts
Clamp your board to a workbench with two parallel clamps – one near the cutting line, another at the far end. Place a 1/4″ plywood scrap underneath to catch blade exit points. For curved cuts, position clamps perpendicular to the curve direction to prevent wood from pivoting during cutting. Never hold small pieces by hand – use a bench vise with jaw protectors.
Executing Flawless Curves and Corners
Start all cuts at 30% blade speed, gradually increasing as the blade penetrates. For tight inside corners, stop the saw with the blade still spinning, carefully pivot the wood, then restart cutting. Always cut 1/16″ outside your pencil line – this gives sanding room while preserving your design. When approaching the end of a cut, reduce speed to prevent tear-out. For letter cutouts, begin with internal shapes first before cutting the outer perimeter.
Sanding Cut Edges to a Professional Finish
Rough cut edges betray amateur workmanship in how to cut wood door hangers properly. Start with 100-grit sandpaper wrapped around a cork block for flat surfaces, using long strokes parallel to the wood grain. Switch to 150-grit for curved edges, switching to a detail sander for tight contours. For inside cutouts, wrap sandpaper around a dowel rod matching the curve radius.
Eliminating Saw Marks Without Removing Shape
Check your progress every 30 seconds by running fingers along edges – they should feel uniformly smooth. Pay special attention to corners where saw marks hide. If you notice uneven spots, mark them with pencil and focus sanding there. For curved edges, sand in the direction of the curve rather than straight lines. Finish with 220-grit paper using light pressure – over-sanding thins delicate sections. Wipe all dust with a tack cloth before staining.
Fixing Common Cutting Mistakes in Wood Door Hangers
Repairing Splintered Edges During Cutting
If your blade splinters the wood face, stop immediately and flip the board over. Continue cutting from the backside using a slower speed. For existing splinters, apply wood glue to the damaged area, clamp with wax paper, and sand after drying. Prevent future splinters by applying blue painter’s tape along cutting lines – the tape fibers bind wood fibers during cutting.
Correcting Jagged Curves After Cutting
Jagged curves usually mean cutting too fast or forcing the wood. Don’t try to sand them smooth – this thins the wood unevenly. Instead, re-cut the section with a fresh blade at half speed. For minor imperfections, use a sharp chisel to pare down high spots before sanding. Always test your cutting technique on scrap wood first.
Attaching the Hanger to Your Cut Wood Sign
Drilling the hanging hole seems simple but often cracks the top of wood door hangers. Position the hole 1″ below the top edge and centered horizontally. Use a brad-point drill bit (not twist bits) for clean entry/exit holes. Drill at 400 RPM with light pressure – high speeds burn the wood. For ribbon hangers, drill two 3/16″ holes 1/2″ apart and thread ribbon through both for balanced hanging.
Preventing Split Wood at Hanging Points
Place a scrap wood block under the drilling area to prevent blowout. For thin plywood hangers, glue a 1/2″ wood disc to the back before drilling – this creates a reinforced anchor point. If using wire, wrap it with electrical tape where it contacts wood to prevent fraying. Always test hang your hanger before final finishing to ensure it hangs straight.
Mastering how to cut wood door hangers transforms frustrating projects into rewarding craftsmanship. Remember the golden rule: slower cuts with sharp blades prevent 90% of cutting errors. Keep your first project simple with bold shapes and thick wood, then gradually tackle intricate designs. After cutting, always inspect edges with a bright light to catch imperfections before finishing. For ongoing success, maintain your saw blades religiously and store patterns digitally for future projects. Your perfectly cut door hangers will become cherished gifts and home accents that showcase your growing woodworking skills.


