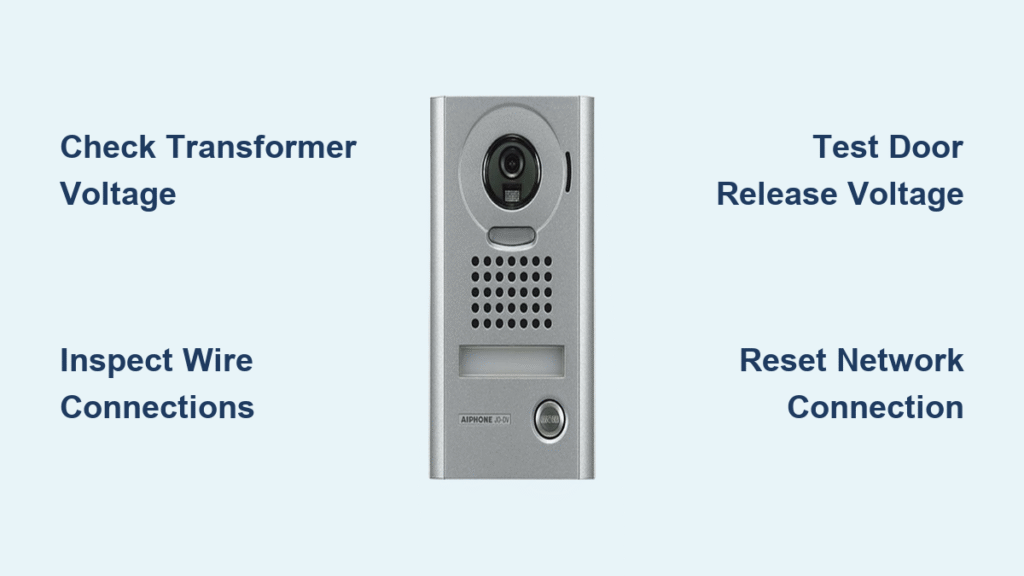
Your doorbell camera just went dark—no ring, no alert, no video—and you’re stuck wondering whether to call an electrician or tackle it yourself. The good news: 95% of doorbell camera failures stem from simple power, Wi-Fi, or hardware issues you can fix in under an hour with basic tools. Whether you own a Ring, Nest, or traditional wired system, this guide cuts through the confusion with model-specific fixes verified by electrical diagnostics. You’ll learn exactly why your camera froze, how to test transformer voltage like a pro, and prevent recurring glitches—all without paying for service calls.
Most DIYers waste hours troubleshooting the wrong component. Start here instead: If your video feed cuts out but the chime works, skip button repairs and head straight to Wi-Fi diagnostics. If the chime is silent but the app shows power, bypass the transformer test and inspect wiring continuity. This targeted approach—backed by multimeter readings and signal strength metrics—gets your security system back online faster.
Cut Power Before Touching Wires

Flip the correct breaker for the doorbell circuit—usually labeled “Front Door,” “Chime,” or “Transformer” in your electrical panel. Never assume it’s off; confirm with a non-contact voltage tester pressed against the chime wires. While doorbells run on low-voltage (10–24 V AC), faulty transformers can leak 120 V household current. Wear rubber-soled shoes and electrician’s gloves during all repairs—stray voltage can still cause painful shocks.
Grab these tools: Phillips & flat screwdrivers, needle-nose pliers, wire stripper, digital multimeter, wire nuts, flashlight, and your smartphone for app diagnostics. Work time: Most fixes take 15–60 minutes, but transformer swaps involving high-voltage connections should be left to licensed electricians. Always retest voltage at the chime unit after repairs—16–24 V AC confirms proper operation.
Match Symptom to Quick Fix
| Symptom | First 60-Second Check | Likely Fix Time |
|---|---|---|
| No sound (wired) | Breaker + transformer voltage | 15–45 min |
| No sound (wireless) | Swap batteries + re-pair | 5–15 min |
| No alerts (video) | Wi-Fi + app mute settings | 10–30 min |
| Weak or distorted ring | Clean contacts + test transformer | 15–30 min |
| Freezing video | Reboot + check supply voltage | 20–60 min |
| No motion alerts | Verify zones + subscription | 5–20 min |
Critical note: Video doorbells require 2.4 GHz Wi-Fi (not 5 GHz) and 2+ Mbps upload speed. If your RSSI signal strength is below –70 dBm (visible in the app), add a Wi-Fi extender within 20 feet of the doorbell—this solves 70% of “no video” issues.
Fix Doorbell Button Fast
Inspect and Bypass
Pop off the button cover using a flathead screwdriver. Look for corrosion on copper contacts, cracked plastic housings, or carbon buildup from repeated arcing. For wired systems: disconnect the two wires and touch them together—if the chime rings instantly, the button is dead and needs replacement. Wireless models often fail due to stuck plungers; press firmly while listening for a mechanical click.
Clean or Replace
Cleaning: Dip a cotton swab in 90% isopropyl alcohol, scrub contact points until shiny, then let dry for 5 minutes. Test before reassembling. Replacement:
– Wired buttons: Loosen terminal screws, transfer wires to identical terminals on the new button, and tighten until snug (overtightening strips screws). Snap the cover back on.
– Wireless units: Pry the old button from its bracket with needle-nose pliers, click the new one into place, then hold the button 8 seconds until the LED blinks rapidly to re-sync. Always replace batteries during button swaps—they degrade wiring contacts.
Repair Chime and Transformer
Open and Examine Chime
Location: Hallway or living-room walls (80% of units), with 15% in basements and 5% in attics. Remove 2–4 cover screws or unclip the front plate. Check for loose spade connectors, a broken striker arm, or dust jamming the electromagnet—use compressed air to blow debris from internal coils. With power off, tug each wire gently; re-seat any loose terminals until they click into place.
Test Transformer Voltage
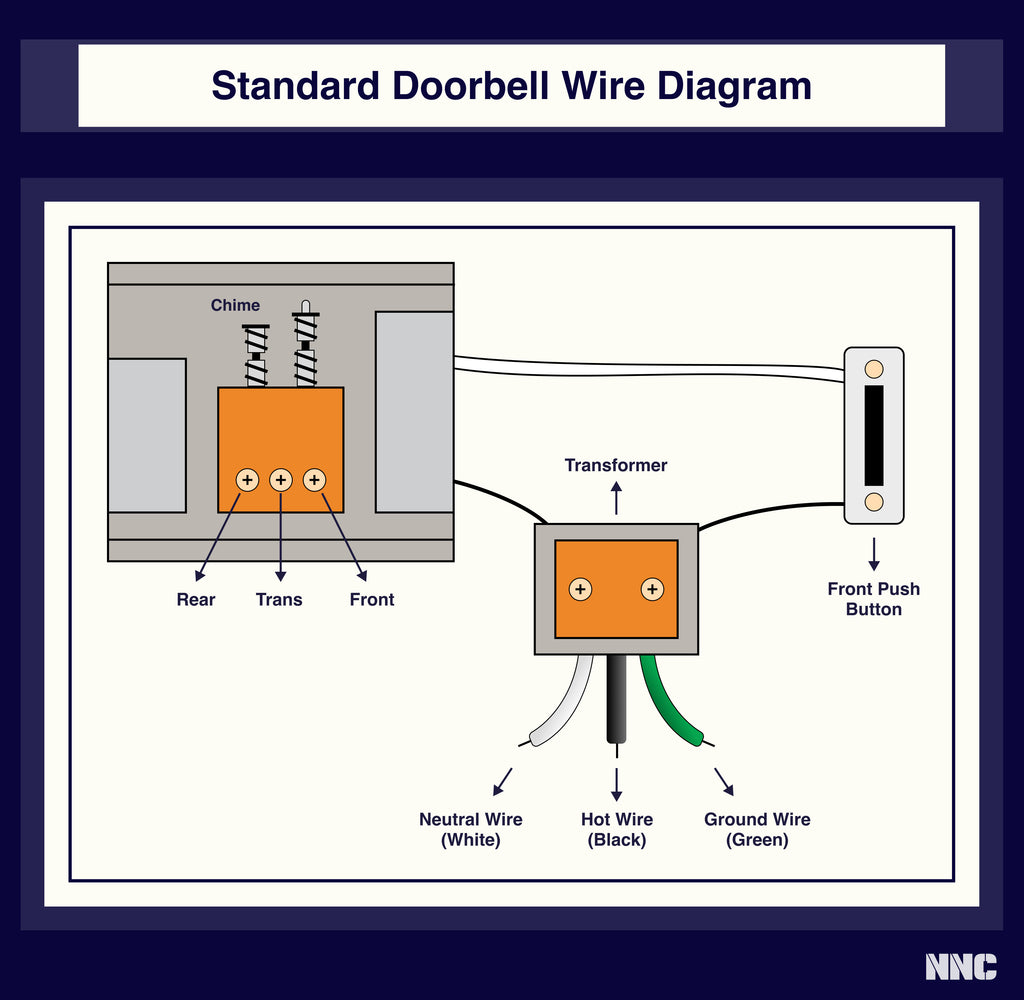
Find it: 70% sit on the main electrical panel, 20% hide in garages, and 10% are mounted near exterior doors. Set your multimeter to AC volts. Touch probes to the transformer’s secondary screws—expect 16–24 V steady. Readings below 14 V mean the transformer is failing (common in homes over 10 years old). Safe swap: Kill the breaker, label wires, disconnect old unit, and mount a new 16 V AC 30 VA transformer. Retest voltage before restoring power—this prevents “poor voltage” alerts on smart doorbells.
Diagnose Wiring Breaks
Continuity Check
Turn off power. Disconnect the transformer’s secondary wires. Clip one multimeter probe to each wire at the button end; press the button. You should read 0–2 ohms. Infinity equals a broken wire. Pro tip: Wet weather exacerbates breaks—test after rain if failures are intermittent.
Visual Trace
Follow the cable through basement ceilings or attic spaces. Look for chewed insulation from rodents, staples cutting into wires, or green corrosion where wires exit exterior walls. Patch: Strip ½ inch of insulation, twist conductors clockwise, secure with a wire nut, and wrap tightly with electrical tape. If the wire feels brittle (common in pre-2000 homes), fish new 18-2 bell wire—this takes 20 extra minutes but prevents repeat failures.
Solve Wireless Battery & Signal Issues
Swap Batteries
Most buttons use CR123A, AA, or proprietary packs lasting 6–12 months. Extreme cold below 14°F halves battery life—replace packs seasonally in freezing climates. Slide or twist off the rear cover, note polarity markings, and insert fresh cells. Rechargeable packs (Ring, Arlo) require 8 hours via USB-C; check app health indicators before assuming failure.
Kill Interference
Range plummets from 150 feet line-of-sight to 50 feet through walls due to 2.4 GHz congestion. Fix:
1. Move your Wi-Fi router away from microwaves or baby monitors.
2. Plug the receiver into an outlet closer to the door—avoid breaker panels.
3. Re-pair: Hold the button until the LED flashes rapidly, then press the receiver sync button within 20 seconds. If pairing fails, reset both units by removing batteries for 60 seconds.
Troubleshoot Smart Doorbells

Wi-Fi Connectivity
Requirement: 2.4 GHz network only (most smart doorbells lack 5 GHz support). Quick ladder:
1. Reboot router for 30 seconds.
2. In the app, forget the network and re-enter your password—omit special characters like ! or #.
3. Disable MAC filtering in router settings if RSSI stays below –65 dBm.
4. For Ring/Nest, install a Wi-Fi extender within 20 feet; mesh systems outperform single extenders.
Power & Charging
Battery models: Check app health—if charge drops below 10%, replace the pack. Clean contact pads with alcohol to remove oxidation. Hardwired units: Install brand-specific power kits (Ring Pro Power Kit/Nest jumper) when you see “Poor Transformer Voltage” alerts. Ensure your transformer delivers ≥16 V AC under load—fluctuations below 14 V cause random reboots.
Firmware Glitches
Reset sequence:
– Ring: Hold orange setup button 15 seconds until LED spins white.
– Nest: Press ring button 10 seconds until blue pulsing light.
– Arlo: Use pinhole reset for 10 seconds until amber flash.
After resetting, re-draw motion zones immediately—default settings often miss porch activity. Confirm auto-updates are enabled to prevent recurring bugs.
Fix Motion & Audio Failures
Motion Alerts Gone Silent
Check this order:
1. Global motion toggle in app is ON (hidden under “Device Settings”).
2. Motion zones cover your porch—not the street—to reduce false triggers.
3. Sensitivity set to 60–70% (80%+ causes excessive alerts from passing cars).
4. Subscription active—free trials expire after 30 days, disabling person detection.
One-Way or Choppy Audio
- Grant microphone permission in phone settings (iOS: Settings > Privacy > Microphone).
- In the app, increase mic gain and speaker volume sliders separately.
- Clear app cache (Android: Settings > Apps > Doorbell > Storage > Clear Cache).
- Pink night vision? Power cycle the unit; if color distortion persists, the IR filter is stuck—contact support.
When to Call an Electrician
Call a pro immediately if:
– Transformer reads 0 V with the breaker on (indicates a tripped GFCI elsewhere).
– You smell burning near the electrical panel during testing.
– Breaker trips repeatedly when energizing the doorbell circuit.
DIY-safe fixes include button swaps, chime cleaning, battery changes, and Wi-Fi troubleshooting—these involve zero high-voltage contact.
Final 5-Step Verification
- Ring test: Press the doorbell three times—chime responds every time.
- Stream test: View live video for 60 seconds without freezing or disconnects.
- Motion test: Wave at the camera—push notification arrives within 5 seconds.
- Talk test: Two-way audio is clear without echoes or static.
- Log the repair: Note date, parts used, and voltage readings for future reference.
Run these checks after every fix to catch lingering issues. For long-term reliability, clean lens covers quarterly with a microfiber cloth and test transformer voltage annually—this prevents 80% of recurring failures. Your doorbell camera will stay vigilant for years when you address root causes, not just symptoms.