
Your front door has gone dark, leaving visitors stumbling at night while your home looks unwelcoming and unoccupied. When your doorbell light stops working, it’s more than just an inconvenience—it’s a safety issue that needs immediate attention. The good news is that most doorbell light problems can be diagnosed and fixed with basic tools and simple electrical knowledge. Whether your light died suddenly or has been gradually dimming, this guide will help you restore proper illumination to your entryway in under 30 minutes.
Most homeowners panic when their doorbell light fails, thinking they need an expensive electrician visit. But the reality is that 90% of doorbell light issues stem from either a jammed button mechanism or a failed light element—all fixable with basic DIY skills. By following this step-by-step guide, you’ll not only fix your current problem but also learn how to prevent future failures, keeping your home looking inviting and secure after dark.
Why Your Doorbell Light Suddenly Stopped Working
Test Button Movement Before Replacing Components
Begin your diagnosis by pressing your doorbell button 5-10 times, paying close attention to how it feels. A properly functioning button should depress smoothly and spring back immediately. If it feels sticky or stays depressed when you release it, you’ve found the root cause—your button is jammed in the closed position, cutting power to the light element. This mechanical failure is incredibly common, especially after painting or during humid weather when moisture causes internal components to swell.
Pro Tip: Hold a small mirror at your door to watch the button return to position. Some jamming issues only appear when the button isn’t under direct pressure. If you notice slow return or sticking, don’t jump to replacement yet—simple cleaning might solve your problem.
Clear Paint Buildup and Physical Obstructions
Look closely around the edges of your doorbell button for paint drips, dirt accumulation, or debris that might be preventing proper movement. Even a thin layer of paint can restrict button travel enough to interrupt the light circuit. Use a toothpick, dental pick, or small craft knife to carefully remove any visible obstructions. For stubborn paint, gently score around the button perimeter with a razor blade to break the seal.
Critical Warning: Never force a stuck button. You could damage internal components and create a more expensive repair. If gentle cleaning doesn’t restore movement, proceed to the next diagnostic step rather than risking further damage.
Verify Light Function After Confirming Button Movement
Once you’ve confirmed the button moves freely, press and hold it while observing the light housing. If the button springs back properly but no illumination appears, your light element has failed. This component failure occurs independently of the doorbell’s main signaling function—meaning your chime might still work while the light remains dark. This is your confirmation that replacement is necessary rather than just cleaning.
Diagnosing Stuck Doorbell Buttons That Won’t Spring Back
Common Causes of Button Jamming
Doorbell buttons jam for several predictable reasons: paint overspray during home projects, dirt and debris accumulation in outdoor units, corrosion from humidity exposure, or simple mechanical wear after years of use. Outdoor installations face additional challenges from temperature fluctuations that cause expansion and contraction of components. In humid climates, moisture can seep into the mechanism, causing rust that binds moving parts together over time.
Release Stuck Buttons Without Causing Damage
For mildly stuck buttons, apply electrical contact cleaner around the button edges and work it gently with your finger. This specialized cleaner evaporates quickly without leaving residue that attracts more dirt. Avoid using oil-based lubricants like WD-40—they’ll solve the immediate problem but create bigger issues later by gumming up the mechanism with dirt. If paint is the culprit, carefully score around the button perimeter with a razor blade to free the edges without damaging the housing.
Time-Saving Shortcut: After clearing obstructions, apply a small amount of dielectric grease to the moving parts. This weather-resistant lubricant won’t attract dirt and provides long-lasting protection against future sticking.
When Jamming Means Replacement Is Necessary
If your button continues to stick despite thorough cleaning, internal mechanical wear has likely reached the point where replacement is more cost-effective than continued troubleshooting. The light element and mechanical components are integrated within the push button assembly, so button replacement solves both issues simultaneously. Attempting to disassemble and repair the internal mechanism usually causes more damage than it’s worth—especially with modern sealed units.
Choosing the Right Replacement Doorbell Button
Confirm Light Component Failure Before Buying
Don’t rush to purchase a new button until you’ve verified the light element has failed. The light component within your doorbell button cannot be repaired separately—it’s permanently sealed within the push button assembly. When diagnostics confirm free button movement but no illumination, replacement becomes your only viable solution. This verification step prevents unnecessary purchases and ensures you’re addressing the actual problem.
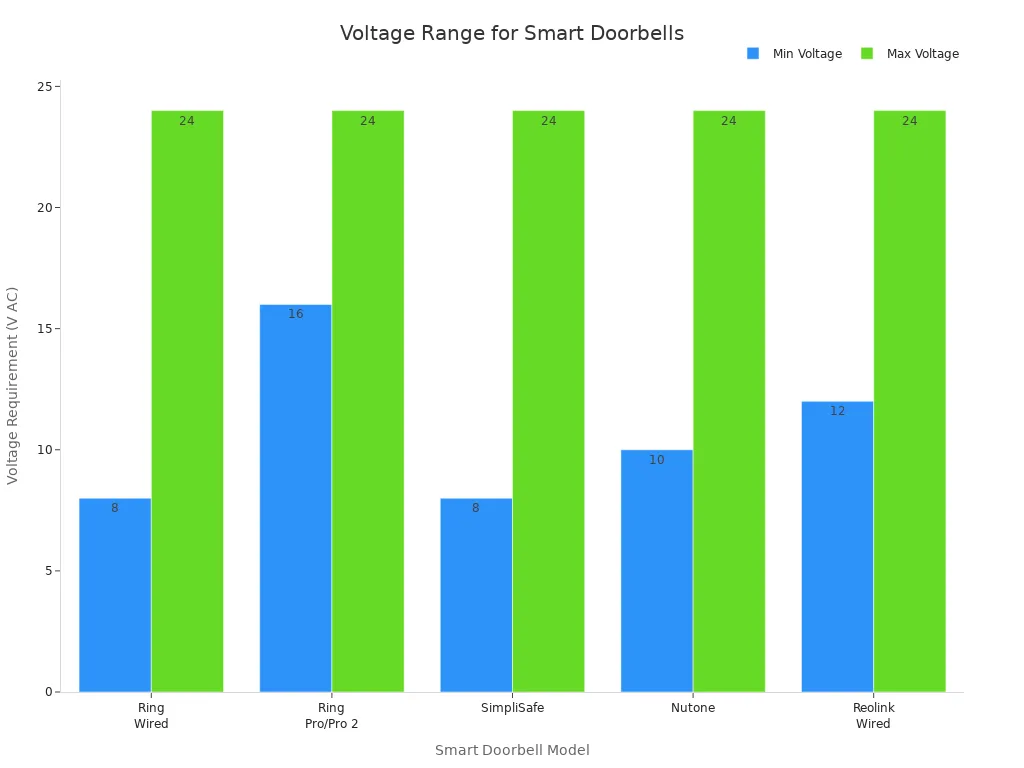
Match Voltage Requirements for Proper Function
Select a new button matching your system’s voltage requirements—most residential doorbells operate on 10-24 volts low-voltage systems. Check your transformer rating (typically found near your electrical panel) or simply match the voltage rating stamped on your old button. Using an incompatible voltage can cause premature failure of your new light element or damage your entire doorbell system.
Pro Tip: Take your old button to the hardware store when shopping for a replacement. Physical comparison prevents mismatched mounting patterns or electrical configurations that could complicate installation.
Upgrade Your Doorbell Light During Replacement
Replacement offers the perfect opportunity to enhance your home’s appearance and functionality. Modern lighted buttons feature LED technology that provides brighter, longer-lasting illumination compared to older incandescent bulbs. Consider finishes that complement your home’s hardware—brushed nickel, matte black, or oil-rubbed bronze options can significantly upgrade your entryway’s aesthetic while solving your lighting problem.
Step-by-Step Doorbell Button Replacement Guide
Safety First: Power Down Circuit Before Starting
Turn off power at your circuit breaker—even low-voltage systems can deliver uncomfortable shocks during replacement. Locate your doorbell transformer (typically near your electrical panel or mounted on a junction box) and flip the breaker labeled “doorbell” or “transformer.” Use a voltage tester to confirm power is off before proceeding. This critical safety step takes less than a minute but prevents potentially dangerous shocks.
Remove Old Button Assembly Without Damaging Wiring
Unscrew the old button from the mounting surface using the appropriate screwdriver. These screws are usually visible on the button face or hidden beneath a snap-off decorative cover. Keep track of these screws—you’ll likely reuse them if your new button matches the mounting pattern. Gently pull the button away from the wall to expose the wiring connections at the back.
Document Wire Connections Before Disconnecting
Before disconnecting any wires, take a clear photo with your smartphone showing exactly how the wires connect to the terminals. Most doorbell buttons use two low-voltage wires connected to terminal screws labeled “FRONT” and “TRANS” or similar markings. Note which wire connects to which terminal—this ensures correct reconnection and prevents wiring mistakes that could damage your new button.
Connect New Button Wires with Precision
Strip 1/4 inch of insulation from wire ends if they’re corroded or damaged, revealing fresh copper for optimal conductivity. Connect wires to the new button’s terminals, matching your photo reference exactly. Tighten terminal screws firmly but avoid over-tightening, which can strip the plastic housing or break delicate terminals. A quarter-turn past finger-tight is usually sufficient.
Mount and Test Your New Doorbell Light
Secure the new button to the mounting surface, ensuring it sits flush and operates smoothly without binding. Restore power at the breaker and test both the light function and doorbell operation. The new LED should provide bright, even illumination across the entire button face. If the light doesn’t work, double-check your wiring connections before assuming the new button is defective.
Preventing Future Doorbell Light Failures
Monthly Button Checks That Prevent Major Failures
Press your doorbell button monthly to ensure smooth operation—this simple 30-second check prevents minor sticking from developing into major failure. Clean around button edges quarterly with a dry, soft-bristled brush to remove dust and debris before they cause problems. This preventative maintenance extends the life of both mechanical and electrical components significantly.
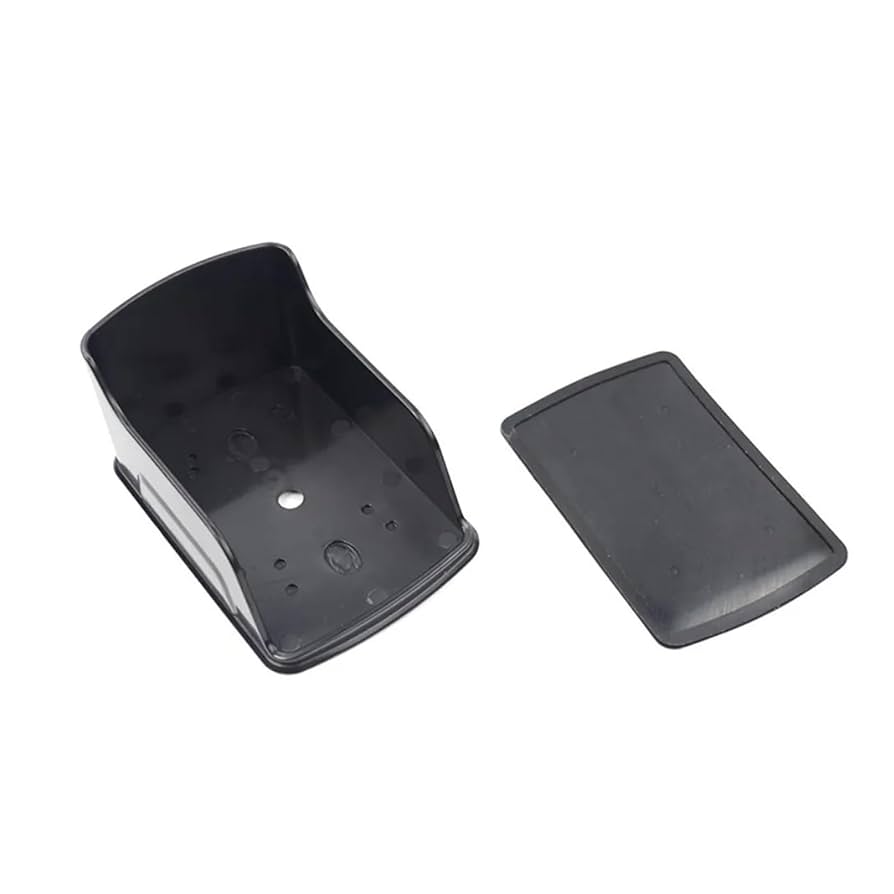
Weather Protection for Outdoor Doorbell Installations
For outdoor installations, ensure your button’s weather seal remains intact. Replace worn gaskets immediately and consider adding a small roof overhang above exposed buttons to shield them from direct rain exposure. Weather-resistant models with IP65+ ratings offer superior longevity in harsh climates and are worth the slight premium over standard units.
Invest in Quality Components for Long-Term Savings
Choose higher-quality replacement buttons featuring LED lights rated for 50,000+ hours versus traditional bulbs lasting just 1,000-2,000 hours. The upfront cost difference is minimal compared to replacement frequency—premium buttons often cost only $2-3 more but can last 25-50 times longer. Look for units with corrosion-resistant terminals and UV-stable housing materials for maximum durability.
Troubleshooting Common Post-Replacement Issues
No Light After Installation: Quick Fixes
If your new button shows no illumination after installation, first verify your wiring connections match the original configuration. Next, check that your circuit breaker hasn’t tripped during installation. Finally, confirm you haven’t accidentally purchased a non-illuminated model—some replacement buttons look identical but lack the light feature. Most modern LED buttons should glow immediately when power is restored, even without pressing the button.
Intermittent Light Problems and Their Solutions
Flickering or inconsistent illumination typically indicates loose wire connections. Turn off power again and recheck terminal screw tightness—wires can slip slightly during button mounting. If the problem persists, examine wire ends for corrosion and clean or replace damaged sections. For older systems with corroded wiring, consider replacing the entire low-voltage cable run between the button and transformer for reliable long-term performance.
Your doorbell light should now provide reliable nighttime visibility for years to come. Remember that most doorbell light issues stem from either jammed buttons or failed light elements—both solvable with basic tools and a 30-minute replacement process. By implementing the monthly maintenance checks outlined here, you’ll prevent 90% of future failures, making that quick button test a worthwhile habit that keeps your home looking welcoming after dark.


