
Your screen door slams shut but won’t stay latched, leaving pests and weather free rein through your home. Or worse—it’s frozen shut, trapping you inside on a beautiful day. A malfunctioning screen door handle isn’t just annoying; it compromises security and comfort. The good news? 90% of handle failures stem from simple mechanical issues you can fix in under 30 minutes with basic tools. This guide cuts through the frustration with precise, actionable steps to diagnose and repair your handle—no professional help needed. You’ll learn exactly how to replace broken springs, realign misfiring latches, and prevent future breakdowns using methods tested on thousands of common screen doors.
Must-Have Tools for Screen Door Handle Repair
Skip the hardware store run by grabbing these seven essentials first. A medium Phillips screwdriver tackles 80% of screws in modern screen doors, while a 3/16-inch hex wrench (or 5mm Allen key) handles hidden set screws on interior handles. Pack needle-nose pliers to reposition stubborn springs and a flathead screwdriver for prying off decorative caps. Keep screws organized in a magnetic tray—losing these tiny parts derails repairs. For lubrication, choose silicone-based spray (not WD-40 for long-term fixes) and always have a universal latch kit on hand. Pro Tip: Test your hex wrench before starting; forcing the wrong size strips screw heads, turning a 10-minute fix into a replacement job.
Why Your Screen Door Handle Suddenly Stopped Working
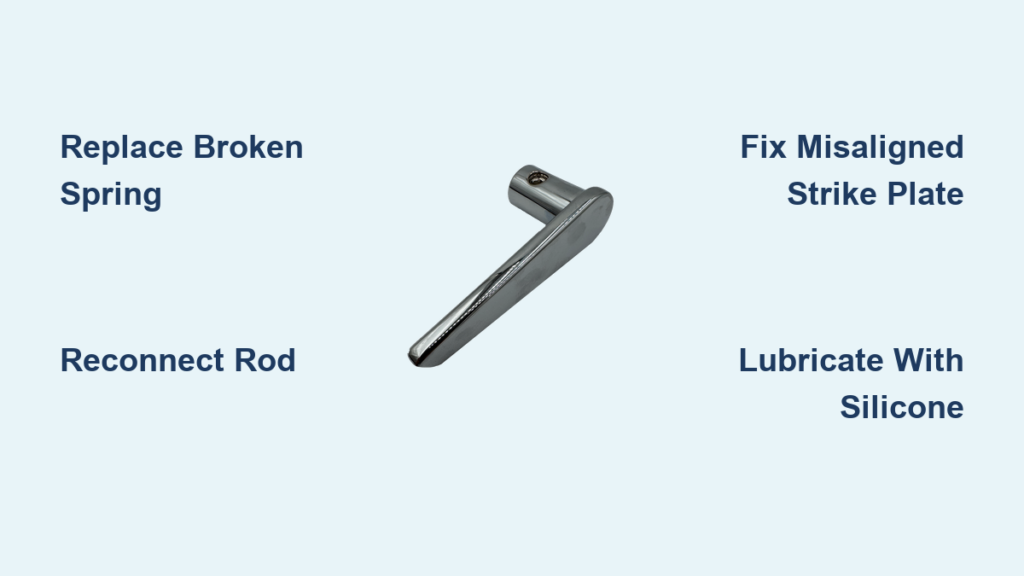
Most handle failures trace back to three mechanical villains. A broken torsion spring—the tiny coiled component that snaps the handle back to horizontal—causes limp, unresponsive handles that won’t retract the latch. Dislodged connecting rods inside the handle assembly create a “dead” feel when you pull the handle; you’ll hear plastic parts rattling but see no movement at the latch. Finally, cracked plastic latches (common in older models) jam against the strike plate, making the door appear “stuck.” You’ll diagnose these by working the handle slowly: if the latch doesn’t extend fully when closed, the spring’s likely dead. If the handle moves but the latch stays put, a rod has disconnected.
Step 1: Removing the Interior Handle Without Damage

Never force a stuck handle—this cracks the spindle. Start by locating the set screw hidden under a plastic cap on the handle’s underside. Pop the cap with a flathead screwdriver (wrap tape on the tip to avoid marring the metal). If the screw resists, apply one drop of penetrating oil and wait 5 minutes. Insert your hex wrench and turn counterclockwise just until loose—over-loosening drops the screw into the door cavity. Now grasp the handle firmly and slide it straight off the square drive shaft. Critical Check: Inspect the square spindle for rounding. If worn, replace the entire handle kit; a loose fit guarantees future failure.
What to Do If the Set Screw Is Stripped
If the screw head is stripped, clamp needle-nose pliers onto the remaining metal nub and rotate gently. If that fails, drill a small pilot hole into the screw center and use a screw extractor. Avoid hammering—screen doors use thin aluminum frames that dent easily.
Step 2: Extracting the Broken Latch Assembly Safely
With the interior handle off, two long mounting screws now anchor the assembly. Remove these from the inside of the door using your Phillips screwdriver—do not let them drop into the door cavity. Hold the exterior handle steady as you unscrew the last bolt; gravity often pulls the assembly outward. Gently pull the entire unit (exterior handle, latch, and faceplate) from the door edge. Warning: If the latch sticks, don’t yank it. Rotate the square spindle with pliers to disengage any jammed parts. For stubborn assemblies, spray penetrating oil into the edge bore and wait 10 minutes before retrying.
Step 3: Diagnosing the Exact Handle Mechanism Problem
Lay the disassembled unit on a clean surface and test each component. Work the exterior handle while watching the latch:
– Latch moves but handle won’t return? → Broken spring (replace immediately)
– Handle moves freely but latch stays static? → Disconnected rod (rethread in 2 minutes)
– Metal parts grinding? → Worn spindle bushings (lubricate or replace)
– Plastic latch cracked at pivot point? → Requires full replacement
Pro Tip: Submerge the mechanism in warm, soapy water for 15 minutes to dissolve years of grime. Dry thoroughly before testing—dirt buildup mimics mechanical failure.
Step 4: Repairing or Replacing the Latch Mechanism

Fixing a Disconnected Spring in 90 Seconds
Use needle-nose pliers to grip the spring’s end hook. Rotate it clockwise until tensioned, then secure the hook onto the metal post. Apply one drop of silicone lubricant to the spring coil. Never use pliers directly on the spring wire—this weakens the metal and causes premature breakage.
Replacing a Cracked Latch in 4 Steps
- Purchase a universal latch kit matching your door thickness (standard is 1-1/8″)
- Insert the new latch into the door edge bore until flush
- Slide the exterior handle onto the square spindle
- Align interior and exterior plates, then insert mounting screws
Critical Mistake Avoidance: Don’t over-tighten mounting screws. Snug is sufficient—overtightening warps the assembly and binds the latch. Test operation before final tightening.
Step 5: Reassembling for Smooth, Reliable Operation
Reverse your disassembly steps but with precision. Slide the interior handle onto the spindle until the set screw hole aligns perfectly with the drive shaft groove. Tighten the set screw just until you feel resistance—overtightening strips the threads. Reinsert mounting screws and test the latch 10 times: it should retract fully with light handle pressure and spring back instantly. Final Check: Close the door slowly. The latch should engage the strike plate with a soft click, not a forceful clunk. If it drags, your strike plate is misaligned (see next section).
Fixing Misaligned Strike Plates That Prevent Latching
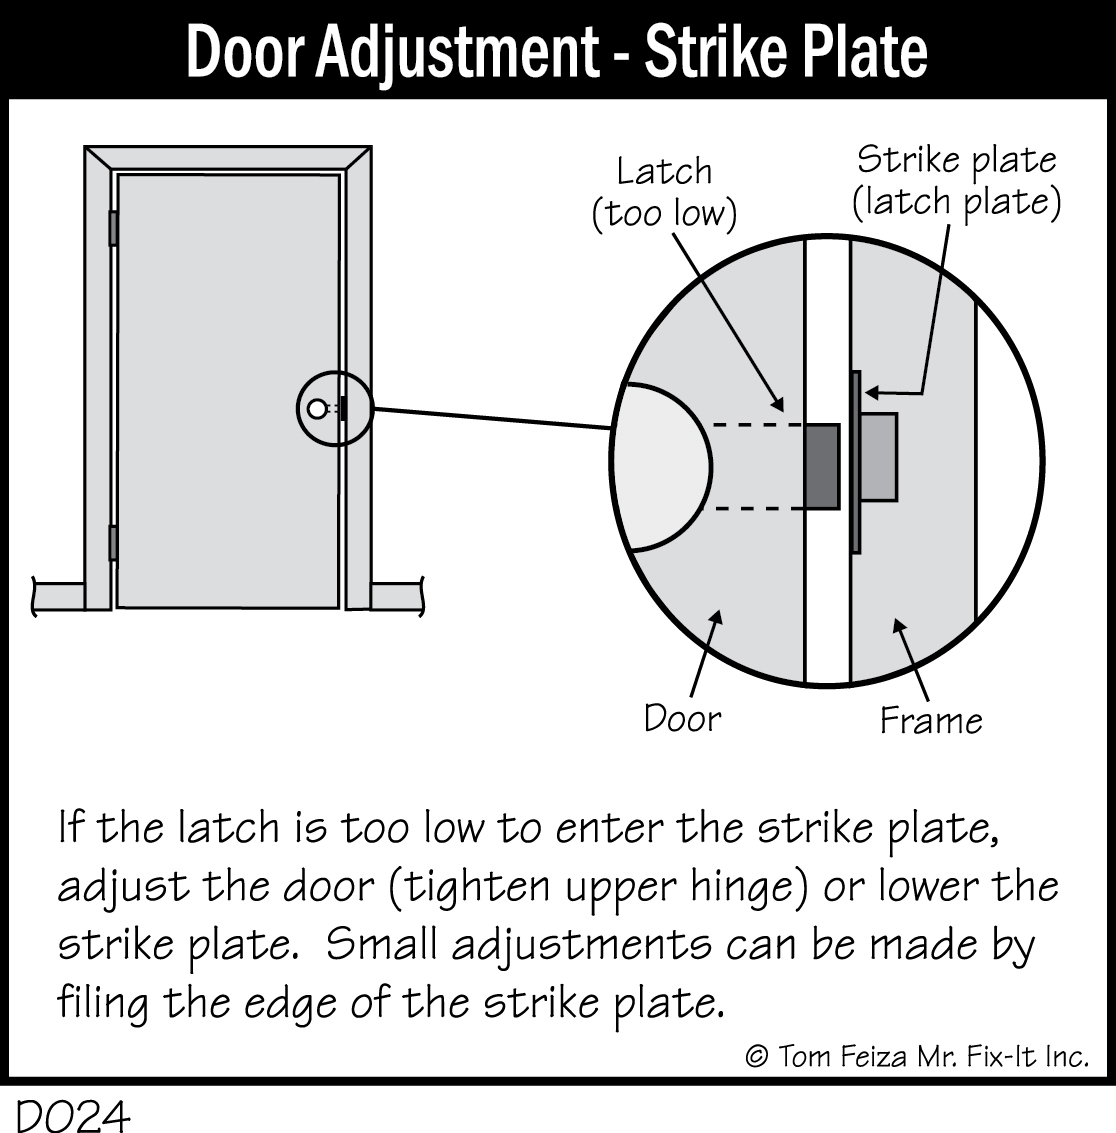
A bent strike plate causes 40% of “broken handle” false alarms. Loosen its two mounting screws slightly, then close the door. Watch where the latch strikes the plate:
– If hitting above the hole, tap the plate downward with a hammer and nail set
– If hitting below, tap upward
– If hitting the edge, shift plate toward the jamb
Retighten screws only after perfect alignment. Pro Shortcut: Rub chalk on the latch tip before closing—the strike mark shows exactly where to adjust.
Why Oil Lubricants Ruin Screen Door Handles (Use This Instead)
WD-40 and petroleum oils attract dust that turns into grinding paste within weeks. Always use dry silicone or graphite lubricant on latches and springs. Apply sparingly: one drop on the spindle, two on the spring pivot. Work the handle 20 times to distribute it. Oil-based lubes also swell plastic components, causing premature cracking—especially in humid climates. For stuck rods, spray silicone into the handle bore, then rotate the spindle with pliers until movement resumes.
When to Replace Your Entire Screen Door Handle Kit
Upgrade to a full kit if you see:
– Rounded square spindles (handles wobble even when tightened)
– Multiple cracked plastic parts (common in 10+ year old doors)
– Corroded metal components (especially near coastal areas)
– Persistent misalignment after strike plate adjustments
Universal kits cost $12-$25 and include all mounting hardware. Match your door thickness first—measure the edge width with calipers. Aluminum doors need stainless steel kits to prevent galvanic corrosion.
Preventing Future Screen Door Handle Failures
Annual maintenance prevents 95% of breakdowns. Every spring:
1. Spray silicone lubricant into the latch mechanism
2. Tighten set screws gently (they loosen from vibration)
3. Check strike plate alignment with the chalk test
4. Install a hydraulic door closer to eliminate slamming
Critical Habit Change: Never slam screen doors. The impact shatters internal springs—train family members to close doors gently using the handle. For high-traffic doors, upgrade to commercial-grade handles with metal internals (look for “heavy duty” labels).
Final Note: A properly repaired screen door handle should operate silently and return to horizontal position without assistance. If your latch still sticks after these steps, warping in the door frame may require professional adjustment—measure the gap between door and jamb; inconsistencies over 1/8″ indicate structural issues. For immediate relief, apply candle wax to the strike plate contact points as a temporary lubricant. Remember: consistent light maintenance beats emergency repairs every season. Your fresh-air sanctuary awaits one smooth handle turn.


