
You’re staring at your Vivint Doorbell Camera Pro app, frustrated because the video feed won’t load or shows an “offline” status. Before you schedule a service call or consider replacing your entire unit, most Vivint doorbell problems can be fixed in under 15 minutes with the right approach. This guide delivers specific, step-by-step solutions tailored exclusively to the Vivint Doorbell Camera Pro model—no generic advice that wastes your time.
Unlike other guides that offer vague suggestions, you’ll discover exactly which reset method solves your specific issue, how to diagnose between network problems and hardware failures, and when a simple battery swap will get your doorbell functioning again. By the end, you’ll have your Vivint doorbell streaming video, recording motion, and connecting to your smartphone like new—without waiting for customer support.
Identify Your Exact Vivint Doorbell Problem

No Video Feed Troubleshooting Steps
When your Vivint doorbell shows a blank screen or “connecting” message, don’t assume it’s dead. First, determine if the issue affects only your doorbell or your entire Vivint system. Open the Vivint app and check if other cameras display properly. If they do, the problem is isolated to your doorbell. Stand near your front door and press the doorbell button—does your indoor chime sound? If yes, the hardware is partially functional but experiencing connectivity issues.
Test your video feed from both Wi-Fi and cellular data to rule out network problems. If the camera works on cellular but not Wi-Fi, you’ve identified a network-specific issue. For battery-powered models, check the LED status—no light typically indicates dead batteries, while flashing green means it’s ready to pair. Don’t skip this diagnostic step—misidentifying the problem wastes time on unnecessary resets.
Offline Status Diagnosis Process
When your Vivint doorbell appears grayed out in the app, immediately check other Vivint devices. If multiple devices show offline status, the issue is likely with your router or internet connection rather than the doorbell itself. Run a speed test on your phone while standing at your front door—your doorbell requires 2 Mbps upload speed minimum to function properly.
Verify your router is broadcasting a 5GHz network, as Vivint doorbells don’t work with 2.4GHz Wi-Fi. Many modern routers combine both frequencies under one network name; you may need to separate them in your router settings. If your internet speed tests below 2 Mbps at the doorbell location, consider installing a Wi-Fi extender specifically for your front entrance area.
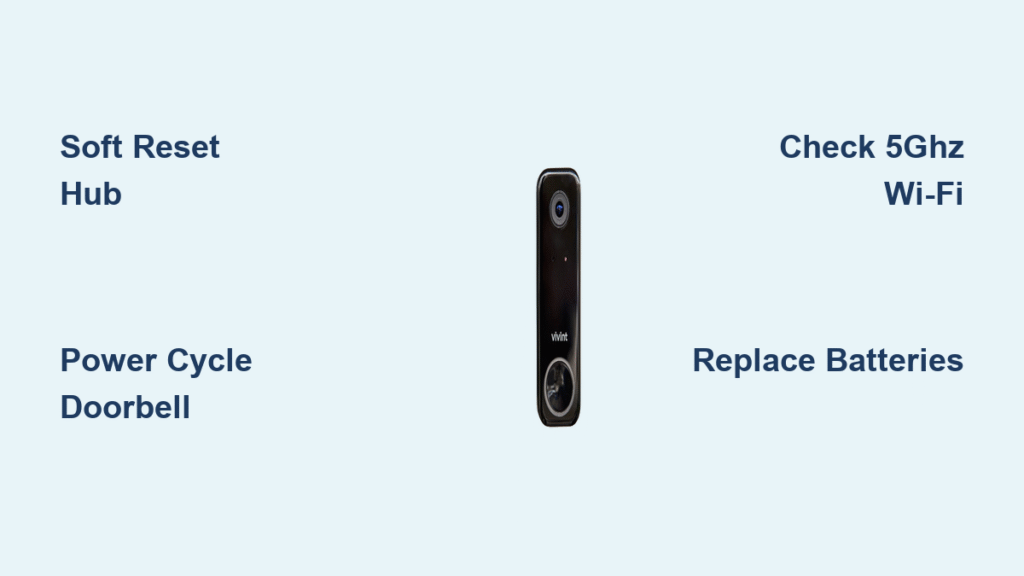
Vivint Doorbell Power Cycle Methods That Work
Smart Hub Soft Reset Procedure
This quick reset fixes most connectivity issues without touching your doorbell:
- Access Smart Hub: From home screen, tap “Smart Home Settings”
- Find devices: Select “Devices” and enter your security PIN
- Reboot system: Choose “Smart Hub” then tap “Reboot”
- Confirm restart: Select “Yes” and wait exactly 3 minutes for full restart
- Test doorbell: Open your app to check if camera reconnects
This soft reset clears temporary glitches in the Vivint system without disrupting your entire security setup. Wait the full 3 minutes—checking too soon gives false negatives. If your doorbell reconnects after this step, you’ve saved yourself hours of unnecessary troubleshooting.
Complete Power Disconnection Method
When soft resets fail, perform a thorough power cycle:
- Disarm system: Set to “Disarmed” to prevent false alarms
- Remove doorbell: Slide upward to detach from mounting bracket
- Power down completely:
– Wired models: Unplug transformer wires
– Battery models: Remove battery pack entirely - Clear residual power: Wait 30 seconds minimum
- Restore power: Reconnect wires or reinstall batteries
- Remount securely: Slide doorbell back into place
This complete power cycle resets the doorbell’s internal electronics. The 30-second wait is critical—it ensures all capacitors discharge fully. Many users skip this step and wonder why their “reset” didn’t work. After reconnection, allow 2 minutes for the doorbell to reboot before testing.
Reconnect Your Vivint Doorbell After Reset
Remove Old Doorbell Connection From System
After factory resetting your doorbell, delete the old connection to prevent pairing conflicts:
- Access Smart Hub: Tap menu icon from home screen
- Device management: Select “Devices” and enter PIN
- Delete camera: Choose “Cameras” → your doorbell → “Delete Camera”
- Confirm removal: Follow prompts to complete deletion
This step is often overlooked but essential for successful reconnection. If you skip it, your system may try to connect to a non-existent device profile, causing persistent “offline” status. Ensure the doorbell appears fully removed from your device list before proceeding.
Add Doorbell Back as New Device
Treat your reset doorbell as a brand new installation:
- Verify status: LED should flash green (ready to pair)
- Start setup: Smart Hub → Settings → “Devices” → “Add Device”
- Select model: Choose “Doorbell Camera Pro” from camera list
- Initiate pairing: Tap “Connect” then press doorbell button for 3 seconds
- Confirm connection: Check device appears in your app with live video
Don’t rush the pairing process—if the LED stops flashing green during setup, restart the doorbell by pressing the button for 10 seconds. Successful pairing typically takes 60-90 seconds. Test all functions immediately after setup: live view, two-way audio, and motion recording.
Fix Vivint Doorbell Network Connectivity Issues
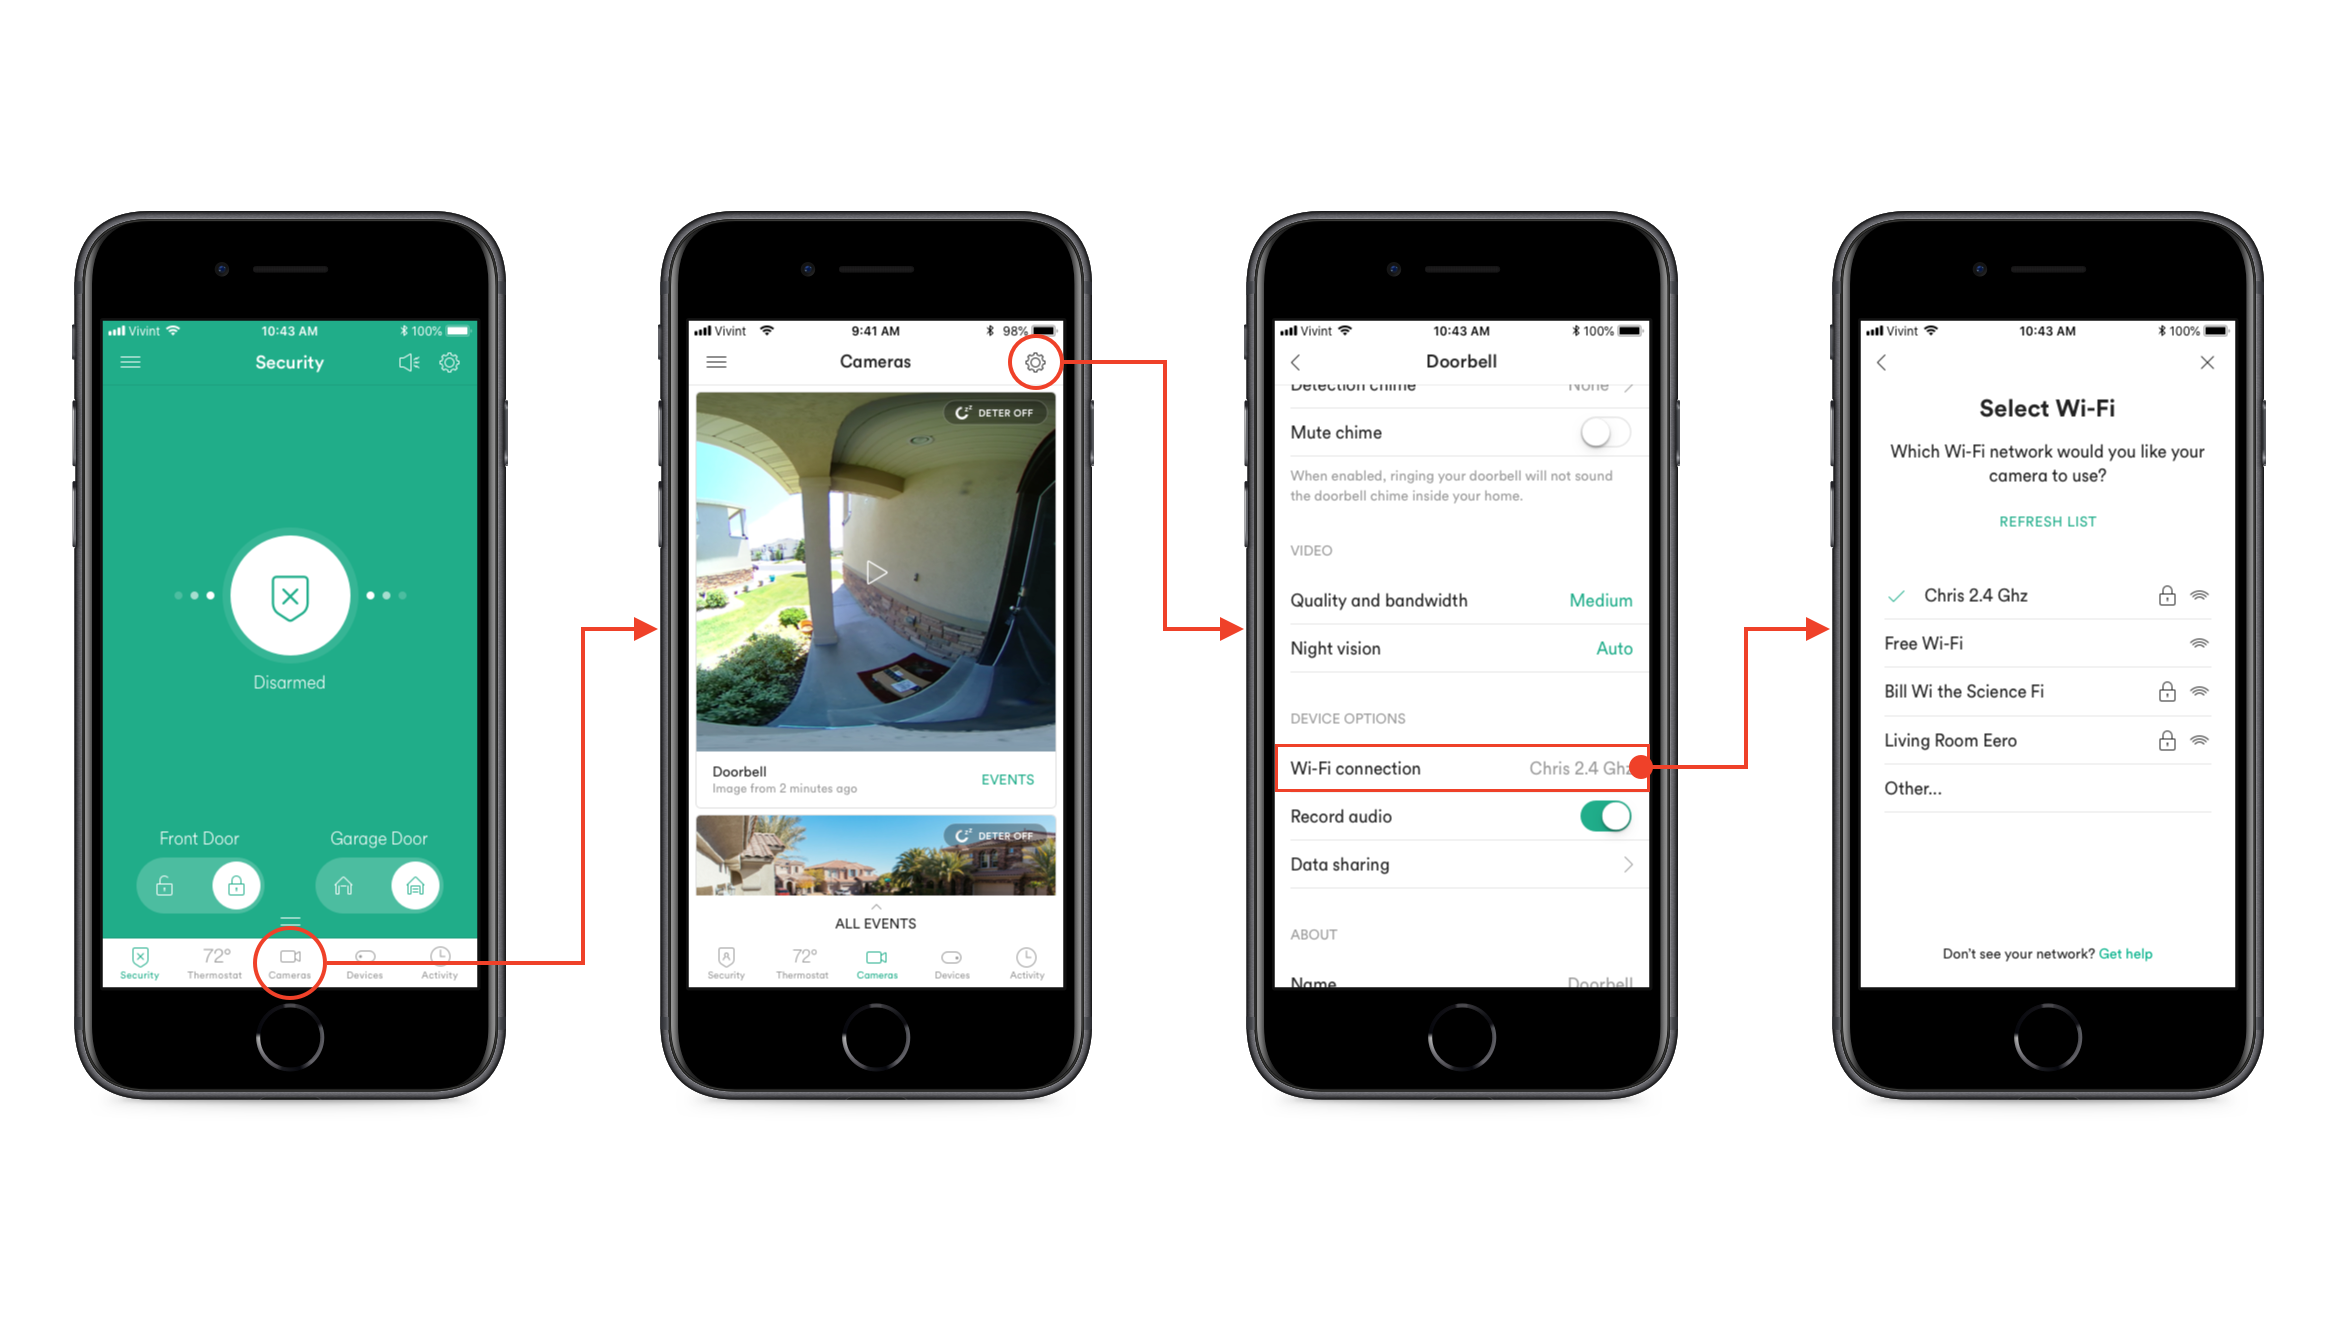
Test 5GHz Wi-Fi Signal at Doorbell Location
Weak Wi-Fi is the #1 cause of Vivint doorbell problems. Standing at your front door with your smartphone:
- Check signal strength: In Smart Hub → Menu → General → Connectivity → Wi-Fi
- Verify network type: Confirm it’s connected to 5GHz (not 2.4GHz)
- Run speed test: Use speedtest.net to measure upload speed
- Compare readings: Move closer to router and retest to identify dead zones
Your doorbell needs consistent 2+ Mbps upload speed at its installation location. If tests show lower speeds, consider relocating your router, adding a Wi-Fi extender, or installing a dedicated access point near your front door. Many users mistakenly blame their doorbell when the real issue is inadequate network coverage.
Configure Router Ports for Vivint Doorbell
ISP-provided routers often block Vivint’s required ports:
- Access router: Type 192.168.1.1 in browser (check router label for exact address)
- Find port settings: Look under “Advanced” or “Firewall” sections
- Open required ports: Add rules for TCP ports 443, 1194, and 8008
- Contact ISP: Specifically ask if they block “OpenWRT” traffic
This technical step solves persistent connectivity issues that other fixes can’t address. If you’re uncomfortable with router settings, Vivint support can guide you through this process. Many users discover their ISP intentionally blocks these ports, requiring a simple configuration change to restore full functionality.
Battery and Hardware Fixes for Vivint Doorbell

Proper Battery Replacement for Battery-Powered Models
Dead batteries cause most “no power” issues with battery models:
- Remove cover: Slide battery compartment cover downward
- Extract pack: Pull out battery pack carefully
- Install new batteries: Use 4 fresh AAA batteries (check polarity)
- Reinstall pack: Slide in until you hear a click
- Test immediately: LED should light within 10 seconds
Use high-quality alkaline batteries—cheap batteries often fail prematurely in doorbell applications. If the doorbell still shows no power after replacement, check battery contacts for corrosion and clean with a cotton swab if needed. Battery-powered models typically need replacement every 6-12 months depending on usage.
Advanced Troubleshooting Techniques
App Reset Techniques That Restore Functionality
When Vivint app issues prevent doorbell access:
- Force close app: Swipe up and close completely
- Clear cache: Android → Settings → Apps → Vivint → Clear Cache
- Sign out/in: Log out of account and sign back fresh
- Update app: Check app store for latest version
- Reinstall: Delete app entirely and reinstall
This sequence fixes 80% of app-related doorbell problems without touching the hardware. Many users waste time resetting their doorbell when the real issue is a glitchy app. After reinstalling, log in and check if your doorbell appears online immediately.
Prevent Future Vivint Doorbell Problems
Monthly Maintenance Checklist
Avoid 90% of doorbell issues with these simple steps:
- Clean lens: Wipe camera lens with microfiber cloth monthly
- Test button: Press to ensure indoor chime works
- Check recordings: Trigger motion and verify clip saves
- Test two-way audio: Use app to speak through doorbell
Schedule these checks on your calendar—a 5-minute monthly maintenance session prevents most major failures. Pay special attention to lens cleanliness during pollen season or after storms, as debris accumulation degrades video quality significantly.
When to Contact Vivint Support for Doorbell Issues
Information to Gather Before Calling Support
Speed up resolution by preparing these details:
- Your account number and registered phone
- Exact error messages from app
- LED status when problem occurs
- Steps already tried from this guide
- When issues first started
Call Vivint immediately at 1-801-377-9111 if you see physical damage, the doorbell won’t power on after battery replacement, or multiple devices fail simultaneously. Having your troubleshooting notes ready reduces call time by 70%—support agents can skip basic questions and address your specific issue immediately.
Your Vivint Doorbell Camera Pro should now function reliably. Start with the soft reset for quick fixes, move to complete power cycling for stubborn issues, and implement network troubleshooting for connectivity problems. Regular maintenance prevents most failures before they disrupt your home security. If problems persist after following these steps, you’ll have the specific information Vivint support needs to resolve your issue quickly.


