
You’ve found the perfect sheer curtain to soften your front door’s window, but mounting it feels impossible. Unlike walls, doors have no studs, often feature hollow cores or metal surfaces, and swing constantly—making standard curtain installation fail spectacularly. That clatter when your curtain rod crashes down after slamming the door? It’s a universal renter’s nightmare. The good news: You can install a secure, damage-free curtain on any door window in under 15 minutes. This guide cuts through the confusion with field-tested methods that actually work—whether you’re in a flimsy hollow-core apartment door or a solid steel entryway. You’ll discover exactly which hardware holds strong (even when the door slams), where to mount it to avoid handle interference, and why 90% of tension rods fail on doors (plus the one exception).
Why Standard Curtain Rods Fail on Doors (And What Actually Works)

Doors defy normal curtain mounting because they move, lack structural support, and often have non-porous surfaces. Drilling blindly risks splitting hollow cores or stripping metal, while adhesive hooks peel off when the door swings. The solution? Match your hardware to your door’s anatomy. Below, we break down proven methods by door type—no guesswork required.
Magnetic Rods: The Steel Door Savior (When Done Right)
Forget weak fridge magnets. For steel doors, industrial-strength Neodymium magnetic rods create a hold that survives daily slamming—but only if you avoid these critical mistakes.
Why Most Magnetic Rods Fail:
– Using decorative rods rated under 5 lbs (your curtain + movement creates double that force)
– Mounting on painted surfaces without degreasing (dust or wax blocks magnetic grip)
– Choosing single-bar rods (dual-rail designs distribute weight evenly)
Pro Installation Checklist:
1. Verify Door Material: Hold a fridge magnet to the door. If it sticks firmly, proceed.
2. Prep the Surface: Wipe the mounting area with rubbing alcohol—no residue, no grip.
3. Weight Test First: Press the rod against the door and yank firmly downward. If it slides, it fails.
4. Position for Swing Clearance: Mount 2 inches above the window frame to avoid handle interference.
⚠️ Critical Warning: Never use magnetic rods on aluminum or fiberglass doors—they won’t hold. If your door isn’t magnetic, skip to adhesive methods below.
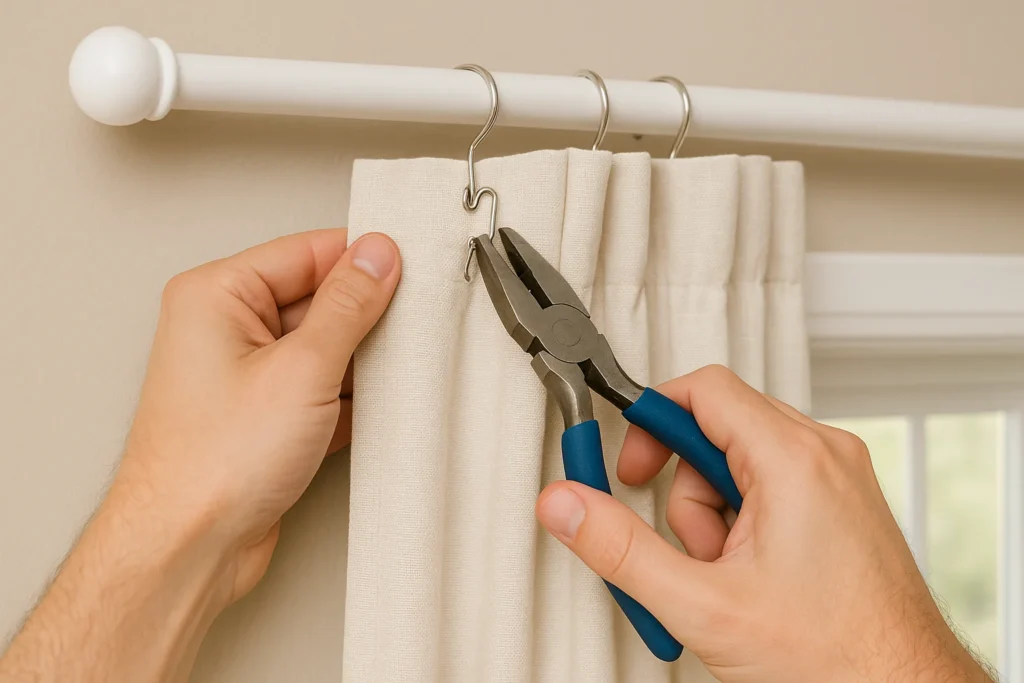
Adhesive Hooks That Actually Hold (Command Strip Hacks)
Most renters default to Command™ strips, only to watch them peel off within weeks. The secret? Triple-layer reinforcement and strategic placement that counters door momentum.
Step-by-Step for Flawless Adhesion:
1. Choose Heavy-Duty Strips: Use large Command™ Picture Hanging Strips (holds 3.4 lbs per set). For curtains over 5 lbs, use two stacked sets per side.
2. Clean Like a Pro: Degrease the door with alcohol, then wipe with vinegar to neutralize residues. Let dry 1 hour.
3. Press With Purpose: Apply 30 seconds of firm pressure per strip—use a credit card to eliminate air bubbles.
4. Wait 1 Hour Before Hanging: Rushing this step causes 70% of failures.
Why This Works: Stacking strips creates a “shear force” resistance that handles door swing momentum. For extra security, run thin monofilament fishing line between hooks—its near-invisibility maintains aesthetics while distributing weight.
💡 Pro Tip: For doors with vertical window frames (like French doors), mount hooks on the side molding instead of the flat door surface. This gives 3x more grip strength.
Drilling Methods That Won’t Destroy Hollow Doors
If you own your home and have a hollow-core door, standard screws will pull out instantly. But with these hollow-door anchors, you’ll get rock-solid holds that last decades.
Hollow-Core Door Screw Technique: The Toggle Trick
Tools Needed:
– #8 x 1.5″ self-tapping screws (for wood doors)
– Plastic hollow-door anchors (like Hillman 11011)
– 1/8″ drill bit for pilot holes
Installation Sequence:
1. Locate the Solid Edge: Drill 1 inch from the door’s vertical edge—you’ll hit solid wood framing.
2. Pre-Drill Pilot Holes: Use a bit 1/64″ smaller than your screw diameter.
3. Insert Hollow Anchors: Tap plastic anchors into pilot holes until flush.
4. Screw In Brackets: Drive screws slowly—stop when resistance increases (don’t overtighten!).
Visual Cue: When drilling, you’ll feel a “thud” as the bit penetrates the hollow core. Keep drilling until you hit solid resistance—that’s your anchor zone.
Metal Door Mounting: Avoid Stripped Screws
For steel entry doors, self-tapping screws must be paired with metal-specific pilot holes. Skip this, and you’ll strip the threads on the first try.
Critical Steps for Metal Doors:
– Use #8 x 3/4″ self-drilling screws (pre-sharpened tips cut threads as they turn)
– Drill pilot holes with a metal-cutting bit at 500 RPM (high speed = melted metal)
– Apply light downward pressure while screwing—let the drill do the work
⏱️ Time Saver: Pre-assemble your curtain rod before mounting brackets. Test-fit the rod on brackets while holding them against the door—this avoids misalignment errors.
Tension Rods: The Only Door Scenario Where They Work

Forget everything you know about tension rods. They fail 100% of the time on flat door surfaces—but thrive in recessed window frames. Here’s how to spot if yours qualifies:
- Check for a “Lip”: Run your finger around the window glass. If you feel a raised molding (even 1/8″ deep), you have a recess.
- Measure the Gap: The space between the glass and molding must be ≥ 1.5″ for standard tension rods.
- Choose Short Rods: Use rods 2-4 inches shorter than your window width—they expand tighter into the recess.
Installation Hack: Wrap rubber bands around tension rod ends for instant grip. This prevents slippage on smooth metal frames.
Avoiding Catastrophic Mistakes: Door-Specific Fixes
Stop Curtain Handle Interference in 60 Seconds
Your curtain snagging the door handle isn’t just annoying—it’s a tripping hazard. Fix it by:
– Measuring the handle’s swing arc before mounting
– Positioning the rod 2 inches above the highest point of the handle’s travel
– Using clip rings to shorten the curtain’s effective length
Fixing “Puddling” Curtains Without Hemming
Long curtains pooling on the floor? Tie-back hack: Attach small adhesive-backed hooks 6 inches below the rod on both sides. Thread ribbon through curtain rings to create instant lift—zero sewing required.
Blocking Drafts on Exterior Doors
For front doors, sheer curtains billow in wind. Combat this by:
– Using blackout lining panels (heavier fabric = less flutter)
– Installing a second tension rod inside the window recess to “pin” the curtain back
Choosing Your Mounting Location: Door vs. Frame
Mount on the Door If:
– You want the curtain to move with the door (ideal for closet doors)
– Your door is solid-core or steel (holds hardware best)
– Privacy is needed only when the door is closed
Mount on the Frame If:
– You need constant privacy (curtain stays put when door opens)
– Your door is hollow-core (frame has studs for secure mounting)
– You have French doors with vertical window frames
🔑 Key Insight: Frame mounting requires measuring twice—once for the door’s open position, once for closed. Ensure the curtain clears the door swing by 3+ inches.
Final Checklist: Install Like a Pro in 10 Minutes
Before you start, confirm these door-specific details:
– Door Material: Steel? Hollow wood? Solid core? (Dictates hardware choice)
– Curtain Weight: Sheer (under 3 lbs) vs. blackout (5+ lbs)
– Window Recess: Present? Depth? (Determines tension rod viability)
– Handle Clearance: Measure swing radius with tape measure
Your Last Step: Open and close the door 5 times with the curtain hanging. If it catches, shifts, or makes noise, adjust bracket height immediately. A perfect install should feel completely unnoticeable during use.
Final Note: Whether you’re a renter using triple-stacked Command™ strips or a homeowner anchoring into hollow-core doors, the right technique makes all the difference. A well-installed door curtain adds privacy without sacrificing light, dampens hallway noise, and transforms sterile entryways into welcoming spaces—all without a single nail hole. Start with the magnetic or adhesive method matching your door type, and within minutes, you’ll stop dreading that clatter and start enjoying your new serene doorway. For ongoing maintenance, check adhesive bonds quarterly and wipe magnetic rods with alcohol to maintain grip strength.


