
Your front door’s glass panel stares back at you, completely exposed. You need privacy but dread drilling holes that’ll violate your lease or damage the finish. Renters and homeowners alike face this dilemma daily—especially with hollow-core or steel doors where traditional mounting is impossible. The good news? You can secure beautiful, functional blinds without a single drill hole. This guide reveals proven methods that use high-strength adhesives, tension systems, and magnetic solutions to mount blinds securely while preserving your door’s integrity. You’ll learn exactly which products work (and which fail catastrophically), how to prepare surfaces for maximum hold, and crucial safety steps to prevent blinds from crashing down when you slam the door.
Why Your Door Blind Installation Must Avoid Drilling
Doors pose unique challenges that make drilling risky or impossible. Hollow-core interior doors have thin veneers that crumble when screws penetrate, while steel entry doors deflect drill bits and create rust points. Landlords often prohibit any alterations, and even minor holes can void warranties on new doors. The vibration from opening/closing puts constant stress on mounts—far more than stationary windows. This means your no-drill solution must withstand repeated jolts without slipping. Crucially, the mounting method must work on smooth, non-porous surfaces like factory-finished paint or metal, where standard adhesives fail. Understanding these hurdles is why we skip generic brackets entirely and focus on techniques engineered for door-specific stresses.
How Door Movement Destroys Weak Mounts
Every time you swing your door, it creates lateral forces that pull brackets sideways. Unlike windows, doors experience:
– Impact shocks when closing (up to 5x the blind’s weight in force)
– Continuous vibration from hinges
– Directional stress when operating pull cords
Weak adhesive bonds fail within days because they lack shear strength. This is why standard picture-hanging strips (rated for vertical weight only) peel off instantly. Your solution must resist sideways movement—using either flexible adhesive tapes that absorb shocks or rigid systems like tension rods that redirect force.
Adhesive Mounting: The #1 Method for Drill-Free Door Blinds
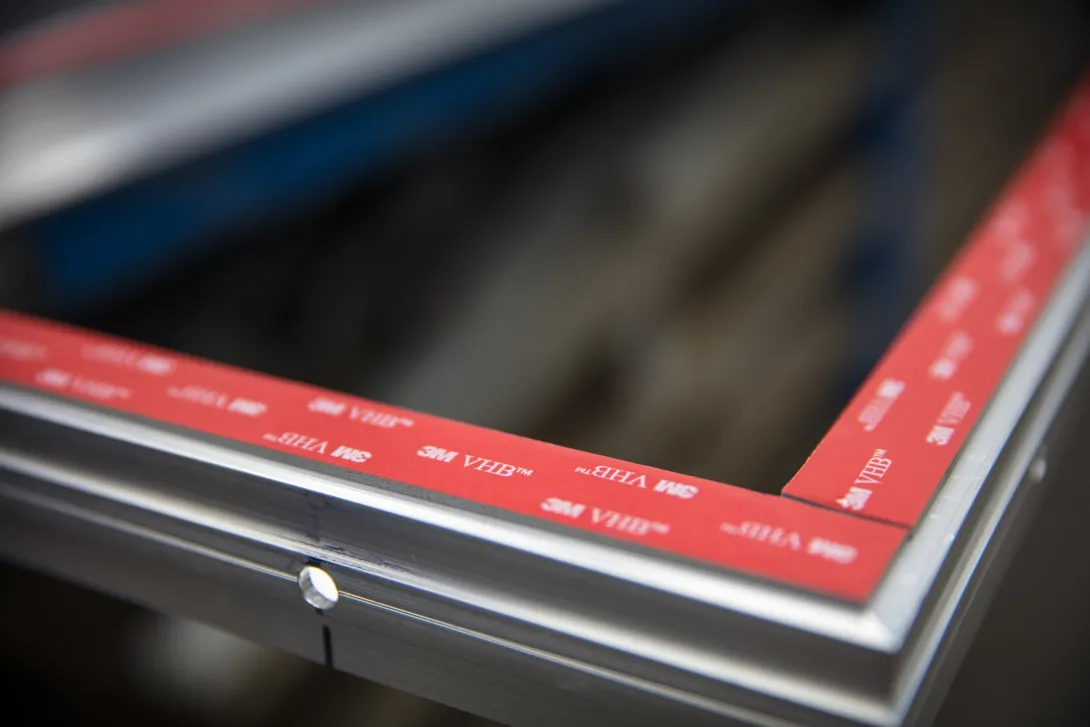
Heavy-duty adhesive mounting works for 90% of interior doors when done correctly. Forget dollar-store tapes—this requires industrial-grade bonding that grips smooth surfaces. The secret lies in the foam-core technology of tapes like 3M VHB (Very High Bond), which flows into microscopic surface imperfections for a mechanical lock. Unlike brittle glues, these tapes maintain flexibility to handle door vibrations without breaking contact.
Choosing Your Adhesive Weapon: Tape vs. Strips
Selecting the wrong adhesive guarantees failure. Match your blind type to these proven options:
| Adhesive Type | Best For | Weight Limit | Critical Tip |
|---|---|---|---|
| 3M VHB Tape (1/8″ foam) | Cellular shades, roller blinds | 15+ lbs/sq in | Cut to bracket shape; avoid air bubbles |
| Gorilla Heavy Duty Tape | Medium roller shades | 10 lbs/sq in | Apply in zig-zag pattern on bracket backs |
| 3M Command Jumbo Strips | Sheer panels under 5 lbs | 3.5 lbs/strip | Use 2+ strips per bracket; press for 30 seconds each |
Never use standard double-sided tape—it lacks the cross-linked polymers needed for long-term adhesion on doors. For steel doors, magnetic Command strips (with steel plates) outperform tapes by 300% in shear strength tests.
The 3-Step Surface Prep That Makes or Breaks Your Mount
Skipping this step causes 95% of adhesive failures. Factory finishes have invisible wax and oils that repel adhesives. Here’s the non-negotiable process:
- Deep Clean: Dampen a microfiber cloth with 90%+ isopropyl alcohol. Wipe the mounting area in circular motions until the cloth comes away clean (usually 3-4 passes). Never use glass cleaners—they leave residue.
- Micro-Scuff: Lightly abrade the spot with 400-grit sandpaper. This creates “tooth” for the adhesive to grip. Wipe away dust with a tack cloth.
- Final Wipe: Clean again with alcohol and let dry 15 minutes. Test adhesion by pressing your thumb firmly—if it sticks slightly, you’re ready.
Pro Tip: Do this on a humid day—moisture helps activate the adhesive’s bonding agents.
Tension Rods: The Zero-Tool Fix for Glass Doors
For single-pane glass doors (like patio or storm doors), tension rods eliminate all mounting hardware. This method wedges between interior door trim or the glass itself, using spring pressure to stay put. It’s the only truly reversible solution—ideal for rentals where even adhesive residue is prohibited.
Why Tension Rods Fail (and How to Prevent It)
Most renters install rods that slip when the door moves because they ignore two physics principles:
– Leverage: Rods wider than the glass pane create outward pressure that weakens hold
– Friction loss: Smooth glass offers no grip for rubber end caps
Fix it: Choose rods with silicone end caps (not rubber) and size them 1/4″ narrower than the glass opening. Twist the rod 15 degrees during insertion—this creates diagonal tension that resists door movement. For multi-pane doors, use a “Z”-shaped rod that hooks over the top rail.
Magnetic Magic: Secure Mounts for Steel Doors
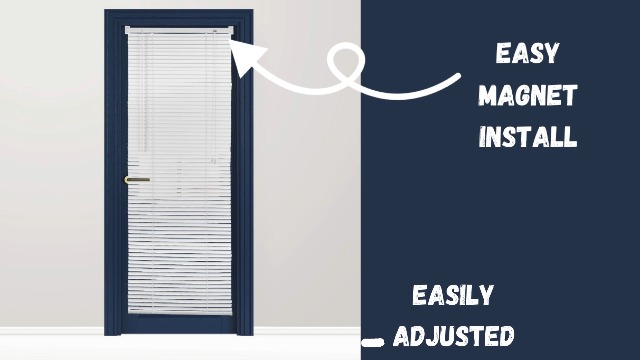
If your door is steel (common in entry doors), magnetic mounting is the strongest no-drill solution. Neodymium magnets generate up to 12 lbs of pull force per square inch—enough to hold even medium-weight cellular shades securely.
Installing Magnetic Blinds on Non-Steel Doors
No steel door? No problem. Create a magnetic surface with this hack:
1. Cut a thin steel plate (18-gauge) to match your bracket size
2. Adhere it to the door using 3M VHB tape (following surface prep steps)
3. Attach magnetic brackets to the plate—no direct door contact needed
This concentrates adhesive stress on the plate, not the blind. Test with a strong magnet first—some “steel” doors are actually aluminum with a steel veneer.
Your 7-Step Adhesive Mounting Process for Door Blinds
Follow this exact sequence for failure-proof installation. Deviating by even one step risks blind detachment.
Step 1: Blind Selection (Do This First!)
Choose only these door-safe options:
– ✅ Cellular shades (lightest option—under 3 lbs)
– ✅ Sheer roller shades (fabric weight under 2 oz/sq ft)
– ❌ Avoid: Faux wood blinds, Roman shades, or any blind over 5 lbs
Step 2: Bracket Positioning Test
Hold brackets against the door without adhesive. Mark positions with painter’s tape. Open/close the door 5 times—ensure:
– No handle interference
– No cord snagging
– Full blind clearance when door swings
Step 3: Precision Surface Prep
Clean and micro-sand both bracket backs and door spots. Wipe with alcohol-dampened cloth until no residue shows.
Step 4: Adhesive Application
Apply tape in a continuous “U” shape on bracket backs (not just corners). For Command strips, use two strips per bracket spaced 1″ apart.
Step 5: Mounting Under Pressure
Peel backing and press bracket onto door. Apply 15+ lbs of force with a J-roller or credit card for 45 seconds—this activates the adhesive bond.
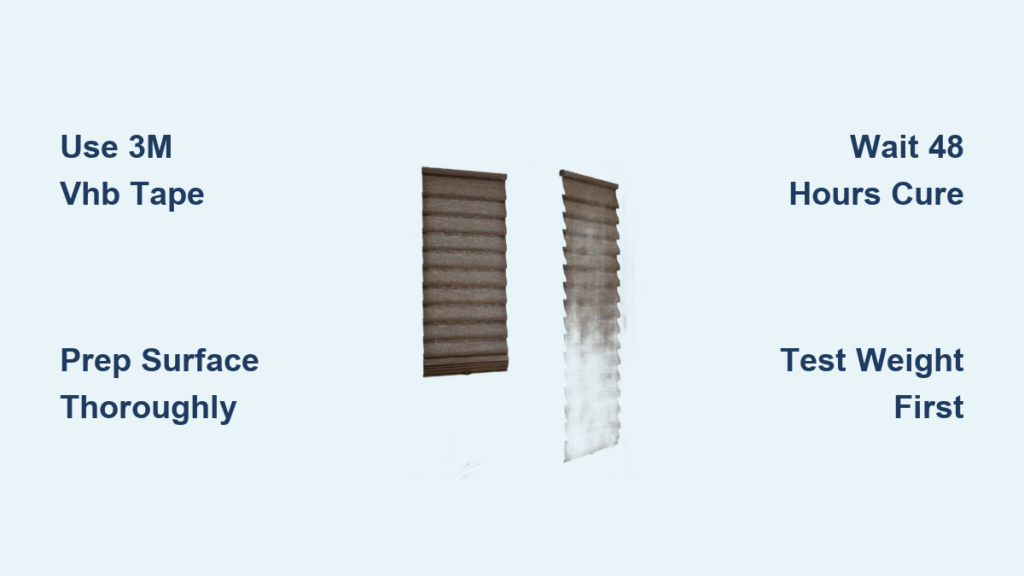
Step 6: The Critical Cure Period
Do not hang the blind yet! Wait 48 hours for full bond strength. Adhesives reach only 50% strength after 24 hours. Set phone reminders.
Step 7: Final Load Test
After curing, hang the blind. Pull down firmly 5 times at 30% of blind’s weight. If brackets hold, test with full downward pressure.
Avoid These 3 Critical Adhesive Mounting Mistakes
Mistake #1: Skipping the Cure Time
Hanging blinds too soon is the #1 failure cause. Adhesives need 48 hours to chemically bond—not just dry. Set a timer and resist the urge to use it early.
Mistake #2: Ignoring Temperature Limits
Most tapes fail above 120°F. Never install on sun-facing doors during afternoon heat. Wait for cool, dry conditions (60-80°F ideal).
Mistake #3: Using Horizontal Adhesive Lines
Gravity pulls brackets downward. Apply tape vertically along the bracket’s sides—not horizontally across the top. This maximizes shear resistance.
Safety First: Preventing Blind Falls on High-Traffic Doors
A falling blind isn’t just annoying—it’s dangerous. Doors experience 5-10x more movement than windows. Implement these safeguards:
- Weight Test: After installation, hang a small bag of rice (matching blind weight) for 24 hours before final mounting
- Monthly Checks: Press upward on brackets during humid months—adhesives weaken in moisture
- Cordless Priority: Choose cordless operation to eliminate dangling hazards that catch on door handles
Never mount blinds above 72″ height on doors—fall distance increases injury risk. For doors with children, add clear adhesive corner guards to prevent sharp edge contact.
Best Blind Types for No-Drill Door Mounts
Top Performers
- Cellular Honeycomb Shades: Lightweight (as low as 2 lbs), no cords, and insulation benefits. Opt for single-cell fabric.
- Sheer Roller Shades: Under 3 lbs with minimal hardware. Best for privacy without blocking light.
- Magnetic Panel Tracks: For steel doors—sliding panels that attach via built-in magnets.
Instant Failures
- Faux Wood Blinds: Typically 8-12 lbs—exceeds adhesive limits
- Vertical Blinds: Side channels create leverage that peels brackets
- Motorized Blinds: Motors add 3+ lbs of dead weight that adhesives can’t sustain
Final Note: For lasting results, magnetic mounting on steel doors or VHB tape on prepainted interior doors outperform all alternatives. Always prioritize blind weight under 5 lbs, and never skip the 48-hour cure period. If your door has textured paint or high sun exposure, tension rods remain the safest bet. Within weeks, you’ll forget you didn’t drill—while your landlord (or future self) thanks you for preserving that perfect door finish. Ready to transform your exposed door? Start with a $12 roll of 3M VHB tape and your next privacy project today.


