
Replacing a worn-out door handle or upgrading your interior hardware doesn’t require professional skills—just the right approach and tools. If your current handle wobbles, sticks, or simply looks outdated, learning how to install a door handle properly can transform both functionality and aesthetics in less time than it takes to watch a movie. Most homeowners waste hours struggling with misaligned latches or loose knobs because they skip critical preparation steps. This guide reveals the exact process professionals use to ensure smooth operation and perfect alignment every time, whether you’re working with a standard passage knob, privacy lever, or entry lockset.
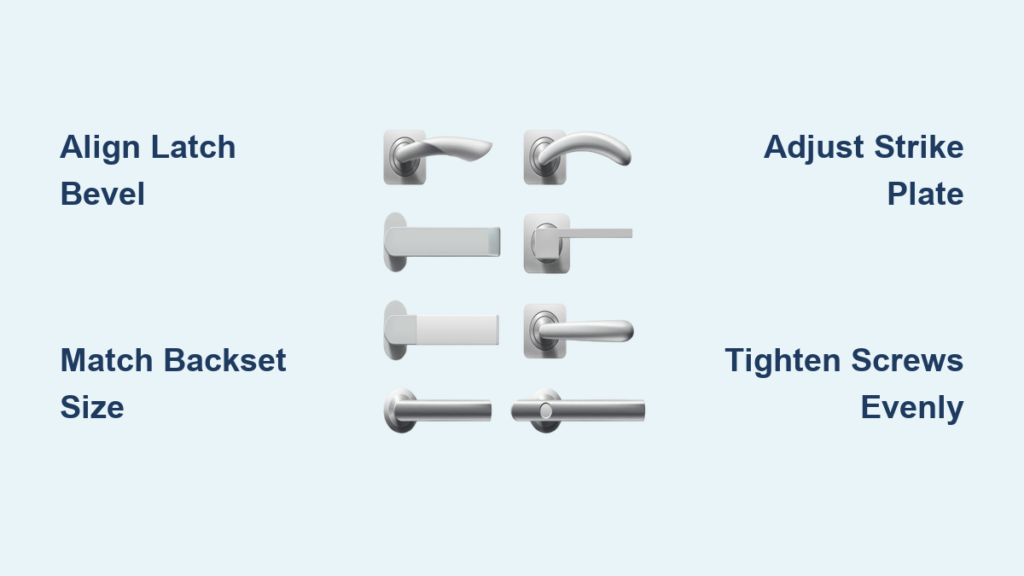
Essential Tools for Flawless Door Handle Installation

Skip this preparation step and you’ll likely face stripped screws or misaligned components mid-project. Before removing your old hardware, gather these specific tools to avoid frustration:
- Precision screwdrivers (both flat-head and Phillips #2) for delicate set screws that strip easily with improper bits
- 1/8-inch drill bit and power drill for creating pilot holes in hardwood doors that resist screw penetration
- Chisel and mallet for adjusting mortises when replacing older hardware with different plate dimensions
- Tape measure and marking gauge to verify backset measurements (critical for proper latch alignment)
- Small level to ensure handles install perfectly horizontal, especially important for lever styles
Your new hardware package should include all necessary components, but verify these before starting: interior and exterior handles, latch mechanism with faceplate, spindle rod, mounting screws of varying lengths, and strike plate. Crucially, confirm your new hardware matches your door’s existing bore configuration—most interior doors use a 2-1/8 inch cross-bore with either 2-3/8 inch or 2-3/4 inch backset. Installing hardware with mismatched measurements creates alignment nightmares that require extensive modification.
Removing Old Hardware Without Damaging Your Door
Identifying Your Existing Handle Type
Different handle mechanisms require specific removal techniques. For standard knobs, locate the tiny release pinhole on the shank—insert a paperclip to depress the mechanism while pulling the knob straight off. Lever handles typically have a setscrew on the side that requires a 3/32-inch Allen wrench. If you see no visible screws, check for a decorative cap that pops off to reveal mounting hardware. Never force removal—applying excessive pressure cracks door edges.
Extracting the Latch Mechanism Without Splintering Wood
After removing both handle halves, unscrew the latch plate from the door edge. If the latch sticks, insert a flat-head screwdriver between the plate and door edge, gently prying while twisting to create separation. For stubborn latches in solid core doors, tap the screwdriver with a hammer to break the seal without damaging surrounding wood. Clean all debris from the cross-bore and edge bore holes with a vacuum attachment—leftover wood fragments prevent new hardware from seating properly.
Installing New Latch Mechanism for Smooth Operation
Positioning the Latch Correctly on First Try
The beveled side of the latch bolt must face the door jamb—this critical detail determines whether your door latches smoothly or jams constantly. Hold the latch in place and close the door slightly to verify the bevel angle matches the jamb’s contour. If the latch sits recessed below the door edge, use your chisel to deepen the mortise: score the wood perimeter with the chisel tip, then remove material in thin layers until the faceplate sits flush. Test-fit frequently—over-chiseling creates gaps that compromise security.
Securing the Latch Without Stripping Screws
Start both mounting screws by hand to avoid cross-threading, especially in particleboard doors prone to stripping. Apply gentle pressure while turning—when resistance increases, stop immediately. If screws won’t tighten fully, fill stripped holes with wooden matchsticks coated in wood glue, let dry for 30 minutes, then reinsert screws. This simple trick creates new gripping material without visible repair marks.
Mounting Interior and Exterior Handles for Perfect Alignment
Inserting the Spindle Without Binding
Slide the square spindle through the latch mechanism’s square hole, ensuring it protrudes evenly on both sides. For levers, match the handedness indicator (usually an L or R stamp) to your door’s hinge side—installing backward prevents proper latching. Test spindle rotation before attaching handles; resistance indicates misalignment that must be corrected now.
Connecting Handles with Professional-Tight Tension
Position the interior handle first, verifying it operates the latch smoothly when turned. Hold both handles aligned while inserting the long mounting screws through the exterior side. Tighten screws incrementally—turn each screw one full rotation before moving to the next—to prevent uneven pressure that causes binding. The handles should sit flush against the door with no visible gaps, yet rotate freely without wobble. If handles feel stiff, loosen screws slightly until smooth operation returns.
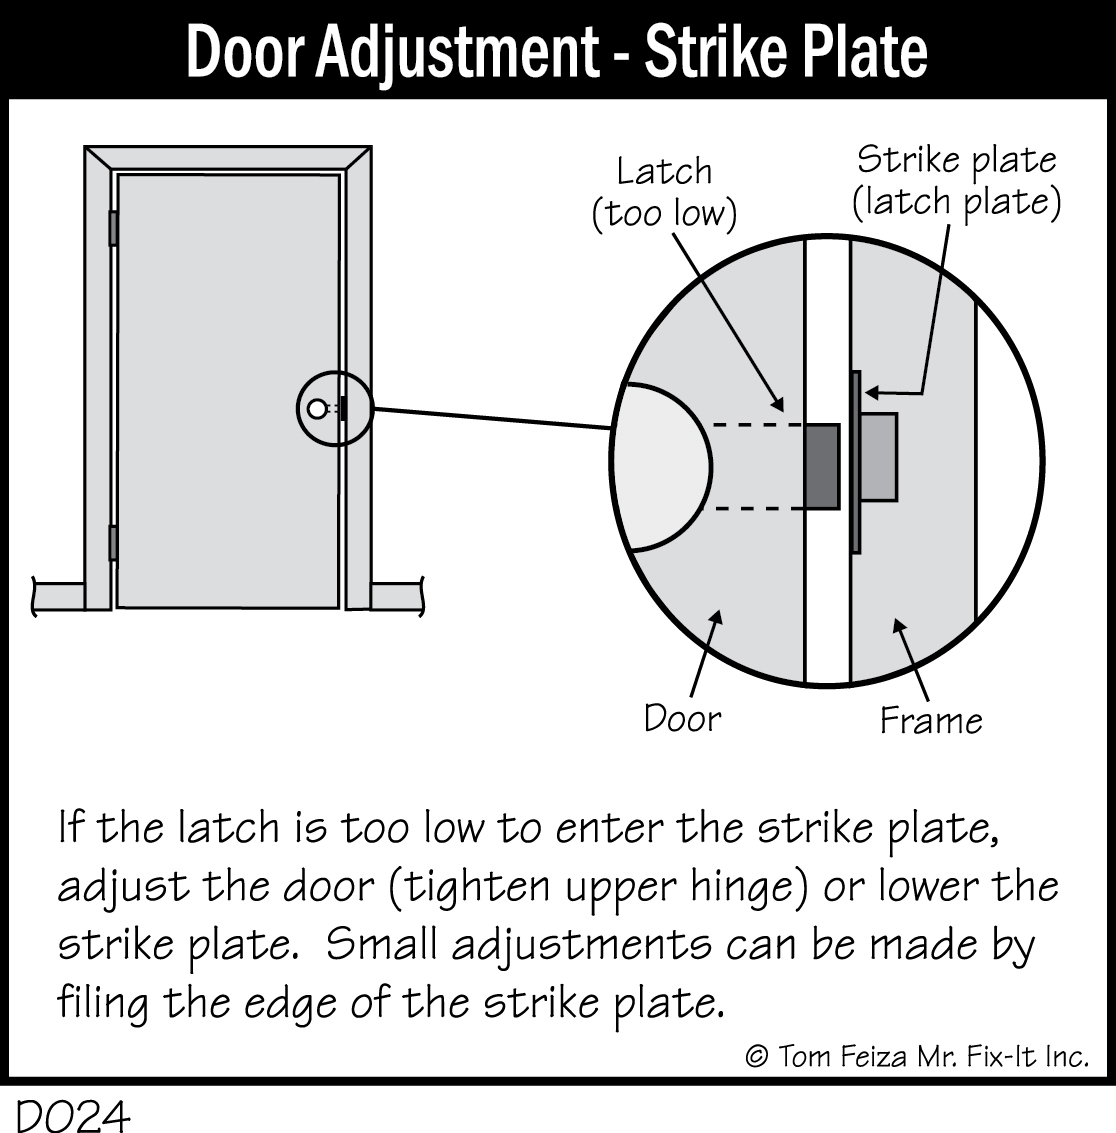
Precise Strike Plate Alignment for Silent Latching
Creating the Perfect Mortise in One Attempt
Close the door slowly while observing where the latch bolt contacts the jamb. Mark this spot with a pencil, then hold the strike plate against the jamb and trace its outline. Score the traced line with your chisel tip using a hammer for clean edges, then remove wood in 1/16-inch increments. The strike plate should sit perfectly flush—protruding plates cause noisy latching and premature wear.
Adjusting Strike Plate Position Without Visible Holes
If your initial alignment misses the mark, don’t just move the plate and leave unsightly screw holes. Fill old holes with golf tees coated in wood glue, let dry, then sand flush before remeasuring. For fine-tuning, use the lipstick test: coat the latch bolt tip with lipstick, close the door, and observe where the mark transfers to the jamb. Adjust the strike plate position to match this exact contact point for silent, reliable latching.
Troubleshooting Common Installation Mistakes
Fixing a Handle That Won’t Return to Position
This frustrating issue usually stems from an over-tightened spindle nut inside the handle mechanism. Remove the interior handle and locate the adjustment nut behind the rose plate. Loosen it one-quarter turn using needle-nose pliers, then reassemble and test. Most modern handles have internal springs that require precise tension—too tight causes stiffness, too loose creates handle wobble.
Solving Partial Latch Engagement
When the latch only partially extends, check the spindle length against your door thickness. Standard spindles work for 1-3/4 inch doors, but thicker doors require extended spindles. Measure your door thickness before purchasing hardware—most big-box stores carry spindle extensions that solve this common mismatch without replacing the entire handle set.
Eliminating Squeaky Latch Mechanisms
Never use oil-based lubricants on door hardware—they attract dust and eventually gum up. Instead, apply a small amount of powdered graphite to the latch bolt and spring mechanism. Work the handle repeatedly to distribute the lubricant, then wipe away excess with a dry cloth. This maintains smooth operation for years without residue buildup.
Final Quality Check Before Calling It Done
Operate the handle 20 times while observing latch movement—any hesitation indicates misalignment. Close the door from three feet away; it should latch securely without bouncing back. For locksets, verify the deadbolt throws fully with minimal key resistance. Check for gaps between roses and door surface that allow dust infiltration. Most importantly, test the handle’s operation under normal use conditions—does it feel smooth and responsive, or stiff and reluctant?
Maintaining Your New Door Handle for Long-Term Reliability
Tighten mounting screws quarterly to counteract normal wood movement—loose handles are the #1 cause of premature failure. Clean lever handles monthly with a damp microfiber cloth to prevent grime buildup in crevices. Every six months, apply a tiny drop of silicone lubricant to the latch mechanism for silent operation. Immediately address any developing wobble before it damages the mounting holes. With proper installation and minimal maintenance, your new door handle will operate smoothly for decades rather than years.
Replacing a door handle seems simple until you encounter misaligned latches or stripped screw holes. By following these precise steps—especially the critical strike plate alignment and spindle tension adjustments—you’ll achieve professional results that function perfectly from day one. The difference between a DIY job that lasts months versus years comes down to these often-overlooked details. Now that you know how to install a door handle correctly, tackle that wobbly knob on your bedroom door this weekend—you’ll gain confidence with each successful installation, making future hardware upgrades feel effortless.


