
That loud BANG when your door slams into the wall isn’t just annoying—it cracks drywall, dents trim, and damages hinges over time. Installing a spring door stopper solves this problem permanently with a simple 20-minute fix. Whether you’re protecting freshly painted walls or preventing costly repairs, this guide shows exactly how to install spring door stoppers correctly for any door type. You’ll learn where to position stops for maximum effectiveness, avoid common mounting mistakes that cause failures, and choose hardware that holds solid through daily use. By the end, you’ll have a quiet-closing door that stops exactly where you want it—no more guessing or trial-and-error.
Why Your Door Knob Keeps Smashing Into Walls
Most door damage happens because standard hinges allow doors to swing 180 degrees—far beyond the safe stopping point. Without a stopper, momentum slams knobs into walls with 30+ pounds of force per impact. Over time, this cracks drywall, loosens trim, and misaligns doors. Spring door stoppers absorb this energy by compressing when hit, then gently returning the door to its resting position. They’re especially critical for hollow-core doors (which flex dangerously on impact) and rooms with baseboard heaters or furniture near the swing path. Ignoring this issue risks $200+ in wall repairs per incident—not to mention replacing dented knobs or broken hinges.
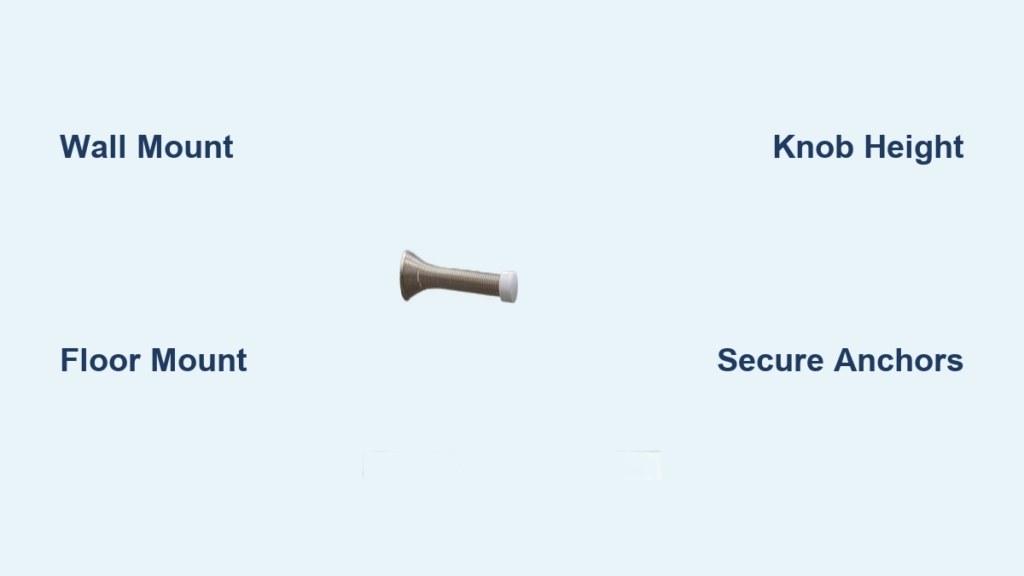
Wall vs. Floor Mount: Which Spring Stopper Suits Your Door?
Choose wall-mounted stops for standard interior doors where knobs hit walls. These install directly on baseboards or walls at doorknob height. Opt for models with rubberized pads (like the Richelieu Hardware Spring Stop) if you have kids or pets—the cushioning prevents loud noises and protects delicate knob finishes. Avoid cheap plastic stops; they crack within months under pressure. For doors swinging into hallways or tight spaces, select floor-mounted stops that anchor to subfloors. These are essential when walls contain electrical boxes, pipes, or fragile moldings. Heavy exterior doors need reinforced floor stops with adjustable tension dials (like the FJK Spring Floor Stop) to handle their weight. Never use door-mounted hinge-pin stops on solid-core doors—they fail under 45+ pound loads.
Spotting Hidden Installation Challenges
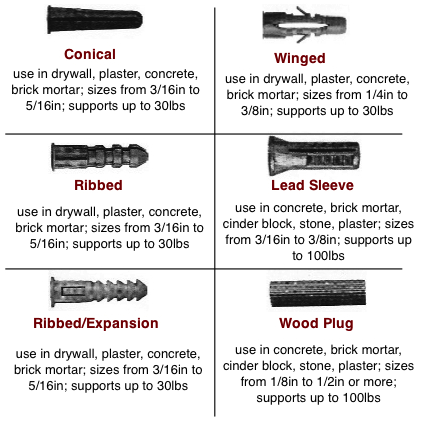
Check for wall obstacles before drilling. Run a stud finder along your planned stop location—hitting a stud means stronger mounting, but missing one requires special anchors. If you feel hollow spots followed by solid resistance, you’ve hit a fireblock between studs. Never install stops over electrical outlets—a single drill slip could cut power to half your house. For tile or stone walls, use masonry anchors and a carbide-tipped drill bit; standard drywall anchors will pull out. In rentals, confirm with your landlord whether you can drill—many allow stops if you patch holes later with matching paint.
Exact Placement Marks That Prevent Knob Damage

Getting positioning wrong causes 80% of stopper failures. The knob must hit the stopper’s center pad squarely—not the edge or base. Misalignment makes doors bounce unpredictably or jam open.
Wall Stopper Placement: The Knob-Height Trick
- Open the door to its natural stopping point (usually 90-110 degrees from closed). Place painter’s tape on the wall where the knob impacts.
- Hold your stopper against the tape so the pad’s center aligns with the knob’s center. Critical: Measure vertically from the floor—most knobs hit walls 36-42 inches high. Mark screw holes here.
- Use a level to ensure marks are perfectly horizontal. A 2-degree tilt makes doors slide off the stopper.
Floor Stopper Positioning: Avoiding Swing Interference
- Open the door fully. Place a coin where the knob touches the floor—this shows the contact point.
- Position the floor stop 1-2 inches behind this spot (toward the hinges). If placed directly under the knob, the door won’t open fully.
- For spring-loaded models, adjust the tension dial to “medium” first. Test by swinging the door lightly—if it stops smoothly, tighten incrementally for heavier doors.
Drill-Proof Mounting for Every Wall Type
Skipping proper anchoring guarantees your stopper tears out on first use. Drywall anchors must support 50+ pounds to handle door momentum.
Tools Checklist for Flawless Installation
- Drill with 1/8″ and 3/16″ bits (1/8″ for pilot holes, 3/16″ for anchor sleeves)
- Self-tapping drywall anchors (like Hillman Speed-Drive) for stud-free walls
- Masonry anchors (Tapcon screws) for brick or tile
- Level and tape measure (laser levels prevent tilt errors)
- Safety glasses (essential for tile or masonry drilling)
Anchoring Secrets Drywall Installers Won’t Share
For drywall: Drill pilot holes 1/8″ wider than anchor sleeves. Insert anchors until flush, then drive screws only until resistance increases—overtightening cracks drywall. Pro tip: Fill anchor holes with toothpicks and wood glue before screwing for 2x holding power. For tile: Mask tape over the drill point to prevent chipping. Use 200 RPM and light pressure; stop when you feel the tile crack (then switch to masonry bit for the wall behind). Never use toggle bolts—they require oversized holes that won’t patch cleanly.
Testing Like a Professional Installer
Most DIYers skip this step and wonder why stops fail. Proper testing confirms safety and longevity.
The 3-Point Function Check
- Slow-motion test: Gently swing the door into the stopper. It should compress smoothly without scraping sounds.
- Full-swing test: Release the door from 3 feet away. It must stop cleanly without rebounding more than 2 inches.
- Wiggle test: Grab the stopper and twist firmly. Zero movement means solid mounting; any play requires anchor replacement.
Fixing Common Post-Install Issues
- Knob misses stopper? Reposition it 1/4 inch toward the hinge side—this accounts for door flex on impact.
- Metal grinding noise? Apply one drop of 3-in-1 oil to the spring mechanism (never WD-40—it attracts dust).
- Stopper pulls out? Replace anchors with snap-toggle bolts—they grip the backside of drywall for 75+ lb capacity.
Spring Door Stopper Lifespan Extenders
A well-maintained stopper lasts 10+ years. Neglect causes premature failure.
Monthly Maintenance Routine
- Tighten mounting screws (vibration loosens them over time).
- Wipe rubber pads with vinegar solution to remove sticky buildup.
- Check spring tension—re-tighten adjustment screws if doors bounce back.
Critical warning: Replace stops showing cracked bases or frayed springs immediately. A broken spring can launch metal parts at high speed during door impact. For high-traffic doors (like kitchens), lubricate moving parts quarterly with silicone spray—oil-based lubes dry out and gum up.
When to Call a Professional
While 95% of installations are DIY-friendly, seek help if:
– Your walls contain asbestos (common in pre-1980s homes)
– You need to mount stops on structural beams (requires engineering approval)
– Doors weigh over 60 pounds (hollow-core max is 45 lbs)
Professionals charge $75-$120 for stopper installation but include wall patching for future removal. Always get written confirmation they’ll use commercial-grade anchors—not the cheap ones included in retail kits.
A properly installed spring door stopper pays for itself after one prevented wall repair. By following these exact placement techniques and anchoring methods, you’ll eliminate slamming noises and protect walls for years. Remember: wall-mounted stops belong at knob height with perfect horizontal alignment, while floor stops need strategic placement behind the impact point. Always use wall-specific anchors—drywall demands self-tapping models, masonry requires Tapcons. Test rigorously before considering the job done, and perform quarterly maintenance to catch wear early. Now that your doors stop exactly where they should, consider installing stops on every interior door—especially bedrooms and hallways where slamming happens most. Protect your walls today, and you’ll skip tomorrow’s drywall repair bill.


