
The rhythmic click of beads against your shoulder as you walk through a doorway—that’s the magic of a handmade beaded curtain. Forget flimsy store-bought versions that tangle within days or shed beads like a molting bird. How to make a beaded door curtain that stays pristine requires strategic planning and pro techniques most tutorials skip. Whether you’re crafting a boho bedroom divider or a sunroom entryway, this guide solves the real pain points: bead shedding, uneven strands, and frustrating tangles. You’ll learn exactly how to calculate bead quantities, choose unbreakable stringing materials, and secure knots that survive daily use—no prior beading experience needed.
Must-Have Supplies for Your Beaded Curtain Project
Skip the craft store overwhelm by focusing on these non-negotiable items. Your curtain’s durability hinges on smart material choices—not just aesthetics.
Choose Unbreakable Stringing Materials (Not Thread!)
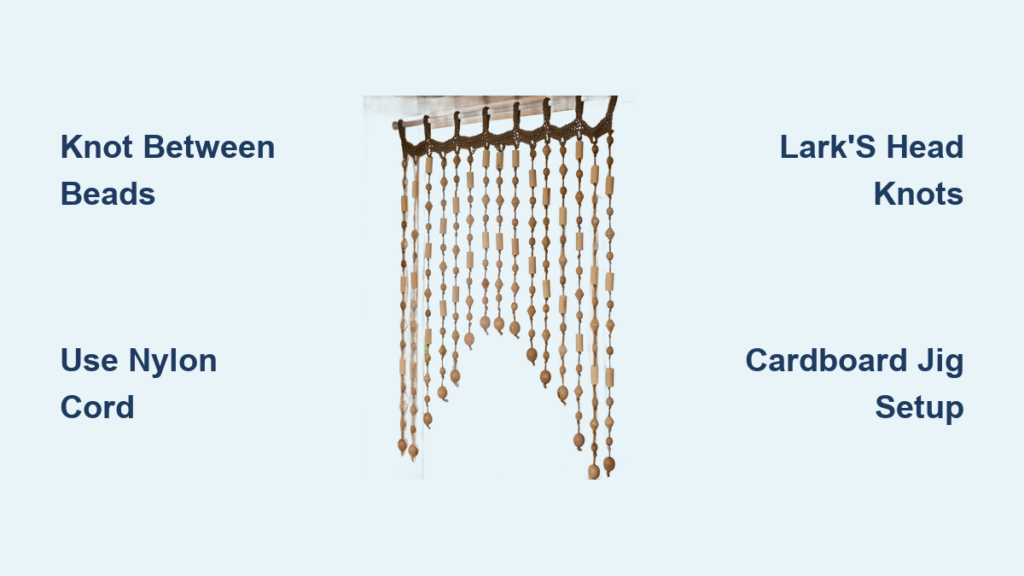
Nylon beading cord (0.5–1mm thickness) is the secret weapon most beginners miss. Unlike cotton thread or fishing line, it resists fraying and handles weight without stretching. For glass or ceramic beads, use 49-strand stainless steel cable coated in nylon—it won’t kink when knotted. Critical tip: Avoid monofilament (fishing line) for doorways—it snaps under repeated friction. Test your cord by pulling firmly; if it stretches or frays, discard it.
Bead selection pitfalls to avoid:
– Small seed beads (under 4mm) will shed constantly through gaps in larger beads. Mix them only as spacers between 8mm+ focal beads.
– Wooden beads look rustic but warp in humidity—seal them with clear matte varnish first.
– Plastic beads cheaper than glass but crack under tension. Prioritize acrylic or recycled-glass beads for durability.
Essential Tools Beyond Scissors
- Beading needle with flexible eye (size 10–12): Stiff needles snag nylon cord.
- Bead stopper (a $2 tool): Clamps cords mid-strand to prevent bead avalanches.
- Glue syringe: For precision knot sealing—no messy blobs.
Skip these: Fancy bead boards. A $1 foam tray with grid lines works better for pattern planning.
Calculate Bead Quantities Before You Start Stringing
Guessing bead counts wastes money and creates uneven strands. Do this math first:
- Measure your doorway: Standard interior doors need 76–80cm (30–32″) long strands. Add 15cm (6″) for top/bottom knots.
- Test your pattern: String 10cm (4″) of your design. Count how many beads fit. Example: 15 beads per 10cm.
- Calculate per strand: (Total strand length ÷ 10cm) × bead count. For 80cm strands: (80 ÷ 10) × 15 = 120 beads.
- Factor in waste: Buy 20% extra beads. If making 50 strands, purchase (120 × 50) × 1.2 = 7,200 beads.
Strand spacing rule: For a 80cm-wide doorway, space strands 2.5cm (1″) apart. That’s 32 strands minimum. Fewer strands = gaps where privacy vanishes.
String Beads Without Tangles or Shedding
Follow this sequence to avoid the #1 frustration: beads sliding out of position.
Knot Between Every Bead (Yes, Really)
Most tutorials skip this, causing beads to clump at strand bottoms. Here’s the fix:
– After threading each bead, tie a double overhand knot against its base.
– Pro shortcut: Use a bead stopper to hold position while knotting. Slide it up as you work.
– Apply glue instantly: Dip knot tip in glue syringe—before trimming excess cord. Wait 2 minutes before proceeding.
Create Bulletproof Bottom Anchors
Weak bottom knots cause entire strands to unravel:
1. Thread a spacer bead (4mm metal) after your last decorative bead.
2. Tie a surgeon’s knot (triple overhand) through the spacer bead.
3. Clip cord to 3mm tail—then seal with glue. The spacer bead hides the knot and adds weight for straight drape.
Secure Top Loops That Won’t Slip Off the Rod

Flimsy loops cause strands to slide together, ruining your pattern. Do this instead:
Lark’s Head Knot Method (No Glue Needed)
- Fold cord in half, creating a 5cm (2″) loop at the top.
- Place loop under the rod, pulling cord ends through the loop (like tying shoes).
- Tighten firmly—this knot grips the rod under tension.
- Critical step: Slide a 10mm wooden bead onto both cord ends above the knot. This locks position permanently.
Why this beats glue: Glue cracks over time. The wooden bead acts as a physical barrier, surviving humidity changes.
Prevent Tangles During Assembly
The horror of 50 knotted strands becoming a single knot monster is real. Avoid it with:
The Cardboard Jig System
- Cut a 30cm x 15cm cardboard rectangle.
- Punch evenly spaced holes (2.5cm apart) along the top edge.
- Thread each completed strand through a hole, securing with a temporary bead below.
- Hang the jig on your rod—strands stay perfectly ordered during installation.
Spacing hack: Attach mini binder clips to the rod between strands. Slide them out after all strands are hung.
Child-Safe Installation That Won’t Crash Down

A falling curtain risks injury or bead avalanches. Reinforce your setup:
Weight Distribution Checklist
- Rod thickness: Minimum 1.5cm (5/8″) diameter for dowels. Thinner rods bow under weight.
- Mounting depth: Screws must hit wall studs (not drywall anchors) for curtains over 2kg. Test stud location with a magnet.
- Strain relief: Add a nylon cord sling under the rod—tie ends to wall brackets. This catches the rod if brackets fail.
Safety non-negotiable: If kids/pets access the area, use beads 25mm+ in diameter. Smaller beads are choking hazards. Hang curtains 15cm (6″) above door height to prevent grabbing.
Fix Common Mistakes Before They Ruin Your Curtain
“My beads are shedding!”
Cause: Knots between beads are too loose.
Fix: Re-string affected strands using beeswax on cord ends—it creates friction for tighter knots.
“Strands won’t hang straight!”
Cause: Inconsistent knot tension or uneven rod mounting.
Fix: Hang strands on jig overnight before final installation. Level the rod using a laser level—never eyeball it.
“Curtain blocks too much light!”
Cause: Overcrowded strands or opaque beads.
Solution: Reduce strand count by 25% and mix in transparent glass beads (like Czech crystals) for light diffusion.
Customize Your Curtain Without Sacrificing Durability
Themed Designs That Last
- Ocean theme: Use sea glass beads (not real shells—they crumble). Seal with marine varnish.
- Boho chic: Add macramé knots between bead clusters using waxed cotton cord—never on the main strand.
- Rainbow gradient: Order beads by hue before stringing. Group colors in 3-bead sequences (e.g., royal blue → teal → aqua).
Pro customization tip: For monograms, use letter beads 12mm+. String them on separate thin wire strands between main bead strands—this prevents sagging.
Maintain Your Curtain for Years of Use
Skip the “dry clean only” nonsense. Do this monthly:
1. Dust removal: Hold curtain taut and wipe downward with microfiber cloth (upward motion tangles strands).
2. Knot check: Gently tug each strand’s bottom knot. Re-glue any that feel loose.
3. Sunlight protection: Rotate curtain 180° every 6 months to prevent UV fading on one side.
Never do this: Wash in soapy water. Moisture swells wood beads and weakens glue.
Creating how to make a beaded door curtain that endures requires respecting physics—not just aesthetics. By knotting between every bead, calculating precise quantities, and securing strands with lark’s head knots plus wooden lock beads, you’ll build a curtain that flows gracefully for years. The cardboard jig system eliminates tangles during assembly, while stud-mounted rods prevent disasters. Start with 8mm acrylic beads and nylon cord for your first project—they’re forgiving and affordable. Once mastered, experiment with glass or mixed media. Your doorway isn’t just an entry—it’s a statement. Now go make it click.


