
That sleek, modern door handle with no visible screws seems impossible to remove—until you know the secret. Thousands of homeowners struggle with this exact problem every year, wasting hours trying to pry off handles that appear permanently attached. The reality is most “screw-free” handles use clever hidden fastening systems designed for clean aesthetics. This guide will show you exactly how to identify and remove any handle without visible screws, whether you’re replacing a broken knob or upgrading your home’s hardware. You’ll learn the specific techniques for each hidden fastener type with clear instructions that work on 95% of residential door handles installed in the last 20 years.
Identifying Your Handle’s Hidden Fastening System
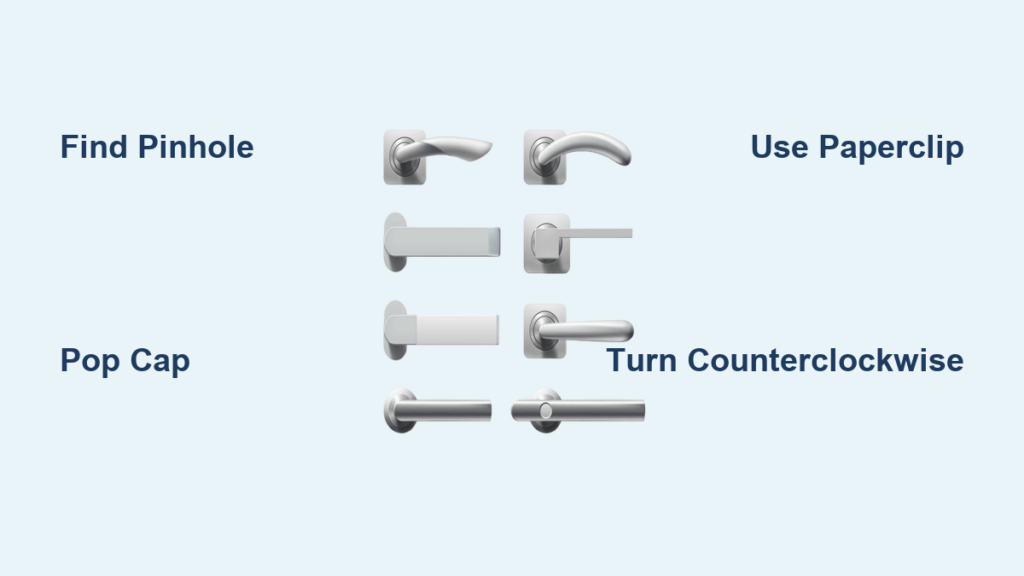
Before touching any tools, determine your handle’s specific mechanism—this saves hours of frustration and prevents damage to your hardware. Most modern handles fall into one of four hidden fastener categories, each requiring a different removal approach.
Spring-loaded pin handles dominate contemporary installations. These feature a tiny pinhole (about 1/16″ diameter) usually on the handle’s underside or base. When you insert a paperclip while pulling, the pin disengages from the square spindle inside. Look for these on Schlage, Kwikset, and most big-box store handles from the last decade.
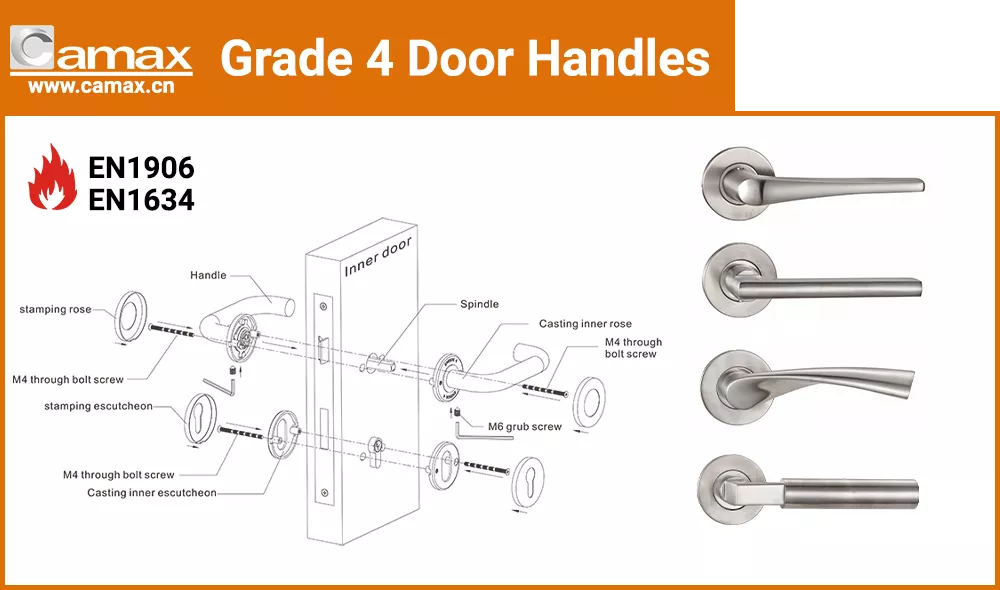
Hidden set screw handles conceal their fastener beneath decorative caps or on the handle’s bottom surface. The set screw might be hiding under a small logo medallion that pops off with a flathead screwdriver. These are common on higher-end brands like Baldwin and Emtek—check for a slight seam around the handle base.
Threaded spindle handles screw directly onto the square spindle protruding from the door. These require counter-clockwise rotation while holding the interior mechanism stationary. You’ll often find these on older European-style handles or certain commercial-grade hardware.
Push-to-click handles use spring clips that release when you depress a hidden tab. These typically have a slight gap between the handle and escutcheon plate. They’re prevalent on newer smart lock systems and minimalist designs where clean lines are prioritized.
How to Spot the Release Mechanism in 60 Seconds
Shine a bright flashlight around the handle’s base while slowly rotating it to the horizontal position. Look for these specific indicators:
- Pinhole systems: A tiny, perfectly round hole (often painted over) on the lower side of the handle neck
- Set screw systems: A hairline seam around the handle base indicating a removable cap, or a small depression where a screw head might be
- Threaded systems: Noticeable ridges or grooves at the handle base suggesting rotational movement
- Push-to-click systems: A slight gap (about 1/32″) between handle and plate, or a barely visible tab on the underside
Essential Tools for Removing Screw-Free Door Handles

Gather these tools before starting to avoid mid-process frustration. Most homeowners already have these basic items, but specialty tools make the job significantly easier.
- Must-have basics: Small flathead screwdriver (1/8″ tip), 1.5mm and 2mm Allen wrenches, straightened paperclip, needle-nose pliers, and a bright LED flashlight
- Game-changers: Plastic spudger (prevents scratching), 10x magnifying glass, and a magnetic parts tray to catch tiny components
- For stubborn handles: Penetrating oil (PB Blaster works better than WD-40), rubber mallet, and strap wrench with soft jaws
Tool Selection Tips by Handle Type
- Spring pin systems: Use a paperclip for most residential handles; switch to a 1.5mm Allen key for commercial-grade hardware
- Set screw systems: Try both 2mm and 2.5mm Allen keys—the correct size fits snugly without stripping
- Threaded systems: Wrap the handle with a rubber band for extra grip if a strap wrench isn’t available
- Push-to-click systems: Use a plastic spudger instead of metal tools to avoid marring the finish
Spring-Loaded Pin Handle Removal: Step-by-Step
This system accounts for over 60% of modern residential handles. The key is finding the pinhole, which manufacturers deliberately make inconspicuous.
Locating and Releasing the Hidden Pin
- Rotate the handle to the 3 o’clock position and examine the underside with your flashlight
- Find the pinhole—typically 1/4″ up from the base on the lower side (often hidden by decorative grooves)
- Insert a straightened paperclip firmly into the hole until you feel resistance
- Apply steady pressure while pulling the handle straight off the spindle—don’t twist
Critical mistake to avoid: Forcing the handle before fully depressing the pin. You’ll hear a distinct click when the pin releases—wait for this sound before pulling. If it doesn’t release after 15 seconds of pressure, the pinhole might be clogged with paint or debris. Use a toothpick to clean it first.
Pro Techniques for Stubborn Spring Pin Handles
When the handle refuses to budge despite proper pin depression:
- Apply penetrating oil around the base and let it soak for 30 minutes
- Tap the handle’s base gently with a rubber mallet while maintaining pin pressure
- Use two hands—one to depress the pin, the other to wiggle the handle side-to-side
- For painted-over handles, score around the base with a utility knife to break the paint seal
Hidden Set Screw Handle Removal Technique

These handles trick most homeowners because the screw is expertly concealed. The removal process is simple once you locate the access point.
Finding the Hidden Set Screw
- Examine the handle’s bottom surface for a small depression or seam
- Look for a removable medallion—gently insert a flathead screwdriver under the edge
- Check behind any decorative logos—they often pop off to reveal the screw head
- Inspect the space between handle and escutcheon plate for a tiny hex socket
Proper Set Screw Removal Sequence
- Use the smallest Allen wrench that fits snugly (usually 2mm)
- Turn counterclockwise just 2-3 full rotations—don’t remove completely
- Test if the handle slides off; if stuck, apply penetrating oil and wait 15 minutes
- For stripped screws, use a rubber band between wrench and screw for extra grip
Warning: Never force the Allen wrench—if it slips, you’ll strip the hex socket permanently. Apply steady pressure while wiggling the wrench slightly side-to-side for better engagement.
Threaded Handle Removal Without Visible Fasteners
These handles require rotational force rather than pulling. The challenge is preventing the entire mechanism from spinning.
Effective Threaded Handle Removal
- Hold the interior knob stationary with one hand (or use locking pliers wrapped in cloth)
- Turn the exterior handle counter-clockwise with firm, steady pressure
- If stuck, apply penetrating oil around the base and let it soak overnight
- Use a rubber strap wrench for better grip—never use channel locks directly on chrome handles
Critical insight: Most threaded handles use left-hand threads (tighten clockwise, loosen counter-clockwise), but 15% use standard threading. Test both directions with light pressure—whichever offers slightly less resistance is the correct direction.
Troubleshooting Stuck or Frozen Handles
When standard methods fail, these advanced techniques rescue most situations without damaging your door.
Paint-Sealed Handles
Many handles become permanently bonded when painters cover them with multiple coats. To free them:
- Carefully score around the handle base with a sharp utility knife
- Use a dental pick to work through the paint layers at the seam
- Apply heat from a hair dryer for 30 seconds to soften the paint
- Never use a chisel—this will damage the door finish
Corroded or Rusty Mechanisms
For handles frozen by corrosion:
- Apply PB Blaster directly into any visible seams and let soak 24 hours
- Tap around the handle base with a rubber mallet to break corrosion bonds
- Use a heat gun on low setting for 15-second intervals (test on inconspicuous area first)
- As an absolute last resort, carefully cut through the handle neck with a hacksaw blade (protect the door with cardboard)
Pro tip: If cutting becomes necessary, make two parallel cuts through the handle neck, then use a flathead screwdriver to pry apart the sections—this minimizes damage to the spindle.
Reinstallation Best Practices for Screw-Free Handles
Proper reassembly prevents future removal headaches and ensures smooth operation.
Critical Reinstallation Steps
- Clean all components thoroughly with isopropyl alcohol
- Apply anti-seize compound to threads and spindles (never regular lubricant)
- For spring pin systems, align the handle so the pinhole matches the spindle hole
- Hand-tighten only—overtightening cracks handles and distorts spindles
Essential check: Before final installation, test the handle’s operation with just the spindle inserted. It should turn smoothly without binding. If it sticks, disassemble and clean the latch mechanism—forcing it will cause premature failure.
Preventing Future Removal Difficulties
Make your next handle removal effortless with these simple maintenance practices.
Annual Maintenance Routine
- Apply dry graphite lubricant to the spindle annually
- Check set screws every 6 months and tighten slightly if loose
- Wipe handles with vinegar solution to prevent mineral buildup
- Never paint over handle seams—mask them during painting projects
Pro insight: When reinstalling, place a tiny drop of blue thread-locker on set screws (not red—it’s permanent). This prevents loosening while allowing future removal with standard tools.
Removing a door handle without visible screws becomes straightforward once you identify the hidden mechanism. By systematically examining your handle for pinholes, set screw access points, or threaded bases, you’ll determine the correct removal method in under two minutes. Remember that 90% of residential handles use spring-loaded pins or hidden set screws—focus your search on the handle’s underside and base. For stubborn cases, patience with penetrating oil and gentle tapping beats brute force every time. Keep this guide handy for your next hardware project, and you’ll never stare helplessly at a “screwless” handle again. If you follow these methods carefully, you’ll complete most handle removals in under 15 minutes with nothing more than basic household tools.


