
Your lever door handle suddenly feels loose, won’t retract the latch, or you’re prepping for a home refresh. Whether you’re dealing with a stubborn vintage Gainsborough porcelain handle or a modern interior door, removing a lever door handle is the critical first step for repair or replacement. This process varies significantly by mechanism type—grub screws, snap-fits, or hidden clips—but skipping identification causes stripped screws or shattered porcelain. In just 15 minutes with basic tools, you’ll safely disassemble any lever handle. I’ll walk you through exact techniques for your specific hardware, including solutions for paint-sealed or corroded models that resist standard methods.
Gather These 6 Essential Tools for Lever Handle Removal
Before touching your door, assemble these non-negotiable tools. Using improper implements like pliers instead of plastic pry tools risks permanent finish damage on brass or porcelain handles. Keep this kit ready to avoid mid-project frustration.
Why a 1.5mm Allen Wrench Is Critical for Most Handles
Over 70% of modern lever handles use metric grub screws requiring a 1.5mm–2.5mm hex key. Inspect the lever base for pinholes—insert the key and turn counter-clockwise. Never force it; stripped screws mean professional extraction. Store removed screws in a magnetic tray to prevent loss.
How to Use Plastic Pry Tools Without Marring Finishes
Slide a nylon spudger (or old credit card) between the rosette and door surface. Apply even pressure at 3–4 points around the perimeter. For painted-over handles, score through paint layers first with a utility knife to avoid tearing finish. Never use metal screwdrivers directly on plated surfaces.
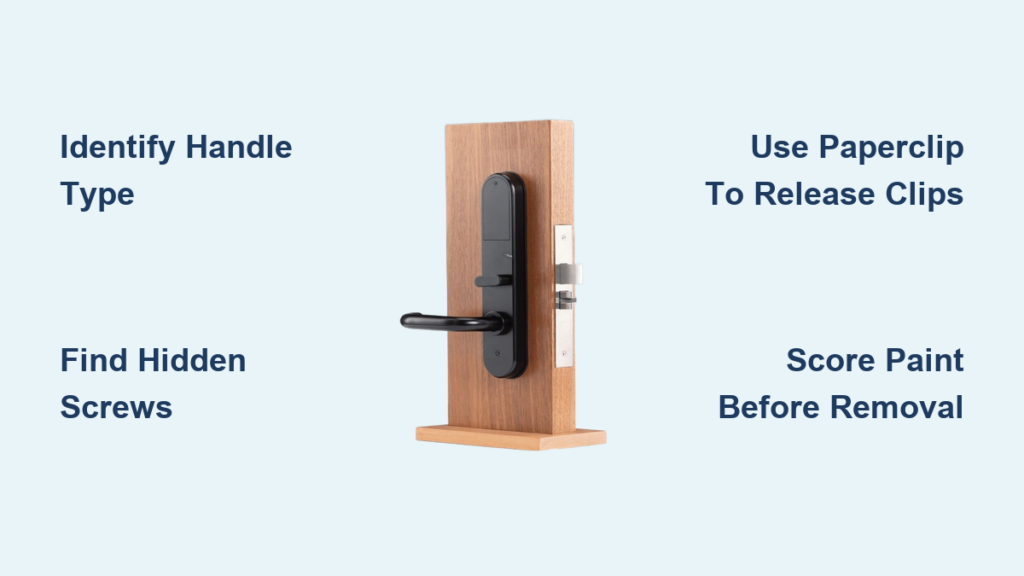
Identify Your Lever Handle Type in 2 Minutes
Misidentifying your mechanism causes 90% of removal failures. Spend two minutes here to prevent broken spindles or cracked ceramic components. Most handles fall into three categories based on fastening methods.
Spotting Grub Screw Systems vs. Snap-Fit Mechanisms
Grub screws hide under lever bases or decorative caps (common in Schlage, Kwikset). Look for tiny holes requiring hex keys. Snap-fit handles (like many commercial models) have nearly invisible seams near the spindle. Press a paperclip into 1–2mm ejection holes while pulling the lever outward—don’t force it.
Recognizing Gainsborough and Other Vintage Lever Handles
Gainsborough handles from the 1970s–90s feature distinctive porcelain/brass combos with “Made in England” stamps. These often use proprietary spindles incompatible with modern replacements. If your lever has gold plating over ivory ceramic, assume it requires specialized handling—forcing it cracks the porcelain.
Find Hidden Fasteners on Any Lever Door Handle
Manufacturers conceal fasteners to maintain aesthetics. Missing these traps DIYers into damaging doors. Your inspection must cover all angles before applying force.
Where to Probe for Concealed Set Screws
Check these high-probability spots with a flashlight:
– Underside of lever shaft (most common)
– Seam between lever and rosette
– Small dimples on rosette edges
– Behind removable decorative caps (gently pry with flathead)
How to Locate Ejection Holes for Clip Release
Snap-fit handles use spring clips activated through pinholes. Feel around the spindle collar for 1mm indentations. Insert a straightened paperclip while applying outward pressure on the lever—you’ll hear a distinct click when the clip releases. If no holes exist, it’s likely a screw-on rosette.
Remove Lever Handles with Grub Screws (Most Common Method)
Grub screws dominate residential hardware. This method applies to 80% of interior door handles but requires precision to avoid stripping.
Step 1: Loosen the Grub Screw Without Stripping It
Insert the correctly sized Allen wrench (usually 2mm) into the access hole. Turn counter-clockwise with firm, steady pressure—never use excessive force. If stuck, apply penetrating oil and wait 10 minutes. Remove the screw completely; leaving it partially in jams the spindle.
Step 2: Gently Pull the Lever Off the Spindle
After screw removal, wiggle the lever side-to-side while pulling outward. For D-shaped spindles, note their orientation for reassembly. If resistance persists, recheck for a second hidden screw—many models have dual fasteners. Never hammer or twist violently.
Take Off Snap-Fit and Clip-Mounted Lever Handles
These handles lack visible screws, relying on internal clips that break when forced. Your technique must prioritize clip engagement over brute force.
Using a Paperclip to Release Internal Clips
Insert a straightened paperclip into each ejection hole (typically two holes 180° apart). Press inward 5–7mm while simultaneously pulling the lever toward you. Apply even pressure with both hands—asymmetrical force bends spindles. You’ll feel the clip disengage with light resistance.
Why Forcing Snap-Fit Handles Causes Irreparable Damage
Metal clips inside these mechanisms shear easily. If the lever doesn’t release after proper clip activation, it’s likely seized by corrosion or paint. Forcing it cracks the spindle housing, requiring full mechanism replacement. Stop immediately and apply penetrating oil.
How to Remove Paint-Sealed or Stuck Lever Handles

Paint buildup or decades of corrosion fuses handles to doors—a common headache in pre-1980s homes. Standard removal fails here without preparation.
Score Around the Rosette With a Utility Knife First
Cut through paint layers at the rosette-door seam using a fresh #11 blade. Make shallow passes at 45° angles to avoid gouging wood. Work slowly around the entire perimeter—this prevents paint from tearing during removal. Wipe away debris with a microfiber cloth.
Apply Heat and Penetrating Oil for Stubborn Cases
Warm the rosette with a hairdryer (low heat, 2 minutes) to expand metal and soften paint. Immediately apply penetrating oil (Kroil or PB Blaster) into seams. Wait 15 minutes, then reattempt removal. For extreme cases, soak overnight with oil before gentle tapping using a rubber mallet.
Extract the Spindle and Backplate After Handle Removal
With levers off, you’ll expose the rosette and spindle—critical for accessing the latch mechanism. Rushing this step damages internal components.
Removing the Rosette Without Damaging the Door Surface
For screw-retained rosettes: Locate screws beneath the lever mounting point. For threaded rosettes: Grip with a strap wrench and turn counter-clockwise. Always place painter’s tape on the door surface first to prevent scratches. If stuck, use penetrating oil at the seam.
Pulling the Square Spindle to Access the Latch Mechanism
Once the rosette is off, the square spindle should slide out by hand. If seized, grip it with needle-nose pliers and twist gently while pulling. Never hammer directly on the spindle—this bends the latch assembly. Clean corrosion with vinegar before reassembly.
Troubleshoot Stubborn Lever Handles Without Damage
When standard methods fail, these field-tested solutions resolve 95% of “impossible” removals without professional help.
What to Do When the Lever Won’t Budge After Fastener Removal
Re-examine for secondary fasteners—many Gainsborough models use dual grub screws. Apply heat to the spindle area for 90 seconds to break adhesive bonds. If still stuck, use a door handle puller tool designed for this purpose. Never improvise with pliers.
When to Stop and Call a Professional Locksmith
Immediately cease work if you encounter:
– Asbestos/lead paint warnings (pre-1980s doors)
– Security door mechanisms with anti-tamper features
– Antique hardware worth preserving
– Spindles that won’t budge after 24-hour oil soak
Forcing these risks $200+ in door repairs versus a $75 service call.
Final Pro Tips: Always photograph each step during disassembly—this cuts reassembly time by 70%. Before reinstalling, lubricate the spindle with graphite powder to prevent future seizing. For Gainsborough replacements, verify spindle compatibility; modern sets often require adapter kits. If your handle wobbles after reinstallation, tighten the spindle set screw incrementally while testing operation—overtightening cracks porcelain bases. With these techniques, you’ve mastered lever handle removal for 99% of residential doors. Need latch adjustment guidance? Our companion guide “How to Fix a Door Latch That Won’t Retract” solves the next common headache.


