

Your wired Nest Doorbell needs removal—maybe you’re upgrading, troubleshooting wiring issues, or moving homes. Unlike battery models, the wired version connects directly to your home’s electrical system, making improper removal risky for both your safety and device integrity. This guide delivers precise, model-specific instructions for safely detaching your Nest Doorbell wired unit without causing electrical damage or security gaps. You’ll learn exactly how to cut power correctly, identify your generation (1st vs 2nd), release stubborn units, handle wiring safely, and permanently erase your data—whether you’re a DIY novice or seasoned smart home user.
Why Cutting Power Is Non-Negotiable for Wired Doorbell Removal
Skipping this step risks electrical shock or frying your doorbell’s circuitry. Your wired Nest Doorbell operates at 16-24V AC, but even low-voltage systems can cause dangerous sparks if mishandled. Head straight to your main electrical panel and flip the breaker labeled “doorbell” or “chime.” If labels are unclear, turn off the main power temporarily—this is safer than guessing. Never rely solely on the Nest app to disable power.
Confirm power is truly off before proceeding: Press your doorbell button firmly. If you hear any chime sound, the circuit is still live. Use a non-contact voltage tester near the mounting plate for absolute certainty—hold it close to the wires visible through the mounting bracket slots. If the tester beeps, return to the breaker. This verification takes 30 seconds but prevents costly mistakes.
Spot Your Nest Doorbell Model in 30 Seconds (1st vs 2nd Gen)
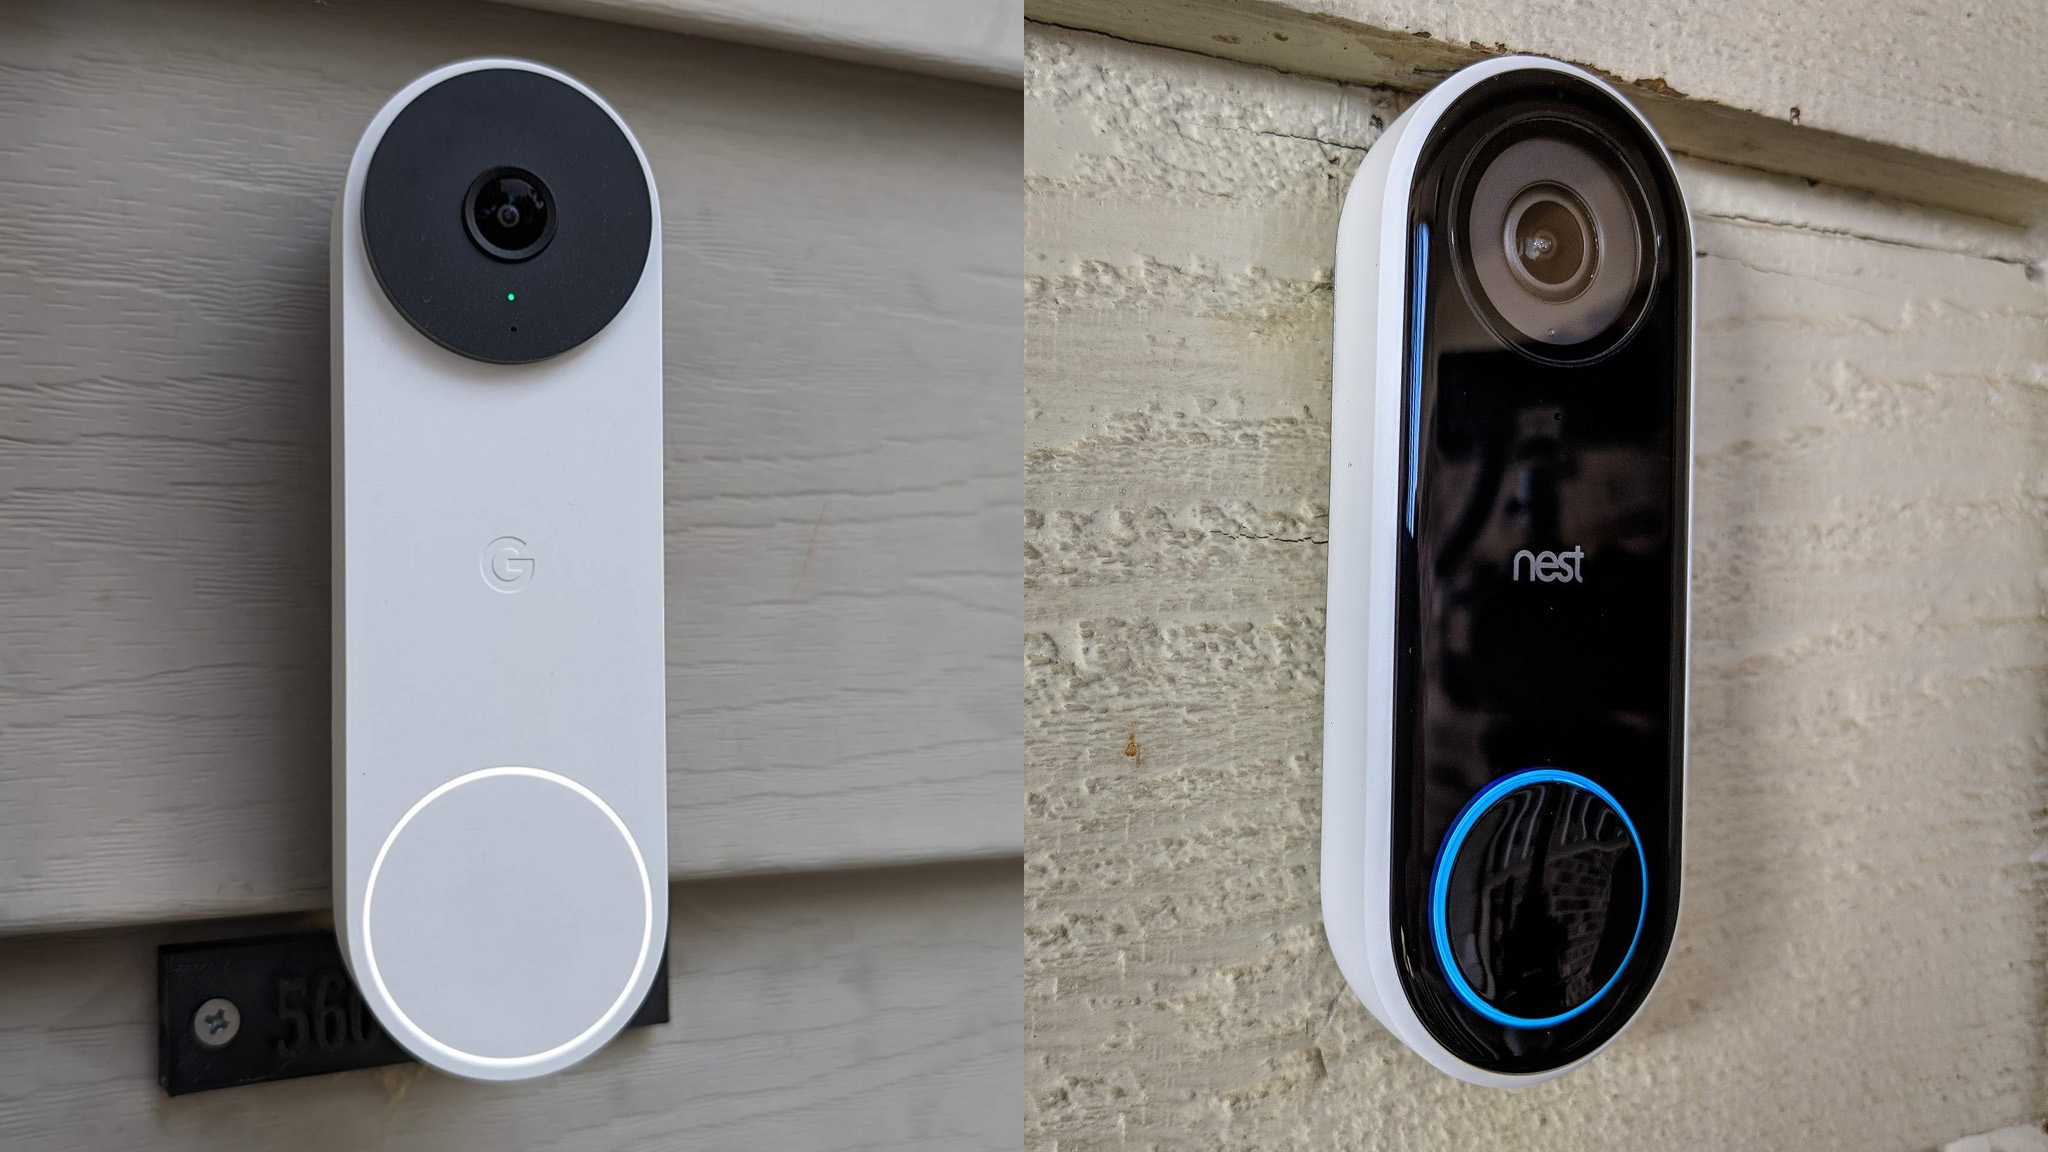
Using the wrong removal method can crack your unit or damage the mounting bracket. Examine the top and bottom edges under bright light—this is critical since removal tools differ drastically between generations.
1st Generation Identification Clues
- Rounded, pebble-like shape with camera centered on the face
- Visible pinhole release at the bottom center (about 2mm wide)
- Back panel shows reset hole near top edge with no QR code
2nd Generation Telltale Signs
- Rectangular profile with camera positioned in the upper third
- No bottom pinhole—instead, check for:
- Tiny hex screw (1.5mm) at top center (most common), OR
- Narrow horizontal slot across the top edge (requires close inspection)
- Back features QR code with reset hole positioned directly above it
Pro tip: Shine a flashlight sideways across the top edge. On 2nd gen models, the hex screw head catches light distinctly, while the slot method shows as a hairline gap. If you see neither, it’s almost certainly 1st gen.
Remove 1st Gen Nest Doorbell With a Paperclip: Step-by-Step
This model’s release mechanism is simple but requires precise technique. Have a straightened paperclip ready (unfolded completely for rigidity). Work in daylight or use a work light—seeing the pinhole clearly prevents scratches.
Critical Release Technique
- Insert paperclip vertically into the bottom pinhole until you feel resistance
- Push upward at a 45-degree angle while simultaneously pulling the unit straight toward you
- Hold steady pressure—you’ll hear a distinct click followed by a soft pop as it releases
- Slide downward slightly before lifting free to avoid snagging wires
Common mistake: Forcing the unit sideways. Always pull straight off the wall. If it resists, recheck power disconnection—live circuits cause magnetic adhesion to the mounting plate. If still stuck, wiggle the paperclip upward while maintaining outward pull; corrosion can bind the mechanism.
Two Ways to Remove 2nd Gen Nest Doorbell (Hex Key or Slot Tool)
Your approach depends entirely on which hidden mechanism your unit uses. Never guess—forced removal cracks the casing. The hex key method appears on newer models, while the slot method is common on early 2nd gen units.
Hex Key Release (Top Screw Visible)
- Required tool: 2.5mm hex key (included in original box; substitute with jewelry repair kit tool)
- Process: Insert key fully, turn counter-clockwise only 1/8 turn (do not remove screw completely), then lift doorbell straight up. The unit slides upward 5mm before detaching.
Slot Method (No Visible Hardware)
- Required tool: 1.5mm flathead screwdriver (or thin butter knife)
- Process: Insert blade into the top-edge slot, press upward while pulling the unit away from the wall. Apply even pressure across the top edge—never leverage from one side.
Time estimate: Both methods take under 60 seconds once you identify your type. If the hex screw won’t budge, confirm it’s not painted over—scrape gently with a knife tip before forcing.
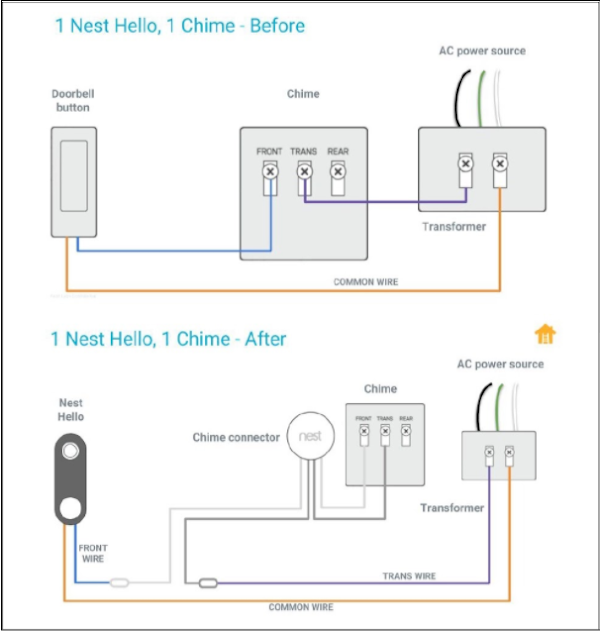
Handle Doorbell Wires Without Causing Electrical Damage

Exposed wires left unsecured can short-circuit when power restores. Behind your detached unit, you’ll see three connections: two low-voltage wires (typically red/white) and a bare copper ground wire. Never cut these wires—you’ll need them for reinstallation.
Safe Wire Management Protocol
- Photograph the wiring before touching anything—note which color connects to “Front Door” vs “Transformer” terminals
- Unscrew wire nuts counter-clockwise with needle-nose pliers (do not pull wires directly)
- Separate wires immediately after disconnecting to prevent contact
- Cap each wire individually with wire nuts or electrical tape
- Install a blank wall plate over the mounting bracket to block moisture and pests
Critical warning: If wires show green corrosion, wear rubber gloves during handling. Corroded connections often indicate voltage issues that require an electrician before reinstallation.
Factory Reset Your Nest Doorbell Before Selling or Recycling
Resetting via the app alone leaves your data vulnerable. Physical reset is mandatory—this erases Wi-Fi passwords, motion zones, and video history from the device’s internal memory. Skipping this step when selling risks exposing your home’s layout and routines.
1st Gen Reset Sequence
- Press and hold both the front doorbell button AND the back reset pinhole simultaneously
- Maintain pressure through the full light sequence: blue spin → yellow flash → lights off
- Release only when blue light pulses slowly (about 30 seconds total)
- Device chimes to confirm reset completion
2nd Gen Reset Precision Timing
- Insert pin into reset hole above QR code
- Hold for exactly 12 seconds—watch for:
– Yellow blinks at 10 seconds (4 quick flashes)
– Solid yellow light at 12 seconds (release immediately) - Wait 30 seconds for automatic reset completion
Data preservation alert: Save critical video clips before resetting. All local storage wipes permanently during this process—no recovery possible.
Delete Your Nest Doorbell From App Without Losing Settings
App removal finalizes data erasure but requires specific sequencing. Attempting this before physical reset triggers error messages like “Device offline” that stall the process.
Correct Removal Order
- Complete physical reset first (as above)
- Open Nest app → Settings (gear icon) → Select doorbell
- Tap “Remove device” → Confirm twice
- For Google Home users: Devices → Settings → “Forget” device
Critical sequence: If you reset after app removal, the device remains linked to your account. Always reset physically first, then remove via app. This prevents “ghost device” errors that block new installations.
Fix Common Nest Doorbell Removal Problems in Minutes
Stuck units often stem from simple oversights—not mechanical failure. Try these targeted solutions before forcing components.
When the Unit Won’t Release
- Power still live: Recheck breaker with voltage tester—doorbell circuits sometimes share breakers with outdoor lighting
- Hidden security screw: Inspect mounting bracket edges for tamper-proof screws (common in rental properties)
- Paint seal: Run an Exacto knife around the unit’s perimeter to break paint bonds
- Winter moisture: Gently warm the unit with a hairdryer for 2 minutes to melt ice buildup
Missing Original Tools? Try These
- Paperclip + electrical tape: Wrap tape around one end for better grip in pinholes
- SIM eject tool: Perfect substitute for reset holes (fits most pin sizes)
- Bobby pin: Straighten completely for hex key slots (bend tip slightly for leverage)
Secure Your Home Immediately After Removing Wired Doorbell
Leaving your entry point unmonitored creates a 24-48 hour security gap during reinstallation. Implement these temporary measures:
- Place a battery-powered camera directly on the mounting bracket (most fit the same footprint)
- Enable motion alerts on existing indoor cameras facing the door
- Install smart door sensors that trigger phone alerts when opened
- Use temporary deterrents like “Security Camera in Use” decals
Never leave exposed wiring uncovered—even for “just a few hours.” Moisture ingress during rain can short your entire doorbell circuit.
Store or Sell Your Removed Nest Doorbell the Right Way
Proper storage preserves resale value and prevents damage during transit. If selling, include these critical items:
- Original mounting bracket (prevents wall damage during buyer’s install)
- Wiring configuration photo (saves buyer troubleshooting time)
- All included tools (hex key, release pin)
- Copy of warranty documentation (check Nest support site for model-specific PDF)
Recycling note: Nest Doorbells contain lithium components—never discard in household trash. Use Google’s free recycling program: request a prepaid shipping label at store.google.com/recycle.
Your wired Nest Doorbell removal is now complete with zero data leaks or electrical hazards. Whether reinstalling immediately or upgrading to a new model, you’ve maintained home security continuity and preserved device value. For future installations, keep your wiring photo handy—it cuts setup time by 70%. Remember: always disconnect power first, identify your model precisely, and reset physically before app removal. These three steps prevent 95% of common doorbell removal issues. Ready for your next smart home project? Check our guide on seamless Nest Doorbell wired reinstallation with voltage compatibility checks.


