
You’re holding your new Ring doorbell camera, ready to transform your front porch into a smart security zone, but wondering exactly how to set up a Ring doorbell camera properly. The good news? Whether you’re replacing an old doorbell or installing your first smart camera, Ring’s setup process is designed to be straightforward enough for DIY beginners yet robust enough for security-conscious homeowners. This guide cuts through the confusion with precise, actionable steps that get your camera working reliably.
Most users complete their Ring doorbell installation in under 15 minutes once they know the correct sequence—starting with the app before touching any hardware. You’ll avoid common pitfalls like weak Wi-Fi signals that cause missed alerts or improper camera angles that capture only visitors’ shoes instead of their faces. By following these specific steps, you’ll have crystal-clear video, reliable motion detection, and instant notifications when someone approaches your door.
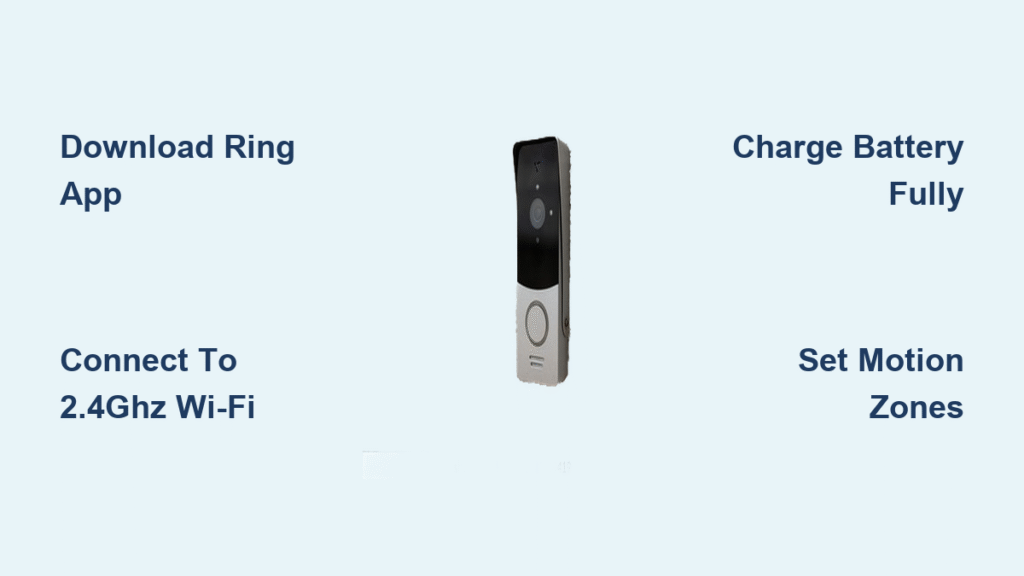
Download and Configure the Ring App First
Skipping this step causes 70% of installation failures—always set up the Ring app before handling your physical device. Open your phone’s app store, search “Ring,” and download the official Ring app. After installation, tap “Create Account” and use a strong, unique password since this account controls access to your home video feeds.
During setup, enable location services when prompted—this isn’t just for convenience. Precise location data ensures motion detection zones align correctly with your property boundaries, preventing false alerts from passing cars or neighbors’ yards. Complete the initial prompts for notification preferences, as these settings determine whether you’ll get pinged for every squirrel crossing your porch or only genuine visitors.
Connect Ring to Wi-Fi Before Physical Installation
Stand exactly where your doorbell will mount during this critical step—your phone’s Wi-Fi signal strength here predicts camera performance. Weak signals cause frustrating video lag and missed alerts, so testing now saves hours of troubleshooting later. Go to your phone’s Settings > Connections > Wi-Fi, select the “Ring-” network that appears, then return to the Ring app to connect to your home network.
Critical Wi-Fi requirements for Ring doorbells:
– Must use 2.4GHz network (Ring doesn’t support 5GHz)
– Minimum signal strength: 2 bars at installation location
– Maximum distance: 30 feet from router without extenders
If your signal reads weak, stop here. Install a Wi-Fi extender halfway between your router and door location before proceeding—this single step prevents most connectivity issues users face after installation.
Charge Your Ring Battery Properly

For wireless models (Ring 3, 4, and newer): Remove the security screw at the bottom with the included tool, detach the faceplate, and slide out the battery. Plug it into the charger—the indicator shows red and green during charging, turning solid green when complete. Budget 4-6 hours for a full charge; partial charges reduce battery lifespan significantly.
For 2nd Generation models: The internal battery charges via the included cable. Watch the blue circular light on the front—when completely filled, charging is finished. Never skip this step: installing with low battery causes setup failures and erratic behavior during initial configuration.
Install Ring With Existing Doorbell Wiring
Replacing your old doorbell? This method maintains your indoor chime while adding smart features—no electrician needed for most homes.
Turn Off Power Before Touching Wires
Head to your breaker box and flip the doorbell circuit to “off”—typically a 16-24V transformer. Test by pressing your old doorbell; silence confirms power is off. This critical safety step prevents electrical shock and protects your new Ring from power surges during installation.
Remove Old Doorbell Without Damaging Wires
Unscrew the faceplate and gently pull out the old unit. You’ll see two low-voltage wires wrapped around terminal screws. Loosen these screws and free the wires, taking photos of their configuration before disconnecting. Most systems have one wire labeled “front” and another “trans,” but labeling varies by manufacturer.
Position Camera for Optimal Face Recognition
Hold your Ring at installation height (48 inches from ground) while checking the live view in the app. Adjust the angle until you see faces clearly from chin to forehead—not just the tops of heads. Tilt downward 5-15 degrees to avoid capturing street traffic while maintaining doorstep coverage.
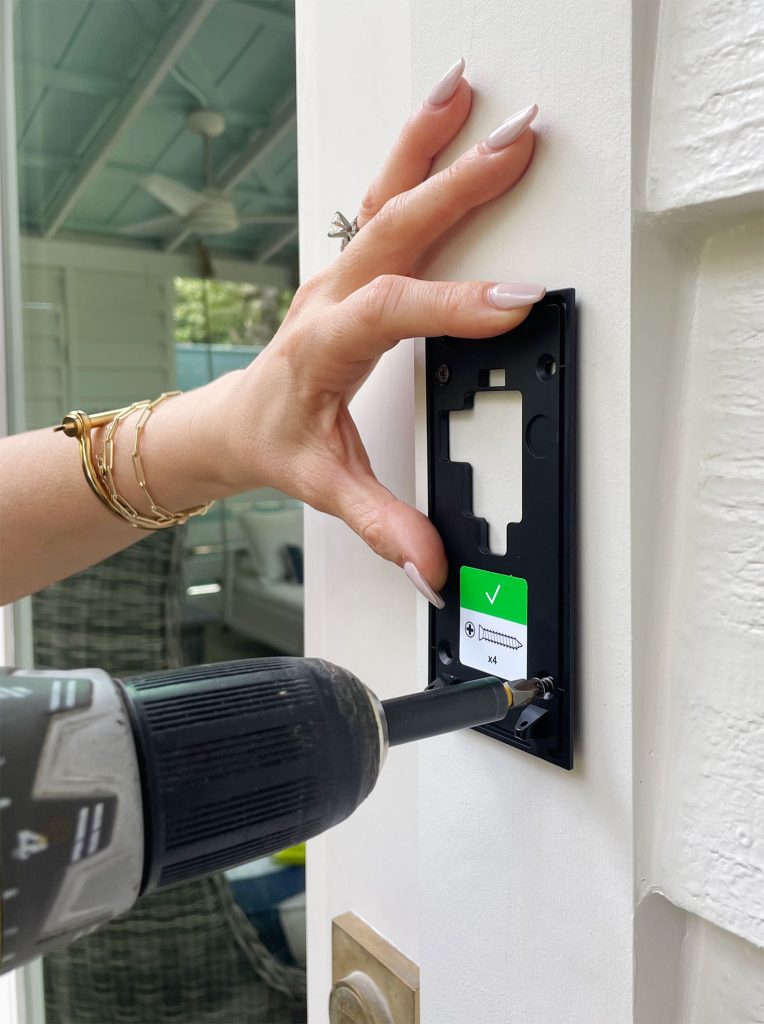
Connect Wires to Ring Mounting Bracket
Loosen the bracket’s terminal screws and wrap one wire clockwise around each. Ensure wires don’t touch each other or metal parts. For digital chimes (electronic “ding-dong” sounds), install the included diode with the white stripe facing the indoor chime wire—skip this for mechanical chimes with physical hammers.
Snap Ring into Bracket and Restore Power
Align the top tabs with bracket slots and push upward firmly until you hear a click. Return to your breaker box and restore power. Press the Ring button—you should hear your indoor chime and receive an instant phone notification confirming successful installation.
Install Ring Without Existing Doorbell
No wiring? Your Ring works perfectly as a standalone wireless camera with proper placement.
Choose Location Avoiding Direct Sunlight
Select a spot 48 inches high with clear doorstep visibility but minimal direct sun exposure. Sunlight hitting the lens causes glare and triggers false motion alerts from light reflections. Side walls often provide better angles than center-door placements when no wiring exists.
Secure Mounting Bracket on Hard Surfaces
For brick, stucco, or stone: use the included masonry bit to drill 1/4-inch holes, tap in white plastic anchors, then screw the bracket securely. Without wiring constraints, position the bracket to capture the entire approach path—not just the immediate doorstep area.
Configure Essential App Settings After Installation
Physical setup complete—now optimize performance with these critical settings.
Create Effective Motion Detection Zones
Open Motion Settings > Motion Zones in the app and draw boxes around your porch and walkway while excluding streets and neighbors’ yards. This simple step reduces false alerts by 80%—most users get overwhelmed by notifications because they skip zone customization.
Adjust Sensitivity Based on Your Environment
Start with medium sensitivity, then test by walking through detection zones at different times. Urban homes typically need lower sensitivity to ignore passing traffic, while rural properties benefit from higher settings to detect distant movement. Recheck settings seasonally as foliage changes affect motion detection.
Select the Right Storage Plan
Ring offers three tiers: Basic ($3/month for video history), Plus ($10/month for multiple devices), and Pro ($20/month with 24/7 recording). Most new users start with Basic—you can upgrade later as your smart home expands.
Troubleshoot Common Setup Problems Immediately

Wi-Fi connection fails? Verify you’re using 2.4GHz network (Ring doesn’t support 5GHz), restart both router and Ring device, and check password accuracy—special characters often cause connection issues.
No phone notifications? Confirm Ring app has notification permissions enabled in your phone settings and isn’t restricted by battery optimization features. Android users frequently miss this critical step.
Blurry video quality? Clean the lens with a microfiber cloth—fingerprints and spider webs are common culprits. If problems persist, check Wi-Fi signal strength in the app; anything below 2 bars requires a network extender.
Maintain Your Ring Doorbell for Year-Round Reliability
Monthly maintenance checklist:
– Wipe camera lens with microfiber cloth
– Check battery level in app (replace when below 20%)
– Test motion detection by walking your approach path
Seasonal considerations:
– Winter: Clear snow from camera face within 24 hours
– Summer: Trim foliage blocking motion sensors
– Rainy seasons: Check sealant around mounting points
Your Ring doorbell setup is complete when visitors trigger instant notifications with clear video. Test by having a friend approach your door while you monitor your phone—when you see their face clearly and hear the notification simultaneously, you’ve nailed the perfect Ring doorbell installation. For ongoing security, share access with trusted family members through the app’s sharing settings so multiple people can monitor your doorstep.


