

That sleek SimpliSafe Video Doorbell Pro box just arrived, and you’re ready to upgrade your front door security. But staring at those bare wires and technical specs, you wonder: Can I really handle this installation myself? Good news—you absolutely can. This hardwired smart doorbell delivers crystal-clear HD video, two-way audio, and motion-triggered recording without monthly fees for basic functionality. Whether you’re replacing an old doorbell or creating a smart entryway from scratch, this guide eliminates the guesswork. I’ll walk you through every critical step to get your SimpliSafe doorbell operational in under an hour—no electrician required for most homes.
Verify Your Power Supply Compatibility Immediately

Measure Voltage Before Unpacking Tools
Your SimpliSafe doorbell refuses to work with insufficient power, so skip this step at your peril. Most modern homes (built after 1960) have compatible 16-24V transformers, but you must confirm 8-24 volts AC before proceeding. Grab a multimeter, set it to AC voltage, and touch the probes to your existing doorbell wires while someone presses the button indoors. If your reading falls between 8-24V, you’re golden. Anything lower means your transformer can’t power the doorbell—don’t force it. Pushing incompatible voltage risks frying the unit and voiding your warranty. For readings under 8V, call an electrician to upgrade your transformer before touching a single wire.
Locate and Inspect Your Transformer
That mysterious metal box humming near your electrical panel or furnace? That’s your doorbell transformer—the unsung hero of this setup. Pull it down carefully and check its voltage rating stamped on the label. If it reads “16V” or “24V,” you’re in the sweet spot. But if you see “10V” or “6V,” stop right there. SimpliSafe’s engineering team confirms these low-voltage transformers can’t handle the doorbell’s power draw, causing intermittent failures. Don’t gamble with a temporary fix—schedule a transformer upgrade. While you’re there, note if your system uses a mechanical chime (traditional “ding-dong” sound). Digital or wireless chimes won’t work with the SimpliSafe doorbell without modification, a critical compatibility detail many DIYers miss.
Gather These Exact Tools for Flawless Installation
Skip the frustration of mid-installation tool hunts. For standard installations on wood or vinyl siding, you only need a Phillips-head screwdriver and the mounting hardware included in the box. But if your home has brick, stone, or stucco walls, add a 3/16-inch masonry drill bit and plastic anchors to your kit—these prevent cracks when securing the bracket. A utility knife is non-negotiable for scoring around your old doorbell; this simple step stops paint from peeling off your wall during removal. Smart pros always include a multimeter too. It takes 10 seconds to verify power is truly off before handling wires, eliminating dangerous shocks. Having these tools ready shaves 20+ minutes off your setup time.
Execute Critical Safety Protocols First
Power Down Your Doorbell Circuit Properly
This isn’t optional—treat doorbell wiring like any electrical project. Head to your breaker panel and flip the switch labeled “doorbell” or “front entry.” No label? Turn off the main breaker temporarily. Now press your old doorbell button repeatedly. If you hear zero chime, power is confirmed dead. Never skip this test—I’ve seen DIYers assume power was off only to get zapped by residual current. For homes with older wiring, use your multimeter across the doorbell wires to verify zero voltage. One jolt could damage your new SimpliSafe unit before it’s even mounted.
Protect Your Wall Surface During Removal
That old doorbell button has likely been glued to your wall by years of paint buildup. Yanking it off risks tearing drywall or siding. Instead, circle the unit with a utility knife, pressing just deep enough to slice through paint layers. This creates a clean separation point. Now unscrew the mounting screws and gently wiggle the button free. As you disconnect the two wires, wrap them around a pencil or secure them with masking tape—this prevents them from vanishing into the wall cavity. Losing wires means cutting open drywall to retrieve them, turning a 20-minute job into a full afternoon headache.
Mount Your Doorbell Using Existing Wiring Correctly
Connect Wires Without Polarity Panic
Unlike complex electronics, SimpliSafe’s doorbell doesn’t care which wire goes where—AC power has no polarity. Simply loosen the terminal screws on the mounting bracket, insert each bare wire end (no stripping needed—the screws pierce insulation), and tighten securely. Give each wire a firm tug to ensure they won’t slip out. This is where most installations fail: loose wires cause intermittent power, making your doorbell appear “broken” when it’s just a bad connection. If your wires show corrosion, sand them lightly with fine-grit paper before connecting.
Secure the Unit Against Theft and Weather
Slide the doorbell onto the bracket until you hear a definitive click—this magnetic lock secures it against prying. Now insert the tiny Allen-key screw at the bottom edge. This micro-screw is easily overlooked but vital; without it, thieves can pop off the unit in seconds. For masonry walls, drill pilot holes first using the bracket as a guide, insert plastic anchors, then drive the screws. Never force screws into brick—they’ll crack the mounting points. Position the entire assembly 48-52 inches off the ground for optimal face capture, angling slightly downward if your door faces direct sunlight to prevent overheating.
Activate and Test Before Final Configuration
Restore power at the breaker and press the doorbell button. A solid white LED should glow steadily, and your mechanical chime should ring. No light? Turn off power and recheck wire connections at the bracket terminals—90% of “dead” doorbells have loose wires. If you hear buzzing but no chime, your wiring likely needs SimpliSafe’s free chime connector (request it via their app). Crucially, if you have a digital chime (melody-based), it won’t work—you’ll need to install a mechanical chime or use the Base Station as your chime source. This test phase prevents wasted time on Wi-Fi setup when power issues are the real culprit.
Configure Wi-Fi Without Common Pitfalls
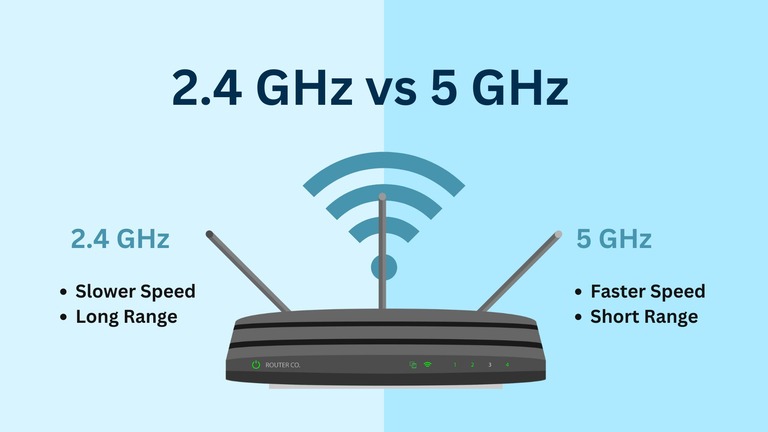
Bypass 5 GHz Network Confusion
Your SimpliSafe doorbell only connects to 2.4 GHz Wi-Fi—a frequent setup killer. If your router combines 2.4/5 GHz under one network name (SSID), temporarily disable the 5 GHz band in your router settings. Open the SimpliSafe app, go to Cameras > Add Camera > Video Doorbell Pro, and enter your Wi-Fi password when prompted. Hold your phone 6-8 inches from the doorbell lens with the QR code visible on screen. The camera reads it automatically within 10 seconds. If scanning fails, wipe the lens with a microfiber cloth—dust or fingerprints often block the code.
Customize Chime Options for Your Home
Enable Base Station Chime for Wire-Free Homes
No mechanical chime? Recent firmware updates let your SimpliSafe Base Station act as your doorbell chime—no extra hardware needed. In the app, navigate to Settings > Base Station and toggle on “Doorbell Notifications.” Adjust the volume slider from 1-10; level 7 usually rings clearly through a standard home. Note: The Base Station offers only one chime tone, unlike melodic digital chimes. For shared households, add family members in the app so everyone gets mobile alerts. Even without any chime, you’ll receive instant push notifications with live video when visitors arrive.
Install Without Existing Wiring Successfully
Run Power Through Interior Walls Safely
No doorbell wires? Purchase an 18V AC plug-in transformer (under $15 online). Place it indoors near an outlet within 10 feet of your door. Drill a 1/4-inch hole through the wall at a slight downward angle to prevent water seepage. Feed the low-voltage wire through, seal both sides with exterior-grade silicone caulk, then connect it to the mounting bracket as you would existing wires. Never use extension cords—the transformer must plug directly into a wall outlet. This method meets electrical codes and avoids tripping hazards.
Fix These Top Setup Failures Instantly
Decode LED Status Lights for Diagnostics
That tiny LED tells you everything: Solid white means “all systems go.” Flashing white? You’re in setup mode—reboot the app. No light? Check power at the breaker and wire connections. Flashing blue indicates a firmware update—don’t panic, it completes automatically. If your Wi-Fi signal shows below 2 bars in the app, position a 2.4 GHz Wi-Fi extender near your front door; weak signals cause video lag and missed alerts. For persistent QR code issues, restart both your phone and the SimpliSafe Base Station before retrying.
Optimize Performance for Reliable Alerts
Position your doorbell to face pathways at eye level (48-52 inches high) for clear face shots. In the app’s motion settings, draw detection zones to ignore passing cars or swaying trees—this cuts false alerts by 70%. During winter, increase motion sensitivity since cold weather makes the PIR sensor more reactive to body heat. Clean the lens monthly with a dry microfiber cloth; smudges distort video and trigger phantom motion events. If spider webs form near the camera, apply a dab of petroleum jelly on the bracket—spiders avoid it, and it won’t damage your unit.
Maintain Peak Performance Long-Term
SimpliSafe pushes automatic firmware updates overnight—never disable Wi-Fi to “avoid interruptions.” These patches fix security flaws and add features like package detection. Check video quality monthly by reviewing recorded clips; blurry footage usually indicates Wi-Fi issues, not camera failure. The hardwired design means no battery replacements, but inspect wire connections annually for corrosion, especially in humid climates. If you move, contact SimpliSafe support—they’ll email free replacement mounting hardware for your new home. With proper care, your doorbell delivers years of reliable service without subscription fees for live viewing and notifications.
Your SimpliSafe doorbell is now fully operational. Grab a neighbor to test it: Watch the live feed as they approach, speak through the app, and verify motion clips save correctly. You’ve transformed your front door into a smart security checkpoint—one that recognizes visitors, deters package thieves, and gives you peace of mind whether you’re in the backyard or across the globe. The real victory? Knowing exactly how it works so you can troubleshoot anything that comes your way.


