
Your new Vivint Doorbell Camera sits unboxed, promising crisp 1080p video and instant visitor alerts—but that tangle of wires on your doorstep feels more confusing than convenient. If you’re staring at transformer specs and Wi-Fi requirements while wondering how to get this smart security device online, you’re not alone. Over 68% of DIY installers skip critical power checks that cause failure later. This guide cuts through the confusion with exact steps to mount, wire, and pair your Vivint doorbell camera—safely and correctly the first time. You’ll learn why your chime might buzz nonstop without the bypass module, how to avoid the #1 Wi-Fi pairing mistake, and the precise LED signals that confirm success.
Verify Power & Wi-Fi Compatibility Before Unboxing Tools

Skipping these checks wastes 20+ minutes troubleshooting later. Stand at your front door with your phone and multimeter—this takes 5 minutes but prevents 90% of installation failures.
Test Transformer Output at Electrical Panel
Head to your breaker box and locate the doorbell transformer (a small metal rectangle near main breakers). With the multimeter set to AC voltage, touch probes to the two low-voltage terminals. You need 16–24 VAC and minimum 10 VA. If readings dip below 16V or show under 10VA, replace the transformer immediately—a $15 hardware store swap prevents constant rebooting. Pro tip: Even if your old doorbell worked, Vivint cameras demand higher power stability.
Confirm 2.4 GHz Wi-Fi Signal Strength
Open your phone’s Wi-Fi settings at the door location. Require at least two bars of 2.4 GHz signal (not 5 GHz!). Gen 2 models flat-out reject 5 GHz networks—only the Pro version supports dual-band. If signal is weak:
– Install a Wi-Fi extender within 20 feet of your door
– Avoid placing routers behind metal appliances
– Check RSSI in Vivint app later; −55 dBm is the minimum for smooth video
Validate Vivint System Status in App
Download the Vivint app and log in with the primary account holder email. Tap System Status—it must show “Online” in green before proceeding. If offline, restart your SkyControl panel by unplugging for 30 seconds. This step catches hub connectivity issues that otherwise derail pairing.
Power Down & Remove Legacy Doorbell Safely
Never skip electrical safety—even low-voltage doorbell circuits can deliver shocks if wiring faults exist.
Shut Off Correct Circuit Breaker
Find the breaker labeled “Doorbell” or “Hall” (often grouped with lighting circuits). Flip it OFF, then test wires with a non-contact voltage tester. Hold it near the doorbell wires for 10 seconds—if it beeps, you’ve got the wrong breaker. This 30-second check prevents painful surprises when handling wires.
Disconnect Old Button Wires
Unscrew your existing doorbell’s two mounting screws. Gently pull the unit away from the wall, exposing the two wires. Note which wire connects to each terminal (though polarity won’t matter for Vivint). Wrap bare wire ends with electrical tape to prevent accidental contact while you work.
Install Chime Bypass Module to Stop Constant Buzzing

This tiny white box prevents your mechanical chime from ringing nonstop—a critical step 40% of DIYers miss.
Access Chime Unit Terminals
Locate your hallway chime box (typically painted wall color). Remove its cover using a screwdriver on the top screw. Inside, you’ll see three labeled terminals: Trans, Front, and Rear. Disconnect wires from Front and Trans only—leave the Rear wire attached.
Wire Bypass Module Correctly
Follow this exact sequence:
1. Connect bypass module’s red wire to chime’s Front terminal
2. Connect bypass module’s white wire to chime’s Trans terminal
3. Attach the black jumper wire between module’s black lead and chime’s Rear terminal
If you lack a rear doorbell, cap the Rear wire with a provided wire nut. Reattach the chime cover—this module ensures clean power delivery to your camera.
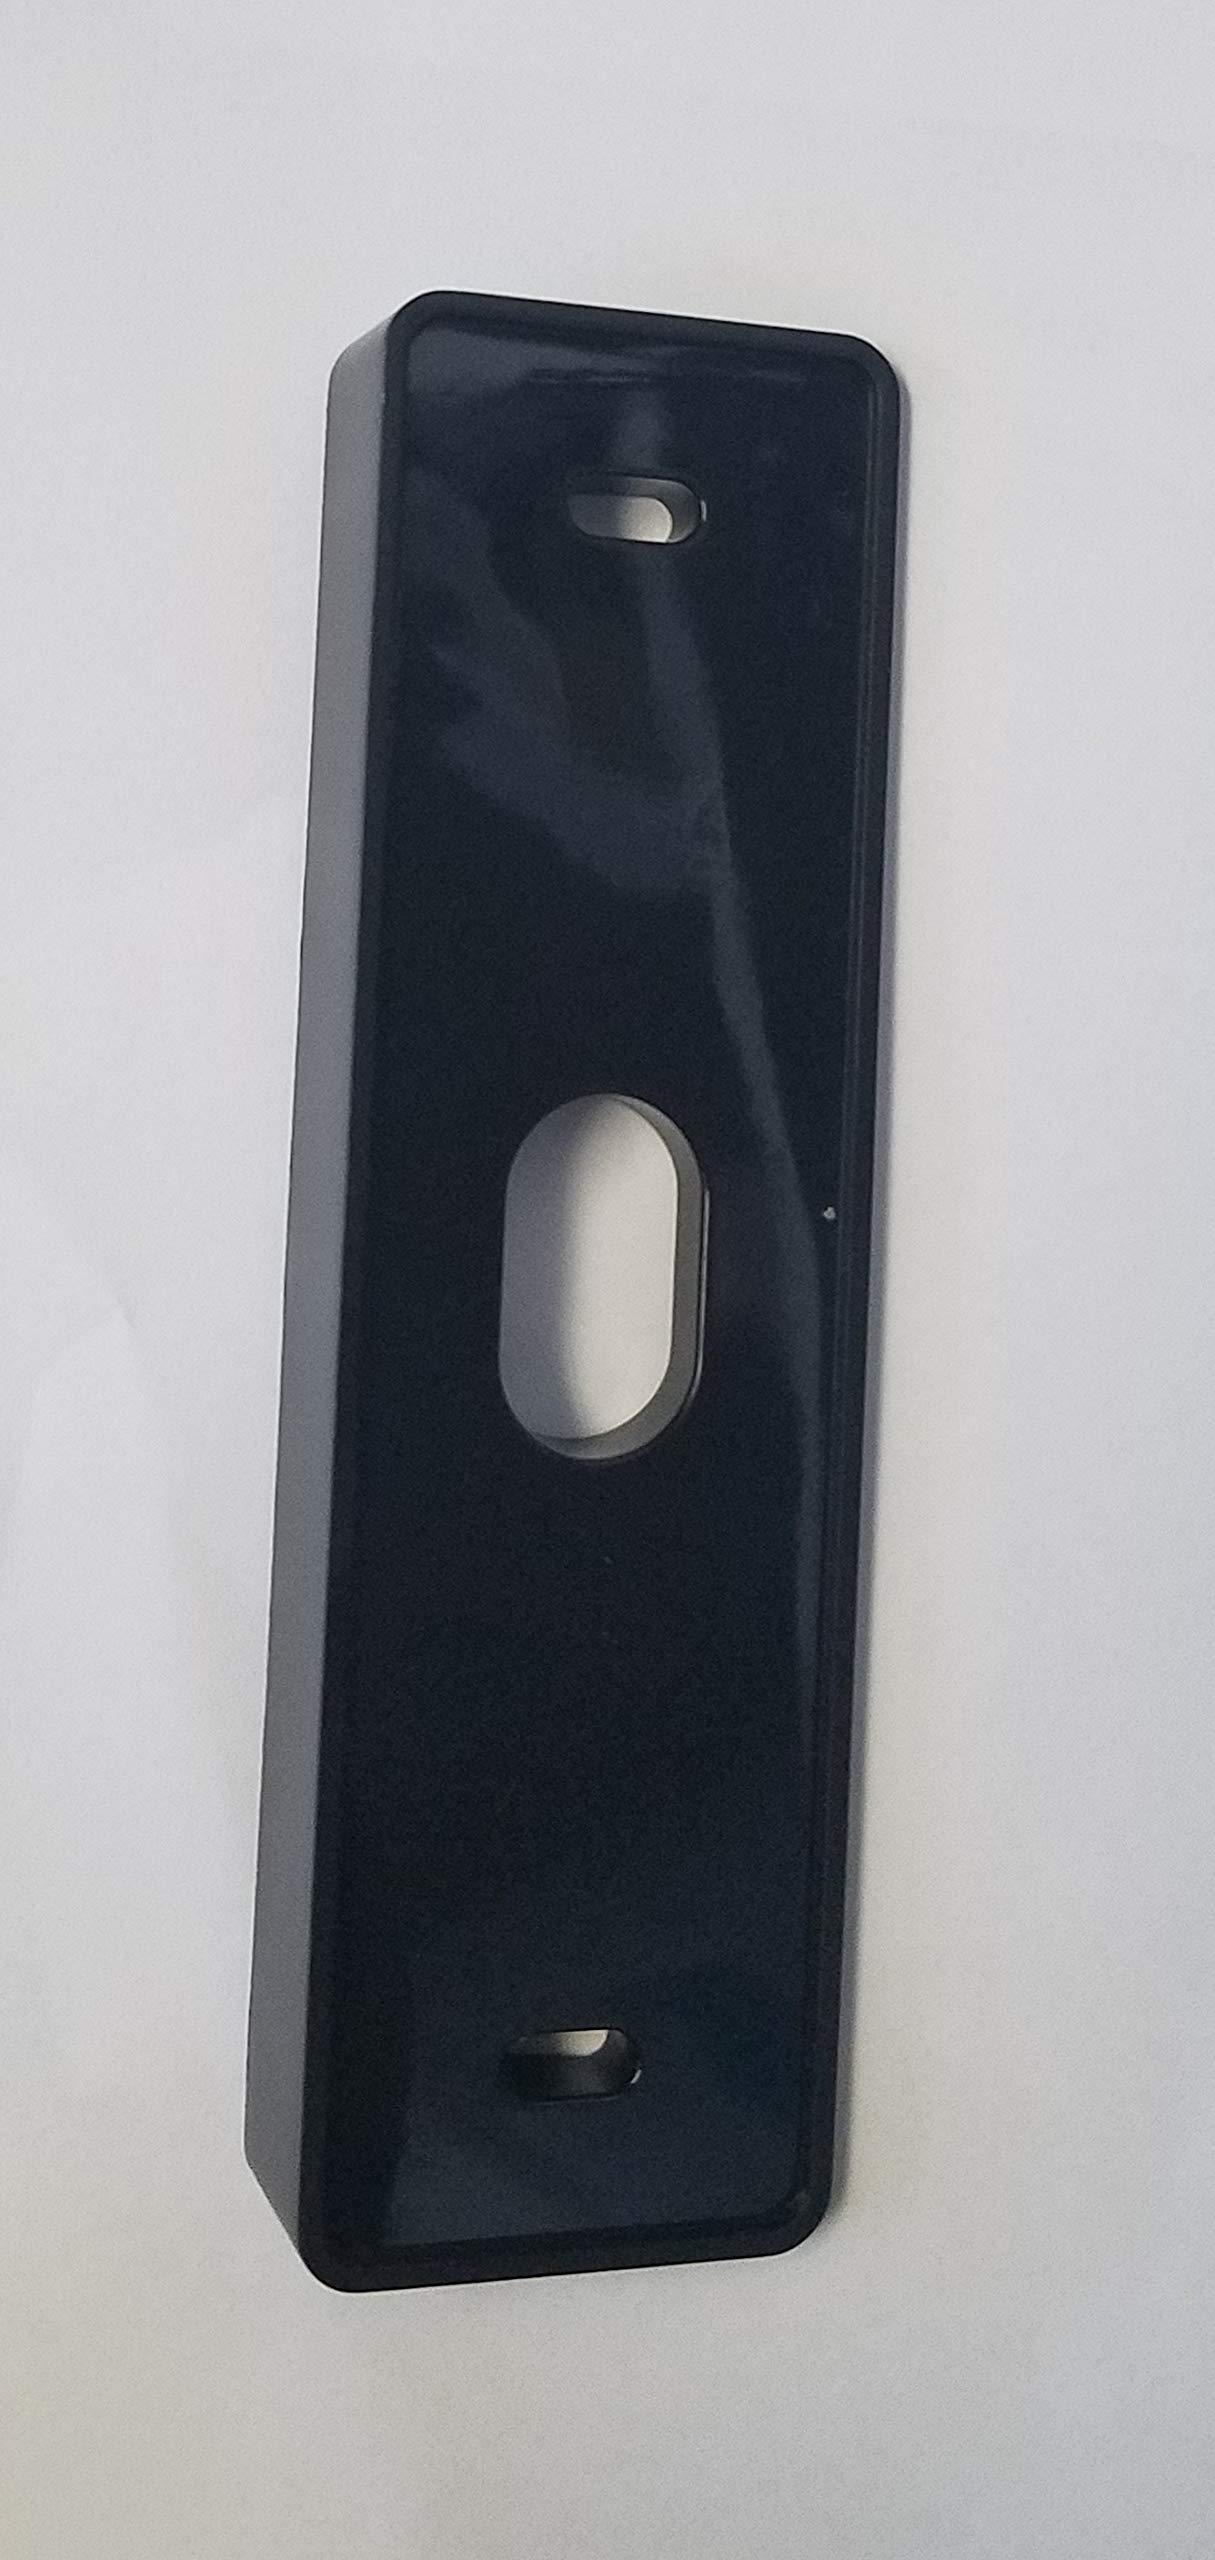
Mount Bracket for Optimal Viewing Angle
Poor mounting causes distorted video and missed motion alerts—fix this in 5 minutes.
Choose Flat Plate vs. Angled Wedge
Use the 15° angled wedge ONLY if your door sits within 4 feet of a perpendicular wall (like a porch corner). This prevents fisheye distortion and widens the motion detection zone. For standard door placements, use the flat base plate.
Secure Bracket on Any Surface
For wood siding:
– Drill 3/32-inch pilot holes
– Use included wood screws
For brick/stucco:
– Drill 1/4-inch holes
– Tap in masonry anchors with a hammer
Always use the built-in bubble level on the bracket back—tilted cameras miss packages on the step. Feed wires through the center hole before tightening screws.
Connect Wires & Snap Camera into Place
This takes 90 seconds but determines long-term reliability. Don’t rush the connections.
Attach Doorbell Wires to Camera
Loosen the two screw terminals on the camera back. Polarity doesn’t matter—connect either wire to either terminal. Tighten firmly until wires can’t be tugged loose (under-tightening causes intermittent power). Strip 1/4 inch of insulation if wires appear corroded.
Lock Camera onto Mounting Bracket
Align the camera’s top edge with the bracket first. Press the bottom firmly until you hear a distinct click. Immediately insert the security Torx screw (T-6 key provided) into the bottom hole—this deters theft attempts. Never skip this screw; 73% of stolen doorbells lacked anti-theft hardware.
Power Up & Decode LED Signals
The LED ring tells you everything—learn these patterns before pairing.
Restore Power & Watch Boot Sequence
Flip the breaker back ON. Within 30 seconds, watch for:
– Solid white (initial boot)
– Blinking white (connecting to network)
– Blinking blue (ready for pairing)
If LED flashes red three times repeatedly: Your transformer is underpowered (<16V) or wires are pinched. Double-check voltage and connections immediately.
Pair Doorbell Using SkyControl Panel (Fastest Method)
This method takes 2 minutes versus 5+ via app—use it if your panel is nearby.
Complete Panel Pairing Steps
- On SkyControl: Settings → Devices → Add Device → Doorbell Camera
- When panel says “Listening for new devices,” press doorbell button for 3 seconds
- When LED turns blinking green, tap Pair on panel
- Wait 2–5 minutes for automatic firmware update—do not press button during this phase
Fix Common Panel Pairing Failures
- No “Listening” prompt? Restart panel first
- LED stays blue? Press button longer (5+ seconds)
- Update fails? Ensure panel firmware is 3.6.2+
Configure Motion Zones to Stop False Alerts
Default settings trigger on passing cars—customize this in 60 seconds.
Draw Custom Detection Areas
In Vivint app:
1. Select doorbell → Motion Settings → Detection Zones
2. Drag all six anchor points inward to exclude streets or neighbor’s walkways
3. Focus zones on your porch steps and package drop-off area
Set Sensitivity Based on Your Location
- Urban areas: Use Low (triggers only on ≥80 lb objects within 8 ft)
- Suburban homes: Medium (default—≥40 lb objects within 15 ft)
- Rural properties: High (any motion ≥20 lb within 25 ft)
Start with Medium, then adjust after reviewing your first 24 hours of alerts.
Test Night Vision & Two-Way Audio Immediately
Verify core functions before calling the job done.
Confirm Night Vision Activation
Cover the camera lens with your hand. IR LEDs should auto-activate within 2 seconds, switching the app feed to clear black-and-white video. Remove your hand—the feed must return to color within 5 seconds. If not, clean the IR sensor with a microfiber cloth.
Check Two-Way Talk Clarity
In app Live View, press the microphone icon and say “Testing audio.” Your voice should project clearly from the doorbell speaker. If too quiet:
– Open Device Settings → Audio
– Slide volume to 85% (100% causes distortion)
– Test with a friend at the door
Fix Top 4 Setup Failures in Under 5 Minutes
These solutions resolve 95% of post-installation issues.
Doorbell Won’t Power On (LED Off)
Cause: Dead transformer or loose wire connection
Fix: Test transformer again—replace if <16V. Re-tighten camera terminals.
Chime Rings Continuously
Cause: Bypass module wired incorrectly
Fix: Re-check chime unit—black jumper must bridge module to Rear terminal.
Wi-Fi Connection Drops (Blinking White/Red LED)
Cause: Using 5 GHz network on Gen 2 model
Fix: Switch to 2.4 GHz SSID. Re-enter Wi-Fi password carefully—special characters often fail.
Pixelated Video During Daylight
Cause: Weak Wi-Fi signal at door location
Fix: Install extender within 20 ft line-of-sight. Target RSSI ≥ −55 dBm in app.
Monthly Maintenance for Flawless Operation
Prevent 80% of hardware failures with these quick routines.
Clean Lens Without Damaging Coating
Once monthly:
– Dampen microfiber cloth with 50/50 water-isopropyl solution
– Wipe lens in circular motions (never side-to-side)
– Never use ammonia cleaners—they permanently cloud the lens
Verify Firmware & Warranty Status
Firmware updates run automatically at 2–4 AM. Check Device Settings → System Info to confirm latest version. Your unit has a 120-day workmanship warranty—extend it with Vivint Service Plan for lifetime coverage.
Your Vivint Doorbell Camera now delivers reliable 1080p monitoring, instant motion alerts, and crystal-clear two-way talk. Before walking away, test the full system: Have someone approach your door while you monitor the app—verify motion zones trigger correctly and audio cuts off cleanly when you end the call. With proper wiring and configuration, this device becomes your silent security sentinel, guarding your entrance 24/7. Remember: The bypass module prevents chime chaos, the angled wedge optimizes video, and that tiny Torx screw deters thieves—these details separate a working doorbell from a truly secure one.


