
That annoying wobble in your door handle isn’t just irritating—it’s a sign your hardware needs attention before it fails completely. A loose door handle can make your home feel less secure and create safety hazards, especially for children or elderly residents. The good news is that learning how to tighten a door handle is one of the simplest home repairs you can master, often taking less than 10 minutes with basic tools. In this guide, you’ll discover exactly how to tighten a door handle regardless of type, avoid common mistakes that worsen the problem, and implement solutions that keep your handles secure for years.
Why Your Door Handle Is Loose and How to Diagnose It
Most loose door handles stem from normal wear and tear as the constant opening and closing motions gradually loosen mounting screws. Interior doors typically develop handle looseness faster than exterior ones due to higher usage frequency—some bedroom doors experience 20-30 operations daily. The vibration from slamming doors accelerates this process significantly, especially in households with children.
Your first diagnostic step should determine whether the entire handle assembly wobbles or just the knob/lever moves independently. If the whole mechanism shifts when you wiggle it, the mounting plate screws have loosened. When only the handle spins while the base remains fixed, you’re dealing with a loose set screw on lever handles or worn spindle connections on knob types. For privacy handles, a loose push-button mechanism often creates a different kind of wobble that requires specific attention.
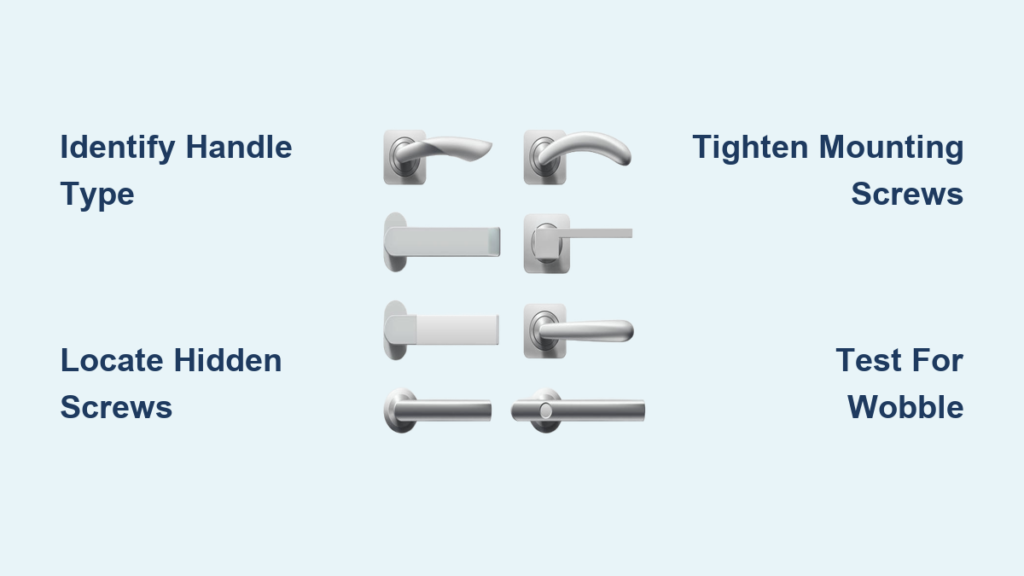
Identifying Your Exact Handle Type Before Tightening
Knowing your handle type prevents costly mistakes during tightening. Passage handles on closet or hallway doors lack locking mechanisms and typically have visible mounting screws. Privacy handles in bathrooms feature push-button or turn-button locks and often conceal screws beneath decorative covers. Keyed entry handles on exterior doors combine visible and hidden fasteners with more complex mounting systems.
Lever handles frequently use small set screws on the neck that require Allen wrenches, while traditional knobs may have release mechanisms under rosettes. Examine your handle closely—look for tiny pinholes, set screw indentations, or seam lines where covers might detach. This identification step takes less than a minute but saves you from stripping screws or damaging finishes during the tightening process.
Must-Have Tools for Tightening Any Door Handle

Before attempting to tighten a door handle, gather these essential tools to avoid mid-repair frustration. A complete set of precision screwdrivers (both Phillips #1 and #2, flathead 3/16″ and 1/4″) handles most visible screws. For hidden fasteners, keep metric and SAE Allen wrenches from 1.5mm to 5mm on hand—most lever handles use 2mm or 2.5mm sizes.
You’ll also need a small flashlight to illuminate hidden screw locations and a plastic pry tool to remove decorative covers without marring finishes. Keep needle-nose pliers nearby for retrieving dropped screws and a magnetic parts tray to prevent losing tiny components. For stubborn cases, blue thread locker (Loctite 242) helps maintain tightness without permanent bonding.
Special Tools for Modern Handle Designs
Contemporary door handles increasingly use specialty fasteners that require specific tools. Torx screwdrivers (T10-T20) work on many newer privacy handles, while spanner bits handle security screws on commercial-grade hardware. If you encounter one-way screws with no visible drive, a specialized removal tool or small hacksaw may be necessary.
For electronic smart locks, include a multimeter to verify power connections after tightening and a small pick tool to access recessed battery compartments. Always match your tool exactly to the fastener type—using a slightly too-small screwdriver is the #1 cause of stripped screws during door handle repairs.
How to Tighten a Standard Doorknob in 4 Simple Steps

Start by locating the release mechanism on your interior knob—usually a small slot or button on the shank. Insert a flathead screwdriver to depress the spring-loaded tab while pulling the knob straight off. Some models require twisting the knob cover counterclockwise first. If you meet resistance, don’t force it; check for hidden set screws before applying additional pressure.
Accessing and Tightening the Mounting Screws
Once the knob is removed, you’ll see the mounting plate covering the latch mechanism. Locate the two long screws that run through the door thickness—these connect both handle halves. Use a properly fitting Phillips #2 screwdriver to tighten these screws clockwise, alternating between them to maintain even pressure. Apply firm but controlled pressure until you feel definite resistance, then give each screw a final 1/8 turn.
Testing Your Work and Avoiding Common Mistakes
Reattach the knob and test operation immediately. A properly tightened handle should turn smoothly without wobble but require deliberate pressure to operate. If the knob spins freely without moving the latch, you’ve overtightened the spindle connection—loosen the mounting screws slightly. Never use power tools for final tightening; the torque easily strips plastic components common in modern handles. If screws won’t tighten fully, you likely have stripped threads requiring repair before proceeding.
Fixing a Wobbly Lever Handle: Hidden Screw Access Guide
Lever handles typically hide their fasteners beneath the handle itself. Examine the underside of your lever near the base for a small hexagonal hole—this accesses the set screw securing the lever to the spindle. Insert the correctly sized Allen wrench (usually 2mm or 2.5mm) and turn counterclockwise to loosen. Some models require complete removal of the set screw, while others just need slight loosening to slide the lever off.
Removing Decorative Covers Without Damage
If no obvious set screw exists, check for a seam line around the rosette base. Gently insert a plastic pry tool at the seam and work your way around the perimeter. Many modern handles use spring clips released by inserting a paperclip into a tiny pinhole. Apply steady pressure while wiggling the cover—sudden force often cracks the plastic. Once removed, you’ll typically find two to four mounting screws securing the entire assembly.
Proper Lever Tightening Technique
After accessing the mounting screws, tighten them in a star pattern (opposite corners sequentially) to prevent binding. For the lever set screw, position the handle at a 45-degree angle before tightening—this distributes stress evenly across the spindle. Apply just enough pressure to eliminate play without restricting movement; overtightening damages the return spring mechanism. Recheck tightness after 24 hours as components settle into position.
Solving Spinning Knob Problems When Tightening Fails
If your knob spins freely but won’t retract the latch, tightening alone won’t solve the problem. This indicates a broken connection between the knob and spindle—a common failure point in plastic-core handles. Remove both knobs to access the square spindle ends. Inspect for rounded corners or stripped slots where the spindle connects to the knob mechanism.
Repairing Worn Spindle Connections
For minor wear, wrap the spindle ends with plumber’s tape to create a tighter fit before reassembly. Severe wear requires spindle replacement—measure your existing spindle’s length and square dimension (typically 7/32″ or 1/4″) for an exact match. When reinstalling, apply a tiny drop of blue thread locker to the spindle screws to prevent future loosening without making disassembly impossible.
Repairing Stripped Screw Holes in Door Handles
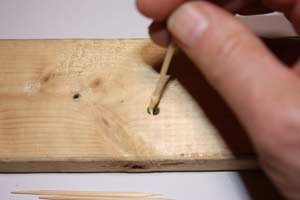
Stripped screw holes cause recurring looseness even after proper tightening. Remove the problematic screw and inspect the hole—if the wood fibers are completely gone, you’ll need to rebuild the material. Insert two or three wooden toothpicks coated with wood glue into the hole, snapping them off flush with the surface. For heavy-use exterior doors, use a wooden dowel (1/4″ diameter) cut to hole depth with generous wood glue application.
Permanent Thread Repair Solutions
Allow glued repairs to cure for at least 4 hours before drilling a new pilot hole slightly smaller than your original screw. For metal components with stripped threads, apply a thread repair compound like JB Weld SteelStik to the screw threads before reinserting. In commercial settings, install helical thread inserts (commonly called “helicoils”) for a permanent solution that withstands high-traffic usage.
Preventing Future Looseness: Maintenance Tips That Work
Establish a simple maintenance routine to prevent recurring handle looseness. Every three months, perform a “wobble test” by gripping the handle firmly and checking for movement in all directions. During this check, tighten any visible screws with a quarter-turn—don’t wait until noticeable play develops. For high-traffic doors, apply this maintenance monthly.
Strategic Lubrication for Long-Term Stability
Apply graphite powder or silicone-based lubricant to the spindle mechanism twice yearly to reduce friction that contributes to loosening. Avoid oil-based lubricants that attract dust and create gummy buildup. For lever handles, a tiny drop of lubricant on the return spring pivot point ensures smooth operation without excess stress on mounting points. Remember: less is more—excess lubricant attracts dirt that accelerates wear.
When Tightening Isn’t Enough: Knowing When to Replace
Certain issues indicate your handle needs replacement rather than tightening. If the latch mechanism fails to engage properly after multiple tightening attempts, internal components have likely worn beyond repair. Handles that develop play within weeks of tightening often have compromised internal structures. Persistent rattling sounds when operating the handle signal broken or missing internal parts.
Cost-Benefit Analysis: Repair vs. Replacement
Consider replacement if you’ve repaired the same handle three times within a year. Quality handles cost $25-$100 but provide years of reliable service, while repeated repairs waste your time and risk damaging the door. For antique or specialty hardware, consult a locksmith before attempting repairs that might devalue the piece. Modern handles install in 15-20 minutes—a small investment compared to compromised security from a failing handle.
Knowing how to tighten a door handle properly transforms a constant annoyance into a quick, satisfying repair that enhances your home’s security and functionality. By identifying your specific handle type, using the right tools, and following these targeted techniques, you’ll eliminate wobble for good. Implement the maintenance tips to prevent future issues and enjoy smooth, secure operation from every door in your home. For persistent problems or valuable antique hardware, don’t hesitate to call a professional—your safety and security are worth the investment.


