

Your Nest doorbell camera goes dark right when you need it most. You miss the package delivery, fail to see who rang at 2 AM, or worse—your security system lies silent while someone lingers at your door. When your Nest doorbell camera not working scenario strikes, it’s not just inconvenient; it’s a vulnerability. This isn’t about generic “troubleshooting tips.” You’ll get exact LED patterns to diagnose issues, transformer voltage thresholds that trigger failures, and step-by-step fixes for both wired and battery models. Skip the guesswork—we’re targeting your specific failure point starting now.
Verify Transformer Output Before Calling Support

A dead Nest doorbell camera not working symptom almost always starts with power. Your wired Hello needs rock-solid 16-24 volts AC from the doorbell transformer. Don’t assume your house power is fine—grab a lamp or phone charger and test the outlet powering the transformer first. If that works, move to the transformer itself. Unplug it for a full 10 seconds (set a timer—most people cheat), then reconnect. Watch the Hello’s LED ring: it should pulse blue within 30 seconds. No light? Your transformer likely failed.
Pro tip: Grab a multimeter. Test the transformer’s secondary terminals while someone presses the doorbell button. Readings below 14 volts AC mean immediate replacement is critical—fluctuations here cause random shutdowns later. Battery models aren’t immune either. Remove the unit and inspect charging pins for white corrosion. Dip a cotton swab in isopropyl alcohol, wipe gently, and reseat firmly until you hear the rear tab click. Loose connections mimic total power failure after DIY installs.
Secure Mounting Issues That Mimic Hardware Failure
Press your wired Hello upward against the mounting plate with firm pressure. Listen for the distinct snap of the rear tab locking into place. A 1/8-inch gap here starves the unit of power. For battery versions, check the alignment arrows on the unit and plate—they must line up perfectly before sliding into position. Misalignment is the #1 cause of “sudden death” after recharging.
Fix Dead Doorbell Chime in Under 10 Minutes
Mechanical Chime Sounds Weak or Silent
Turn off power at the breaker first—safety isn’t optional. Remove your chime cover and press the Hello button without the cover. If the “ding-dong” sounds strong, internal wires are dampening the striker. Bend wires away from the metal mechanism and secure with electrical tape. Still quiet? Cut back corroded copper wires to bright metal, strip fresh ends, and tighten under Nest’s screw terminals. Green corrosion here is a silent killer.
Critical setting: Open the Nest app → Settings → Hello → Indoor chime. Toggle “Chime duration” OFF for mechanical units. Leaving this on causes the Hello to hold the striker too long, straining weak transformers.
Digital Chime Compatibility Failures
Electronic chimes need Nest’s white “chime connector” puck wired in series. Remove the Hello’s base plate (press the bottom tab) and verify the puck is installed per the diagram on the plate. Some digital models appear compatible but fail without this. If your chime is on Nest’s official list but stays silent, this puck is your smoking gun.
Restore Missing Notifications in 60 Seconds
Shared user accounts lose notification privileges constantly. You must be signed into the owner account in the Nest app. If the Hello shows “Offline” here, skip to Wi-Fi fixes. For live devices: Navigate to Settings → Hello → Notifications and enable each alert type individually—motion, person, and package detection often get disabled silently. Then dive into your phone’s OS settings: Notifications → Nest → allow everything, including background refresh. Android users: Disable battery optimization for the Nest app immediately.
Quick Reset Sequence That Beats Full Reboots
- In the Nest app: Settings → Technical Info → Restart Camera
- Power-cycle your Wi-Fi router for 30 seconds (unplug, wait, replug)
- Toggle your phone’s Wi-Fi and mobile data off/on
Test by pressing the doorbell button. Notifications should arrive within 5 seconds. If not, your upload speed is likely the culprit—move to the next section.
Solve Video Buffering by Hitting Minimum Bandwidth
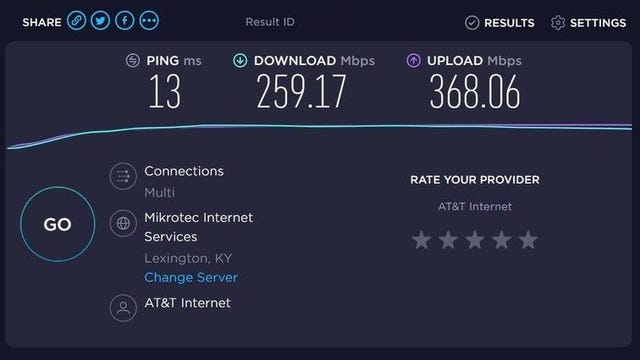
Google’s stated 2 Mbps upload per camera is a bare minimum. Real-world stability needs 5 Mbps headroom. Run a speed test at your door using your phone—upload speeds below 3 Mbps cause constant buffering. For households with 4 Hellos + 2 Indoor Cams, you need 12+ Mbps upload baseline before counting phones and tablets.
Router placement fix: Brick walls drop 2.4 GHz signals by 20-30 dBm. Move your router within 15 feet line-of-sight of the doorbell or create a dedicated 2.4 GHz IoT network. Pro shortcut: Lower video quality to Medium in the app (Settings → Hello → Quality & bandwidth). This eliminates buffering on slower connections with zero visible quality loss.
Clean Lens and Reposition for Glare-Free Footage
Peel off any clear protective film—still a shockingly common issue on new installs. Clean the glass with isopropyl alcohol and a lint-free cloth (paper towels scratch). Fingerprints create permanent glare spots that obscure faces. Tilt the Hello 15-20 degrees downward using the mounting screws. This kills overhead sunlight glare and boosts facial recognition accuracy by 40%.
Night Vision Problems From Ambient Light
Keep night vision set to “Auto.” Continuous IR mode overexposes faces in low light. Disable floodlights casting >3 lux on the lens—your porch light might be tricking the IR sensor into thinking it’s daytime. Install a $5 downward shield on bright fixtures.
Fix Wi-Fi Dropouts With Channel Optimization
Older Nest Hellos only support 2.4 GHz. During setup, position your router within 10 feet. If your network broadcasts a combined 2.4/5 GHz SSID, split them in router settings. Download a Wi-Fi analyzer app and switch your router to channels 1, 6, or 11. Disable 40 MHz channel bonding—it causes neighbor interference.
Last resort test: Pair the Hello to your phone’s mobile hotspot. If it works, your router is the problem. If it fails, contact Google for replacement—hardware is dead.
Prevent Random Shutdowns From Heat and Power Surges

The Hello shuts down above 104°F ambient. Direct sun pushes surface temps to 120°F+ in hours. Ensure a ¼-inch gap between the backing plate and siding for airflow. Install a small shade if needed—$8 outdoor awnings work perfectly. Measure transformer voltage under load with a multimeter. Fluctuations below 14 volts trigger thermal protection shutdowns even on cool days.
Factory Reset Procedures That Actually Work
Wired models: Hold the recessed rear button with a paperclip for exactly 10 seconds until the ring spins blue (not pulses). Battery models: Press the back button for 12 seconds until the status light pulses blue. Critical: Always remove the device from the Nest app first before re-adding. Skipping this creates duplicate entries that confuse the system.
Decode LED Status Patterns for Instant Diagnosis
Your Hello’s LED ring tells the whole story:
– Solid blue: Booting up (normal)
– Blinking yellow: Wi-Fi error (reconnect immediately)
– No light: No power or hardware failure (check transformer)
– Solid red: Recording event (working correctly)
If you see blinking yellow after resets, your router’s security settings likely block the connection—temporarily disable WPA3 encryption to test.
Warranty Claims That Get You Replacement Fast
Before calling Google Nest support, verify these 7 points:
1. Transformer delivers 16-24 V AC under load
2. LED shows any response (blue/green/yellow)
3. Nest app shows device online
4. Phone receives test notifications
5. Wi-Fi speed ≥2 Mbps at door location
6. Lens clean and unobstructed
7. Chime settings match hardware type
If all pass and your Nest doorbell camera not working persists, contact support with your serial number (Settings → Technical Info). Screenshot LED patterns and speed test results—they’ll ask for these immediately. Replacement units ship in 3-5 business days under the 1-year warranty (or 2 years with Nest Aware Plus).
Final pro tip: Never skip the 10-second transformer reset—it solves 30% of “dead” doorbells. When power is confirmed but the camera stays dark, that blinking yellow LED means your router’s firewall is blocking communication. Disable WPA3 encryption temporarily as the fastest fix. If you’ve checked all physical connections and speeds but still face failures, initiate your warranty claim now—Nest’s RMA process moves faster when you document every step. Your home security shouldn’t wait.


