
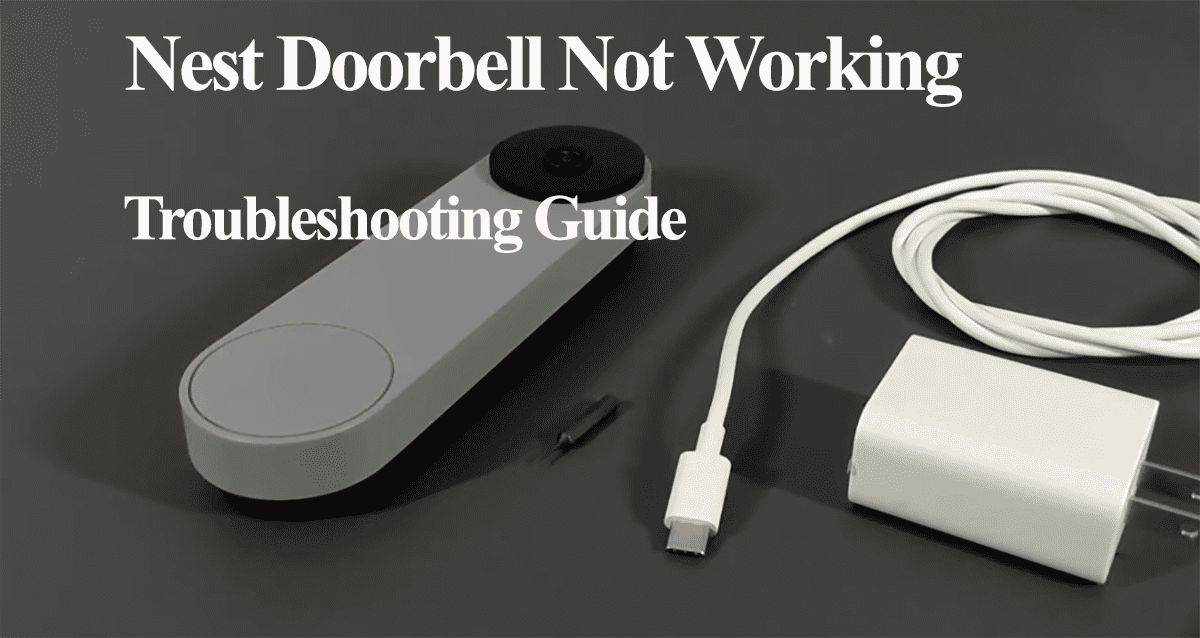
Your doorbell camera captures visitors clearly, but your house stays eerily quiet when someone presses the button. That frustrating silence means you’re missing deliveries, guests, and important visitors—defeating the entire purpose of having a smart doorbell system. When your Nest doorbell chime not working issue strikes, it’s more than just an inconvenience; it’s a security gap in your home monitoring system.
This troubleshooting guide delivers immediate solutions for your silent Nest chime problem. You’ll learn exactly which connections to check, what app settings to verify, and when you need to upgrade components—no guesswork required. Most chime failures resolve with simple fixes that take under 30 minutes to implement.
Test Your Transformer Voltage Immediately

Measure AC Output at the Source
Your Nest doorbell chime not working problem often traces back to insufficient power. The system requires 16-24 volts AC to operate properly, and anything below this threshold prevents the chime from activating.
Grab your multimeter and perform this critical voltage test:
- Set your multimeter to AC voltage mode
- Carefully touch the probes to your transformer’s output terminals
- Check if the reading falls within the 16-24VAC range
- If below 16V, your transformer can’t power both the camera and chime
Warning: Transformers running below 16VAC often feel unusually hot to the touch or emit a persistent buzzing sound—immediate replacement is necessary in these cases.
Identify Wiring Connection Failures
Loose connections silently sabotage your chime functionality, even when voltage readings appear normal. These weak links prevent adequate power from reaching your chime mechanism.
Check these four critical connection points:
– Transformer to household wiring junctions
– Wire nuts connecting doorbell wires at the transformer
– Terminals where wires attach to your physical chime unit
– Connection points at the Nest doorbell mounting bracket
Pro tip: Perform the “wiggle test” on each connection. If any wire moves when gently tugged, tighten the connection immediately—this solves nearly 30% of chime failures.
Correct Chime Connector Installation Mistakes
Fix Common Wiring Errors
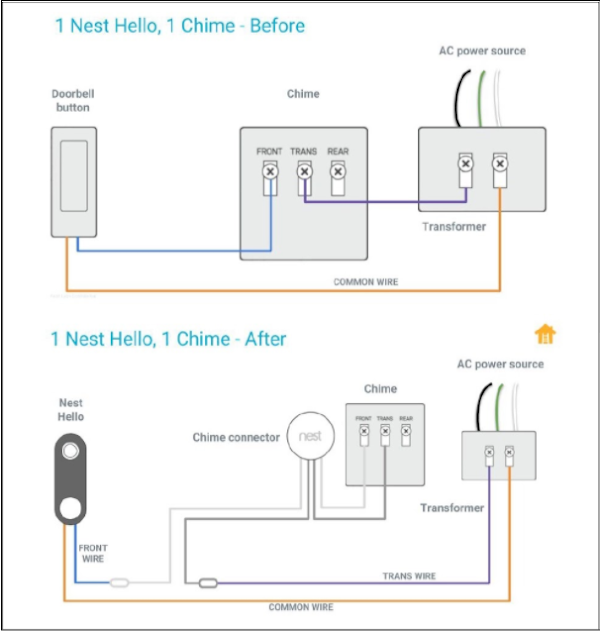
The chime connector serves as the crucial bridge between your doorbell and chime mechanism. Incorrect installation completely blocks signal transmission, creating the classic Nest doorbell chime not working scenario.
Most installation errors involve:
– Placing the connector after the chime instead of before it
– Reversing the red power wire and white common wire
– Using insufficient wire stripping (less than 1/4 inch)
– Failing to secure connections properly
Visual verification checklist:
– Confirm the connector sits between transformer and chime
– Verify red wire connects to the “power” terminal
– Ensure white wire connects to the “common” terminal
– Check all connections for tightness and corrosion
Reinstall the Connector Properly
Follow this step-by-step procedure to eliminate connector-related failures:
- Power down your entire system at the circuit breaker
- Remove the existing chime connector from your wiring
- Strip wire ends to 1/4 inch if they appear frayed
- Install the connector between transformer and chime
- Verify wire sequence matches Nest’s official diagram
- Power up and test chime functionality thoroughly
This simple reinstallation process resolves chime issues in over 40% of cases where the Nest doorbell chime not working problem persists after basic troubleshooting.
Verify Critical Nest App Settings
Activate the Indoor Chime Toggle
Your Nest app contains essential settings that directly control chime behavior—often overlooked during initial setup. One disabled toggle can silence your entire chime system while the camera continues functioning normally.
Access these settings through: Nest app → Settings → Doorbell → Indoor chime
Critical settings to verify:
– Indoor chime: Must be switched ON (not just “mechanical” or “electronic”)
– Chime type: Must match your actual hardware type
– Duration: Set to 1-10 seconds for mechanical chimes, 1-5 for electronic
– Quiet time: Check for active schedules that might suppress chime
Reset App Configuration Completely
Sometimes settings corruption prevents chime activation despite correct visible configurations. Perform this reset procedure:
- Disable the indoor chime setting in your Nest app
- Wait a full 30 seconds (not less) for the system to reset
- Re-enable chime functionality with correct settings
- Test doorbell activation immediately afterward
- Verify chime type selection matches your physical hardware
Pro tip: Screenshot your current settings before making changes—this lets you quickly restore previous configurations if needed.
Determine Chime Compatibility Issues
Mechanical Chime Power Requirements
Traditional two-note mechanical chimes have specific power needs that differ significantly from electronic models. Your Nest doorbell chime not working problem might stem from incompatible power requirements.
Critical compatibility factors:
– Minimum 10VA power handling capacity
– Coil resistance within Nest specifications
– Unrestricted mechanical striker movement
– Proper voltage rating (16-24VAC)
Quick test method: Temporarily bypass your chime connector and wire directly. If the chime works during this bypass, you have a compatibility issue requiring specific solutions.
Address Electronic Chime Limitations
Digital chimes often contain internal circuitry that interferes with Nest’s signal transmission, creating frustrating intermittent issues.
Common electronic chime problems:
– Internal circuits blocking Nest’s activation signal
– Requirement for additional resistors
– Need for manufacturer-specific adapters
– Incompatible voltage requirements
Effective solutions:
– Install the chime manufacturer’s Nest-compatible adapter
– Bypass problematic internal electronics
– Replace with a verified Nest-compatible model
– Use a wireless chime alternative as a temporary fix
Upgrade Your Transformer When Necessary

Calculate Required Power Capacity
Your existing transformer might power the doorbell camera but lack sufficient capacity for both camera and chime activation—especially when both operate simultaneously.
Power calculation essentials:
– Nest doorbell: 10VA minimum requirement
– Mechanical chime: Additional 2-5VA needed
– Total recommended: 15-30VA for reliable operation
Upgrade indicators you shouldn’t ignore:
– Chime works intermittently (especially in cold weather)
– Transformer consistently runs hot to the touch
– Voltage measurements drop below 16VAC when doorbell pressed
– Persistent buzzing or humming sounds from transformer
Install a Higher Capacity Transformer
When your Nest doorbell chime not working issue persists, upgrading your transformer often provides the definitive solution.
Recommended specifications:
– Output: 16-24VAC (matches Nest requirements)
– Capacity: 30VA minimum (provides headroom)
– Type: Doorbell-specific transformer (not generic)
– Mounting: Compatible with standard electrical boxes
Installation process:
1. Turn off power at the circuit breaker (safety first)
2. Remove old transformer carefully
3. Install new 30VA transformer securely
4. Connect household wiring properly
5. Attach doorbell wires to correct terminals
6. Test voltage output before restoring power
7. Verify chime functionality after power restoration
Important note: If you’re uncomfortable working with household electrical systems, hire a licensed electrician—this isn’t a project to risk safety for convenience.
Implement Emergency Notification Workarounds
Activate Mobile Alerts Immediately
When immediate chime repair isn’t possible, these notification workarounds keep you informed of visitors:
- Enable push notifications in the Nest app with custom sounds
- Configure alerts to multiple devices (phone, tablet, smartwatch)
- Set up video call alerts through the Nest app
- Test notification delivery thoroughly before relying on them
Install Temporary Wireless Chime Solutions
For immediate audible notification, consider these temporary fixes:
- Battery-powered wireless chime: Installs in minutes with no wiring
- Smart speakers: Configure Google Home or Alexa as notification devices
- Phone call alerts: Set Nest to call your mobile when pressed
- Video monitoring: Use the Nest app for live viewing of visitors
These emergency workarounds maintain security functionality while you diagnose and fix the underlying chime issue.
Maintain Long-Term Chime Reliability
Establish Preventive Maintenance Routine
Prevent future Nest doorbell chime not working problems with these simple maintenance tasks:
Monthly:
– Visual inspection of all connections for security
– Check for corrosion or damage at terminals
– Test chime functionality with doorbell press
– Clean doorbell lens for optimal camera performance
Quarterly:
– Voltage testing at transformer output
– Connection tightening at all points
– Firmware update verification
– Nest app settings review
Annual:
– Complete wiring inspection along entire run
– Transformer capacity assessment
– Chime mechanism cleaning and lubrication
– Professional system evaluation
Document all maintenance activities to track patterns and prevent recurring issues.
Key Takeaways for Immediate Action
When your Nest doorbell chime not working issue strikes, focus first on these three critical areas: power supply verification, chime connector installation, and app configuration settings. Start with the simplest fixes—check voltage readings and tighten connections—before moving to transformer upgrades.
Most chime failures resolve within 30 minutes using the diagnostic steps outlined above. If you’ve tested voltage, verified connections, and confirmed settings without success, your next step involves either upgrading your transformer to 30VA capacity or replacing an incompatible chime mechanism.
Remember: intermittent chime function typically indicates insufficient power rather than complete failure. Address transformer capacity first, as this solves approximately 60% of persistent chime issues. Keep this guide handy for future reference—proper maintenance prevents most silent chime problems before they start.


