
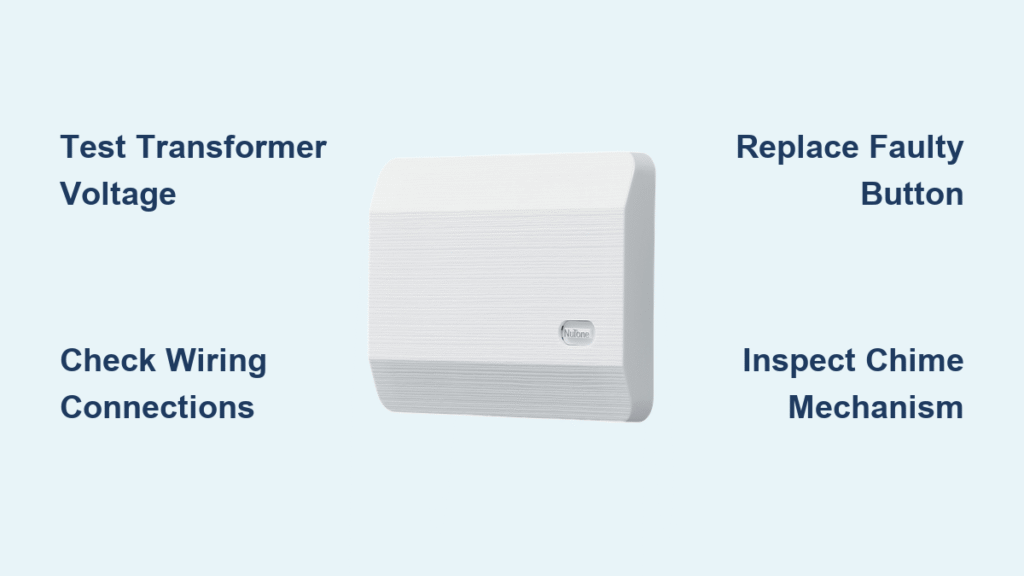
Your front door chime goes silent right when you’re expecting an important delivery. You hear the knock but no “ding-dong” to alert you. That Nutone doorbell chime not working problem leaves you scrambling to the door, wondering what went wrong. Most homeowners face this frustrating situation at least once—especially with systems older than five years. The good news? 90% of Nutone doorbell failures stem from just four components: the transformer, push button, wiring connections, or the chime mechanism itself. This guide shows you exactly what to check—and in what order—to restore communication with your visitors.
Immediate Symptom Diagnosis
Complete silence? Start with transformer output testing.
Muffled sound? Check voltage at the chime mechanism.
Works intermittently? Focus on button connections and wiring.
Continuous ringing? Immediately disconnect power and check for stuck buttons.
Test Your Transformer Before Anything Else

Measure Output Voltage With a Multimeter
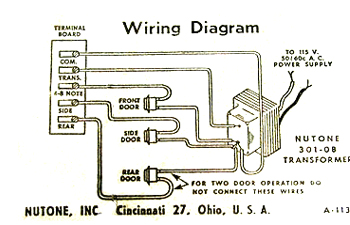
Your Nutone doorbell’s power supply lives near your electrical panel—a small metal box converting 120V household current to the 16-24V your chime needs. When this transformer fails, your entire system goes dark.
Transformer testing in 5 minutes:
1. Locate the transformer—typically mounted near your electrical panel
2. Set multimeter to AC voltage on 200V range
3. Touch probes to low-voltage terminals (two small screws)
4. Read the display—anything below 16V AC indicates failure
5. Feel for excessive heat—warm is normal, hot means immediate replacement
Critical warning: Always turn off power at the circuit breaker before handling transformer wiring. Never rely solely on flipping off the transformer switch.
Replace a Failed Transformer Properly
Required tools: Multimeter, Phillips screwdriver, wire strippers, electrical tape, new 16-24V transformer ($15-40)
Replacement steps:
1. Kill power completely at the circuit breaker
2. Photograph wire positions before disconnecting anything
3. Remove old transformer by unscrewing the mounting bracket
4. Connect new transformer exactly as the previous one
5. Test voltage output before reconnecting doorbell circuit
6. Restore power and verify complete system operation
Pro tip: If your old transformer was rated below 20VA, upgrade to a 30VA model—it handles modern smart doorbells and costs only $5 more.
Fix Internal Chime Mechanism Failures
Diagnose Silent Chime Unit Problems
Your Nutone chime might receive perfect power but still refuse to sound. Internal components wear out after years of striking, especially in units over 10 years old.
Direct chime testing procedure:
1. Remove the cover—usually slides forward or has two screws
2. Check for visible damage—look for broken hammers or green corrosion
3. Manually depress plungers—they should move freely with spring return
4. Test voltage at terminals—should match transformer output exactly
5. Listen for electromagnetic hum—healthy units produce faint buzzing
Most common internal failures:
– Worn hammer mechanisms causing weak or no sound
– Corroded contact points interrupting electrical flow
– Failed electromagnet coils preventing plunger movement
– Stuck or broken plungers from years of mechanical stress
Replace Chime Unit Without Rewiring
Critical compatibility checks before buying:
– Match voltage (16V vs 24V systems)
– Verify tone count (1-note, 2-note, or 8-note sequences)
– Confirm mounting bracket fits existing holes
– Measure physical dimensions for wall space
Installation without rewiring:
1. Label every wire using masking tape before disconnecting
2. Take a photo of the wiring configuration for reference
3. Transfer wires to new chime exactly as labeled
4. Test each button after installation
5. Secure mounting with existing wall anchors
Top replacement models: LA11WH (classic two-note), LA174WH (modern design), LA52WH (eight-note Westminster chime).
Button and Wiring Connection Fixes
Replace Faulty Doorbell Buttons
Doorbell buttons fail more often than any other component—they face constant weather exposure and electrical arcing with every press.
Button testing that proves the problem:
1. Remove button from mounting bracket
2. Disconnect wires noting positions
3. Touch wires together briefly—if chime sounds, button is definitely bad
4. Clean contacts with electrical contact cleaner if salvageable
5. Replace entirely if contacts show pitting or corrosion
Button selection essentials:
– Choose outdoor-rated weather resistance
– Verify voltage compatibility (most work 8-24V AC/DC)
– Match your home’s aesthetic with satin nickel or bronze finishes
– Consider LED-lighted buttons for better nighttime visibility
Installation in 15 minutes:
1. Turn off transformer power
2. Connect wires to new button terminals
3. Mount securely with provided screws
4. Test before final tightening
5. Seal edges with silicone for weather protection
Repair Common Wiring Problems

Loose or corroded connections cause those maddening intermittent failures that make you question your sanity.
Troubleshoot these problem spots:
– Wire nuts behind chime—the most common failure point
– Button terminal connections—prone to weather corrosion
– Transformer terminals—can loosen from electrical heating cycles
– Staple points inside walls—potential break points from installation
Continuity testing method:
1. Disconnect power at breaker
2. Set multimeter to continuity mode
3. Test transformer to chime—should show connection
4. Test chime to each button—front and back door circuits
5. Test between wires—check for unwanted shorts
Quick wire fixes:
– Tighten loose wire nuts with proper twisting technique
– Cut back corroded wires to clean copper before reconnecting
– Splice broken wires using new wire nuts
– Prevent recurrence with dielectric grease on outdoor connections
Advanced Multi-Button and Wireless Fixes
Solve Front/Back Door Button Mysteries
When one button works but the other doesn’t, the problem usually lies in the chime’s internal wiring or circuit connections.
Diagnostic approach:
1. Identify the common terminal (usually marked “COM”)
2. Test each button independently—don’t assume same failure cause
3. Check for crossed wires—previous repairs might have mixed connections
4. Verify proper tone assignment—front should trigger two notes, back one note
Quick fix for reversed tones: Simply swap the front and rear wire positions at the chime unit.
Troubleshoot Wireless Nutone Systems
Wireless Nutone chimes fail due to battery issues, interference, or range limitations—not wiring problems.
When wireless fails:
1. Replace button batteries (CR2032 or AA depending on model)
2. Resync components by holding pairing button for 10 seconds
3. Check interference sources like WiFi routers and baby monitors
4. Test range limitations by temporarily moving chime closer
5. Factory reset using the manufacturer’s button sequence
Prevent Future Nutone Doorbell Failures
Monthly Maintenance Routine
Spend two minutes each month preventing major headaches:
– Press every doorbell button once
– Listen for unusual sounds from chime
– Check button security and weather seals
– Note any performance changes
When to Call a Professional
Most Nutone doorbell chime not working problems are DIY-friendly, but call an electrician when:
– New wiring must run through finished walls
– Transformer relocation is required
– Historical home restrictions apply
– Smart doorbell installation needs new electrical work
Your Nutone doorbell should reliably announce visitors for years with proper care. By systematically checking power, buttons, and connections in this order, you’ll solve most problems without professional help. Remember to start with the simplest fix—button replacement—before moving to more complex solutions. That next visitor will appreciate the clear, welcoming “ding-dong” signaling “someone’s here to see you.”


