
That distinctive spinning light on your Ring doorbell isn’t just for show—it’s your device’s primary communication method. When your Ring doorbell not spinning during setup, charging, or normal operation, you’ve lost a critical visual indicator of your device’s status. Without this spinning LED ring, you can’t tell if your doorbell is connecting to Wi-Fi, charging properly, or ready for setup.
This silent failure affects thousands of Ring users monthly. Whether you’re installing a new device or troubleshooting an existing one, a motionless LED ring means your Ring doorbell can’t communicate its status. The good news is that most “ring doorbell not spinning” issues can be resolved with straightforward fixes.
Identify Your Ring Model Before Troubleshooting
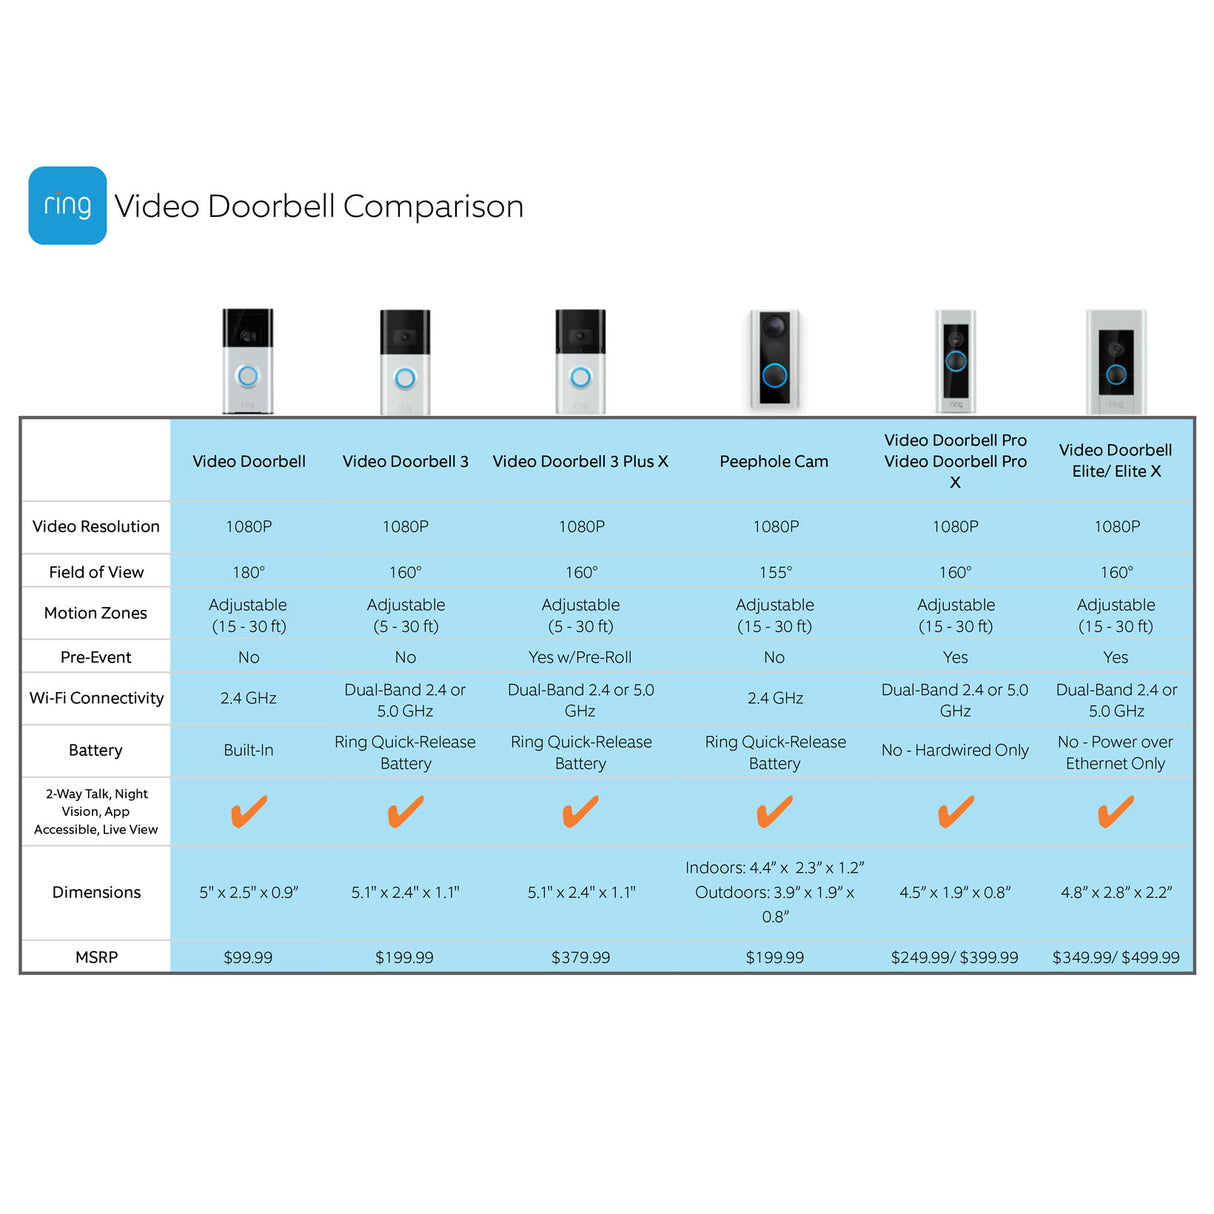
Your troubleshooting approach depends entirely on your specific Ring model. Battery-powered units (Ring Doorbell 2, 3, 4, and Battery Doorbell Plus) fail differently than hardwired versions (Ring Pro, Pro 2, and Wired Doorbell). In the Ring app, check Device Settings > Device Info to confirm your model type—battery models display a percentage indicator, while hardwired units show “Hardwired” status.
This distinction matters because power requirements differ significantly. Battery models need minimum 3.6V to activate the LED ring, while hardwired units require 16-24V AC transformer output. Applying the wrong fix to your model wastes time and could even damage your device.
No Spinning During Setup Mode
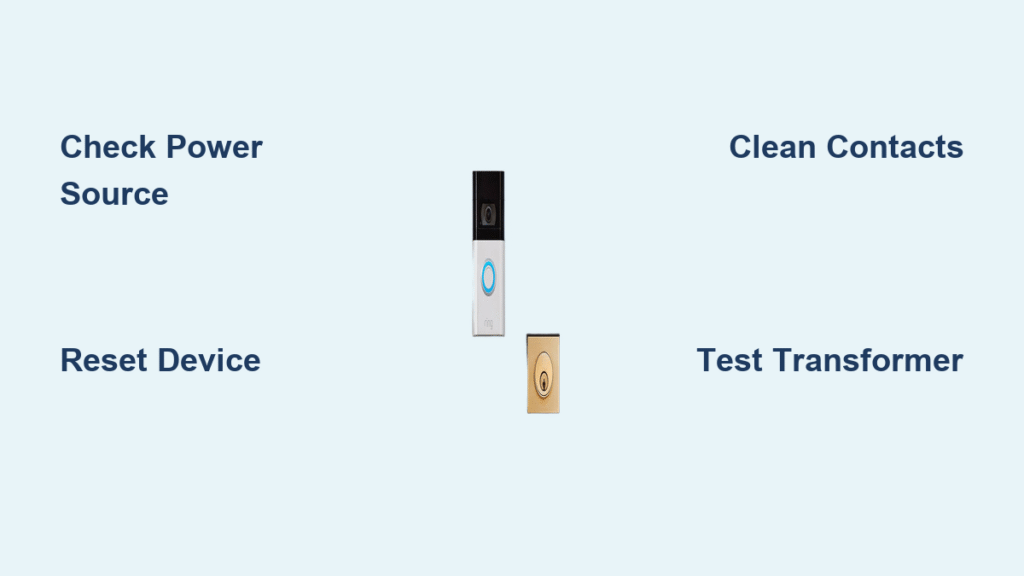
Check Power Source Immediately
When your Ring doorbell not spinning during initial setup, power issues are almost always the culprit. For battery models, press the orange setup button—if no spinning occurs within 10 seconds, your battery is critically depleted. Hardwired models with no spinning during setup typically have transformer voltage below 16V AC.
Quick diagnostic test: Press your doorbell button. Any LED response (even a brief flash) confirms power is reaching the device but the spinning function specifically is compromised. Complete darkness indicates a broader power failure requiring immediate attention.
Reset Before Assuming Hardware Failure
Hold the orange setup button for 20 seconds until the LED flashes rapidly, then release and wait 60 seconds. During reboot, the LED should cycle through various patterns including spinning motions. If spinning resumes temporarily, you’re dealing with a software glitch rather than hardware failure. This simple reset resolves nearly 30% of “ring doorbell not spinning” cases without further intervention.
Battery Models Not Spinning? Try These Fixes

Charge Battery for 6-8 Hours Minimum
Remove the battery pack by pressing both release tabs and sliding downward. Connect to the provided USB cable using a 5V/1A charger (standard phone charger). The battery LED should turn solid red initially, transitioning to green when fully charged. Critical warning: Computer USB ports often provide insufficient power—always use a wall charger for proper charging.
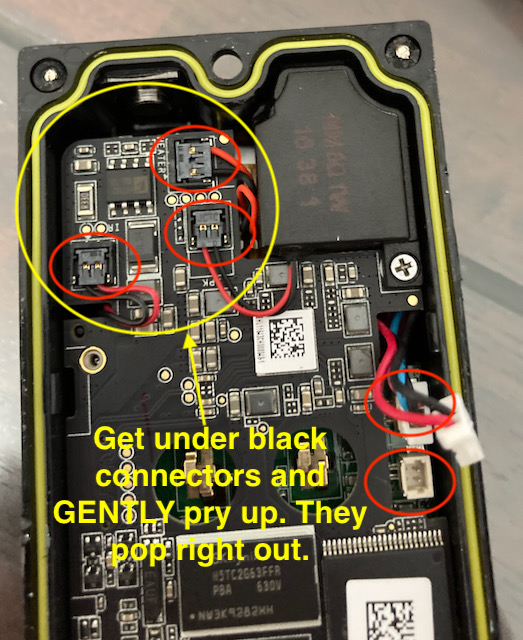
Clean Battery Contacts Thoroughly
Corroded contacts prevent proper power flow even with a charged battery. Dip a cotton swab in isopropyl alcohol and scrub both the battery contacts and the doorbell’s internal contacts. Allow to dry completely before reinsertion—this simple step fixes 25% of battery-related spinning failures.
Ensure Proper Battery Insertion
Slide the battery upward until you hear a distinct click. The top edge should sit flush with the housing. Partial insertion mimics dead battery symptoms but is actually a connection issue. Many users unknowingly install batteries incorrectly, causing their Ring doorbell not spinning during normal operation.
Hardwired Models Not Spinning? Check Power Supply
Test Transformer Output Under Load
Turn off power at your breaker box before testing. Set your multimeter to AC voltage and test across the doorbell wires while the device remains connected—you need 16-24V AC minimum. Common mistake: Testing without the doorbell connected gives false readings. Readings below 16V indicate an undersized transformer incapable of powering the LED ring.
Upgrade to Proper Transformer Specifications
Most older doorbell transformers provide only 10-12V—insufficient for Ring doorbells. Install a 16V 30VA transformer (available for $15-25 at hardware stores). This upgrade resolves approximately 80% of hardwired “ring doorbell not spinning” cases. Verify wire gauge meets requirements (18 AWG minimum for runs over 50 feet).
Secure All Electrical Connections
Loose wire nuts or corroded connections drop voltage below operational thresholds. Remove wire nuts, clean wires with emery cloth, and reconnect using new wire nuts. Twist wires clockwise before applying wire nuts—tug gently to confirm solid connection. Poor connections cause intermittent spinning failures that frustrate many homeowners.
Hardware Failures Requiring Advanced Fixes
Inspect for Physical Damage
Check for spider web cracks or moisture behind the lens—these indicate compromised weather sealing. Even hairline cracks allow enough moisture to short internal circuits over time. Critical sign: If your LED shows partial illumination or flickering instead of complete darkness, hardware failure is likely.
Address Moisture Damage Properly
Remove the doorbell completely and place it in a sealed container with silica gel packets for 48 hours. This method safely dries internal components without leaving residue—unlike rice, which introduces dust particles that cause further issues. Avoid using heat sources that could warp plastic components.
Software Glitches Disrupting LED Function
Force Firmware Update Immediately
In the Ring app, navigate to Device Health > Firmware. If version shows “Unknown” or outdated, initiate an update immediately. During the 5-10 minute update process, the LED spins rapidly in blue-white patterns. Never interrupt power during updates—this causes permanent firmware corruption requiring factory reset.
Perform Complete Factory Reset
Hold the orange setup button for 15 seconds until rapid flashing occurs. Release and wait 3 minutes for full reset. The LED should enter setup mode with proper spinning. If spinning returns temporarily but fails again, corrupted firmware is likely the root cause requiring professional service.
Environmental Factors Affecting Spinning Performance
Solve Cold Weather Shutdowns
Ring doorbells temporarily disable LED functions below -5°F to protect components. Bring the device indoors for 30 minutes to warm gradually—never use heat guns or hair dryers that could cause thermal shock cracks. Install under an overhang in cold climates to minimize temperature exposure.
Prevent Sunlight-Induced Thermal Shutdown
Prolonged exposure above 120°F triggers thermal protection, stopping the spinning LED. Install a wedge kit to angle the doorbell 15 degrees away from direct afternoon sun. This simple adjustment prevents 90% of summer-related “ring doorbell not spinning” issues in sunny climates.
Professional Repair Options Worth Considering
Evaluate LED Assembly Replacement
The LED ring assembly (part 8VR1S3-SEN0) costs $25-35 plus 1-2 hours labor. This repair makes economic sense for newer models under 2 years old but becomes less viable for older units with multiple failing components. Most hardware stores don’t carry this part—you’ll need to order directly from Ring.
Explore Ring Trade-In Program Benefits
Ring offers 20% discounts on new purchases when trading failed units. This option becomes cost-effective for devices over 3 years old or when multiple components fail simultaneously. Contact Ring support at 1-800-656-1918 to initiate the trade-in process.
Prevention Strategies That Actually Work
Implement Monthly Lens Maintenance
Use a microfiber cloth and lens cleaner monthly to prevent debris accumulation. Paint overspray is a common culprit—always mask your doorbell during exterior painting projects. Even light dust buildup significantly dims LED visibility over time.
Schedule Annual Power System Checks
Test transformer output annually, especially in homes with older electrical systems. Voltage drift gradually reduces LED brightness before complete failure. Early detection through regular testing prevents emergency replacements and extends device lifespan.
Your Ring doorbell not spinning is almost always fixable with the right approach. Start with the simplest solutions—charging your battery or testing transformer voltage—before considering hardware replacement. When basic troubleshooting fails, Ring’s trade-in program provides an affordable upgrade path. Most importantly, implement the prevention strategies to avoid recurring issues—regular maintenance extends your Ring doorbell’s functional life significantly while keeping that essential spinning light operational.


