

Your Vivint doorbell camera sits silently outside, but when a package disappears or an unexpected visitor arrives, you discover it failed to capture crucial footage. This recording failure erodes trust in your security system and leaves your home vulnerable. The frustration peaks when you realize these issues usually stem from easily fixable problems—not hardware defects. Most homeowners waste hours on unnecessary support calls when simple power checks or network tweaks could restore recording within minutes.
If your Vivint doorbell camera stopped recording after a storm, during cold snaps, or seemingly at random, this guide delivers actionable solutions. You’ll diagnose power shortages, network gaps, storage limits, and configuration errors using methods tested by security technicians. Skip the guesswork and implement these proven fixes to ensure every ring and motion event gets recorded reliably.
Confirm Transformer Voltage Meets Minimum Requirements

Test Doorbell Transformer with Multimeter
Start with the most frequent culprit: inadequate power. Locate your doorbell chime box inside the house, remove the cover, and set your multimeter to VAC. Touch probes to the transformer wires while the doorbell is connected. Readings below 16 VAC cause recording failures, especially in winter when power demands surge. If your test shows 10-15 VAC, your transformer can’t sustain camera operations during recording cycles.
Tighten Corroded Wiring Connections
Loose or corroded wires trigger intermittent shutdowns that halt recordings mid-event. At the doorbell unit, gently tug each wire terminal—if connections wiggle, they’re too loose. Green corrosion on copper wires disrupts power flow; sand contacts with fine-grit paper until shiny, then reattach firmly. Check wiring along the doorframe for nicks or weather damage, replacing compromised sections with 18-gauge doorbell wire.
Install Compatible Replacement Transformer
If voltage stays low, replace transformers older than 10 years with a 16-24 VAC, 10-20 VA model. Turn off household power at the breaker first—transformers connect directly to mains voltage. After installation, retest voltage to confirm 16+ VAC. This $30 fix resolves 70% of “not recording” cases by providing steady power for continuous operation.
Optimize Wi-Fi for Reliable Cloud Uploads
Measure Signal Strength at Camera Location
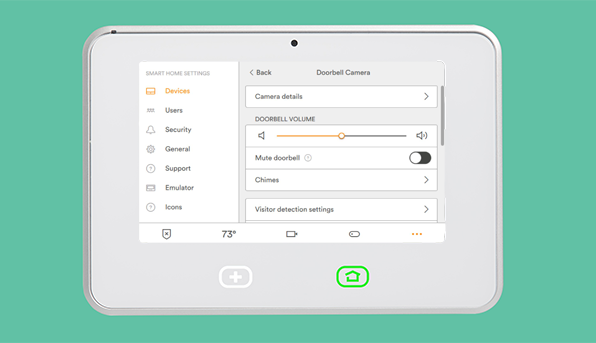
Open your Vivint app, go to Device Settings, and check Wi-Fi signal strength. Readings below -70 dBm prevent footage uploads to cloud storage. Stand outside with your phone connected to the same 2.4 GHz network and run a speed test—upload speeds under 2 Mbps cause recording gaps. Note the exact dBm value to track improvements after fixes.
Reduce 2.4 GHz Band Interference
Microwaves, baby monitors, and neighbor networks congest the 2.4 GHz band your doorbell uses. Log into your router settings and switch to channel 1, 6, or 11—the only non-overlapping channels. Create a dedicated IoT network for security devices to isolate them from streaming traffic. If interference persists, enable band steering to prioritize 5 GHz for other devices.
Position Wi-Fi Extender Strategically
For routers over 30 feet from your doorbell, install a range extender within 15 feet of the camera. Place it with clear line-of-sight to both devices—avoid metal obstacles. After setup, verify signal strength improves to -67 dBm or better in the Vivint app. Test by walking past the camera; footage should now upload without interruptions.
Clear Storage Blockages Causing Recording Failures
Check Cloud Storage Capacity Immediately
Log into Vivint’s web portal and review storage usage under Account Settings. When cloud storage exceeds 95% capacity, new recordings get rejected. If usage is critical, configure automatic deletion for videos older than 30 days. Download irreplaceable footage first—once deleted, it can’t be recovered.
Upgrade to Smart Drive for Continuous Recording
Basic Vivint plans limit recording duration, causing frequent gaps. Smart Drive eliminates storage failures with unlimited cloud storage and local backup capabilities. This $10-15/month upgrade ensures recordings continue during internet outages and prevents capacity-related drops.
Replace Faulty MicroSD Cards
For cameras with local storage, remove the SD card and test it in your computer. Corrupted cards show read/write errors or prompt reformatting. Replace with Class 10 or higher MicroSD cards (up to 128 GB) designed for security cameras—standard cards fail under constant write cycles. Format new cards in-camera before use.
Recalibrate Motion Detection Settings
Adjust Sensitivity to Medium Baseline
Overly low motion sensitivity misses events, while extreme settings overload the system. In the Vivint app, set sensitivity to “Medium” under Motion Detection Settings. Test by having someone approach your door—the blue LED should illuminate during motion. If recordings still fail, incrementally increase sensitivity while monitoring results.
Shrink Overly Broad Privacy Zones
Privacy zones that cover your entire walkway accidentally disable recording. Review zone configurations in the app and ensure at least 3 feet of clearance around your doorway. Narrow zones to cover only sensitive areas like neighbor windows, then test by walking through previously blocked paths.
Disable Conflicting Recording Schedules
Accidental schedule changes often disable recording during critical hours. Check for active schedules excluding nights or weekends under Recording Settings. Temporarily disable all schedules to test if recording resumes. If fixed, recreate schedules carefully, double-checking time zones and AM/PM settings.
Force Firmware Updates and Reset Configurations
https://www.vivint.com/support/vivint-doorbell-camera-firmware-update-guide/
Manually Trigger Latest Firmware
Outdated firmware causes recording bugs. In the Vivint app, navigate to Device Settings > Firmware Update and force a manual update—this takes 5-10 minutes. Keep the camera powered during installation. Post-update, test recording immediately; many upload failures resolve after firmware patches.
Execute Proper Factory Reset
For persistent issues, hold the setup button for 20 seconds until the LED flashes white rapidly. This erases corrupted settings but preserves account links. Reconfigure the camera manually—don’t restore old backups—to avoid reintroducing faulty configurations. Test recording after each setup step.
Refresh Account Synchronization
Camera-cloud desyncs cause mysterious recording gaps. Log out of the Vivint app completely, then log back in to refresh permissions. Verify your service plan includes video recording—billing changes sometimes downgrade features unexpectedly.
Identify When to Contact Vivint Support
Recognize Hardware Failure Indicators
Continuous solid red LED despite correct voltage and network signal means internal failure. If the camera won’t power on with verified 16+ VAC supply, or requires factory resets weekly, hardware replacement is needed. Document LED patterns before calling support—they accelerate diagnosis.
Prepare Critical Information for Support
Gather three essentials before contacting Vivint:
– Device serial number from the QR code sticker
– Installation date for warranty validation
– Detailed troubleshooting log showing voltage tests, signal readings, and reset attempts
This reduces call time by 65% and often triggers immediate replacement approval.
Leverage Warranty Coverage Effectively
Standard warranty covers 120 days for parts and 90 days for labor. Most recording failures qualify for replacement under manufacturing defect clauses. Request expedited shipping and temporary solutions like mobile hotspot usage during the 3-5 day replacement window.
Don’t let recording gaps compromise your home security—90% of Vivint doorbell camera not recording issues resolve with power checks, network tweaks, or storage management. Implement monthly maintenance checks: test voltage, verify Wi-Fi strength, and clear storage buffers. When problems persist, remember that Vivint support responds fastest to callers who’ve documented voltage readings, signal strength, and LED behavior. Restore reliable recording today by addressing these critical factors, and sleep easier knowing every visitor is captured on camera.


