
Changing a door knob without visible screws can feel like solving a puzzle, especially when there’s no obvious way to remove it. Unlike modern knobs with exposed screws, many older or decorative models hide their fastening mechanisms for a clean, seamless look. This guide will show you exactly how to change a door knob without screws using proven techniques for hidden-release systems from the 1950s to today.
If you’re staring at a smooth, screwless knob and wondering where to start, you’re not alone. Millions of homes built between the 1950s and 1970s feature vintage hardware that uses concealed pins, collars, or snap-on plates. Even some modern lever handles hide screws under removable roses. The key is knowing what type of mechanism you’re dealing with and how to trigger its release.
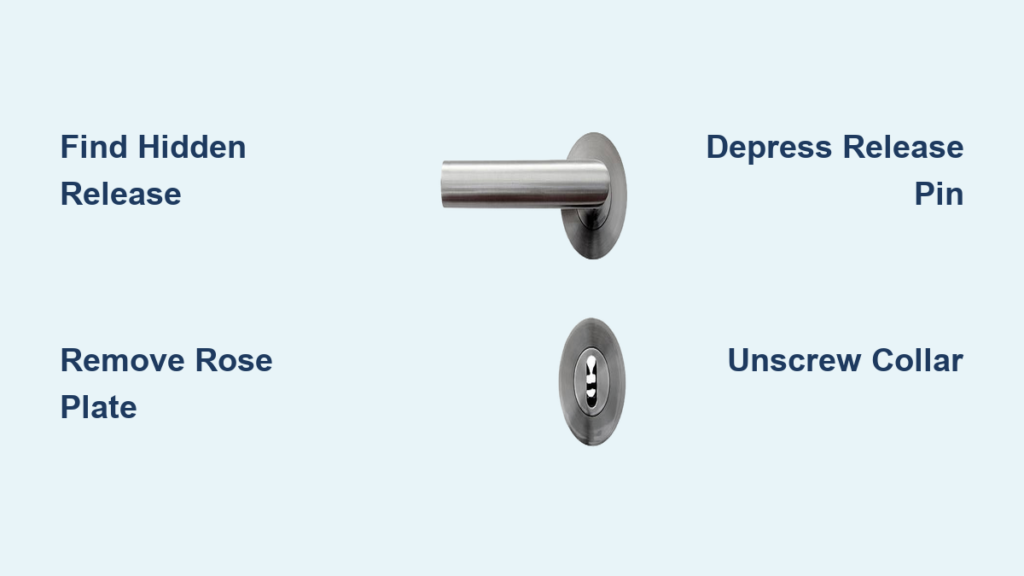
Find the Hidden Release Mechanism

Before applying force, inspect both sides of the knob carefully. Most screwless designs use one of several hidden systems: spring pins, removable roses, threaded collars, or internal retaining pins. Your first step is identification.
Use a flashlight and magnifying glass if needed. Look for small holes or divots near the base of the knob, seams or slots on the rose, rotatable collars between the knob and door, or brass pins visible through tiny openings. Once you spot a clue, match it to the mechanism type below.
Check for a Removable Rose Plate
Many lever-style and round knobs conceal screws under a decorative rose that snaps, twists, or slides off. Identifying whether you have a snap-on or twist-off rose determines your removal approach.
Remove a Snap-On Rose
Look for a small slot or nub on the edge of the rose. Insert a flat-head screwdriver into the slot and gently push inward. Some roses release with pressure, not twisting. If push doesn’t work, try twisting the screwdriver slightly to pop it off. Forcing a twist on a push-release rose can scratch or break the finish, so test both methods gently before applying more force.
Remove a Twist-Off Rose
Some models require a counter-clockwise turn to unlock. Grip the rose and rotate by hand, or use a soft cloth for better traction. Once removed, exposed screws will let you detach the lever base. A user who removed 15 vintage knobs confirmed: “Slide a flat screwdriver into that slot and twist. The plate came right off and revealed the screws.”
Depress the Internal Release Pin
Knobs from the 1950s through 1970s often use a spring-loaded pin hidden in the neck or base. This is common in Sargent and similar mid-century models. The pin must be fully depressed to release the retainer holding the knob on the spindle.
Locate the Pin Hole
Look for a tiny hole on the side of the knob shaft or near the door. It may appear as a dimple, recessed dot, or protruding brass pin. Use your magnifying glass if the hole is difficult to spot.
Release the Knob
Insert a small tool into the hole such as a 1/16″ Allen wrench, precision screwdriver, or small nail. Press the pin inward fully while holding it down, then pull the knob straight off the spindle. Repeat on the other side if needed. One user confirmed success: “That was it. I just knew it would be simple. Thanks!”
If the knob won’t come off, ensure the pin is fully depressed. Partial pressure won’t trigger release. Lubricate the spindle with WD-40 if it’s stiff or corroded.
Unscrew the Threaded Collar

Heavy-duty or exterior knobs often use threaded collars instead of screws. These are common on solid brass or commercial-grade hardware weighing up to 1.5 pounds per side. The collar sits between the knob and the door surface.
Identify the Collar
Look for a rotatable ring between the knob and the door. It may be flush or slightly raised with knurled or smooth edges. This mechanism is common on exterior doors because it provides extra security and durability.
Remove the Collar
Try unscrewing by hand, turning counter-clockwise. If stuck, wrap pliers in cloth and gently tighten to avoid marring. Use a strap wrench for better grip without scratching. Once both collars are off, slide the knobs off the spindle. One user noted: “I used large pliers to unscrew the collar on both sides, then had to pry it apart after an hour of confusion.”
Remove the latch bolt screws on the door edge first. This frees up space and reduces internal binding during removal.
Extract the L-Shaped Retaining Pin

Some vintage knobs use an L-shaped brass pin to hold the internal chassis together. This is common in multi-door systems from the mid-20th century where matching hardware was installed throughout a home.
Steps to Remove
First, remove one knob using the pin or collar method. Take off the rose plate to expose the internal mechanism. Look for an L-shaped pin through a small hole near the spindle. Use needle-nose pliers to pull the pin straight out. Now pull the entire mechanism from the opposite side. A firm yank may be needed if paint or warping has caused binding.
Free a Tab-and-Slot Chassis
Some modular vintage locks use four tabs and a retaining pin to lock the two halves together. The entire mechanism pulls through from one side, which can surprise homeowners who expect internal parts to stay inside the door.
How to Disassemble
Remove the inner knob and rose first. Look inside and you should see four tabs extending through slots. One tab has a pin through it. Remove it with needle-nose pliers. Go to the outer side of the door and pull the outer knob firmly. The whole unit should come out. If stuck, tap gently from the inside with a wood block and hammer to loosen tight fits.
Tools You Need for the Job
Having the right tools makes the difference between a five-minute job and a frustrating hour. Gather these items before starting.
The essential tools include a precision flat-head screwdriver for engaging rose slots or depressing pins, an Allen wrench in 1/16″ or 5/64″ sizes for triggering spring-loaded releases, needle-nose pliers for removing L-pins or retaining clips, cloth-wrapped pliers for unscrewing tight collars safely, a strap wrench to grip collars without scratching, a flashlight or headlamp to see into recessed areas, a utility knife to cut through paint sealing components, and a hammer with wood block for tapping stuck mechanisms loose. A magnifying glass helps spot tiny holes or slots you might otherwise miss.
Troubleshoot Common Problems
Even with the right method, things can go wrong. Here’s how to fix the most frequent issues.
Nothing Releases After Trying All Methods
Check both sides of the door because some mechanisms only release from one side. Score around the rose with a utility knife because paint may be sealing it shut. Try another identical knob in the house because one might have a broken part revealing the mechanism.
Knob Won’t Pull Off After Pressing the Pin
Make sure the pin is fully depressed because partial pressure won’t work. Lubricate the spindle with WD-40 if it’s stiff or corroded. Try twisting slightly while pulling because some models need alignment.
Mechanism Is Stuck After Disassembly
Remove the latch bolt screws on the door edge because this lets the latch move freely and reduces internal binding. Wiggle and pull because internal parts often catch on the latch housing. Tap from the inside with a wood block to loosen tight fits.
Decide: Repair, Reuse, or Replace
Before disassembling, ask whether this knob is worth saving. Consider both the practical and aesthetic value of your hardware.
Save the knob if you have matching knobs on multiple doors, it’s vintage or collectible with solid brass or manufacturer markings, or you plan to reuse it on closets, sheds, or secondary doors. One user explained: “I’m saving the knob to use on other doors since it matches four others in the house.”
Replace the knob if the finish is peeling or corroded, excessive force risks damaging the door, or new knobs cost only $7 to $10 which isn’t worth the hassle. As one practical advice-giver noted: “If it’s covered in paint and the finish is gone, skip the repair. New ones are cheap and easy to install.”
Special Cases to Watch For
Certain situations require extra attention because standard methods may not work.
Exterior door knobs often use heavier-duty collars or double pins and may require wrenches or pliers for removal. They’re more likely to have tighter tolerances due to weather exposure. Paint-sealed components from decades of paint can fuse roses, collars, or pins together. Use a utility knife to cut through paint lines before pulling and apply penetrating oil to help loosen stuck metal.
For unknown or unmarked brands, assume it uses a pin-release system common in vintage, a snap-on rose common in modern levers, or a threaded collar common in exterior doors. Search YouTube for visual help using terms like “remove Sargent 6 Line knob.”
Frequently Asked Questions About Changing Door Knobs Without Screws
How do I know if my door knob has hidden screws?
Look for small holes near the base, seams on the rose plate, a rotatable collar between the knob and door, or brass pins visible through openings. These are telltale signs of hidden fastening mechanisms.
Can I force the knob off if it’s stuck?
No. Forcing can damage the door or break the hardware. Instead, identify the mechanism type and apply the correct release method. Lubricate stuck parts with WD-40 or cut through paint seals with a utility knife.
What if my knob is painted over?
Paint can seal components together. Score around the rose or collar with a utility knife to break the paint seal before attempting removal. Apply penetrating oil to help loosen stuck metal parts.
Are vintage door knobs worth saving?
Yes, if they match other knobs in your home, have collectible value, or you plan to reuse them. Solid brass and manufacturer-marked pieces often have more value than modern replacements.
Do all screwless knobs use the same mechanism?
No. Different manufacturers and eras used different systems. Some use pins, others use collars, roses, or retaining pins. Systematically check all common types to find what works for your specific knob.
Key Takeaways for Changing Door Knobs Without Screws
Changing a door knob without screws isn’t about force. It’s about finding the hidden release mechanism designed into the hardware. Whether it’s a pin, collar, rose, or internal pin, the mechanism is designed to come apart cleanly with the right approach.
Start by inspecting both sides of the knob for holes, slots, or collars. Then methodically try rose removal with push or twist techniques, test pin depression with a small tool, unscrew collars if present, and extract any retaining pins you find. Always remove the latch bolt screws on the door edge to reduce binding during extraction.
With patience and the right tools, you can remove, replace, or reuse any screwless knob while preserving both your door and your sanity. The investment in learning the correct method pays off when you avoid damaging expensive vintage hardware or your door itself.


