
A faulty or compromised door lock cylinder puts your home or vehicle security at risk. Whether you’ve lost your keys, moved into a new property, or need to upgrade to a higher-security model, changing the cylinder yourself saves money and provides peace of mind. This guide covers residential, commercial, and automotive lock cylinders with step-by-step instructions, tool recommendations, and troubleshooting advice.
You’ll learn how to identify your lock type, measure for the correct replacement, remove the old cylinder safely, and install the new unit without damaging your door or mechanism. We also cover when professional help is needed and how to maintain your new lock for years of reliable operation.
Identify Your Lock Type First
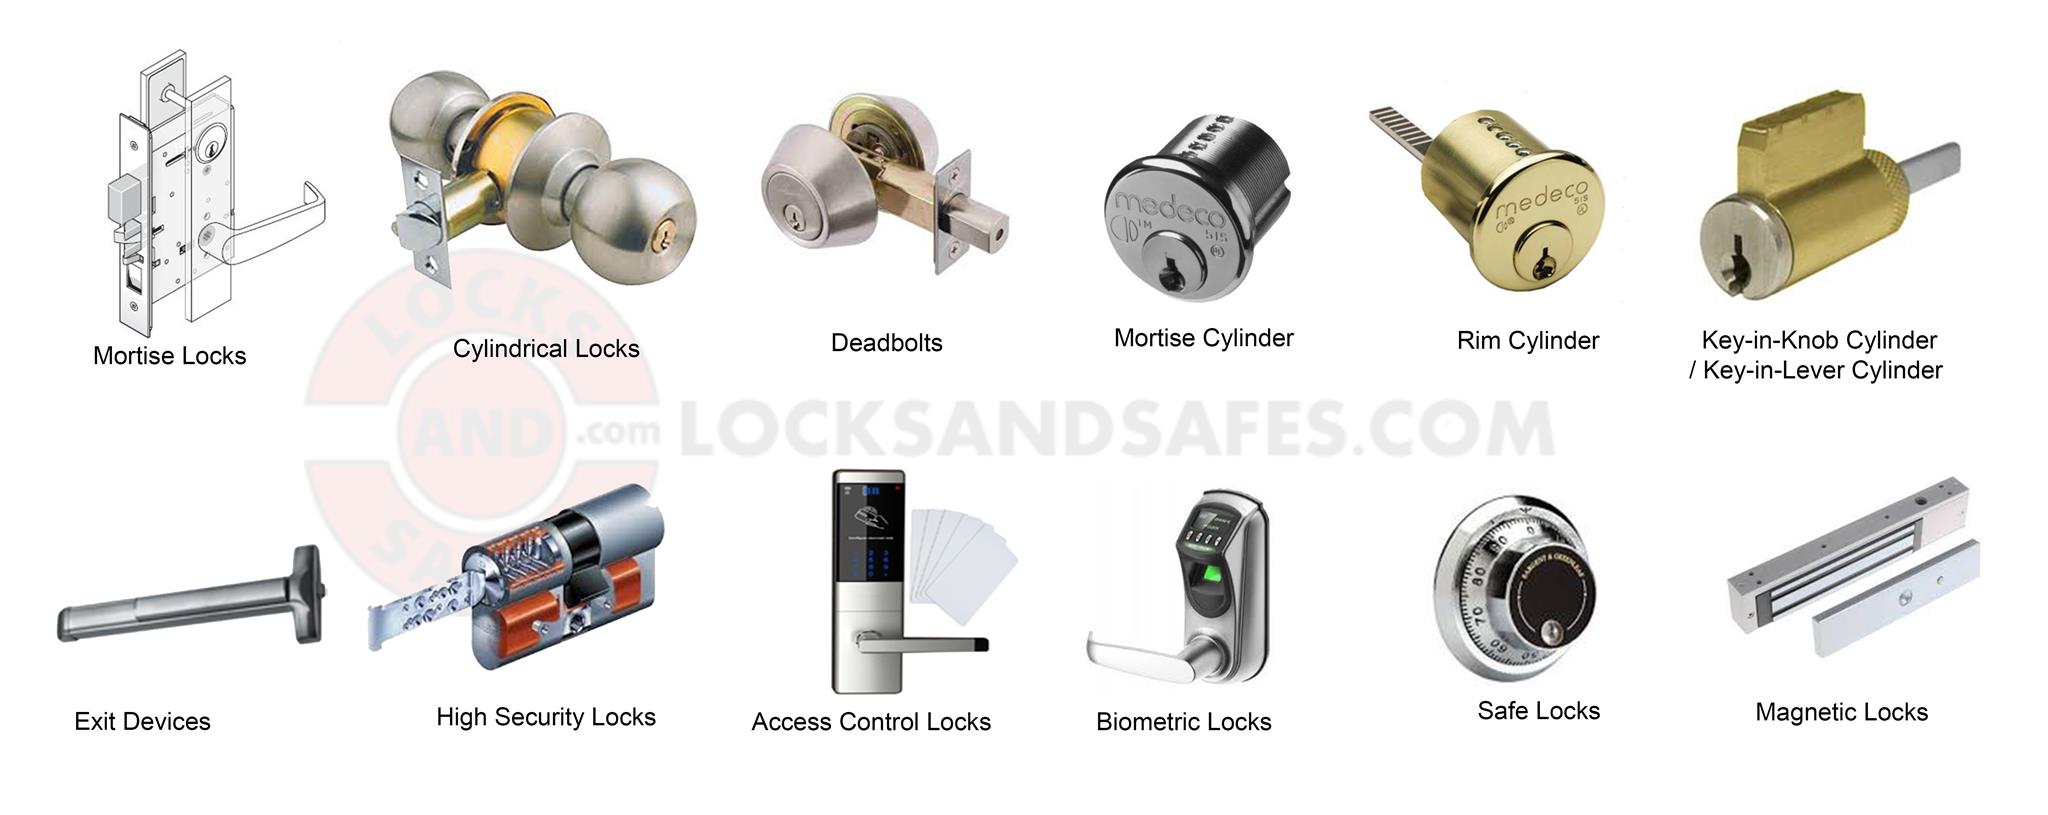
Lock cylinders vary significantly in design and removal method. Identifying your specific type before purchasing a replacement prevents compatibility issues and wasted trips to the hardware store.
Common Residential Lock Types
Cylindrical locks appear in standard doorknobs and deadbolts from brands like Schlage and Kwikset. A horizontal retaining screw on the door edge secures the cylinder in place. Euro profile cylinders dominate uPVC and composite doors in Europe with symmetrical designs and side-mounted retaining screws. Mortise locks embed into the door edge in older homes and require deeper pocket modifications. Nightlatches (Yale-style) mount on the door surface and use connecting bars to engage the strike plate.
Commercial and Automotive Variants
Interchangeable core cylinders let property managers change locks quickly using control keys without removing the entire hardware. Storefront locks thread into commercial glass doors like bolts. Automotive door lock cylinders connect to linkage rods inside the door panel and may include electrical connectors for power locks. Ignition cylinders in vehicles integrate with immobilizer electronics and steering lock mechanisms.
Pro Tip: Photograph your lock and search by brand plus model number (often stamped on the faceplate) to confirm the exact type before buying replacement parts.
Gather the Right Tools
Having proper tools on hand prevents door damage and makes the job proceed smoothly. Missing equipment forces improvised solutions that often cause problems later.
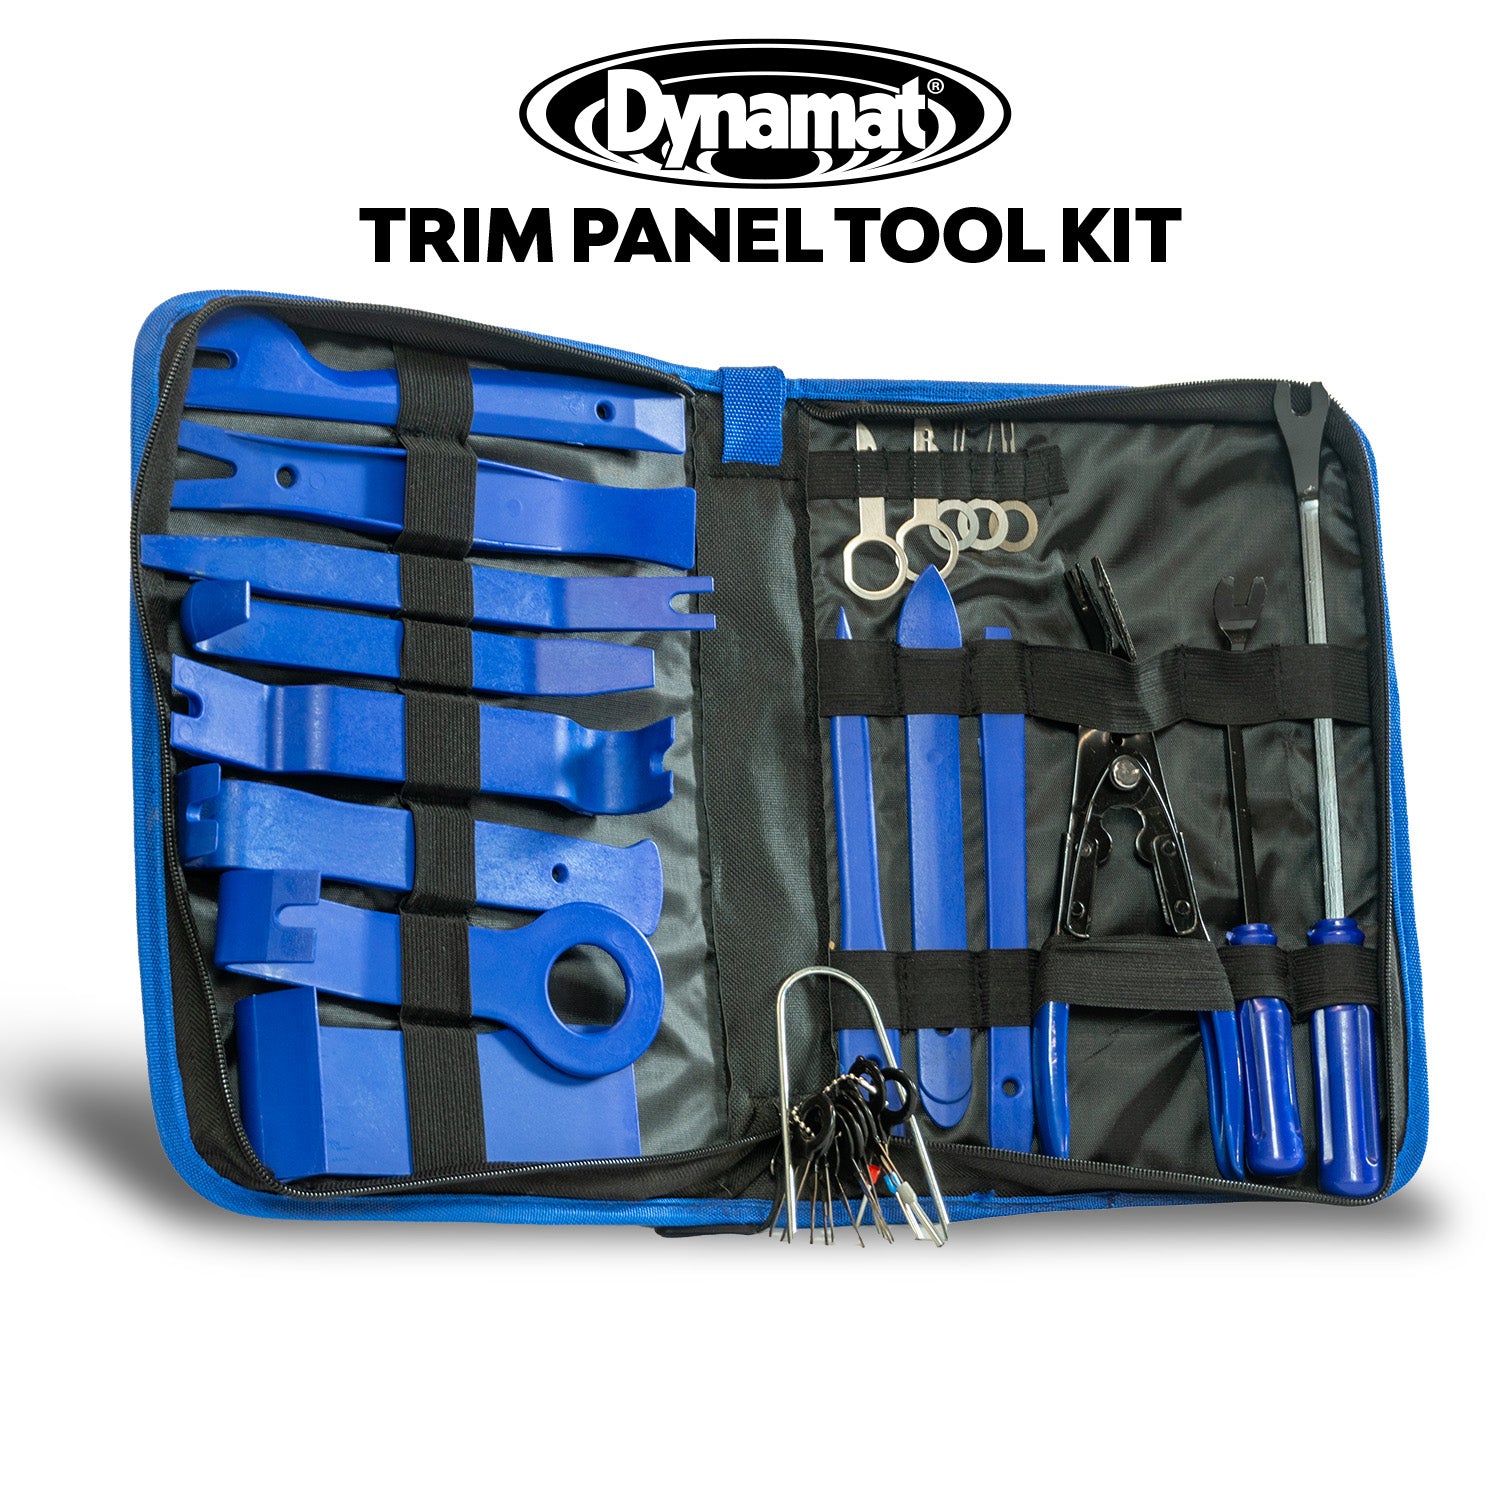
Essential Tools for Cylinder Replacement
A screwdriver set covering Phillips and flathead sizes handles most residential and commercial screws. A 2.5mm Allen key releases ignition lock cylinders. A measuring tape records cylinder dimensions accurately. A flashlight illuminates tight spaces inside door panels. Plastic pry tools remove automotive trim without scratching surfaces. A magnetic tray or sectioned container keeps screws organized during disassembly.
Optional Tools for Special Situations
A hacksaw trims connecting bars on nightlatches. A chisel and hammer modify wood for mortise lock pockets. Silicone grease or dry graphite spray lubricates the new cylinder smoothly. Avoid oil-based products like WD-40 because they attract dirt and gum up mechanisms over time.
Pro Tip: Label each screw with tape noting its location. Automotive applications often use multiple screw sizes, and mixing them causes fitting problems during reassembly.
Measure the Old Cylinder Accurately
Ordering the wrong size cylinder ranks as the most common DIY mistake. Taking precise measurements before purchasing prevents this costly error.
Measuring Residential Cylinders
Open the door fully. Insert the key into the cylinder. Measure from the center of the retaining screw to the outer face of the lock, then repeat for the inner face. Record both measurements separately because many cylinders are asymmetric. For example, a 30mm outside measurement and 40mm inside measurement indicates a 70mm total length cylinder.
Standard euro cylinder sizes include 40/40, 45/45, 50/50, or mixed combinations like 35/50. Always record both values rather than assuming symmetry.
Measuring Commercial and Automotive Units
Storefront cylinders require measuring thread length (typically 1″, 1.25″, or 1.5″) and confirming thread type. Mortise locks need the backset measurement from keyhole center to door edge. Automotive door cylinders often sold as assemblies include gaskets and linkage components. Always compare manufacturer part numbers when possible.
Warning: A 5mm size difference prevents proper bolt throw or causes misalignment that binding the lock mechanism.
Remove the Old Cylinder Safely
Each lock type has a specific removal sequence. Following the correct procedure avoids breaking the cylinder or damaging the door.
Removing Cylindrical Residential Locks
Remove door handles if they obstruct access by unscrewing mounting screws. Locate the horizontal retaining screw on the door edge. Insert the key and turn 10 to 45 degrees (not fully). This partial rotation disengages the cam from the lock body. Pull the cylinder straight out. If resistance occurs, adjust the key position slightly and try again. Never force the cylinder because this damages the cam.
Removing Euro Profile Cylinders
Find the retaining screw beside the cylinder on the door edge. Loosen the screw without fully removing it. Insert the key and turn 15 to 45 degrees. Pull the cylinder out from either side. The symmetrical design allows removal in either direction.
Removing Interchangeable Core Cylinders
Turn the operating key 1/8 to 1/4 turn clockwise. Push the cylinder from the opposite side. It slides out when properly disengaged. Insert the new core while holding the key in the turned position, then rotate back to lock it in place. Some models use a set screw instead of a control key.
Removing Storefront Threaded Cylinders
Remove faceplate screws and take off the faceplate. Loosen the set screw near the cylinder base. Insert a mismatched key into the keyhole as a wrench. Turn counter-clockwise to unthread the old cylinder. Thread the new cylinder clockwise until the keyhole faces downward, then tighten the set screw.
Caution: Forcing stripped threads requires replacement of the entire lock case. Back off and realign if resistance occurs during removal.
Replace Automotive Door Lock Cylinders
Car door lock cylinders require interior trim removal but remain manageable for patient DIYers with proper documentation.
Removing the Automotive Cylinder
Open the door fully and disconnect the battery (optional but recommended for safety). Remove the interior door panel using plastic pry tools around the edges. Take photos during disassembly for reference. Disconnect any electrical connectors for power locks or sensors. Remove screws or clips securing the cylinder. Pull the old cylinder out carefully while watching for plastic lugs that align with the mechanism.
Installing the New Automotive Cylinder
Clean the bore thoroughly and inspect for corrosion. Lubricate the new cylinder with silicone grease before insertion. Align the lugs and push the cylinder into position. Secure with fasteners torqued to 5 to 10 Nm. Reconnect electrical connectors. Reinstall the trim panel ensuring all clips snap fully into place. Test the lock function using both the key and power lock button.
Pro Tip: Use OEM replacement parts. Aftermarket cylinders often lack proper gaskets or linkage components, causing premature failure.
Handle Ignition Lock Cylinder Replacement
Vehicle ignition cylinders involve immobilizer electronics. Mechanical fit does not guarantee functional operation.
Removing the Ignition Cylinder
Locate the access hole under the steering column (the middle hole on many Ford vehicles). Insert the key into the ignition without turning it. Insert a 2.5mm Allen key into the access hole and press upward to release the internal pin. Turn the key clockwise and listen for two distinct clicks indicating proper release. Pull the cylinder out while the key remains inserted.
Installing the New Ignition Cylinder
Insert the new cylinder with the key already in the ignition barrel. Push inward while twisting slightly. A click confirms proper locking. Test ignition by starting the engine and checking that accessories function properly. Verify the steering wheel unlocks normally.
Critical: Transponder keys require dealer or locksmith programming. The mechanical fit may be perfect, but the immobilizer system prevents engine starting without proper electronic pairing. Purchase OEM programmed cylinder-key sets matched to your VIN for best results.
Install and Align the New Cylinder
Proper alignment ensures smooth operation and extends the life of your new lock cylinder.
Insert with Key in Place
Always insert the new cylinder with the key already inserted. This aligns the cam (tailpiece) with the internal mechanism automatically. Align the cam with the lock body before pushing the cylinder fully into position.
Secure Without Over-Tightening
Tighten the retaining screw firmly to secure the cylinder, but avoid over-tightening. Excessive pressure binds the cylinder and prevents smooth rotation. For euro locks, ensure the cylinder seats fully before tightening the side screw.
Adjust Connecting Bars for Nightlatches
Cut the connecting bar with a fine-tooth hacksaw so it projects 12mm beyond the mounting plate. Position the mounting plate 1.5mm from the door edge. Align arrows on the lock case and plate before tightening all fasteners. Use the original lock case as a template to mark the strike plate position on the door frame.
Test the Lock Thoroughly
Skipping tests creates problems that become much harder to fix after reassembly. Always verify function before finishing the job.
Residential Lock Testing
Turn the key multiple times from both inside and outside positions. Check that deadbolts extend fully and retract smoothly. Operate the door handle and ensure it lifts freely without binding. If binding occurs, loosen the retaining screw, realign the cam, and retighten.
Automotive Lock Testing
Turn the key both directions to verify lock and unlock functions. Test power lock operation using the key fob and interior switches. Confirm the door handle still operates properly. Check that no warning lights appear on the dashboard.
Ignition System Testing
Start the engine and let it run for several minutes. Verify the steering wheel unlocks normally. Check that all dashboard accessories function properly. Ensure no warning lights remain illuminated after startup.
Troubleshoot Common Installation Issues
Even careful work sometimes produces unexpected results. These solutions address frequent problems.
Cylinder Won’t Come Out
The key likely hasn’t turned enough to disengage the cam. Turn the key 10 to 45 degrees (partial rotation) before pulling. Full rotation does not release the cylinder on most models.
Handle Doesn’t Lift After Installation
The cam is misaligned inside the lock body. Remove the cylinder and reinsert with the key turned slightly. This aligns the cam with the internal mechanism properly.
Deadbolt Doesn’t Extend Fully
The connecting bar length is incorrect. Adjust the bar to project exactly 12mm beyond the mounting plate for nightlatches. Measure and recut if necessary.
Key Turns But Lock Doesn’t Engage (Automotive)
The linkage rod disconnected during installation. Access the linkage from inside the door and reconnect the rod to the cylinder arm.
Engine Won’t Start After Ignition Cylinder Replacement
The transponder key isn’t programmed to the vehicle. Visit a dealer or certified locksmith for immobilizer system reset or key programming.
Pro Tip: Video record the entire disassembly process. Reassembly becomes straightforward when you can watch exactly how everything connected.
When to Call a Professional
Some situations justify calling an expert rather than continuing as a DIY project.
Situations Requiring Professional Help
Seized or broken cylinders risk damaging the door frame or bore. Cracked trim or corroded bores may need structural repair. Electronic immobilizer systems require programming tools and dealer access. Transponder key systems need specialized equipment. Complex linkage mechanisms in vehicles easily misalign without proper experience. Uncertainty about trim removal risks breaking clips or damaging upholstery.
Why Professional Service Matters
Certified locksmiths and auto technicians have specialized extraction tools, OEM parts access, and key programming software. They handle high-security cylinders, legacy systems like Weslock models, and complex automotive electronics regularly. The cost of professional service often proves cheaper than repairing DIY mistakes.
Frequently Asked Questions About Changing Door Lock Cylinders
How long does it take to replace a door lock cylinder?
Most residential cylindrical locks take 15 to 30 minutes for experienced DIYers. Euro profile cylinders and interchangeable cores require similar time. Automotive door cylinders take 1 to 2 hours due to trim removal. Ignition cylinders average 30 to 60 minutes plus programming time if needed.
Can I replace just the cylinder or do I need to replace the entire lock?
You can replace only the cylinder in most cases. This works when the lock body and mechanism remain functional. However, if the entire hardware shows wear or you’re upgrading security, replacing the complete lock set may provide better results.
What happens if I buy the wrong size cylinder?
The cylinder won’t insert properly or won’t engage the mechanism. Binding occurs during operation, eventually causing failure. Always measure both sides of the existing cylinder and confirm manufacturer part numbers before purchasing.
Do I need to lubricate the new lock cylinder?
Yes. Apply silicone grease or dry graphite spray to the cylinder before installation. This ensures smooth operation and protects against moisture. Avoid oil-based products like WD-40 because they attract dirt and gum up internal pins over time.
Can I rekey instead of replacing the cylinder?
Yes, a locksmith can rekey most cylinders by changing the internal pin configuration. This lets you use an existing key with new hardware. However, rekeying costs nearly as much as replacement and doesn’t upgrade security features.
Is it legal to replace my own car door lock cylinder?
Yes, vehicle owners can replace their own door lock cylinders. However, ignition cylinders with transponder keys require programming to match your VIN. Aftermarket keys may not integrate with the immobilizer system, so OEM replacement is typically recommended.
Key Takeaways for Changing Your Door Lock Cylinder
Changing a door lock cylinder is a straightforward DIY project when you understand your lock type and follow precise steps. Identify whether you have a cylindrical, euro profile, mortise, nightlatch, interchangeable core, storefront, or automotive cylinder before purchasing replacement parts. Measure both the external and internal lengths accurately to ensure compatibility.
Gather appropriate tools including screwdrivers, Allen keys, measuring tape, and plastic pry tools for automotive work. Remove the old cylinder by turning the key 10 to 45 degrees (not fully) to disengage the cam before pulling. Install the new cylinder with the key already inserted, align the cam properly, and secure without over-tightening.
Test all functions thoroughly before reassembling trim panels. Lubricate with silicone grease or dry graphite spray, never oil-based products. For automotive ignition cylinders, expect to need dealer programming for transponder keys. When in doubt about compatibility, electronic systems, or trim removal, call a certified locksmith or automotive technician.
This guide gives you confidence to handle most cylinder replacements safely and correctly, saving time and money while improving your security.


