
A damaged door frame can compromise your home’s security, energy efficiency, and appearance. Whether you’ve got a kick-damaged strike plate, a rotted exterior jamb, or a cracked hinge post, knowing how to repair a door frame is one of the most practical DIY skills a homeowner can have. The good news? Most repairs take just a few hours with basic tools and materials.
Ignoring a split or weakened jamb can lead to failed locks, drafts, and even forced entry. But with the right approach, you can restore strength and appearance. This guide covers every repair method based on damage type, location, and security needs. You’ll learn how to assess damage accurately, choose between repair and replacement, and execute professional-quality fixes that last.
Assess the Damage First
Before grabbing tools, inspect the frame thoroughly. Misdiagnosing the issue leads to weak repairs and recurring problems.
Identify the Cause of Damage
Knowing why the frame failed helps prevent future issues. Common causes include forced entry near the strike plate, moisture rot at exterior bottoms, poor installation with short screws or no shims, structural settling creating gaps, and age-related wear from repeated stress. If the door sticks or won’t latch, don’t assume it’s the frame first. Check hinges and door alignment.
Tap and Probe for Hidden Weakness
Use simple tests to find soft or hollow spots. The tap test involves striking the jamb with a screwdriver handle. A dull thud indicates rot while a sharp knock means solid wood. The probe test uses an awl or thin screwdriver inserted into suspect areas. Easy penetration signals decayed wood. Also look for cracks, mismatched filler, peeling paint as a moisture clue, or gaps behind trim.
Test Door Operation
Close the door slowly and observe whether it rubs at the top, bottom, or side. Check if the latch catches smoothly and whether the deadbolt binds. Misalignment may mean the frame is twisted or hinges are loose rather than the jamb being damaged.
Essential Tools for Frame Repair
Gather these before starting. Most are common in home toolkits.
Must-Have Tools
You need a pry bar or super bar to remove casing without tearing drywall. A drill or impact driver drives screws and drills pilot holes. An oscillating multi-tool cuts out damaged wood precisely. A half-inch chisel cleans strike plate mortises. A four-foot level ensures the jamb is plumb. A carpenter’s square verifies 90-degree corners. Spade bits in half-inch, five-eighths, and one-inch sizes drill recesses for hardware. A utility knife cuts caulk lines before prying. Side cutters clip nail ends safely. A rubber mallet taps parts into place gently.
Helpful Add-Ons
A T-bevel or angle finder matches old bevels on exterior patches. A glue injector or syringe pushes adhesive deep into cracks. An orbital sander smooths filled areas fast.
Fix a Split Jamb: Glue and Clamp Method
This method works perfectly for cracked hinge or strike zones on interior doors where the wood is still solid.
Open and Inject Glue
Remove hardware by unscrewing the strike plate, latch, and deadbolt. Widen the crack slightly using a thin chisel or wedge to open the split. Inject Titebond III using a syringe or stick to push waterproof wood glue deep into the seam. Use enough glue for it to squeeze out around the whole edge. If no squeeze-out appears, you didn’t use enough. Clamp tightly with bar clamps across the crack. Wipe excess glue with a damp sponge. Let cure for 12 to 24 hours.
Reinforce with Long Screws
After glue sets, pre-drill holes through the jamb. Drive three-inch deck screws into the wall stud every four to six inches. Countersink and fill holes with wood filler. This turns the jamb into a structural extension of the stud.
Finish Like New
Sand smooth with 120-grit then 220-grit paper. Fill minor gaps with white wood filler or painter’s caulk. Prime with BIN or Zinsser Cover Stain to block bleed-through. Paint to match with two coats for durability.
Patch Localized Damage: Cut-Out and Insert
This approach is ideal for busted-out strike plate areas where damage is contained.
Remove Damaged Wood
Use an oscillating tool or chisel to cut out splintered or crushed wood. Square the edges for a clean fit.
Install Solid Wood Block
Cut a replacement block from scrap wood of the same thickness. Test fit. It should sit flush and snug. Apply PL400 construction adhesive or epoxy filler. Insert block and clamp until set. Reinforce with three-inch screws into the stud if possible.
Re-Drill for Hardware
Close the door and mark latch position with a pencil. Drill a recess with a five-eighths-inch spade bit to half-inch depth. Chisel flat so the strike plate sits flush. Drill through-bolt hole if needed.
Replace the Entire Jamb: Full Frame Swap
This is the best approach for exterior doors, severe damage, or when preparing your home for sale.
Remove Old Frame
Remove weather-stripping and hardware. Cut the caulk line with a utility knife. Pry off casing with a super bar. Clip nail ends with side cutters. Extract the jamb leg. It may come out in pieces.
Prep the Opening
Clear debris and old shims. Check for rot or pests. Insert half-inch wood filler blocks into gaps behind framing. Screw blocks in place with two-and-a-half-inch screws. This creates a solid base for the new jamb.
Install New Jamb Leg
Cut a one-by-five board to length, typically 81 and a half inches for an 80-inch door. Test fit and add a thin shim if needed. Position and secure with two-and-a-half-inch wood screws into the stud at top, middle, and bottom. Pre-drill to avoid splitting.
Reattach Casing and Stop
Use pre-mitered trim or cut 45-degree angles with a miter saw. Nail with 18-gauge brad nails and countersink slightly. Install stop molding by notching behind the jamb with a five-eighths-inch bit. Close the door to test fit, then secure.
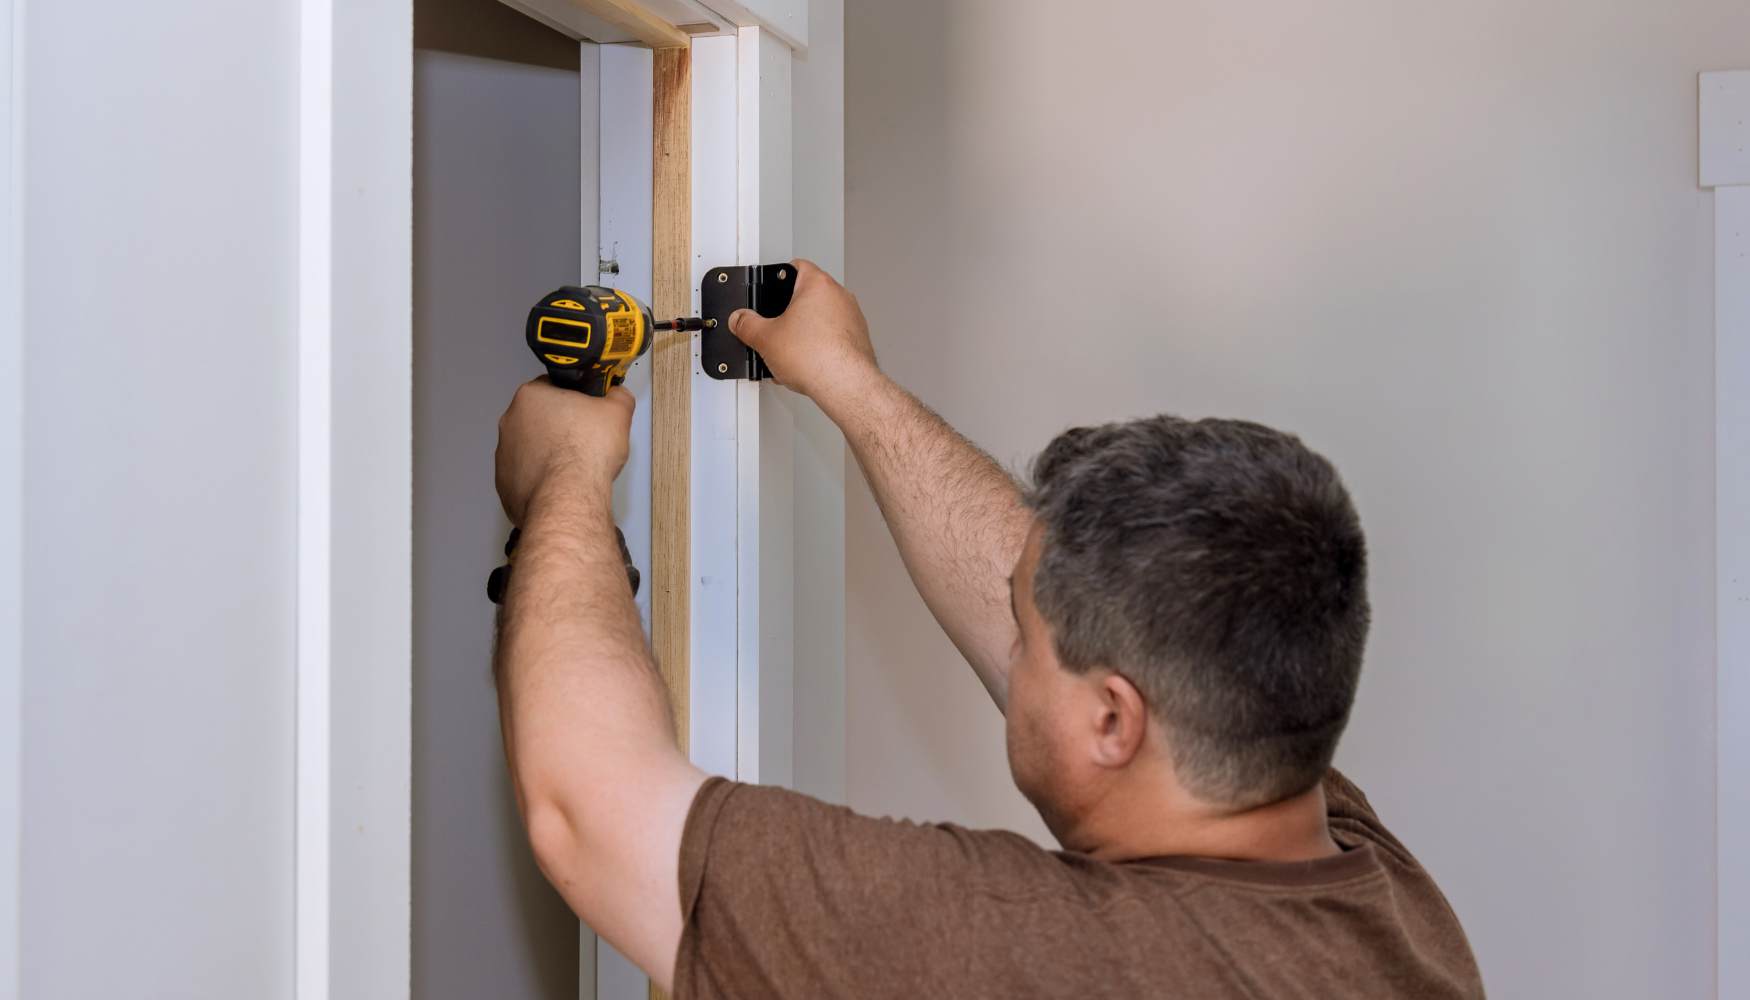
Reinstall Hardware
Transfer latch and deadbolt positions from door to jamb. Drill and chisel recesses as needed. Secure with screws.
Fix Rotted Bottom: PVC Patch with 45 Degree Bevel
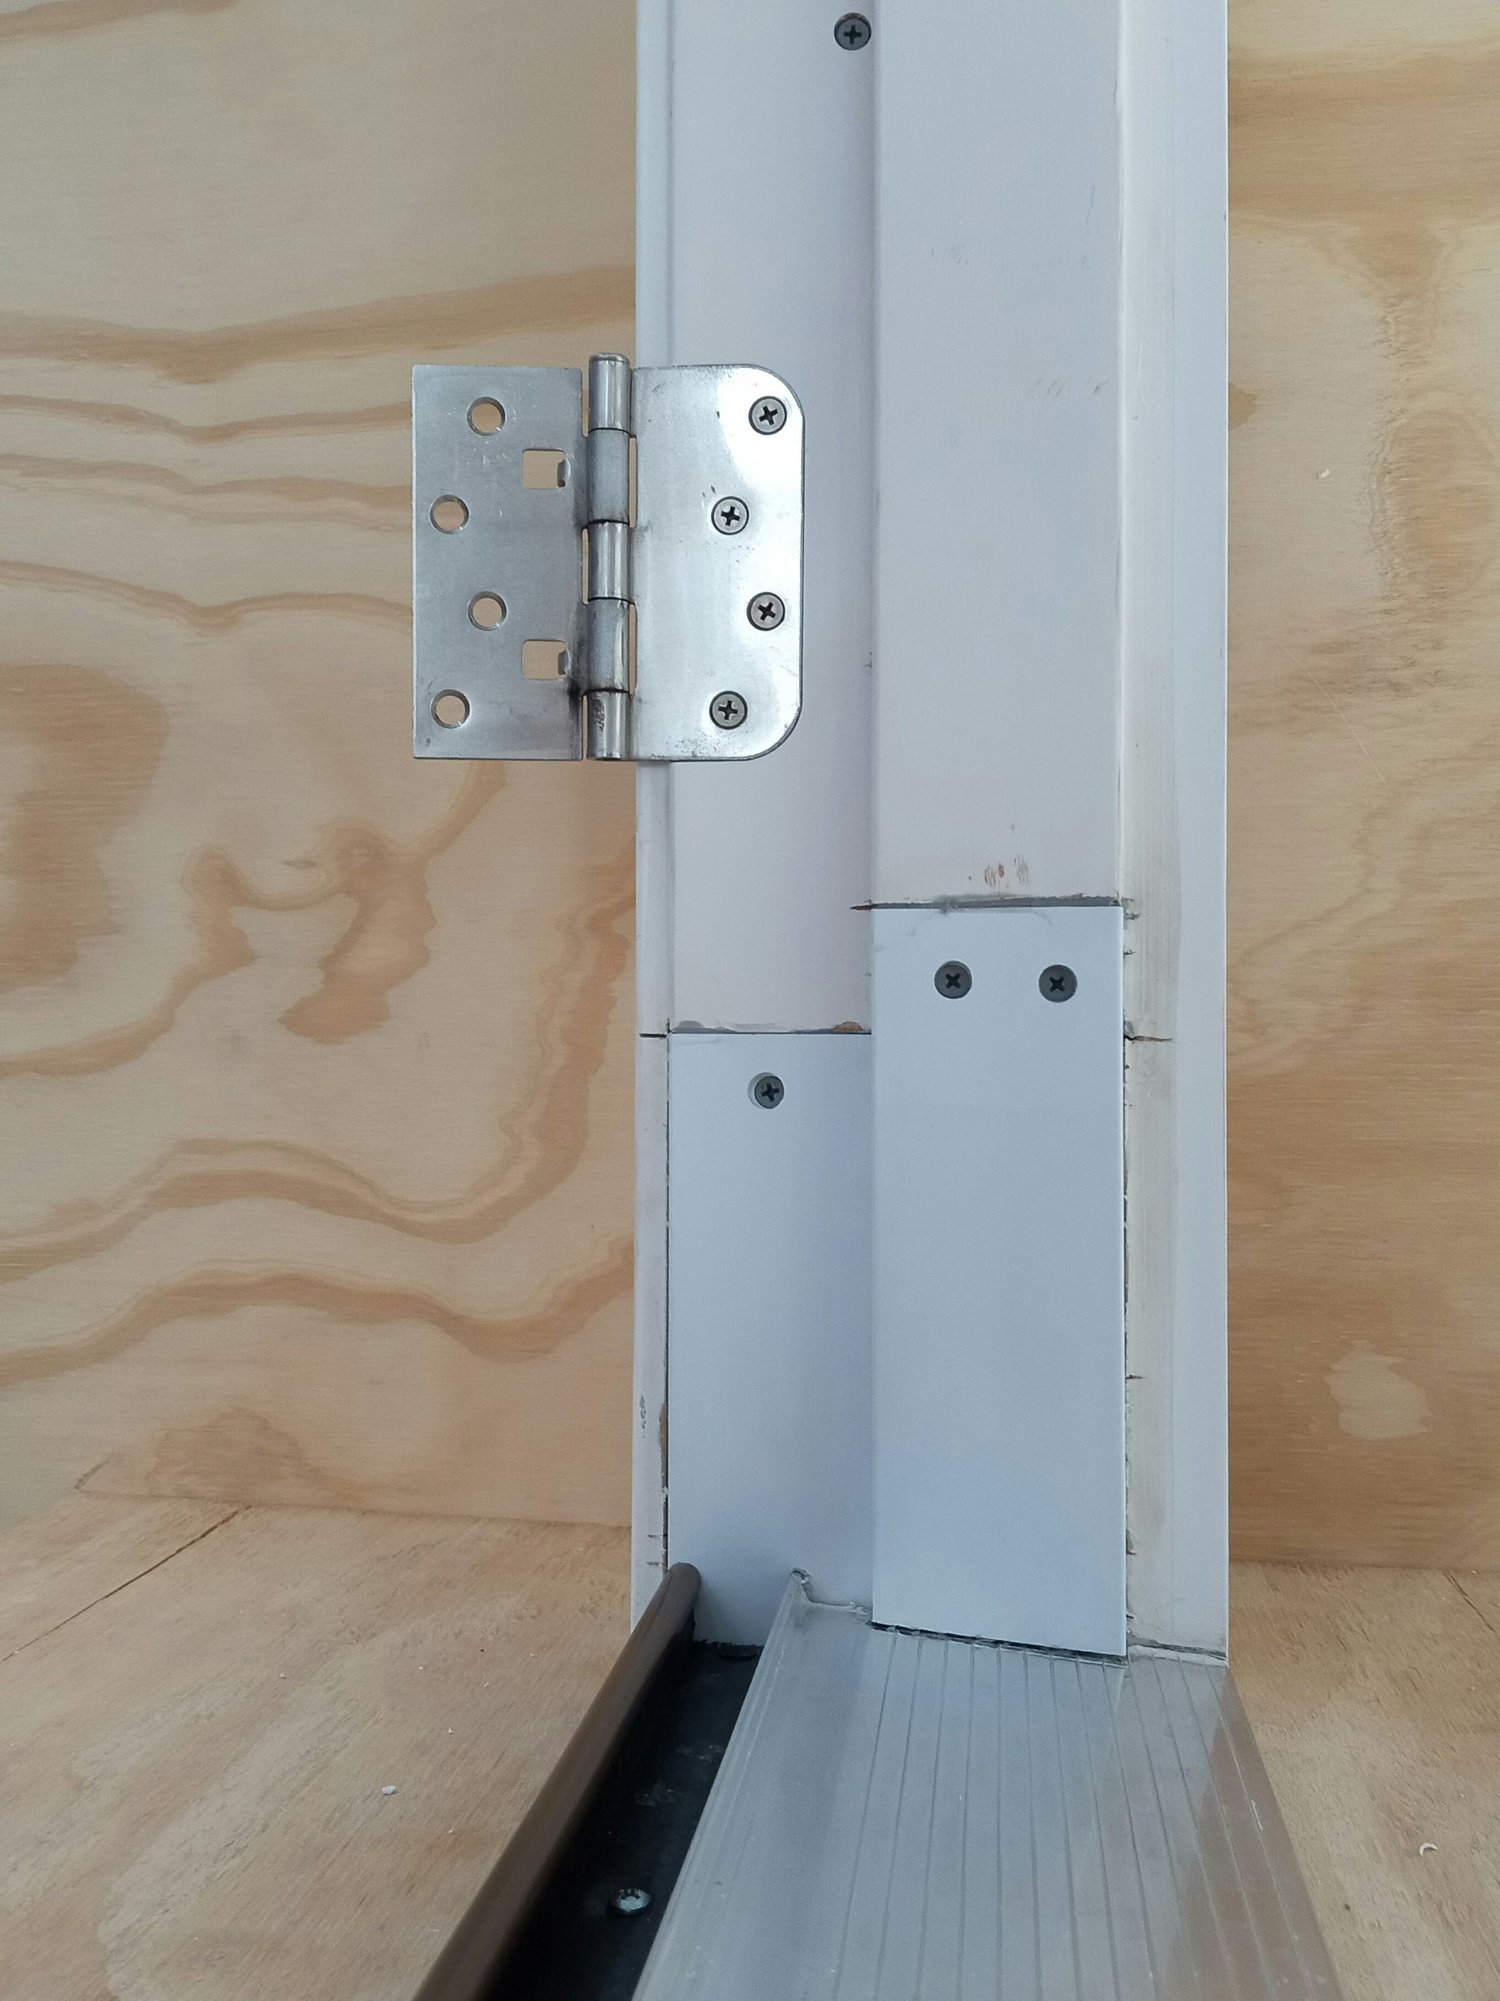
This long-lasting fix works for exterior door rot at the bottom of the jamb.
Cut Out Rotted Section
Remove casing. Probe upward to find solid wood. Mark the cut point. Make an outward-facing 45-degree bevel with a handsaw or oscillating tool. This sheds water away from the joint.
Fit and Attach PVC Patch
Cut Veranda PVC trim to match the angle and height. Use a straight backer block behind the bevel for support. Apply PVC cement or epoxy. Secure from behind with GRK screws or brad nails. Shim and level for perfect alignment.
Seal and Finish
Fill the joint with Bondo. Mix with hardener until green-blue and work fast. It sets in about two minutes. Shape with a chisel after 10 to 25 minutes. Sand with 120 grit. Apply white wood filler for final smoothing. Prime with oil-based Zinsser Cover Stain. Paint with exterior semi-gloss, two coats. Apply silicone caulk at the bottom edge to create a weep channel.
Boost Security: Reinforce the Strike Zone

A strong repair means nothing if it can’t stop a kick-in.
Upgrade to 3-Inch Screws
Replace factory three-quarter-inch strike plate screws with three-inch deck screws. Pre-drill to prevent splitting. Screws must anchor into the wall stud. Three inches spreads the force to the studs behind the jamb.
Install a Jamb Reinforcement Kit
Products like the U-11026 Jamb Repair Kit add steel protection. Screws go over the strike area without full replacement needed. This increases resistance to forced entry.
Replace Entire Door System for Exterior Entries
For garage or main entry doors, replace both door and frame. This ensures proper weather sealing, alignment, and maximum security. It also avoids liability if a weak repair fails during a break-in.
Finish Like a Pro: Paint and Caulk Right
A seamless finish hides the repair and protects against moisture.
Sand and Prime
Sand filled areas progressively. Go from 120 to 180 to 220 grit. Wipe with tack cloth. Apply alcohol-based BIN or oil-based Zinsser Cover Stain. This prevents tannin bleed and ensures paint adhesion.
Match Paint Exactly
Use a paint-matching app or bring a sample to the store. Apply with a high-quality brush or mini roller. Two coats are recommended, especially for exteriors.
Caulk All Joints
Use paintable caulk on top and sides. Use silicone caulk at the bottom exterior edge to allow drainage. Tool with a damp finger for a smooth finish.
Prevent Future Damage
Avoid repeat repairs with these proactive steps.
Stop Moisture Intrusion
Install gutters with downspout extensions. Ensure ground slopes away from foundation. Seal all exterior joints with paintable or silicone caulk.
Allow for Seasonal Movement
Leave slight gaps in joints. Wood expands and contracts with temperature changes. Don’t over-tighten screws near corners.
Annual Inspection
Check every year for soft spots, paint blistering, gaps behind casing, and loose hardware. Catching rot early saves hundreds in repairs.
Frequently Asked Questions About Door Frame Repair
Can I repair a door frame myself, or do I need a pro?
You can handle most interior door frame repairs yourself with basic tools. However, hire a professional for exterior doors, security doors, or if you see widespread rot or insect damage.
How long does a door frame repair last?
A proper glue-and-clamp repair lasts 10 to 20 years for interior doors. PVC patches on exterior doors last 20 to 30 years with correct installation.
What’s the fastest way to fix a cracked door frame?
The fastest approach uses super glue and tape. Apply glue to the crack, press together, and wrap with tape. Leave tape on for 24 hours. This works for small splits on interior doors.
Should I repair or replace a rotted door frame?
Replace if rot affects more than six inches of the jamb or sits on an exterior door. Repair works for small, localized rot spots on interior frames.
How much does professional door frame replacement cost?
Professional replacement runs $100 to $400 depending on your location and door type. You can find someone local who would do it for about $100.
Key Takeaways for Repairing Your Door Frame
Choosing the right repair method depends entirely on damage severity and door location. Minor cracks respond well to glue and clamp with screw reinforcement. Localized strike plate damage calls for cut-out and insert patches. Rotted exterior bottoms need PVC patches with 45-degree bevels to shed water. Full jamb replacement is the gold standard for exterior doors and forced-entry damage.
Focus on three things for lasting results. First, use structural reinforcement with three-inch screws into wall studs rather than relying on filler alone. Second, protect against moisture with proper sealing, drainage angles, and PVC materials for exteriors. Third, finish professionally with correct priming, paint matching, and caulking.
With the right method, tools, and finishing touches, you can repair a door frame that’s stronger and better-looking than before. Your repair will last for years when done right.


