
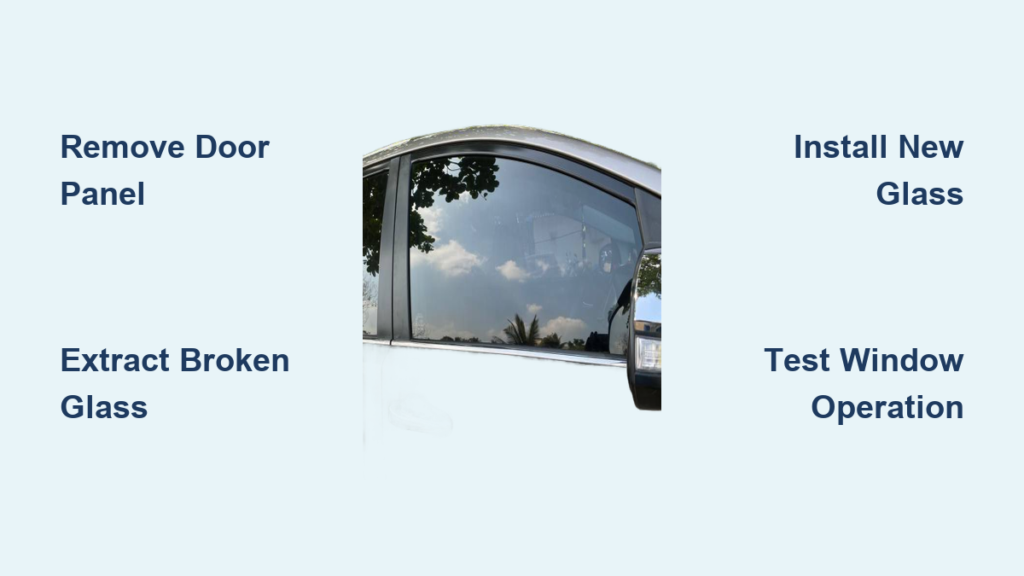
A broken car door window is more than just an inconvenience. It compromises your vehicle’s security, exposes the interior to weather damage, and makes driving uncomfortable. Whether shattered by vandalism, an accident, or mechanical failure, replacing a car door window is a repair you can tackle yourself with basic tools and careful execution. This guide walks you through every stage of the process, from removing the door panel to testing the final installation.
While side windows are made of tempered glass and cannot be repaired like windshields, they can be replaced without replacing the entire door mechanism. You will reuse the window regulator and motor in most cases, focusing only on extracting the broken pane and installing a new one. With proper safety gear, a few hours, and under $100 (or much less with salvaged glass), you can restore full functionality and avoid costly shop bills.
Essential Tools and Materials for Window Replacement
Before starting, gather all necessary tools and materials to avoid mid-job interruptions.
Tools you will need:
– Plastic trim removal tool for safely detaching door panel clips
– Phillips screwdriver for standard screws
– Torx screwdriver set for hidden fasteners
– Socket set with 10mm and 12mm sockets
– Magnetic parts tray to prevent losing screws
– Alligator clips and 12V power source for manual window operation
– Flashlight for visibility in dark door cavities
– Shop vacuum for glass debris
Protective equipment required:
– Cut-resistant gloves to protect hands from glass shards
– Safety glasses or goggles to prevent eye injury
– N95 face mask to minimize glass dust inhalation
Consumables to have on hand:
– New window glass (OEM, OEE, or salvaged)
– Rubber weatherstrip seal
– Vapor barrier replacement
– Butyl tape or weatherstrip adhesive
– Silicone-based lubricant
– Dielectric grease for electrical connectors
Safety Precautions Before Starting
Working with tempered glass requires strict safety protocols to prevent injury.
Critical electrical safety: Always disconnect the negative battery terminal before starting work. This eliminates the risk of electrical shorts, accidental window activation, or airbag deployment. For hybrid vehicles, the 12V battery may be located in the trunk, but disconnecting it still safely disables critical systems.
Glass handling safety: Wear gloves and safety glasses at all times during the replacement process. Tempered glass breaks into sharp pieces that can cause deep cuts even after initial breakage. Handle glass by the edges only, and never apply direct pressure to intact panes.
Work environment safety: Work in a clean, well-lit area to reduce the risk of losing small parts and improve precision. Keep children and pets away from the workspace. Use a shop vacuum to thoroughly remove all glass fragments before proceeding to the next step.
Remove Interior Door Panel
The first major step involves removing the interior trim to access the window mechanism.
Uncover and Remove All Screws
Start by locating every visible screw on the door panel. These are typically found near the armrest, around the door handle, beneath the speaker grille, and under rubber plugs or plastic caps. Use a Phillips screwdriver or Torx bit as needed. Some vehicles use tamper-proof fasteners, so check your model specifications if you encounter unfamiliar hardware. Place all screws in a magnetic tray to prevent loss.
Detach Trim Covers and Switch Bezels
Remove any plastic covers over power window switches, manual window cranks, or door lock knobs. For switch panels, gently pry with a plastic trim tool. For crank handles, use a window crank removal tool (about $5 at auto parts stores) to slide behind the clip and release it without scratching the surface.
Pry Panel Using Plastic Trim Tool
Insert a plastic trim removal tool around the panel edges and gently snap out the retaining clips. Work your way around the perimeter, applying even pressure. Never use metal screwdrivers, as these scratch paint and break clips. Once all clips are released, lift the panel upward to disengage it from the door-lock plunger and window track.
Disconnect Electrical Connectors
Unplug all wiring harnesses including the power window switch, door lock actuator, speaker, and mirror controls. Take photos during disassembly or label connectors with tape to ensure correct reassembly. Set the panel aside on a soft surface to avoid cracking.
Pro Tip: Take photos during disassembly to remember screw locations and clip positions.
Access Window Mechanism and Lower Glass
With the panel removed, you now have full access to the inner door structure.
Peel Back Vapor Barrier
Remove the black plastic vapor barrier (also called the moisture shield) glued or taped to the metal door frame. Carefully peel it back and use duct tape to hold it out of the way. If the adhesive fails during removal, reattach later using butyl tape or weatherstrip adhesive for a strong, waterproof seal.
Vacuum Door Cavity Thoroughly
Use a shop vacuum with a crevice tool to remove all glass shards from the bottom of the door, inside tracks, and around the regulator. Double-check with a flashlight. Leftover fragments can damage components or cause injury during reassembly.
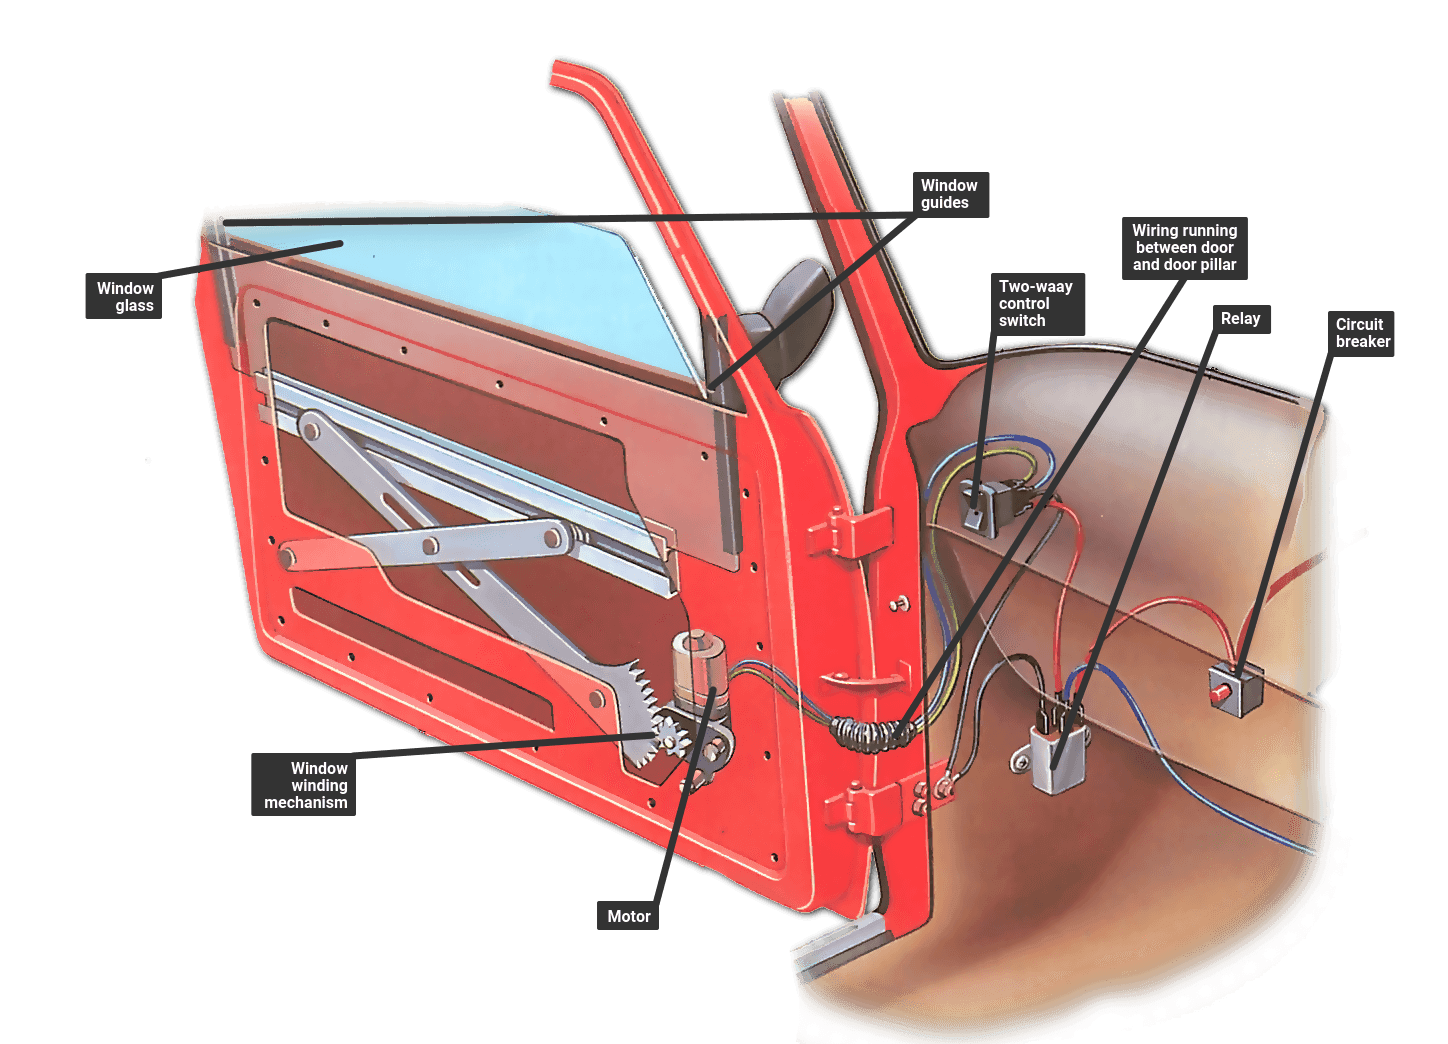
Locate Regulator and Mounting Hardware
Identify the window regulator, which is the metal arm or scissor mechanism that moves the glass. Find the bolts or nuts (usually 10mm or 12mm) connecting the bottom of the glass to the regulator bracket. If the motor works, you can use an external 12V source to lower the window for easier access.
Lower Window Using External Power
If the glass is intact but stuck, use a portable power source to move it. Disconnect the window motor harness, strip a small section of insulation from the two motor wires, and attach alligator clips to a 12V battery. Touch the clips to the motor wires, connecting as-is to lower the window or reversing polarity to raise it. The window should move within seconds.
Note: If the motor works, you can use an external 12V source to lower the window for easier access.
Remove Broken Window Glass
Now extract the damaged pane safely and completely.
Disconnect Motor Wiring First
Unplug the motor wiring harness before removing glass to eliminate the risk of accidental window activation during the process.
Remove Mounting Bolts
Use a socket wrench or ratchet to remove the bolts securing the glass to the regulator. An extension bar helps reach tight spaces. Support the glass as you loosen the final bolts, as even shattered panes can fall suddenly.
Extract Glass Through Door Top
Wearing cut-resistant gloves and safety goggles, lift the glass upward and out through the top of the door opening. Handle by the edges only, as even small pieces of tempered glass have razor-sharp edges.
Re-Vacuum Cavity
After removal, vacuum again to catch any missed fragments. Check corners and behind the vapor barrier carefully.
Inspect and Service Internal Components
Take this opportunity to check for wear and improve long-term performance.
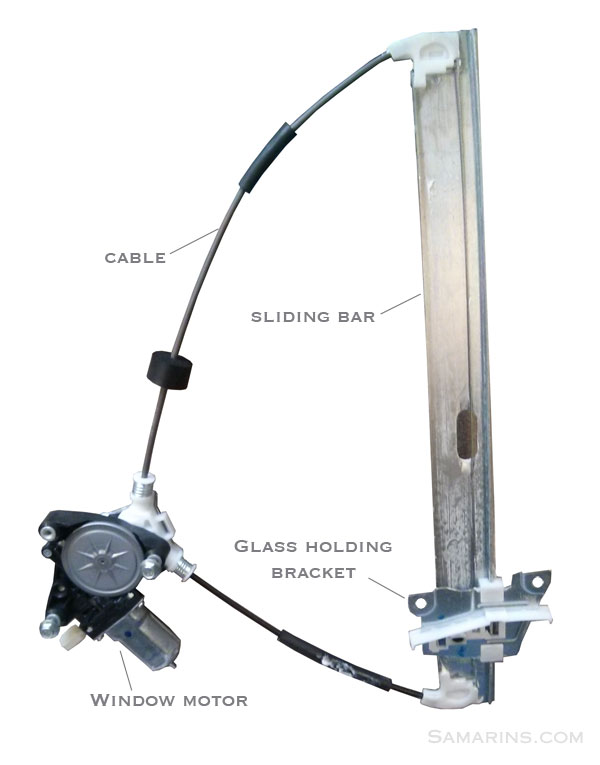
Check Window Regulator Condition
Inspect the regulator for bent rails, cracked plastic guides, or worn gears. Replace the regulator if damaged, as proactive replacement prevents future breakdowns and avoids repeated disassembly.
Test Motor Function
Listen for grinding or hesitation during operation. Smell for burnt insulation indicating overheating. A failing motor may work intermittently but should be replaced if questionable.
Lubricate Tracks and Rails
Apply silicone-based lubricant to window channels, regulator arms, and roller guides. Avoid oil-based lubes, as they attract dust and degrade rubber components over time.
Replace Weatherstrip if Damaged
If the rubber window seal is cracked, hardened, or shrunk, install a new one. This ensures smooth travel and proper weatherproofing.
Install New Window Glass
Precision matters during installation to avoid binding or leaks.
Verify New Glass Fit
Confirm the replacement matches the original in curvature, thickness, hole placement for the regulator, bevel angle, and DOT certification label. Use OEM, OEE, or junkyard-salvaged glass, and avoid no-name brands.
Position Glass in Door Cavity
Lower the new pane into the door from the top. Align the front edge with the nose of the front track and the rear edge with the heel of the rear track. Have a helper support the glass if possible.
Attach Glass to Regulator
Slide the mounting holes over the regulator bracket. Insert bolts and tighten finger-tight first, then use a socket extension for final tightening. Hand-tight plus a quarter turn is sufficient. Never overtighten, as this cracks tempered glass.
Reconnect Motor Wiring
Plug the harness back in securely. Ensure no wires are pinched between components.
Test Window Before Reassembly
Avoid reassembling only to find misalignment by testing now.
Temporarily Restore Battery Power
Reconnect the negative battery terminal to restore power for testing.
Operate Window Multiple Times
Use the switch to roll the window fully up and fully down. Repeat this cycle three to five times to ensure consistent operation.
Check for Smooth Operation
Look for binding or rubbing against seals, grinding or noise, incomplete closure at the top, or proper sealing when closed. If issues arise, loosen the mounting bolts slightly, reposition the glass, and retighten.
Warning: Never force a stuck window. Investigate track alignment or seal interference first.
Reinstall Weatherstrip and Vapor Barrier
Seal the system against moisture and noise.
Press Rubber Seal Into Frame
Snap the window channel back into the upper door frame. Ensure the glass sits centered within it. Apply dielectric grease inside the track to reduce friction and noise.
Reattach Moisture Shield
Smooth the vapor barrier back into place using butyl tape or weatherstrip adhesive to reseal edges. Eliminate air bubbles and ensure full coverage to prevent rust and water intrusion.
Reinstall Door Panel
Final reassembly requires attention to detail.
Reconnect All Electrical Harnesses
Plug in the window switch, door lock, speaker, and mirror controls. Ensure each connector clicks fully. Use dielectric grease on plugs to prevent corrosion.
Align and Snap Panel Into Place
Position the panel so hooks engage the door frame and the lock plunger fits through its hole. Press firmly around the edges to seat all plastic clips. Replace any broken clips now.
Reinstall Screws and Trim
Replace all screws in their original locations. Reattach the switch bezel, crank handle if manual, and rubber caps.
Professional vs. DIY: Cost Comparison
| Factor | DIY Replacement | Professional Service |
|---|---|---|
| Cost | $20 to $300 | $100 to $600+ |
| Time | 1.5 to 4 hours | About 1 hour |
| Tools Needed | Moderate | None |
| Warranty | None | Limited lifetime |
| Best For | Budget DIYers | Busy owners, luxury cars |
Cost-saving tips for sourcing glass: Junkyards offer matching glass for $18 to $50. Online retailers like RockAuto and eBay provide options, but verify fit with your VIN. Dealerships are most expensive but guarantee OEM fit. Aftermarket suppliers offer OEE-certified glass as a middle ground.
Avoid cheap, unlabeled glass. Poor fit leads to noise, leaks, and early failure.
Frequently Asked Questions About Car Door Window Replacement
Can I replace just the window glass without replacing the whole door?
Yes, you can replace just the window glass in most vehicles. The window regulator and motor are typically reusable unless they are damaged. This makes the repair much more affordable than replacing entire door assemblies.
How long does it take to replace a car door window yourself?
Most DIYers complete the job in 1.5 to 4 hours, depending on their experience level and whether complications arise. First-time installers should plan for the longer end of this range.
Do I need to replace the weatherstrip when replacing the window?
You should inspect the weatherstrip and replace it if it shows signs of cracking, hardening, or shrinkage. A damaged weatherstrip causes wind noise, water leaks, and premature regulator wear.
Can I use aftermarket glass for replacement?
Yes, but stick with OEE (Original Equipment Equivalent) certified glass. Avoid cheap, unlabeled glass, as poor fit leads to noise, leaks, and early failure. OEM glass is the premium option.
What should I do if my window motor fails after replacing the glass?
If the motor fails, you will need to access it through the door cavity (following the same panel removal steps). Replace the motor with one matching the original specifications. Consider replacing the regulator at the same time if either component shows wear.
Does insurance cover window replacement?
Comprehensive auto insurance often covers side window replacement with little or no out-of-pocket cost. Check with your provider to confirm coverage and preferred vendors.
Key Takeaways for Replacing Your Car Door Window
Replacing a car door window is a realistic DIY project that saves hundreds of dollars when done correctly. Focus on clean disassembly with photo documentation, careful glass handling with proper safety gear, and thorough testing before final reassembly. Pre-purchase replacement clips and inspect the regulator and weatherstrip while the door is open.
The total cost ranges from $20 to $300 for DIYers, with junkyard glass being the most economical option. Professional services cost $100 to $600+ but offer convenience, warranty protection, and mobile service. Choose professional installation for luxury vehicles or when warranty coverage matters.
If you are unsure about any step or drive a high-end vehicle, professional mobile service offers speed, expertise, and peace of mind. Either way, a properly replaced window restores security, comfort, and structural integrity to your vehicle.


