

Is your front door letting in cold drafts during winter or hot air in summer? You are not alone. Air leaking around a door is one of the most common sources of energy loss in homes, responsible for up to 30% of heating and cooling costs. Even a tiny gap—just 1/8 inch—can act like leaving a window open all year. The good news is most leaks are fixable with simple tools, affordable materials, and a few targeted steps.
Whether you are dealing with a drafty entry door, warped frame, or worn seals, this guide walks you through every solution. You will learn how to diagnose leaks accurately, seal gaps effectively, align misaligned doors, and prevent future air infiltration with proven methods.
Find Where Air Is Leaking

Before sealing anything, you need to know exactly where the air is entering. Many homeowners waste time patching visible gaps while missing hidden leaks behind trim or inside wall cavities.
Use the Dollar Bill Test
Close your door on a dollar bill at multiple points around the perimeter. Pull it out gently and note the resistance.
- Ideal result: The bill meets firm resistance but slides out with moderate effort
- Too loose: The bill slips out easily, indicating poor seal
- Too tight: The bill cannot be pulled out, meaning the door binds
Repeat this test at the top, middle, latch side, and hinge side. This reveals where weatherstripping has failed or is not compressing properly.
Run a Hand Feel or Smoke Test
On a windy day, slowly run your hand around the entire door frame. Feel for even slight airflow at the top, sides, bottom, and corners. For better precision, light an incense stick and hold it near seams, joints, and edges. Watch for smoke distortion, which shows active air movement. These tests catch leaks invisible to the eye.
Check for Hidden Cavity Leaks
Air often sneaks through the wall cavity behind the door jamb, especially in older homes. Look for gaps between trim and wall, cracked or missing caulk, and paint cracking at corners. Even if the door seals well, air can bypass it through these hidden paths. Use thermal imaging if available, as energy auditors use it to spot temperature differences caused by infiltration.
Fix Weatherstripping Gaps
Weatherstripping seals the moving parts where the door meets the jamb when closed. Over time, it wears out, compresses, or cracks, especially on exterior doors exposed to sun and weather.
Choose the Right Weatherstripping Type
Different types serve different purposes. Here is a quick reference:
- V-Strip (Tension Seal): Best for high-traffic doors on latch and hinge sides; lasts 5-10 years
- Rubber Bulb Seals: Ideal for top and latch jambs with uneven surfaces; lasts 7-10 years
- Kerf-Mounted Vinyl: Fits standard doors with grooves; lasts 3-5 years
- Foam Tape: Good for small gaps on a budget; lasts 1-3 years
- Interlocking Seals: Perfect for French or double doors; lasts 5+ years
Avoid felt and basic foam for exterior doors, as they degrade fast.
Install V-Strip on Vertical Jambs
Remove old weatherstripping first. Clean the jamb with rubbing alcohol. Measure and cut V-strip slightly longer than the jamb. Press it into place along the latch side and top. At corners, make 45-degree miter cuts or overlap slightly. V-strip lasts longer than adhesive foam and provides consistent compression without sticking.
Add a Rubber Bulb Seal at the Top
For doors with large or irregular gaps, install a hollow rubber bulb seal on the head jamb. It compresses when the door closes, forming an airtight barrier. Use one with metal backing for durability. This is especially effective if the door sags slightly at the top.
Seal Corners with Felt Patches
Gaps often form at top corners due to frame twist. Fix them by cutting a small piece of felt weatherstrip and tucking it behind the main seal at the corner. Secure with one staple if needed. This fills micro-gaps that cause whistling or light leaks.
Seal Fixed Gaps With Caulk and Foam
Non-moving joints, like where the frame meets the wall or behind trim, are major sources of air leakage. These require permanent sealing solutions.
Caulk Gaps One-Fourth Inch or Smaller
Use the right caulk for each job. For exterior gaps, choose silicone or polyurethane caulk, which is waterproof and UV-resistant. For interior trim, use silicone-latex blend, which is paintable and flexible. Avoid acrylic caulk, as it cracks under expansion. Apply to clean, dry surfaces and let cure fully before painting.
Use Backer Rod for Larger Gaps
For gaps wider than one-fourth inch, insert closed-cell foam backer rod into the gap first. Press it in about one-fourth inch below the surface. Apply caulk over the top. This prevents caulk from sinking or cracking and creates a flexible, durable seal.
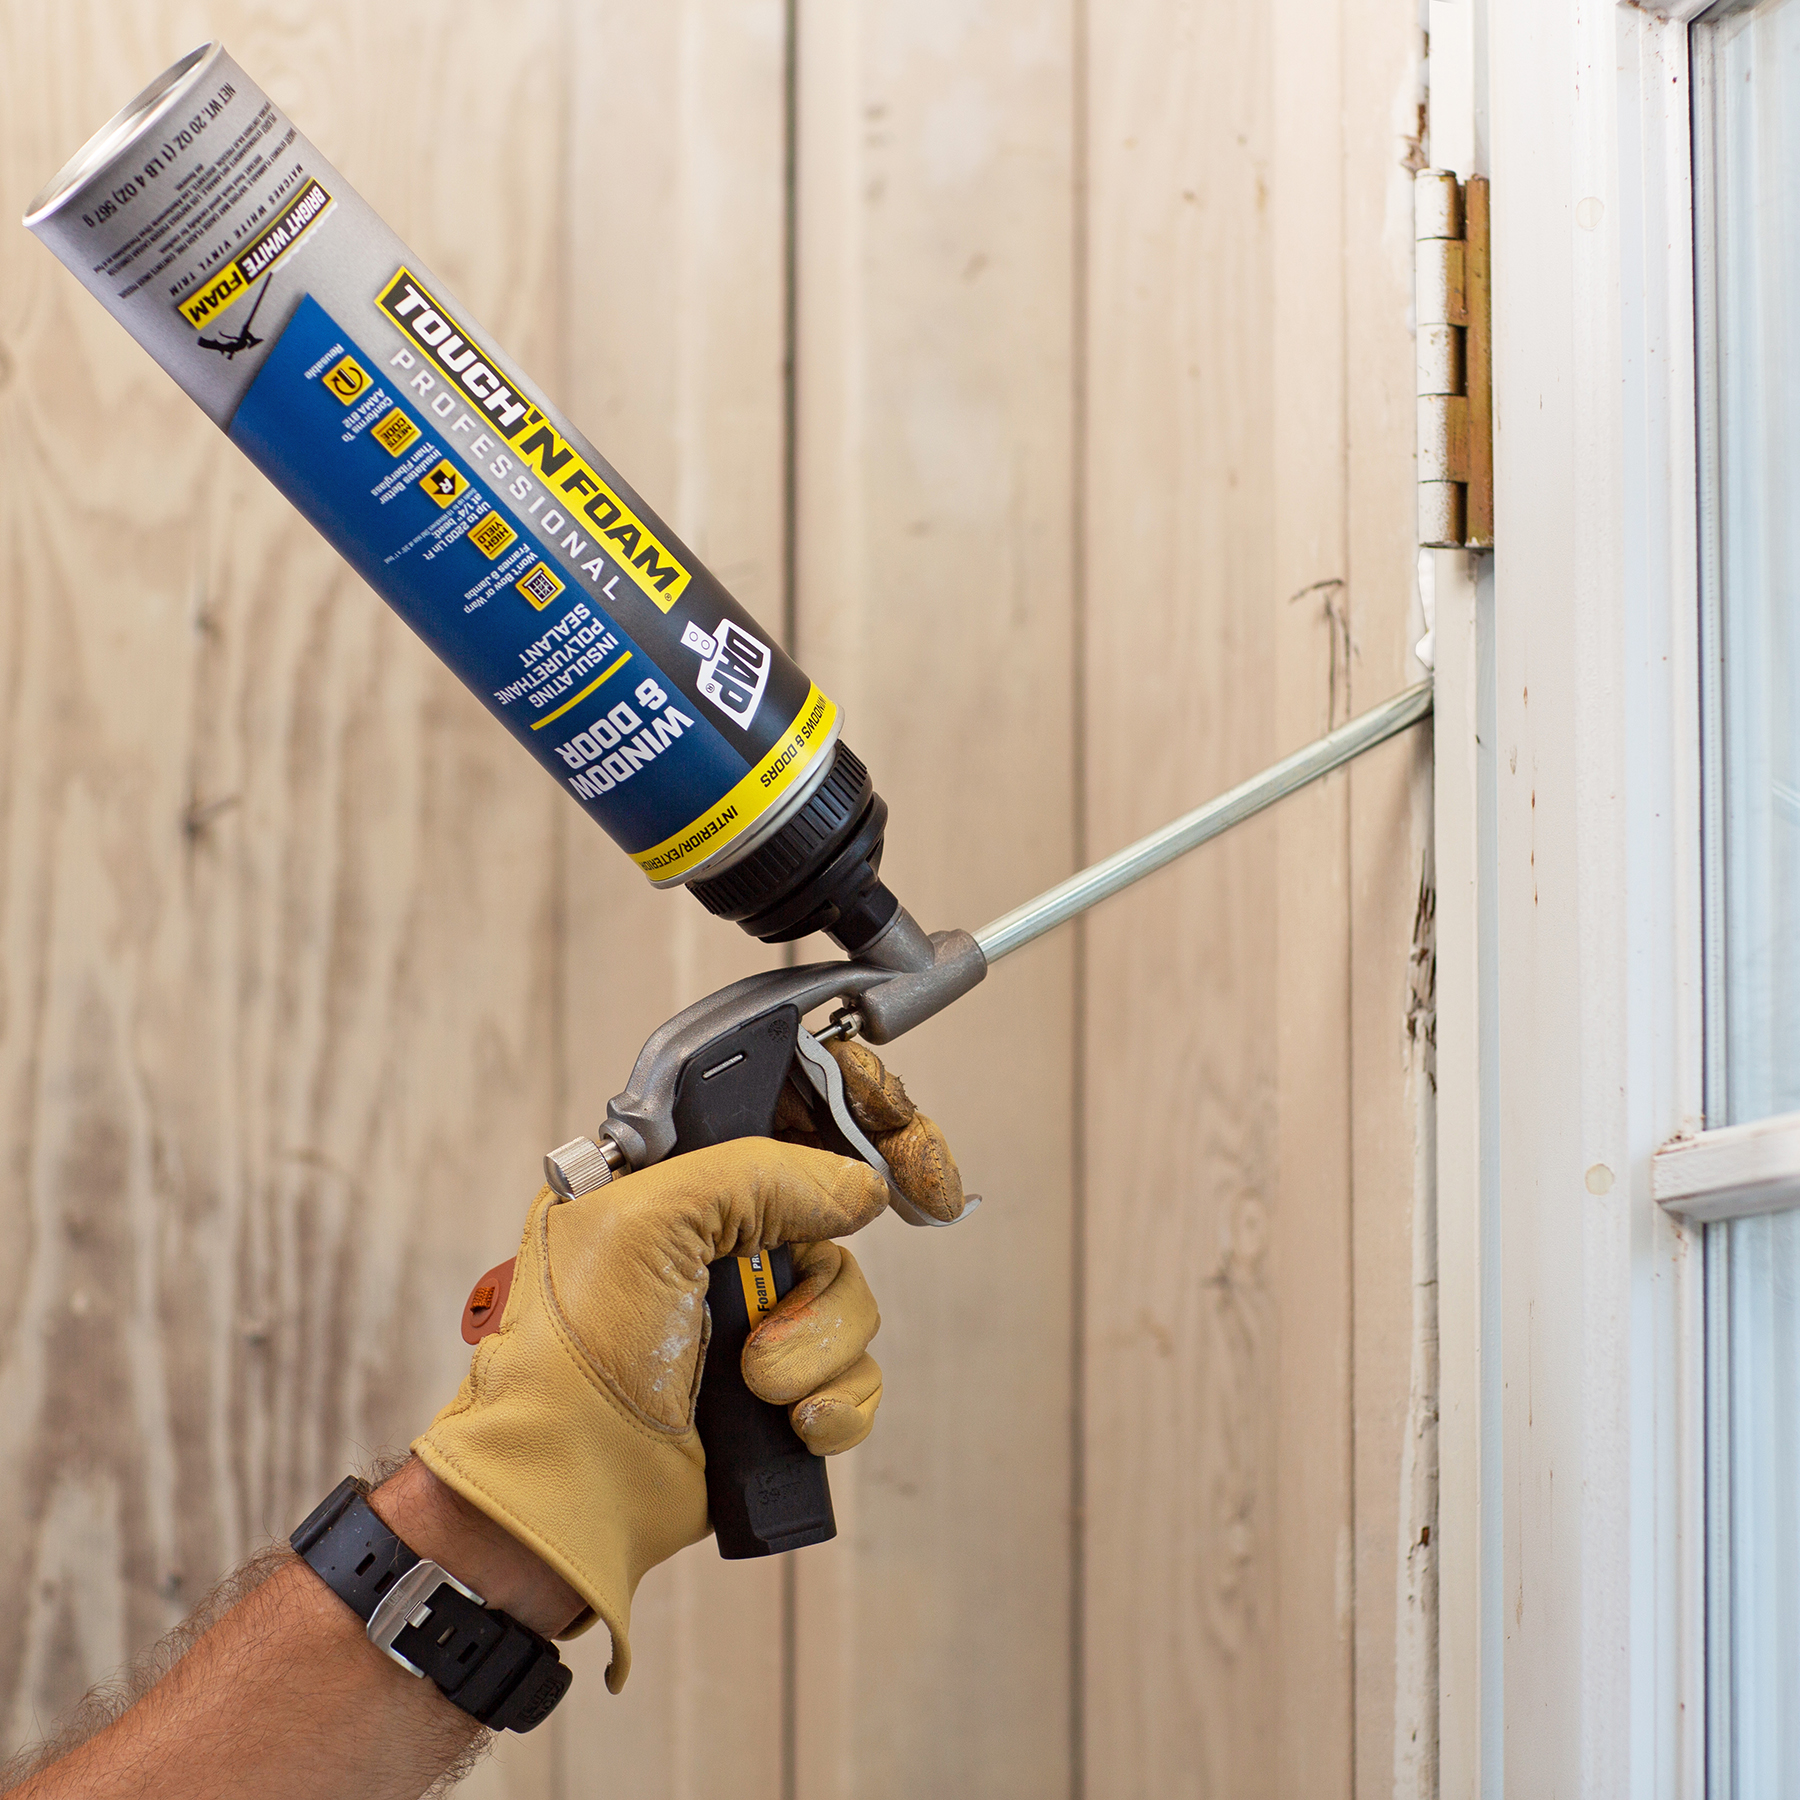
Insulate Wall Cavities Behind the Frame
Hidden air leaks hide in the space between the door frame and rough opening. Fix them with low-expansion spray foam, which expands slowly without warping the jamb, fills voids completely, and adds insulation and rigidity. Do not use high-expansion foam, as it can push the frame out of alignment. After foam cures for about 24 hours, trim excess and finish with caulk or trim.
Stop Bottom Air Leaks
The bottom of the door is the number one spot for drafts, especially in older homes with uneven floors or worn thresholds.
Adjust the Threshold
Many modern doors have adjustable thresholds with four screws. Turn screws counterclockwise to raise the threshold or clockwise to lower it. Adjust all screws equally to keep it level. If stuck, clear debris with a brush and tap gently with a hammer and wood block. The goal is for the door sweep to drag slightly when closing, enough to seal without binding.
Install a Door Sweep
Choose based on your floor type. Rubber or vinyl sweeps work best on smooth, level floors. Brush seals work well on uneven or warped subfloors. Automatic drop-down seals deploy when the door closes for maximum sealing. Bulb gaskets compress on contact and work ideal for flat thresholds. Measure door width, cut sweep to size, pre-drill holes to prevent splitting, and attach with screws to the bottom edge.
Replace a Damaged Threshold
If the threshold is cracked, corroded, or permanently misaligned, remove the old one and install a new one made of aluminum, bronze, or vinyl. Match the height to door clearance. Some include ramps for accessibility without sacrificing seal. A new threshold can eliminate up to 80% of bottom leakage.
Align a Misaligned Door
No amount of weatherstripping works if the door does not sit flush. Misalignment is often due to sagging, twisting, or out-of-square frames.
Fix a Sagging Door with Long Screws
Most exterior doors sag over time, pulling the top away from the jamb. Remove the top hinge screw on the jamb side and replace it with a 3-inch wood screw. The long screw reaches into the wall stud, pulling the jamb tight. Repeat on the middle hinge if needed. This simple fix often restores full contact with weatherstripping.
Bend the Hinge Leaf for Fine Adjustment
If the top corner still gaps, remove the hinge pin from the top hinge. Use pliers to bend the jamb-mounted leaf slightly away from the opening. Reinsert the pin and test. Bending the hinge pulls the top of the door closer to the jamb. Bend all knuckles evenly, about 1/16 inch. Use caution, as over-bending can damage hinges.
Shim the Door Frame
For doors that are out of square, remove interior trim first. Check the jamb with a 24-inch level. Insert wood shims between jamb and stud where gaps exist. Adjust until plumb and level, then secure with screws through shims. Reinstall trim. This ensures even pressure on weatherstripping along all edges.
Adjust the Strike Plate for Better Seal
Even a well-aligned door will not seal if the latch does not pull it tight enough against the weatherstrip.
Bend the Strike Plate Tab
If the door rattles or gaps at the top, insert a screwdriver into the strike plate’s metal tab and gently bend it outward. Close the door, and the latch should now pull tighter. This deepens the pocket and increases compression on the weatherstrip.
Reposition the Strike Plate Inward
For bigger gaps, unscrew the strike plate and chisel the mortise slightly deeper into the jamb. Move the plate 1/16 to 1/8 inch closer to the door edge, then screw it back in. This forces the door to close more tightly and improves the seal.
Fill Old Screw Holes for Stability
If the jamb is loose, fill old holes with wood dowel and glue or epoxy. Let cure, then re-drill pilot holes and reattach the strike plate. This prevents future shifting and maintains alignment.
Upgrade to Permanent Solutions
If repairs do not hold or your door is old and damaged, consider long-term upgrades.
Install a Storm Door
A storm door adds a second barrier with its own weatherstripping. Benefits include reducing wind-driven air and rain, protecting the main door, improving energy efficiency, and allowing ventilation without full exposure. Choose one with durable seals and adjustable threshold.
Replace with a Pre-Hung Energy Star Door
This is best for warped, cracked, or rotted doors, severely out-of-square frames, or chronic air leakage. Choose a pre-hung unit that comes already aligned and is easier to install square and level. Look for insulated core (foam-filled steel or fiberglass), integrated weatherstripping, and thermal break in metal doors. Energy Star-rated doors can reduce air leakage by up to 50% compared to older models.
Apply Temporary Fixes in a Pinch
Need immediate relief? Try these short-term solutions.
Use a Draft Snake
Place a fabric tube filled with rice or sand along the base of the door. It blocks airflow instantly. You can sew a 30-36 inch tube yourself or buy decorative store-bought versions.
Tape on Plastic Sheeting
For winterization, apply clear plastic film over the door with double-sided tape. Shrink it with a hair dryer for a tight seal. This blocks drafts and adds an insulating air layer.
Roll a Towel Under the Door
This is quick and free. Simply roll a bath towel and place it at the threshold. It is effective for emergency sealing. Remember, these are not permanent solutions—use them only until you can make lasting repairs.
Test Your Repairs
After every fix, verify it works.
Re-Run the Dollar Bill Test
Check all sides. The bill should now meet resistance everywhere.
Look for Light Gaps
Have someone close the door while you watch from outside. No light should shine through.
Do a Smoke Test Again
Pass incense around the frame. No smoke movement indicates successful seal.
Monitor Comfort and Bills
Over the next few weeks, notice if rooms feel warmer or cooler and track energy usage. A successful fix often pays for itself in one heating season.
Maintain Seals Yearly
Even the best fixes degrade over time.
Inspect Annually
Before winter and summer, check weatherstripping for wear, look for new gaps in caulk, and clean thresholds and sweeps.
Replace Weatherstripping Every 3-5 Years
Foam and felt wear fastest. V-strip and rubber last longer but still need replacement.
Re-Caulk Every 5-10 Years
This is especially important on exterior joints exposed to weather.
Lubricate Hinges and Latch
Use silicone spray or graphite powder to keep operation smooth and alignment stable.
Know When to Call a Pro
DIY works for most issues, but some require expert help.
Call a Carpenter or Contractor If
The door frame is rotted or pulled away from the wall, the sill is damaged or shows signs of water intrusion, the house has settled causing permanent misalignment, or the frame is secured with brickmold and removing it risks damage.
Many doors were never installed square. You cannot just add shims—you need to reassess the whole frame. If alignment fails despite your efforts, professional re-hanging may be needed.
Frequently Asked Questions About Air Leaking Around Doors
What causes air to leak around a door?
Air leaks occur through gaps between the door slab, frame, threshold, trim, or wall cavity behind the frame. Common causes include worn weatherstripping, gaps in caulking, misaligned doors, damaged thresholds, and settling foundations.
How much energy does a drafty door waste?
Air leaking around a door accounts for approximately 30% of household heating and cooling energy loss. Even a 1/8-inch gap can allow airflow equivalent to a 4-inch by 4-inch window open year-round.
What is the easiest way to find door air leaks?
The dollar bill test is simple and effective. Close the door on a dollar bill at multiple points around the perimeter. If it slides out easily, you have a leak. For more precision, use a smoke or incense test on a windy day.
How often should weatherstripping be replaced?
Replace weatherstripping every 3-5 years, depending on the material and usage. V-strip and rubber seals last longer than foam or felt. Inspect annually for signs of wear, compression, or damage.
Can I fix a sagging door without replacing it?
Yes. Replacing the top hinge screw with a 3-inch wood screw that reaches into the wall stud often corrects minor sagging. For fine adjustment, you can bend the hinge leaf slightly to pull the door tighter against the jamb.
Key Takeaways for Stopping Air Leaking Around a Door
Stopping air from leaking around a door is not about one fix—it is a systematic approach. Start by diagnosing exactly where leaks occur using the dollar bill test, smoke test, and visual inspection. Then address each leak type with the appropriate solution: weatherstripping for moving gaps, caulk for fixed joints, threshold adjustments for bottom drafts, and hinge or strike plate fixes for alignment issues.
Invest in quality materials like V-strip and rubber bulb seals rather than cheap foam, which degrades quickly. For persistent problems or aging doors, consider upgrading to a storm door or Energy Star-rated pre-hung unit. Always test your repairs and maintain seals annually to ensure long-term performance.
With the right tools and techniques, you can eliminate drafts, cut energy bills by up to 30%, and enjoy a more comfortable home year-round. Start with the dollar bill test today. Your wallet and comfort will thank you.


