
A freshly stained wood door transforms the look of your home, adding warmth, depth, and protection in one powerful upgrade. Whether you’re refinishing an old entryway or customizing a new unfinished door, staining brings out the natural grain while shielding the wood from UV rays, moisture, and wear. Unlike paint, which sits on top, stain penetrates the wood, enhancing its character instead of hiding it. This guide walks you through every step, from prep to polish, with pro-level details, common mistakes to avoid, and expert tips for a flawless finish.
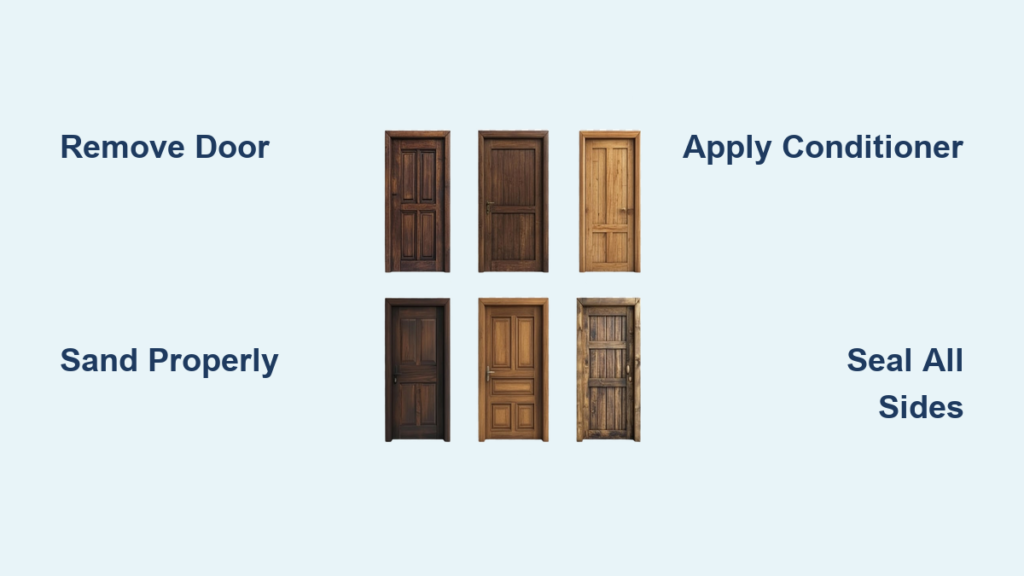
Remove Door and Prepare for Staining
Take the Door Off Hinges
For a smooth, drip-free result, remove the door and work flat on sawhorses or a workbench. Hanging doors often lead to runs and uneven absorption. Removing the door gives you full access to edges, rails, and stiles, which is especially important for sealing all six sides. Use a utility knife to cut any paint seals around the jamb, then unscrew hinges and lay the door flat. If removal isn’t possible, use gel or water-based stain to minimize sagging and work in small sections.
Remove All Hardware
Take off knobs, locks, deadbolts, hinges, strike plates, and weatherstripping. Reinstalling over hardware creates uneven surfaces and traps moisture. Mask glass panels with Frog Tape and plastic sheeting. Delicate-surface tape prevents peeling clear coats or paint. Label hardware in a bag for easy reassembly later.
Sand the Door for Smooth Stain Absorption
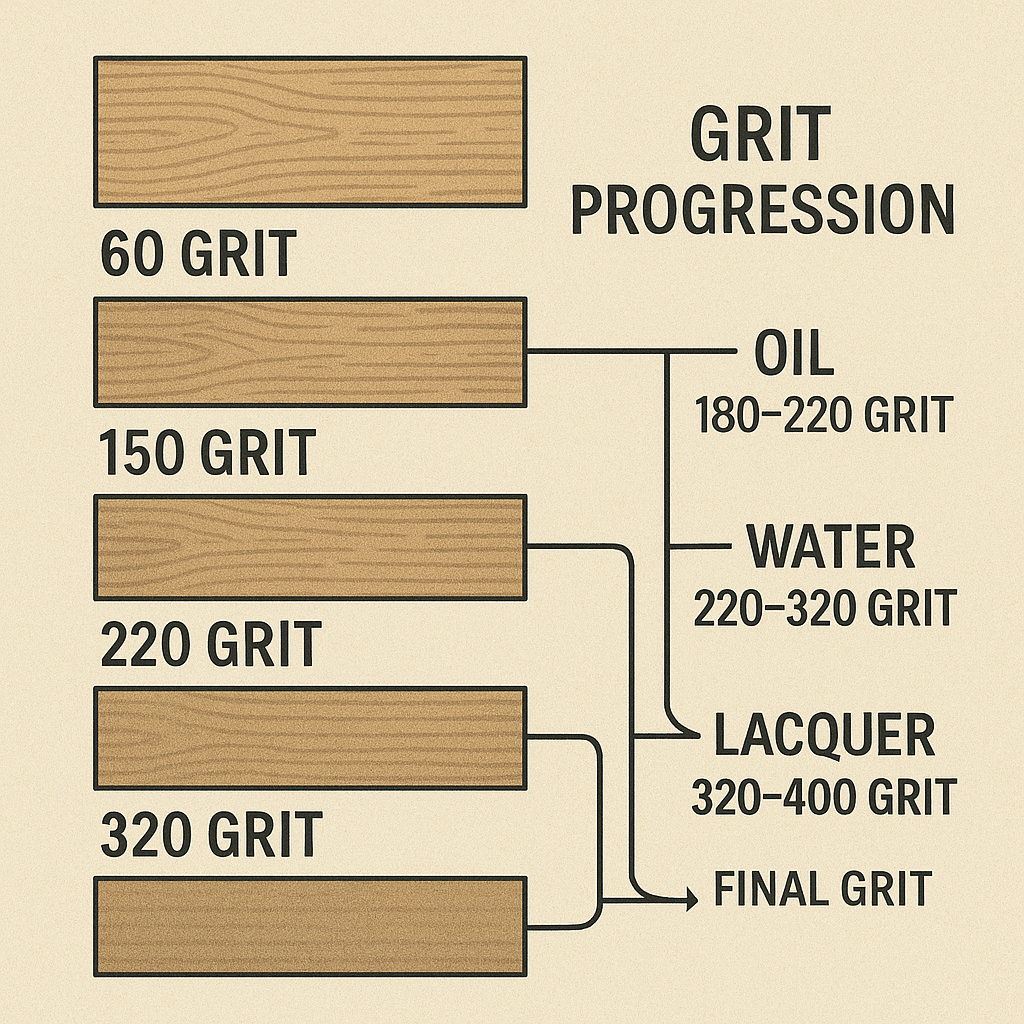
Use the Right Grit Progression
Sanding opens wood pores so stain can penetrate evenly. Begin with 120-grit sandpaper to remove old finish or smooth rough spots, then finish with 180-220 grit for a silky-smooth surface. Never exceed 220 grit because over-sanding closes pores, reducing stain uptake. Always sand with the grain to avoid scratches. Use a 3M sanding sponge or dual-angle sanding block for grooves, miter joints, and raised panels.
Avoid Sanding Through Veneer
Many exterior doors have thin veneer layers. Test sanding in an inconspicuous corner first. If you see a change in wood color or texture, you’re getting too close to the core. Stop immediately and switch to lighter pressure.
Clean and Remove All Dust
Wipe With Mineral Spirits
After sanding, wipe the door with mineral spirits on a blue shop towel to remove wax, oil, or old residue. Avoid water because it can raise the grain prematurely. Let the door dry completely before moving to the next step.
Vacuum and Use Tack Cloth
Vacuum the door with a brush attachment, then wipe with a tack cloth. Refold the tack cloth frequently to keep it sticky. Do not rely on compressed air because it blows dust around without removing it. A clean surface prevents specks and bubbles in the final finish.
Apply Pre-Stain Conditioner
When to Use Conditioner
Softwoods like pine, fir, and aspen absorb stain unevenly, leading to blotches. Prevent this by applying a pre-stain wood conditioner. It’s not needed for hardwoods like oak or walnut unless you’re staining end grain or edges, which absorb more. Gel stain users can skip conditioner because it naturally evens out absorption.
How to Apply Conditioner
Apply with a lint-free cloth or staining pad. Let it sit 5-15 minutes, following the product label. Wipe off excess before it dries. Wait 30 minutes before staining. Even on hardwoods, conditioning end grain ensures consistent color.
Test Stain Color First
Preview Before Committing
Stain names like Provincial or Weathered Oak vary by brand and wood type. Test on a scrap piece or the top/bottom edge of the door. Dampen a small area with water because wet wood mimics the final stained look. Hold samples next to trim, flooring, or siding to check color harmony.
Mix Stains for Custom Shades
If the color is too light, mix two oil-based stains. Label the can with the ratio for future touch-ups. One DIYer blended two coats after the first was too light and achieved perfect tone on the third try.
Apply Stain With the Grain
Use the Right Tools
For control and even coverage, use a lint-free rag or staining pad. Foam brushes work for flat areas but can drip. Natural bristle brushes are best for oil-based stains. Synthetic brushes work better for water-based stains. Never use a roller because it leaves texture.
Work in Sections
Divide the door into top panel, rails, stiles, and bottom rail. Apply stain liberally with long strokes along the grain. For raised panels, work from the center outward. Use a rag-wrapped finger or small brush for grooves. Stir the stain gently with a paint stick. Shaking creates bubbles.
Wipe Off Excess Stain
Control Darkness by Timing
Wait 2-15 minutes, depending on desired darkness, then wipe off excess with a clean, lint-free cloth. Wipe with the grain to avoid streaks. Too dark. Wipe aggressively with mineral spirits before it dries. Too light. Wait 30 minutes or longer, then apply a second coat.
Never skip the wipe-off step. Excess stain won’t dry and leaves a sticky film, forcing a full sand-down restart.
Let Dry and Apply Second Coat
Drying Times Vary
Drying times depend on stain type. Water-based stain dries in 2-6 hours. Oil-based stain needs 8-24 hours. Gel stain takes 6-12 hours. Wait at least 12 hours before handling or flipping the door. For deeper color, apply 2-3 coats. Lightly sand with 220-320 grit between coats and wipe with tack cloth.
Think of additional coats like higher SPF sunscreen. Extra layers boost UV and moisture protection.
Seal All Six Sides With Topcoat
Choose the Right Topcoat
Stain alone isn’t enough. A clear topcoat is essential, especially for exterior doors. Use spar urethane for maximum UV and moisture resistance. For interiors, use oil- or water-based polyurethane. Match finish type to stain. Oil-based stain needs oil-based urethane.
Why Seal Every Side
Moisture enters through cut ends and edges, leading to warping and cupping. The bottom rail is most vulnerable. Sealing all six sides maintains moisture balance and prevents damage, even for interior doors.
Apply Finish With a Quality Brush
Brush Technique
Stir the finish, don’t shake. Dip a cheap disposable brush and fan out the bristles first. Wipe off excess on the can rim. Apply long, smooth strokes with the grain. Work clockwise around the door to maintain consistency. Keep a wet edge to avoid lap marks.
Sand Between Coats
After the first coat dries, lightly sand with 320-400 grit to remove dust nibs or bubbles. Wipe clean with tack cloth. Apply a second coat. Usually, no sanding is needed after that. Add a third coat for high-traffic or exterior doors.
Polish for a Glass-Like Finish
Buff With Steel Wool
After full cure, up to 30 days for oil-based finishes, buff the surface with #0000 steel wool. Wipe away residue with a clean cloth. This polishing step removes fine texture and enhances depth, giving a professional, smooth, cleanable surface. Skipping this may leave the finish feeling slightly rough.
Rehang the Door
Wait for Full Cure
Let the door cure at least 24-48 hours before rehanging. Insert hinge pins from the bottom up. Use a level to ensure plumb. Shim behind the jamb if needed and trim excess with a utility knife.
The area under old hardware may be lighter. Sand those zones to bare wood before staining for even color.
Maintain Your Stained Door
Routine Care
Wash with mild soap and water every 3-6 months. Avoid pressure washing or abrasive scrubbing. Polish with furniture wax or polish every 6 weeks to maintain luster.
Reapply Topcoat
For exterior doors, reseal every 3-5 years. In sunny or humid climates, consider annual topcoat touch-ups. Spot-treat cracks or fading. For major wear, full sanding and re-staining are required.
Fix Common Staining Problems
Blotchy Stain
Caused by uneven absorption in softwoods. Pre-stain conditioner prevents this. Test first.
Stain Too Dark
Act fast before it dries. Wipe with mineral spirits to lighten.
Sticky Surface
Excess stain wasn’t wiped off. Sand down, clean, and restart.
Dust in Finish
Clean the workspace. Cover the area before coating. Sand and recoat if dried.
Work Safely and Smart
Protect Yourself
Wear nitrile gloves, safety glasses, and a respirator when sanding or using solvents. Work in 65-85°F with low humidity and good ventilation.
Dispose of Rags Properly
Lay stain-soaked rags flat outdoors to dry. Spontaneous combustion risk exists if piled. Store brushes in a nitrile glove to prevent drying between coats.
Pro Tips for Best Results
Stain both sides of the door to prevent warping from moisture imbalance. Use a test board with the same wood species. Label custom stain mixes for future touch-ups. Use Frog Tape around glass because it won’t peel clear coats. Feather thick spots in finish before they dry to avoid white patches.
Frequently Asked Questions About Staining a Wood Door
How Long Does It Take to Stain a Wood Door
The entire process takes 2-4 days. Plan for 1 day of prep and sanding, 1-2 days for staining and drying, and 1-2 days for applying topcoats. Actual working time is 4-8 hours, depending on door size and complexity.
Can I Stain Over Old Paint
No. You must remove all old paint first. Sand or use a paint stripper to get down to bare wood. Stain cannot penetrate through paint, so the color won’t take properly.
What Happens If It Rains After Staining
Protect the door from rain for at least 24-48 hours after staining and sealing. Rain can wash off uncured stain and damage the finish. If rain hits a recently stained door, expect uneven color and possible water spots.
Do I Need to Seal Interior Doors
Yes. Even interior doors benefit from a topcoat. Sealing protects against moisture from humidity and cleaning. It also makes the finish washable and more durable.
Can I Use a Roller to Apply Stain
No. Rollers leave texture and don’t allow proper wipe-off. Use a lint-free cloth, staining pad, or brush for best results. The goal is even application with proper penetration.
How Often Should I Reseal an Exterior Wood Door
Reseal exterior wood doors every 3-5 years. In harsh climates with intense sun or heavy rain, consider annual inspection and touch-ups. Watch for fading, cracking, or peeling as signs it’s time to reseal.
Key Takeaways for Staining Your Wood Door
Staining a wood door is a high-impact, budget-friendly upgrade that boosts curb appeal and protects your investment. Success starts with proper preparation. Remove the door, sand with the right grit, and clean thoroughly before applying any stain. Always test stain color first because it looks different on every wood type. Apply pre-stain conditioner if working with softwoods to prevent blotching. Wipe off excess stain within 2-15 minutes to control darkness. Seal all six sides with a quality topcoat, especially for exterior doors. Wait at least 24-48 hours before rehanging. With the right prep, tools, and patience, you can achieve a professional finish that lasts 10-20 years. Follow the sequence: prep, condition, stain, seal, and maintain. Your door won’t just look better, it’ll perform better too.


