
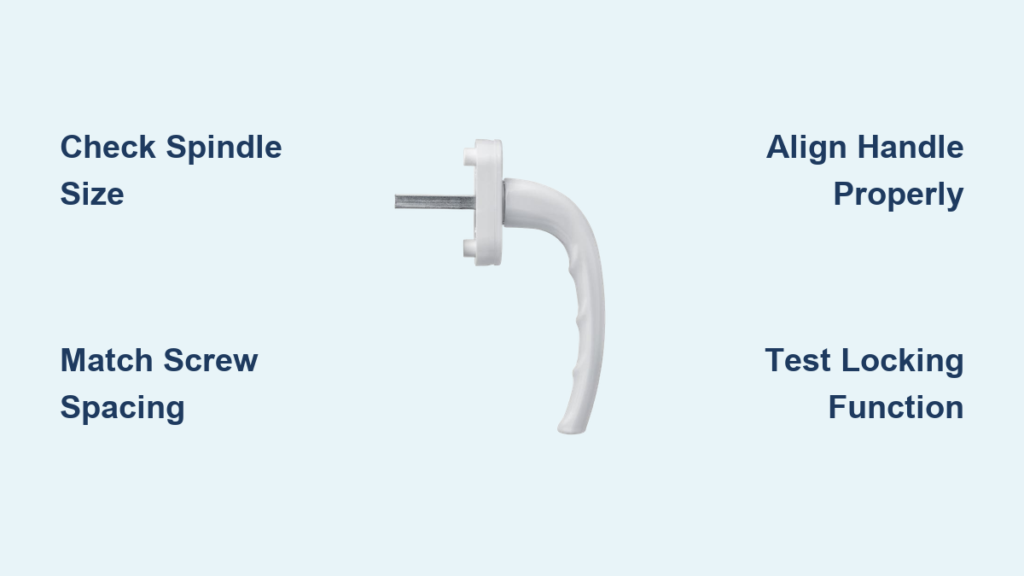
A stiff, broken, or wobbly window handle can turn simple ventilation into a daily struggle and weaken your home’s security. When a uPVC window refuses to lock or the handle won’t turn smoothly, replacement is almost always the best fix. The good news is that learning how to replace a window handle takes only about five minutes and requires nothing more than basic household tools. This guide walks you through every stage, from confirming part compatibility to testing your new handle for smooth, reliable operation. You’ll discover how to measure spindle sizes correctly, avoid costly frame damage, and achieve a perfect fit without drilling new holes or hiring a professional.
Confirm Handle Compatibility Before You Buy

Installing the wrong handle leads to misalignment, poor locking, and potential damage to your window’s internal gearbox. Taking a few minutes to verify compatibility saves time, money, and frustration.
Match These Critical Dimensions
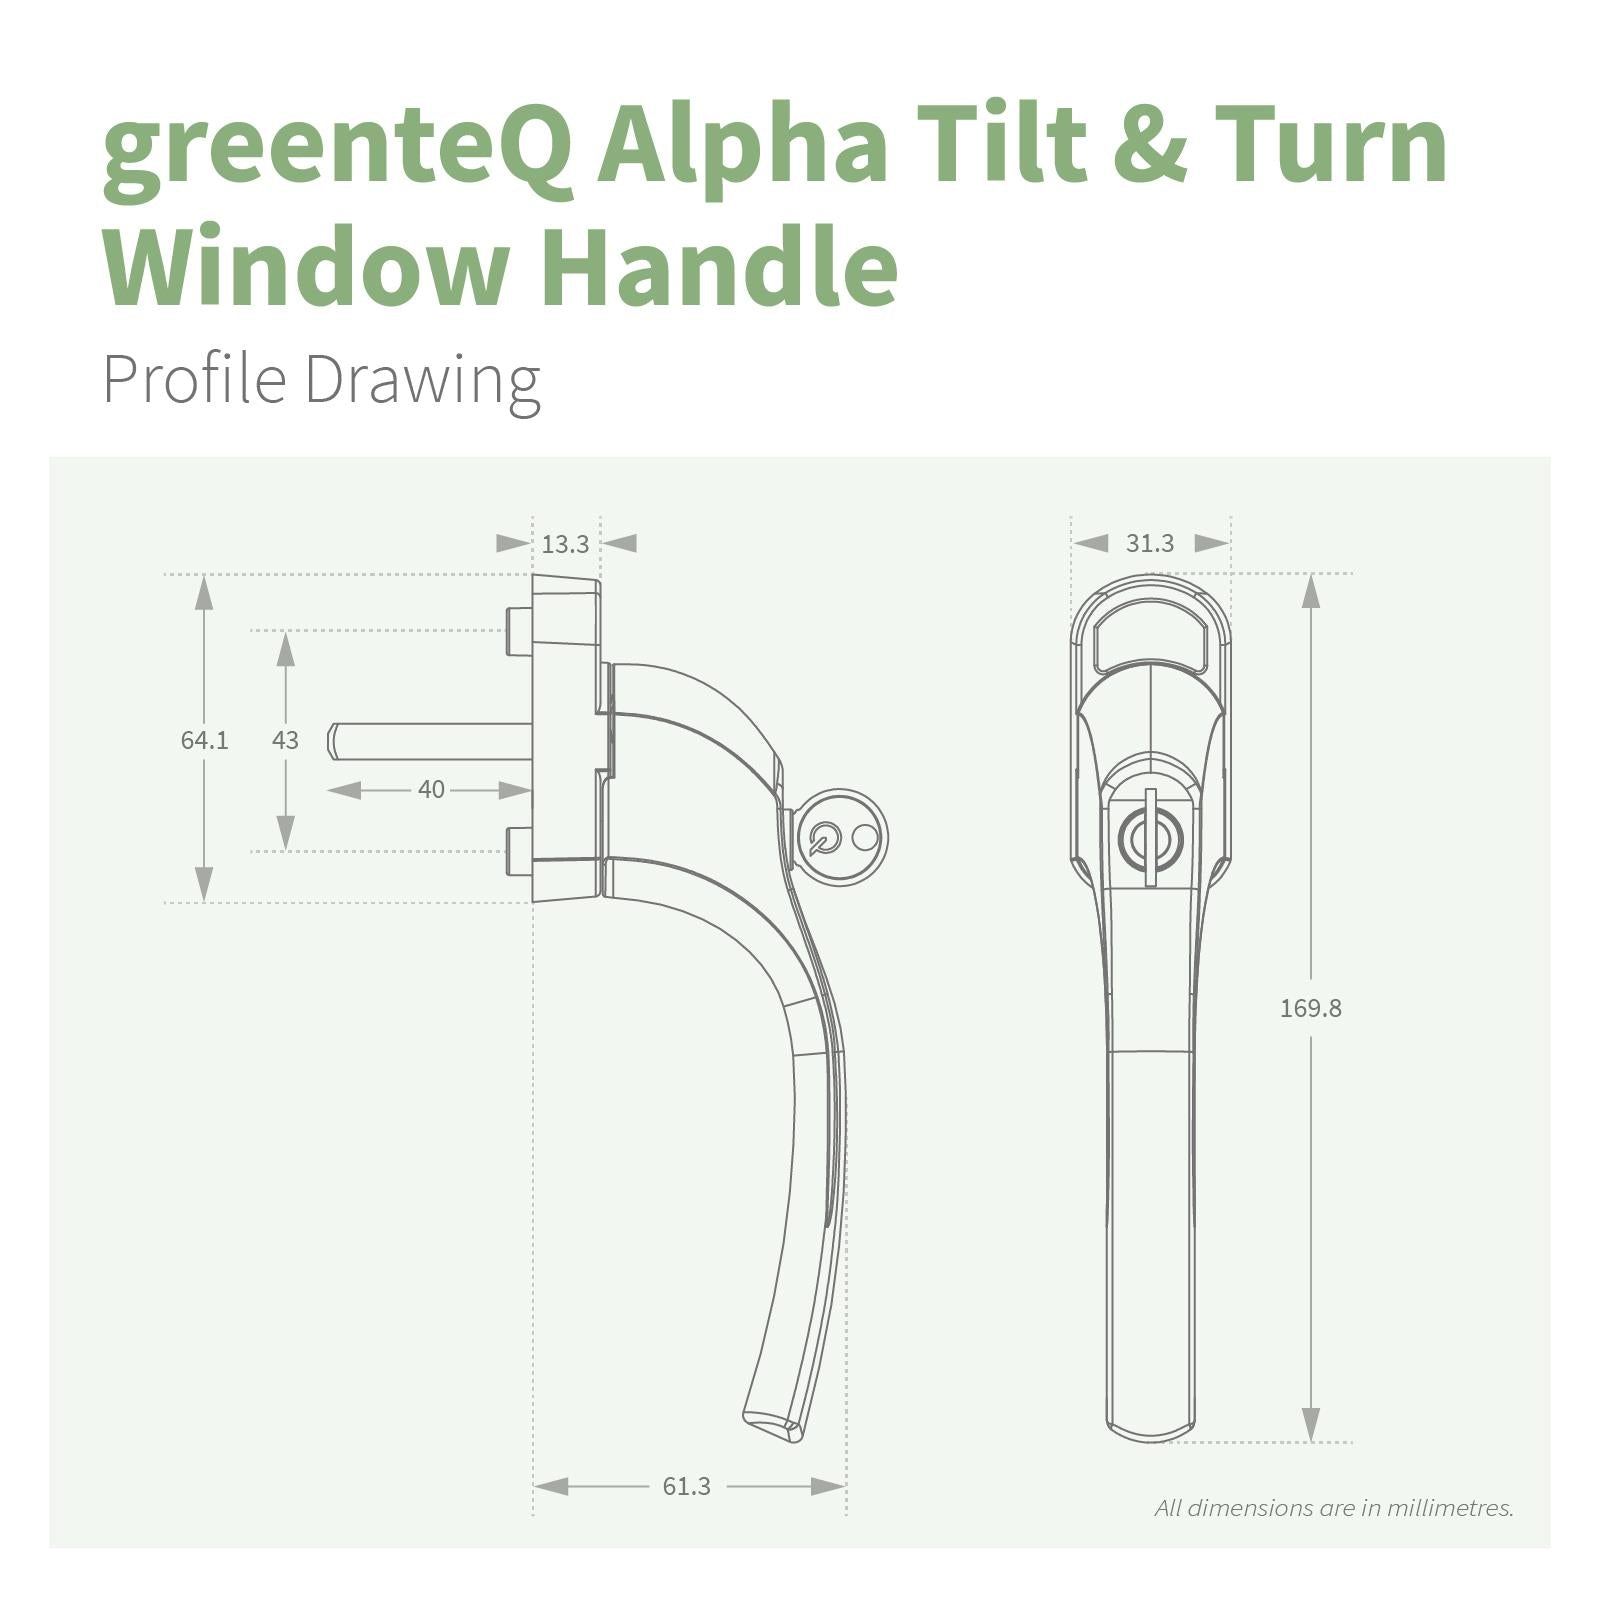
- Screw hole spacing: Measure center-to-center between the top and bottom screw holes. Most uPVC handles use 43mm, 45mm, or 52mm spacing.
- Spindle length: The square metal bar must fully engage the gearbox. Standard lengths range from 25mm to 50mm depending on handle design.
- Spindle cross-section: Measure the square spindle across its flat sides. Common sizes are 7mm or 8mm square.
- Handle style: Espagnolette (most common), cockspur, and tilt-and-turn handles are not always interchangeable.
- Color and finish: Match white, black, brown, or chrome to your existing hardware for a consistent look.
✅ Pro Tip: Remove the old handle first and bring it to the hardware store, or measure it precisely before ordering online.
Understand the Risks of Mismatched Parts
- Drilling into reinforced frames: Many uPVC frames contain internal steel or aluminum reinforcement. New screw holes may hit metal, making installation impossible without specialized tools.
- Universal-fit options: Some manufacturers (like Everest) offer universal handles that accommodate color changes without compatibility headaches, ideal for style upgrades.
If your window uses a keyed locking system, ensure the new handle matches the same key code when replacing multiple units.
Gather Your Tools and Supplies
This quick repair requires minimal equipment. Having everything ready ensures a clean, damage-free swap.
What You Need
- Replacement handle verified for compatibility
- Screwdriver (Phillips or flat-head, depending on screw type)
- Prying tool such as a small flat-head screwdriver or butter knife for removing screw caps
⏱️ Time Estimate: 5 minutes per window
🔧 Difficulty Level: Easy, no electrical or plumbing knowledge required
Remove the Old Window Handle Safely
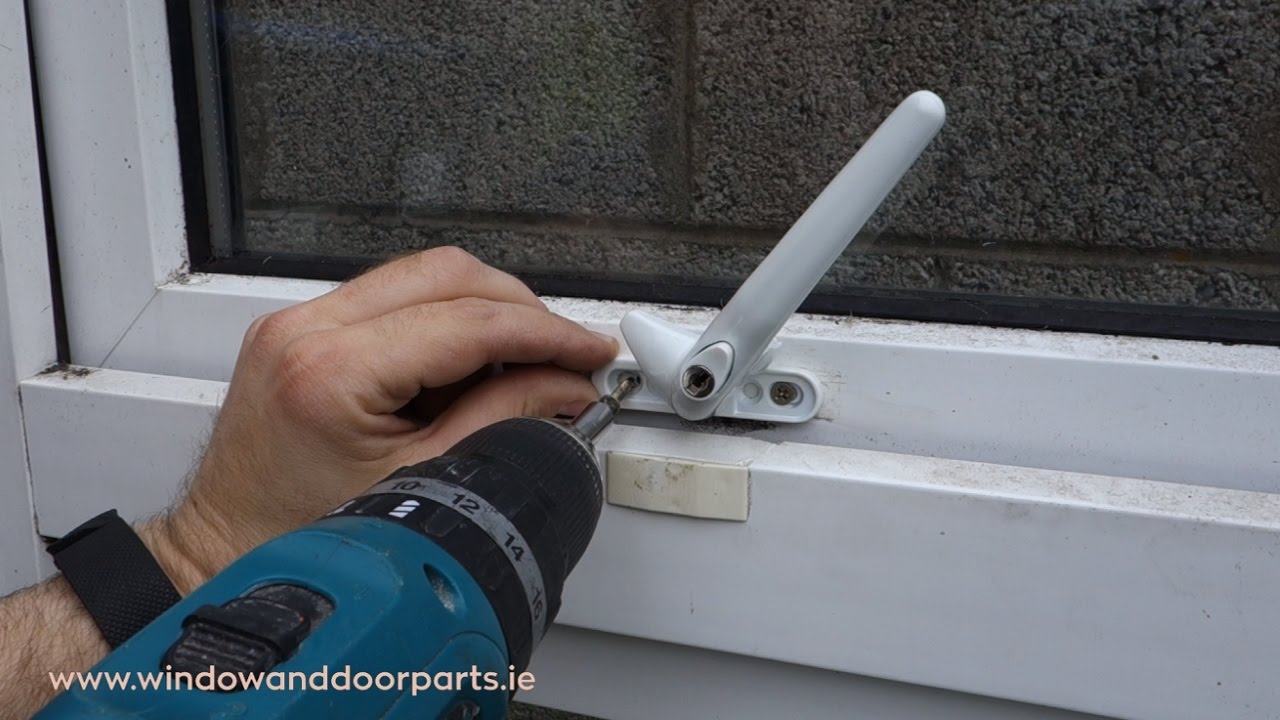
Careful removal protects your frame, spindle, and gearbox from unnecessary damage.
Open the Window Fully
Leave the handle in the horizontal (open) position. This disengages the locking cams from the frame, releasing tension on the spindle and preventing damage during removal.
Locate and Remove the Screw Covers
Inspect the base of the handle where it meets the frame. Most uPVC models hide screws under small plastic caps positioned above and below the handle base. Some caps slide open while others are recessed.
Gently insert a flat-head screwdriver or butter knife under the cap edge and pry upward.
⚠️ Warning: Use light pressure to avoid scratching the uPVC surface or cracking the plastic cap.
Unscrew and Remove the Handle
Once the screws are exposed:
- Hold the handle firmly with one hand.
- Remove both top and bottom screws with your screwdriver.
- Keep hold of the handle as the last screw loosens so it doesn’t drop.
Pull the handle straight off the spindle. The metal bar should slide out cleanly from the gearbox.
Install the New Window Handle
With the old unit removed, precise installation ensures proper function and long-term reliability.
Align the New Handle Correctly
Hold the new handle in position while keeping it in the open (horizontal) position. Line up the screw holes with the existing frame holes and verify the spindle points straight into the gearbox.
✅ Visual Check: The handle should sit flush against the frame with no gaps or tilting.
Insert the Spindle and Secure with Screws
Slide the spindle into the gearbox until the handle base rests flat against the frame.
- Insert the screws through the top and bottom holes.
- Tighten gradually, alternating between top and bottom to maintain even alignment.
- Stop when snug. Do not overtighten, as this can crack the plastic housing or strip the screw threads.
Reattach the Screw Covers
Snap the decorative caps back over the screw heads. If you have new covers, confirm they match your handle style and color.
❌ Troubleshooting Tip: If caps won’t seat properly, check whether screws are protruding. Trim longer screws or swap them for flush-mount versions.
Test Handle Operation Immediately
Never assume the job is done without verifying full functionality.
Rotate Through the Full Range of Motion
- Turn the handle upward to the locked position (usually vertical).
– Listen for a click as locking pins engage the frame.
– Gently try to lift or tilt the sash. It should not move. - Return to the horizontal (open) position.
– The handle should turn smoothly without resistance. - Close and reopen the window.
– The latch should catch cleanly every time.
Fix Common Post-Installation Issues
| Issue | Likely Cause | Solution |
|---|---|---|
| Handle wobbles | Loose screws or stripped holes | Tighten screws; replace with slightly larger ones if needed |
| Stiff turning | Spindle misalignment or dirt buildup | Apply silicone lubricant to the spindle entry point |
| Window won’t lock | Spindle too short or gearbox failure | Verify spindle length; inspect internal mechanism |
✅ Final Check: Spray a small amount of silicone lubricant around the spindle base every 6 to 12 months to maintain smooth operation.
Extend Handle Lifespan with Simple Care
A few minutes of preventive maintenance each year keeps handles working like new.
Clean and Inspect Annually
- Wipe down the handle and base with a damp cloth.
- Remove built-up grime, dust, or paint splatter that could restrict movement.
- Check for cracks, corrosion, or play in the spindle connection.
Lubricate Sparingly
Use silicone-based spray (never oil) on the spindle and around the gearbox entry point:
- Oil attracts dust and gums up over time.
- One quick burst twice a year is sufficient.
🛠️ Pro Note: Never force a stiff handle. If it resists turning, investigate the cause. Forcing it can snap the spindle or damage the locking mechanism.
Choose the Right Replacement Handle
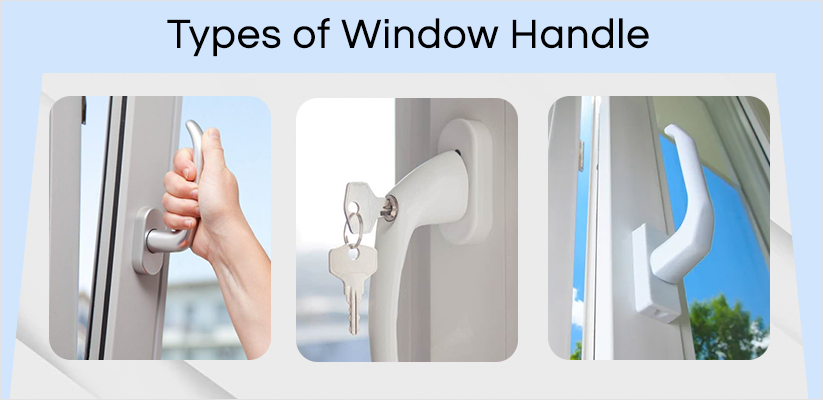
Smart selection avoids return trips and wasted money.
Key Selection Criteria
- Type: Espagnolette handles are standard on most uPVC windows.
- Handing: Most modern handles are ambidextrous and work on either side, but verify before purchase.
- Security: Keyed locks add safety and are ideal for ground-floor windows. Match key codes across replacements.
- Finish: Match existing color (white, black, brown, chrome) unless you’re intentionally upgrading.
🛒 Where to Buy: Hardware stores, online window part suppliers, or directly from your window manufacturer.
Take your old handle with you or measure these three points before ordering:
- Distance between screw centers
- Spindle length from base to tip
- Spindle cross-section (7mm or 8mm square)
Frequently Asked Questions About Replacing a Window Handle
How long does it take to replace a window handle?
Most replacements take about 5 minutes per window. The process involves removing two screws, swapping the handle, and reinstalling the screws. Having the correct replacement part on hand keeps the job quick and hassle-free.
Do I need to drill new holes to install a replacement handle?
No, drilling is not necessary when you choose a compatible handle. The new handle should align with the existing screw holes in your frame. Drilling into uPVC frames is often impossible due to internal steel or aluminum reinforcement, so matching the original hole spacing is essential.
What size spindle do I need for a uPVC window handle?
Spindle sizes vary, but the most common cross-sections are 7mm and 8mm square. Lengths typically range from 25mm to 50mm. Measure your existing spindle from base to tip and across its flat sides to ensure proper engagement with the gearbox.
Can I use a universal handle on any uPVC window?
Universal handles work with many uPVC window systems, particularly those from manufacturers like Everest. They allow color changes without compatibility issues. However, always verify spindle size, screw hole spacing, and handle style before purchasing to confirm a proper fit.
Why does my new window handle feel loose after installation?
A loose handle usually means the screws aren’t tight enough or the screw holes have become stripped. Tighten the screws first. If the holes are worn, slightly larger screws or a filler repair may restore a secure fit.
What should I do if the handle turns but the window won’t open?
This indicates a spindle mismatch or an internal gearbox failure rather than a handle problem. Verify that your spindle length and cross-section match the original. If the spindle is correct, the gearbox itself may need professional inspection or replacement.
Key Takeaways for a Successful Window Handle Replacement
Replacing a window handle is one of the simplest home repairs you can tackle, and doing it yourself saves the cost of a service call. Start by confirming compatibility through screw hole spacing, spindle dimensions, and handle style. Gather a screwdriver and a thin prying tool, then remove the old handle by opening the window fully and unscrewing the base. Install the new handle in the open position, tighten screws evenly without over-torquing, and test the full range of motion before considering the job complete. Annual cleaning and silicone lubrication will keep your new handle operating smoothly for years. If problems persist after replacement, the issue likely lies within the gearbox or locking mechanism, and consulting a window technician is the best next step.



