
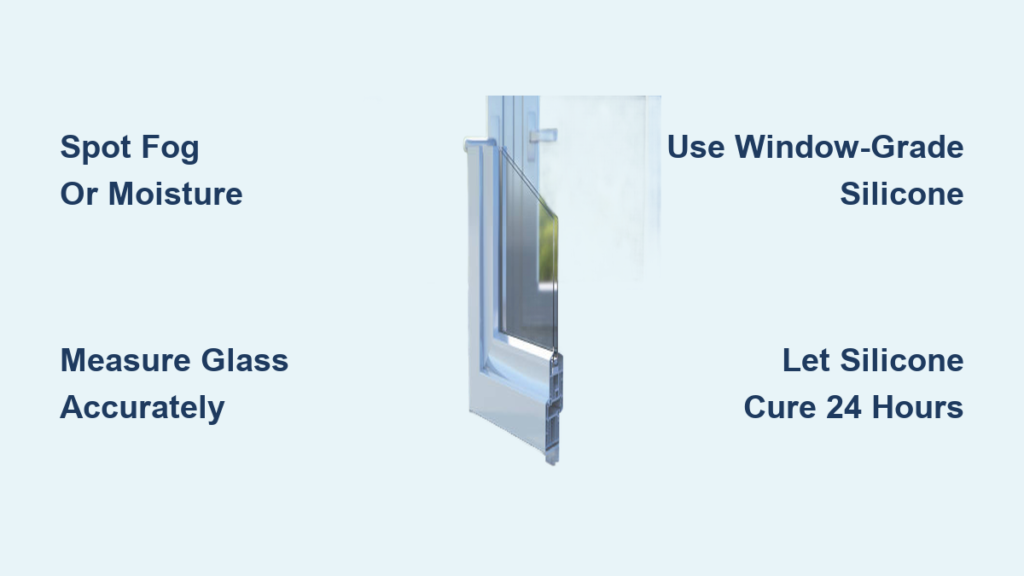
A foggy window or a cracked pane can make any room feel neglected, but you don’t need to replace the entire frame or call in a contractor. Most double pane window failures happen because the sealed glass unit inside has lost its integrity, not because the frame is damaged. Swapping out just the glass unit is a smart, budget-friendly fix that can be done in under two hours with basic tools.
This guide breaks down the entire process of how to replace a double pane window, from spotting the warning signs to installing the new glass. You’ll learn how to measure accurately, order the right parts, and complete the job safely, saving roughly $300 to $700 compared to professional service.
Spot the Warning Signs Before You Start
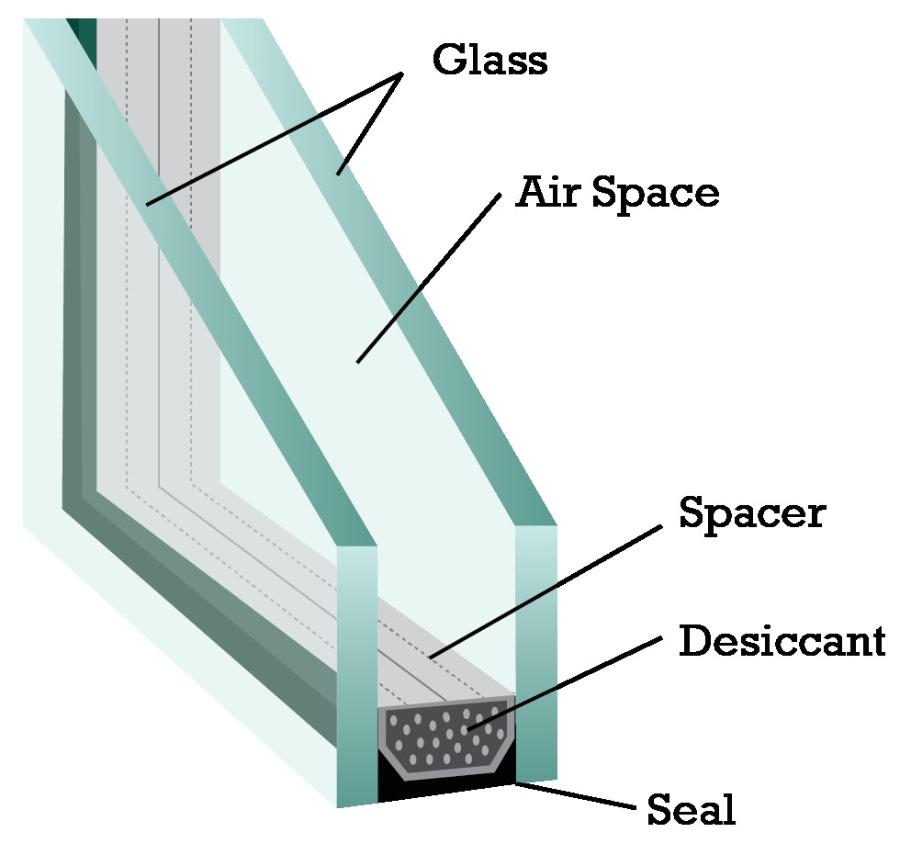
Not every window issue calls for a full glass replacement. Confirm the problem first so you don’t waste time or money.
Fog or Moisture Trapped Between Panes
If you see haze, droplets, or a milky film between the two glass layers, the seal has failed. Moisture inside means insulation has dropped and mold can start growing. No amount of cleaning will fix this; the sealed unit must be replaced.
Cracks or Visible Breaks
Even a hairline crack compromises the entire unit. Double pane windows rely on a sealed gas layer for efficiency, and a break lets in air and moisture. Replace the whole unit, not just the cracked side.
Drafts and Rising Energy Bills
Feel for cold air near the window in winter, or use an infrared thermometer to compare temperatures between a working window and the suspect one. A failed seal is a common culprit when rooms feel drafty or heating costs climb.
Measure the Existing Glass Unit Correctly
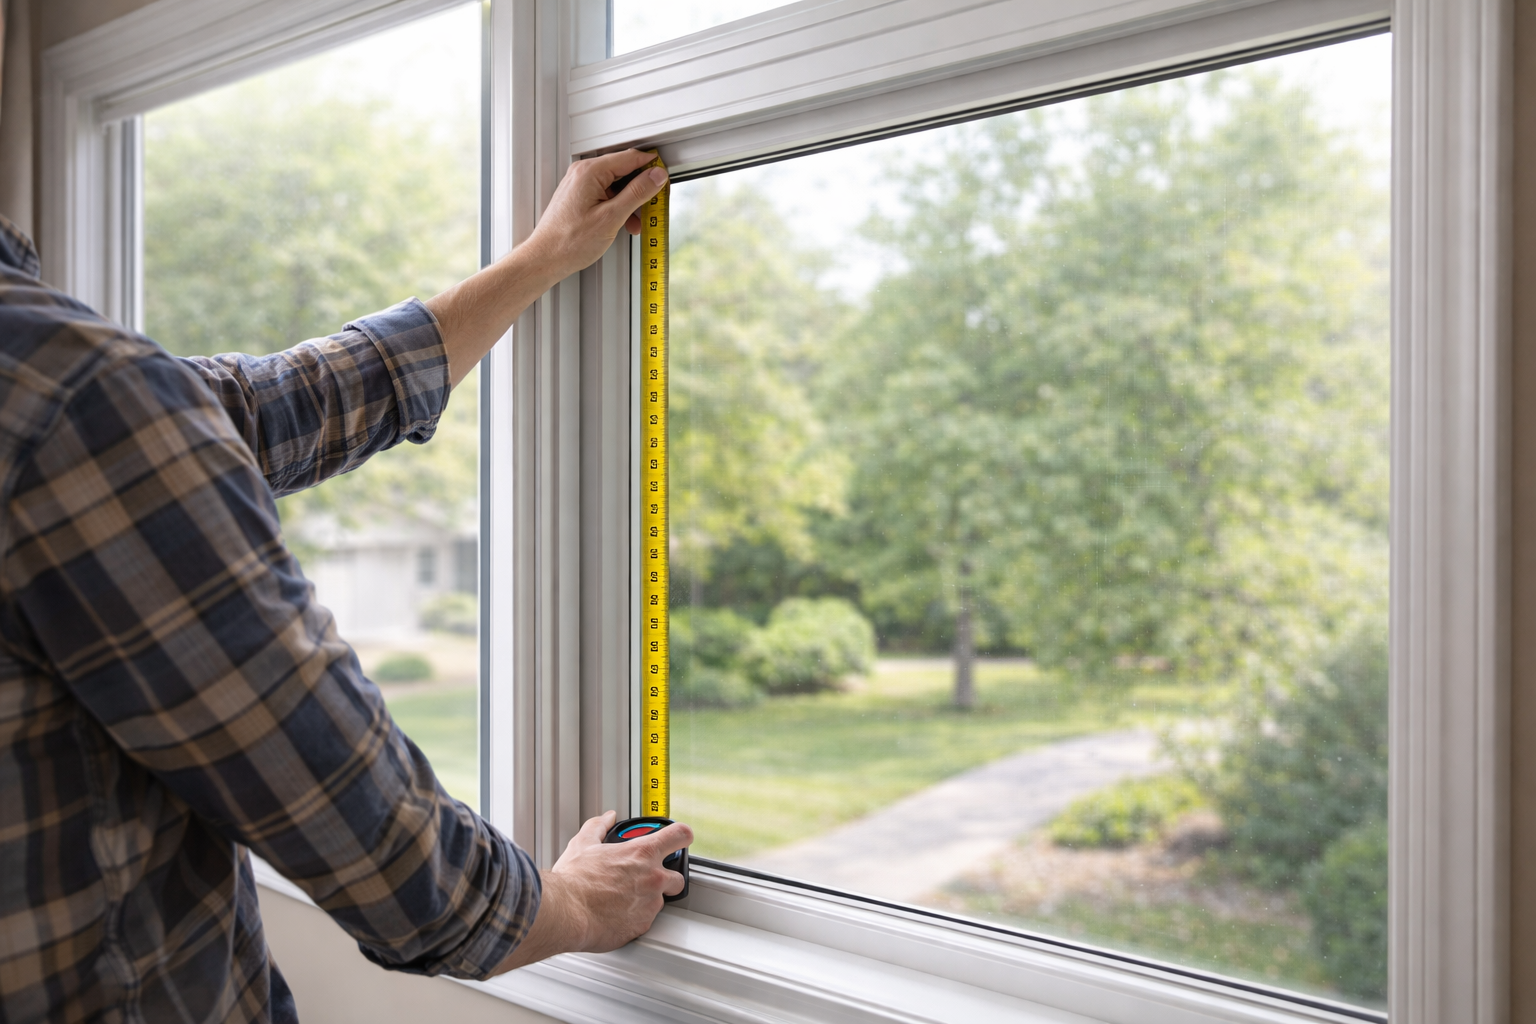
Wrong measurements mean a replacement that won’t seat properly. Precision here saves headaches later.
Remove the Old Unit First
Foggy or dirty glass hides the true edges. Pulling out the failed unit gives you accurate measurements and lets you inspect the frame for hidden damage.
Record Height, Width, and Thickness
Use a metal tape measure and write dimensions to the nearest 1/16 inch:
– Height and width: Measure the full outside edge of the sealed unit.
– Thickness: Common sizes are ½”, 5/8″, ¾”, 7/8″, or 1″. This determines how deep the frame channel is.
Note Special Features
Check for decorative grids (muntins), Low-E coatings, or gas fills like argon. These details matter when ordering.
Order the Right Replacement Unit
A mismatched IGU won’t fit or perform well. Source carefully.
Buy Through a Local Dealer
Order from a local building supplier or glass shop instead of online. You’ll avoid high shipping costs on heavy glass, get help verifying specs, and reduce the risk of breakage in transit.
Contact the Original Manufacturer
Look for a logo etched in a corner of the glass. Call the manufacturer with your measurements; they often supply exact replacements even if you don’t know the model number.
Confirm What’s Included
Make sure your order covers:
– The new IGU
– Matching glazing beads (vinyl strips)
– Window-grade silicone bedding (if not included, buy separately)
Budget around $48 to $75 for the full kit.
Gather Your Tools and Materials
Having everything on hand prevents mid-project trips and keeps the work safe.
Must-Have Materials
- Replacement IGU (custom-ordered)
- Glazing beads (replacements if damaged)
- Window-grade silicone (not standard caulk; it must be labeled for glass bedding)
- Painter’s tape or duct tape (for cracked glass)
Critical Tools
- Suction cups for lifting heavy glass
- Moon knife or putty knife for prying beads
- Sharp scissors for cutting vinyl strips
- Scraper for removing old sealant
- Isopropyl alcohol for cleaning
- Vacuum for debris
- Heavy gloves and safety goggles (non-negotiable)
Remove the Old Glass Unit Safely
This step demands patience, especially with broken glass.
Tape Cracked Glass First
If the pane is cracked but still intact, apply tape in a grid across both sides. This holds shards together and prevents sudden collapse during removal.
Pry Off the Glazing Beads
Glazing beads are thin vinyl strips around the glass edge that snap into the frame.
– Start with the side beads, which often overlap the top and bottom.
– Slide a moon knife under the bead and gently pry it loose.
– Work slowly to avoid gouging the frame, and set beads aside if you plan to reuse them.
Cut Through the Old Sealant
Run a scraper or utility knife around the inner edge of the glass to slice through cured silicone. A slightly heated blade softens stubborn sealant.
Lift Out the Unit
- Attach suction cups to the glass.
- Pull the unit straight out, wiggling slightly if it sticks.
- For shattered glass, remove fragments by hand (with gloves) and place them in a rigid, labeled container for disposal.
Prep the Frame for the New Unit
A clean frame is the key to a strong, lasting seal.
Scrape Out Old Sealant
Remove every bit of old silicone from the channel where the glass sits. Leave no chunks or sticky residue behind.
Wipe with Alcohol
Dampen a cloth with isopropyl alcohol and scrub the entire channel. This strips away oils and dust that could weaken the new bond.
Vacuum All Debris
Extract every speck of dust, sand, and glass particles. Even tiny bits can prevent a flush fit or damage the new unit.
Install the New IGU the Right Way
Proper technique here prevents leaks and ensures long-term performance.
Apply Fresh Silicone Beading
Squeeze a continuous, even bead of window-grade silicone around the inner lip of the frame channel. Don’t skip spots; gaps create weak seals.
Set the New Glass in Place
- Attach suction cups to the new IGU.
- Align it with the frame opening.
- Press firmly into the silicone, applying even pressure around the edges. You should feel it seat fully.
Work quickly; silicone starts curing within minutes.
Reinstall the Glazing Beads
- Cut beads to length with sharp scissors for clean ends.
- Start with the top and bottom beads, then install the sides (reverse of removal).
- Press beads into the groove by hand. They should snap in snugly without needing a mallet, which can crack the new glass.
Check the Fit and Seal Quality

A good installation looks seamless and feels solid.
Inspect Bead Alignment
Walk around the window and confirm the glazing beads sit flush with the frame. Look for gaps, lifts, or uneven sections.
Test for Movement
Press gently on the glass. It should feel solid with no wiggle. Movement means the silicone didn’t bond or the unit isn’t seated fully.
Verify Clarity
Look for any immediate fog or haze. A clear, dry interior space confirms the factory seal is intact.
Let the Silicone Cure Fully
Rushing this step can ruin the entire seal.
Wait 24 Hours
Keep the window closed and avoid cleaning or pressure washing for at least one full day. Silicone needs time to fully cure and adhere.
Choose a Dry, Calm Day
Wind can shift the glass before the silicone sets. If rain is expected, cover the exterior or wait for better weather.
Prevent Future Window Failures
A little care goes a long way toward extending the life of your new IGU.
Clean Glass Safely
Use non-abrasive cleaners and soft cloths. Avoid ammonia-heavy products near the seals.
Inspect Seals Every Year
Check glazing beads and frame edges annually for cracks, lifting, or separation. Catching small issues early prevents full IGU failure.
Skip the Pressure Washer
High-pressure sprayers can force water under the beads and compromise the silicone bond.
Know When to DIY and When to Call a Pro
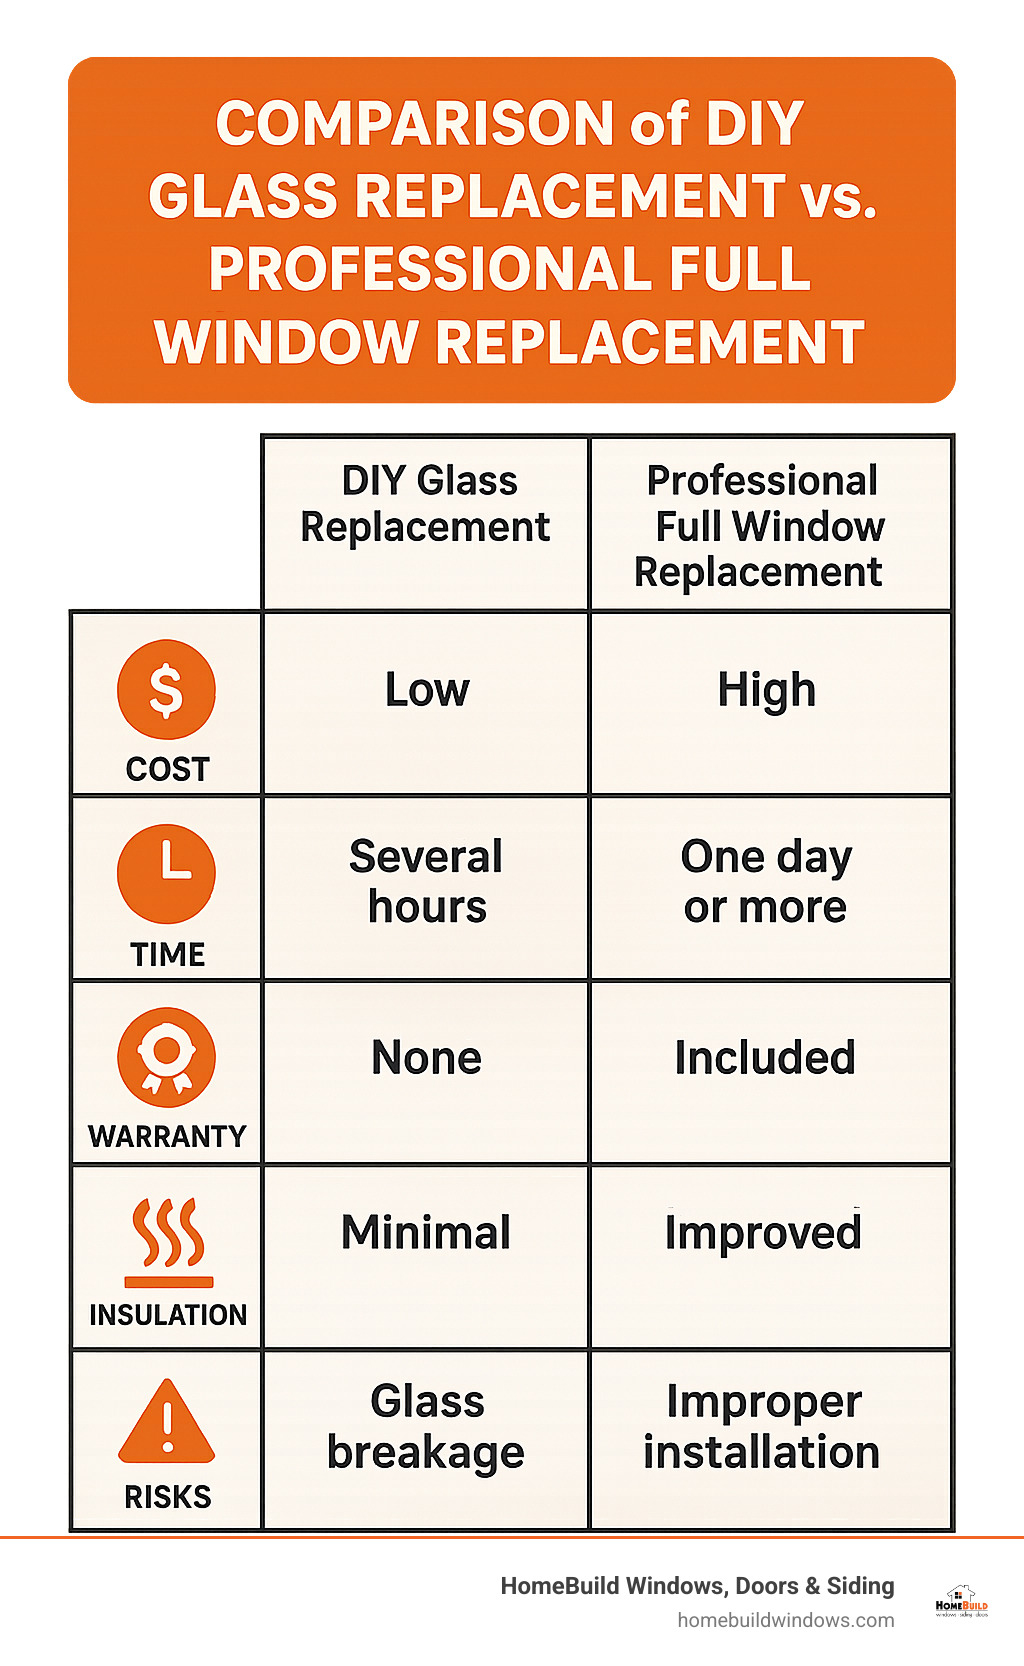
Most standard double pane windows are safe and simple to replace yourself, but some situations call for a professional.
DIY Works Best For:
- Standard-sized windows under 36″ x 60″
- Clear access from inside and outside
- No active warranty requiring certified installers
- Homeowners comfortable with precision work
Hire a Pro If:
- The window is large or heavy (like patio doors)
- It’s high up or hard to reach safely
- The manufacturer requires certified installation to keep the warranty
- You’re unsure about handling glass safely
Specialists like Glass Doctor charge more but offer guarantees and insurance coverage.
Frequently Asked Questions About Replacing a Double Pane Window
Can I replace just one pane of a double pane window?
No. Double pane windows function as a single sealed unit. If one pane is broken or the seal fails, the entire Insulated Glass Unit (IGU) must be replaced to restore insulation and structural integrity.
How much does it cost to replace a double pane window yourself?
A DIY replacement typically costs around $75 total, including the glass unit (about $48), silicone, and supplies. Professional full window replacement often runs $300 to $800 or more.
How long does it take to replace a double pane window?
Once materials are on hand, the actual replacement takes one to two hours. You also need to allow 24 hours for the silicone bedding to cure before exposing the window to rain or cleaning.
What tools do I need to replace a double pane window?
Essential tools include suction cups, a moon knife or putty knife, sharp scissors, a scraper, isopropyl alcohol, a vacuum, heavy gloves, and safety goggles. You also need window-grade silicone and replacement glazing beads.
Will replacing the glass void my window warranty?
Some manufacturers require certified installers to keep the warranty valid. Check your warranty terms before starting. If professional installation is required, hiring a specialist preserves your coverage.
How do I know if my window seal has failed?
The most common signs are fog, condensation, or moisture droplets trapped between the two glass panes. You may also notice drafts, cold spots near the window, or a spike in energy bills.
Final Thoughts on Replacing a Double Pane Window
Learning how to replace a double pane window is one of the most rewarding DIY home repairs you can tackle. The job saves significant money, takes only a few hours, and restores both clarity and energy efficiency to your home. Focus on accurate measurements, use window-grade silicone, and handle every piece of glass with care.
Start by inspecting your windows for the warning signs covered above. If you spot fog, cracks, or drafts, grab your tape measure and order a replacement IGU from a local dealer or the original manufacturer. With a little patience and the right tools, you’ll have a window that looks and performs like new.



