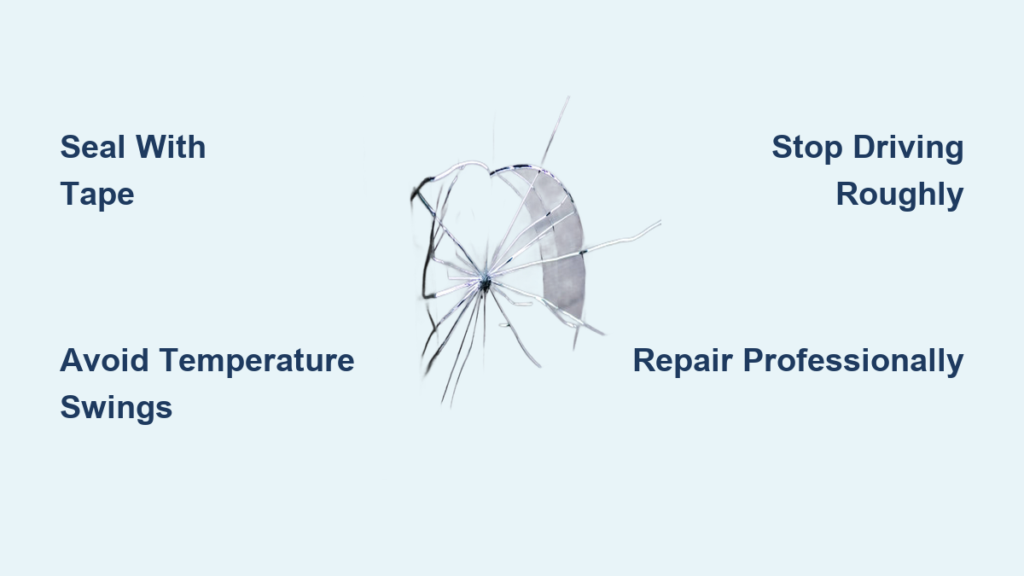
A cracked windshield is more than an eyesore; it is a safety risk that grows worse by the day. Even a tiny chip can stretch across the glass within hours when temperature swings, road vibration, or moisture come into play. The good news is that fast, smart action can stop a cracked window from spreading long enough to arrange a professional repair, often saving you hundreds of dollars.
Below you will find proven temporary fixes, clear guidelines for DIY resin kits, and the warning signs that mean replacement is unavoidable. You will also learn which home remedies (looking at you, nail polish) actually make things worse and why skipping repair can put your safety and wallet at risk.
Immediate Damage Control in the First 24 Hours

Speed matters. Acting within the first day dramatically improves your odds of containing the crack before contamination and stress take over.
Seal the Damage with Clear Packing Tape
Clear packing tape is the fastest way to block moisture and dirt from entering the fracture. Once debris settles inside, it acts like a wedge that widens the crack when temperatures change.
How to apply it:
1. Clean the area with glass cleaner or a water-vinegar mix.
2. Dry the surface completely with a lint-free cloth.
3. Cut a piece of clear tape slightly larger than the crack.
4. Press firmly over the damage and seal all edges.
Pro Tip: Replace the tape if it gets cloudy or loose. Never use duct tape or colored tape; it can stain the glass and block future resin bonding.
Prevent Thermal Shock
Temperature change is the number one reason cracks spread. A swing of 30°F (17°C) or more can force the fracture to run, especially during winter freeze-thaw cycles or hot summer afternoons.
Critical actions to take:
– Never pour hot water on a frozen windshield.
– Avoid blasting the defroster on high when the glass is ice-cold.
– Do not aim AC vents directly at sun-baked glass.
– Warm the cabin gradually in winter; cool it slowly in summer.
– Park in a garage or shaded area whenever possible.
Expert Note: Heard a cracking sound overnight? That is thermal stress at work. Seal the area immediately and stabilize the temperature around the vehicle.
Adjust Your Driving Habits
Every pothole, hard brake, and slammed door adds mechanical stress to damaged glass. Reduce these dynamic loads until the repair is done.
Do this right away:
– Steer clear of potholes, speed bumps, and rough pavement.
– Maintain extra following distance to avoid sudden stops.
– Close doors, the trunk, and the hood gently to prevent cabin pressure spikes.
– Disable wipers if the crack sits in their path; blade pressure can pry it open.
– Postpone long trips and highway driving.
Visual Cue: If the crack reaches the windshield edge, replacement is almost always required. Edge cracks spread faster because of structural tension.
DIY Resin Repair: When It Works and When It Doesn’t
A DIY resin kit can stabilize small damage and slow spreading, but only under the right conditions. It is not a substitute for professional service.
Decide If DIY Repair Makes Sense
Before buying a kit, run through this checklist:
| Condition | DIY Repair Possible? |
|---|---|
| Chip smaller than 1 inch (30mm) | Yes |
| Crack 3 inches or shorter (and fresh) | Yes |
| Crack touches the windshield edge | No |
| Crack sits in the driver’s line of sight | No (distortion risk) |
| Damage contaminated with dirt or moisture | No (poor results) |
Time Sensitivity: For best results, act within 48 hours of the damage. The longer you wait, the more contamination sets in.
Step-by-Step Resin Injection
Most kits include UV-cured resin and a small applicator bridge. Follow these steps carefully:
-
Clean the Area
Wipe with isopropyl alcohol and a microfiber cloth. Let it dry completely. -
Position the Applicator
Center the bridge directly over the crack. Many kits use suction cups to create a tight seal. -
Inject the Resin
– Open the valve and let capillary action pull resin into the fracture.
– Close the valve, then reopen to draw out air bubbles. Repeat two to three times.
– Stop when resin rises slightly above the glass surface. -
Cure with UV Light
Expose the repair to direct sunlight for 15 to 20 minutes, or use the UV lamp included in the kit. The resin should harden to a clear finish. -
Scrape and Polish
Remove excess resin with a razor blade held at a 45° angle. Buff with glass polish for clarity.
Cost: Kits typically run between $10 and $42. Trusted brands include Rain-X and Permatex.
Risk Warning: Poor technique traps air bubbles or leaves haze, which can make professional repair impossible later. If you are unsure, skip the DIY route and call a pro.
DIY Methods to Avoid
Some internet fixes sound clever but cause real damage.
Clear Nail Polish
Do not use it. Nail polish yellows under UV light, breaks down in heat, and contaminates the glass, blocking proper resin bonding. At best, it is a 24-hour patch for chips under ¼ inch.
Superglue (Cyanoacrylate)
Never use it on glass. It clouds, cracks, and bonds too aggressively. Once applied, it prevents professional resins from adhering and often forces a full replacement.
Silicone or Hair Dryer Fixes
These are outdated and unreliable. Silicone degrades within months and leaves residue, while heat application risks thermal shock.
Bottom Line: If you would not trust it on your phone screen, do not trust it on your windshield.
Professional Repair vs. Full Replacement
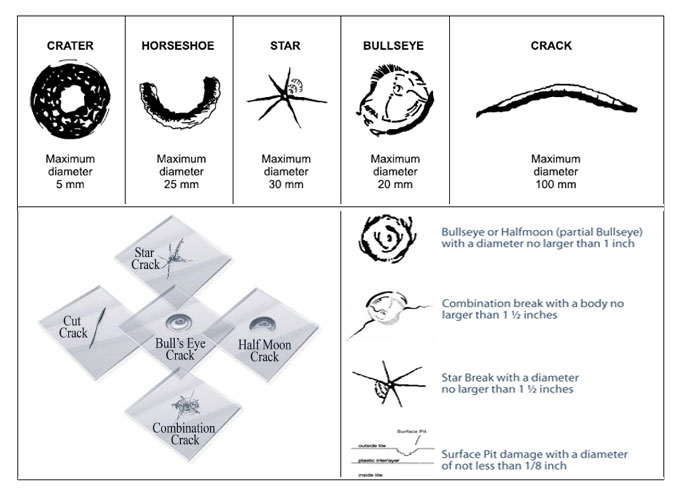
When done correctly, professional repair restores up to 90% of the windshield’s original strength and permanently halts spreading.
When Professional Repair Is the Right Call
Technicians use industrial-grade resins and vacuum-injection tools that outperform any DIY kit.
Schedule a repair if:
– The crack is under 6 inches (some shops handle up to 7 inches).
– The damage is outside the driver’s primary line of sight.
– The crack does not touch the edge of the windshield.
– Only the outer glass layer is damaged.
– The damage is fresh and clean.
Typical Cost: $40 to $80.
Time Required: Under 30 minutes.
Warranty: Many shops offer lifetime repair guarantees.
Bonus: Most insurance companies waive your deductible for chip repair under comprehensive coverage, which means the fix is often free.
When Replacement Is the Only Option
Some damage cannot be safely repaired. Replacement becomes mandatory when:
- The crack is longer than 6 inches.
- The damage sits in the driver’s line of sight (repairs cause optical distortion).
- The crack starts or ends at the windshield edge (compromises the structural seal).
- Multiple cracks or spiderweb patterns are present.
- The inner glass layer or plastic interlayer is breached.
- The damage blocks ADAS sensors (lane-keep, auto-brake, adaptive cruise).
ADAS Note: Replacement requires recalibration of driver-assist systems, often done with specialized software and targets. Skipping this step risks malfunctioning safety features.
Replacement Cost: Anywhere from $300 to over $1,000, depending on the vehicle and ADAS needs.
Why Cracks Spread: The Science Behind the Damage
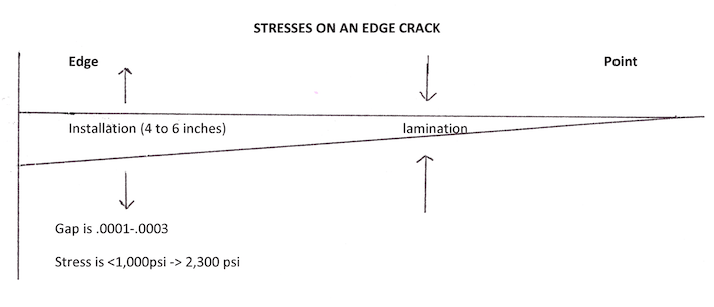
Knowing what drives crack growth helps you prevent it.
Thermal Stress Is the Silent Killer
Glass expands when hot and contracts when cold. A cracked windshield has a weak point where stress concentrates, so uneven temperatures pull the fracture open.
- Winter: Water inside the crack freezes and expands, forcing the fracture wider.
- Summer: Sun heats one section faster than the rest, creating uneven expansion.
- Daily Swings: Even HVAC use can trigger spread if airflow is too direct.
Pro Tip: Cracks often grow overnight during cold snaps. If you hear a sudden “pop,” inspect the windshield right away.
Vibration and Structural Load
Every bump you drive over causes the vehicle frame to flex. That flex transfers stress directly to the windshield, especially where a crack already exists.
- Potholes, speed bumps, and railroad tracks are high-risk.
- Slamming doors creates a pressure wave inside the cabin that pushes against the glass.
- Heavy cargo or roof loads increase frame flexion.
Visual Clue: If a crack runs parallel to the windshield edge, it is under high structural tension and likely to spread fast.
Contamination and Moisture
Dirt, road salt, and water entering the fracture make everything worse.
- Water expands when frozen, increasing internal pressure by up to 2,000 psi.
- Grit acts like an abrasive, slowly widening the fracture.
- UV exposure degrades temporary sealants like tape or nail polish.
Safety, Legal, and Financial Risks of Ignoring the Crack

Delaying repair is not just expensive; it is dangerous.
Structural Safety Threats
Your windshield is a critical safety component:
- It provides up to 45% of roof crush protection in a rollover.
- It acts as a backstop for passenger airbags. A cracked windshield may collapse and redirect the airbag toward the ceiling.
- It increases the risk of full shattering on minor impact.
Legal and Inspection Consequences
- Fines: Many states and countries issue fines for cracks in the driver’s field of vision or within the wiper sweep zone.
- Inspection Failure: Vehicles with large or obstructive cracks often fail safety inspections.
- Liability: In an accident, an unrepaired crack could be viewed as negligence, complicating insurance claims.
Insurance and Cost Comparison
| Action | Average Cost | Deductible | Rate Impact |
|---|---|---|---|
| DIY Repair | $10 to $42 | None | None |
| Professional Repair | $40 to $80 | Often waived | None |
| Replacement | $300 to $1,000+ | Full comprehensive deductible | Possible increase if frequent |
Smart Move: Repair early. A $50 fix today can prevent a $700 replacement tomorrow.
Step-by-Step Action Plan
Follow this timeline to stop a cracked window from spreading and resolve it safely.
Phase 1: First 24 Hours
- Assess the damage: size, location, and type (bullseye, star, or line).
- Clean the area with alcohol or a vinegar solution.
- Seal with clear packing tape.
- Park in shade or a garage to avoid temperature extremes.
Phase 2: Next 3 to 7 Days
- Drive gently and avoid bumps and hard stops.
- Monitor daily for growth. Use a marker to outline the crack ends.
- Skip car washes to avoid high-pressure sprays.
- Decide between DIY and professional repair.
Phase 3: Permanent Solution
- If the crack is 3 inches or shorter and not in your sightline, use a quality DIY kit.
- If the crack is 6 inches or shorter, schedule a professional repair.
- If the crack is longer than 6 inches, near the edge, or in your sightline, book a replacement with ADAS recalibration if needed.
Frequently Asked Questions About Stopping a Cracked Window from Spreading
Can a cracked window stop spreading on its own?
Rarely. Even if a crack appears stable, thermal stress, vibration, and contamination almost always cause it to grow over time. Sealing the damage and controlling temperature can slow it down, but only professional repair stops it permanently.
How long do I have before a small chip becomes a serious crack?
There is no guaranteed window. Some chips hold for weeks, while others run several inches in a single cold morning. Treat every chip as urgent and seal it within 24 hours for the best outcome.
Will clear nail polish actually stop a crack from spreading?
No, not reliably. Nail polish yellows under UV light, degrades in heat, and contaminates the glass, which prevents professional resin from bonding later. It is at best a desperate 24-hour patch for chips under ¼ inch.
Is it safe to drive with a cracked windshield?
It depends on the size and location. Small chips outside the driver’s line of sight are usually manageable for short trips. Long cracks, edge damage, or anything in your direct line of sight should be treated as a safety hazard and repaired immediately.
Does insurance cover windshield crack repair?
In most cases, yes, under comprehensive coverage. Many insurers waive the deductible entirely for chip repair to encourage early fixes. Replacement usually requires you to pay the comprehensive deductible, which ranges from $50 to $500.
How do I know if I need a repair or a full replacement?
Repair is usually possible when the crack is under 6 inches, not in your line of sight, and not touching the edge. Replacement becomes mandatory when the crack is longer, located in your sightline, reaches the edge, or penetrates the inner glass layer.
Final Thoughts on Stopping a Cracked Window from Spreading
Stopping a cracked window from spreading comes down to three things: speed, smart choices, and avoiding bad advice. Clear tape buys you time. Temperature control prevents shock. Professional repair restores strength. And knowing when to replace rather than patch keeps you safe and legal.
Do not gamble with visibility or structural integrity. A small investment in repair today prevents a major expense and potential danger tomorrow. Seal the damage now, schedule a professional fix, and drive with confidence.