
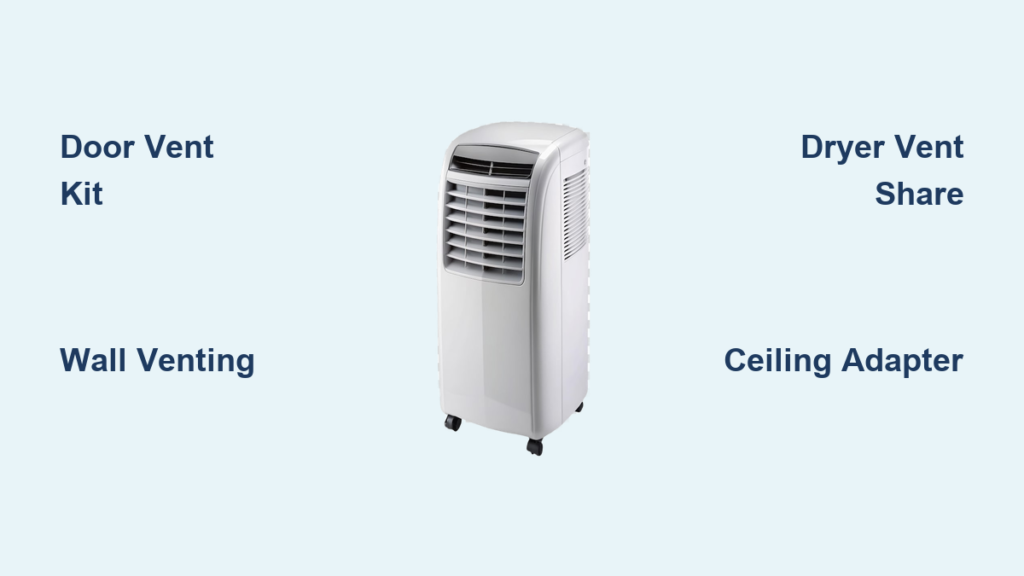
You bought a portable air conditioner to escape summer heat, but your room has no window. Frustrating, right? Thousands of renters and homeowners face this exact problem every cooling season. The good news is that venting a portable AC without a window is entirely possible when you use the right method.
Here’s the reality: all compressor-based portable ACs must expel hot air outside. They don’t create cold air. They transfer heat. Without proper venting, the heat stays trapped indoors, and your unit works harder while cooling less. This guide covers six safe, tested methods to vent your portable AC anywhere, plus what to avoid and when to switch to alternatives.
Door Venting Solutions

Install a Vent Kit Through an Exterior Door
The most popular and renter-friendly way to vent a portable AC without a window is through an exterior door. Sliding glass doors, patio doors, and standard entry doors all work well with the right kit.
Start by measuring your door opening and your AC’s exhaust hose diameter. Most door vent kits include a rigid panel (plexiglass or foam board) with a pre-cut hole for the hose. For DIY projects, cut a panel to fit the door space and drill a hole slightly smaller than the hose for a tight friction fit.
Attach the hose to your AC, feed it through the panel, and slide the panel into place. Seal all edges with weatherstripping or foam tape to prevent hot exhaust from leaking back into your room.
Pro Tip: For sliding doors, place a draft blocker or rolled towel at the bottom after installation to close any remaining gap.
Seal Every Gap to Stop Air Recirculation
Even tiny gaps destroy cooling efficiency. Hot air leaking back into the room forces your AC to run constantly, driving up energy costs.
Use foam tape, rubber gaskets, or expandable draft seals around the vent panel. Test for leaks by holding a tissue near the edges. If it flutters, you have a draft. Skip standard duct tape since it degrades under heat. Aluminum foil tape creates a durable, airtight bond that withstands high temperatures.
Wall Venting (Permanent Option)

Drill Through an Exterior Wall for Maximum Efficiency
If you own your home or have landlord approval, wall venting delivers the best long-term performance. It creates a direct, straight path to the outside, similar to a mini-split system.
Choose a spot on an exterior wall close to where your AC will sit. Use a stud finder to avoid wires and plumbing. Mark the center point and drill a hole using a hole saw. Most installations need a 5 to 6 inch diameter to match standard wall sleeves.
Insert the wall sleeve and secure it from both sides. Connect your AC’s exhaust hose to the interior side of the sleeve. On the exterior, attach a weatherproof vent cap to block rain and pests.
Seal Thoroughly Against Leaks and Pests
Once the sleeve sits flush, seal all gaps with exterior-grade caulk or fire-rated expanding foam. This stops moisture intrusion, air leaks, and insect entry.
Warning: Never leave the hole unsealed. Even small gaps invite water damage, mold growth, and higher energy bills.
This method keeps the hose short and straight, which maximizes airflow and cooling power. Unlike window kits, wall vents preserve natural light and don’t interfere with window operation.
Drop Ceiling Venting
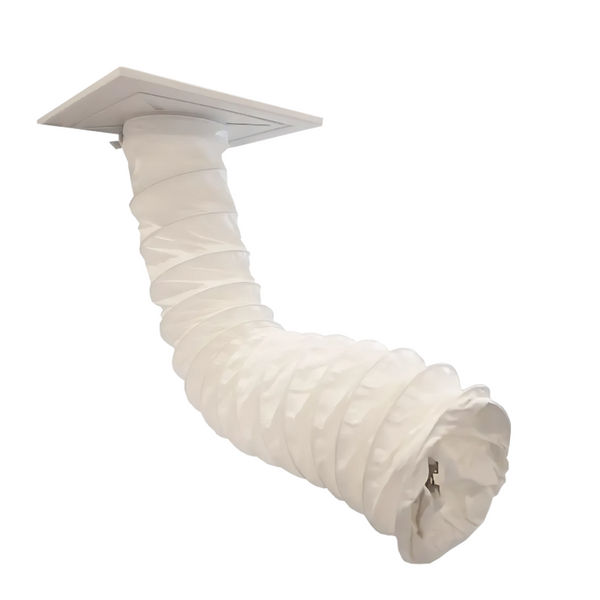
Use a Ceiling Adapter in Suspended Tile Systems
Basements, offices, and commercial spaces with drop ceilings offer a viable venting path, but only when the space above has proper ventilation to the outside.
Remove a ceiling tile near your AC unit. Cut a hole in the tile to fit a drop ceiling vent adapter. These adapters have flanges that sit securely in the ceiling grid.
Attach your exhaust hose to the adapter, then reinstall the modified tile. Make sure the hose runs straight without kinks or pinches. Secure it to ceiling supports with zip ties if needed.
Confirm the Attic or Plenum Has Active Ventilation
Critical Step: Venting hot air into a sealed ceiling cavity creates serious problems. Trapped heat raises indoor temperatures, promotes mold growth, and damages insulation or wiring.
Before installing, verify that the space above has soffit vents, ridge vents, or exhaust fans. If no ventilation exists, run a duct from the adapter to an exterior wall or roof vent. Without guaranteed airflow above, skip this method entirely.
Dryer Vent Utilization

Share an Existing Dryer Duct Safely
Many homes have a laundry room with a 4-inch dryer vent that exits outdoors. If one is nearby, you can temporarily share the duct with your portable AC.
Ensure the dryer stays off whenever the AC runs. Simultaneous use causes backdrafting and reduced airflow. Purchase a dryer vent adapter kit with a Y-connector and damper. The damper blocks hot air from flowing back into your AC when the dryer activates.
Remove the dryer vent cover, attach the Y-splitter, and connect your AC hose to one side. Reattach the dryer hose to the other. Seal all joints with aluminum foil tape.
Prevent Blockages and Backdrafting
Lint buildup poses a serious risk. Clean the entire duct system before connecting your AC, then check monthly for obstructions. Confirm the exterior exhaust flap opens freely. If your AC’s airflow can’t push it open, hot air recirculates indoors.
This setup works best with dual-hose portable ACs, which maintain balanced airflow. Single-hose units may struggle due to negative pressure.
Chimney or Fireplace Venting
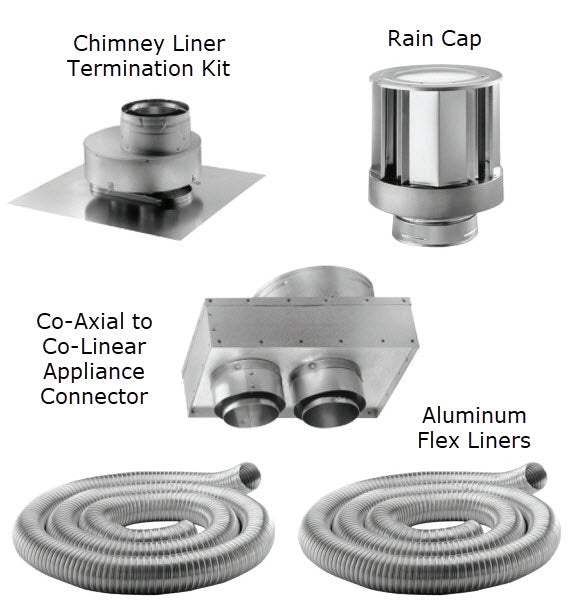
Route the Hose Through an Unused Flue
Older homes with unused chimneys can repurpose the flue as an exhaust path. This works well when windows are off-limits but a fireplace exists.
Buy a chimney venting kit with a long flexible hose and a fireplace adapter. Open the damper fully and clean out soot or debris first. Attach the hose to your AC, then feed it up the flue.
Seal the fireplace opening around the hose with high-heat foam or a custom wood panel. Without a proper seal, your AC will cool the entire house by drawing air up the chimney.
Block Heat Loss and Downdrafts
An airtight seal is non-negotiable. Use fire-rated caulk or heat-resistant foam to close every gap. Never leave the damper open without sealing around the hose.
Safety Note: Only use this method when the chimney is clean and completely cool. Avoid it if the fireplace was used recently, since residual heat can damage the hose.
Attic Venting (Last Resort Only)
Vent Only Into Well-Ventilated Attics
Venting into an attic is risky unless the space has strong cross-ventilation. Otherwise, you’re dumping 90–120°F exhaust air into a confined area that turns into an oven.
If your attic has ridge vents, gable fans, or powered turbines with good airflow, this method might work. Cut a hole in the ceiling near your AC, install a vent adapter, and run the hose into the attic. Seal the penetration with fire-rated foam to prevent conditioned air loss.
Monitor for Heat Buildup and Mold
Even with ventilation, watch attic temperatures closely. If heat rises significantly, stop using this method immediately.
Hot, moist air in an attic encourages mold on wood, insulation, and ductwork. Inspect regularly for moisture or mildew signs. When the attic lacks proper ventilation, choose a different venting method.
Hose Optimization Tips

Keep the Hose Short and Straight
Your exhaust hose directly affects cooling performance. Longer hoses and sharp bends increase backpressure, reducing airflow and forcing the compressor to work harder.
Aim for a hose length under 5 feet. Every extra foot reduces efficiency. Avoid 90-degree bends, which can cut airflow by up to 30%. If you need more length, use only manufacturer-approved extensions designed for your specific unit.
Insulate the Hose to Reduce Heat Radiation
Standard exhaust hoses are thin plastic that radiates heat back into your room, working against your cooling efforts. Wrap the hose with insulated duct wrap or buy a pre-insulated sleeve.
Keep the hose away from curtains, furniture, and flammable materials. Maintain at least 6 inches of clearance on all sides for safety.
Maintenance and Cleaning
Clean the Hose Every 3 Months
Dust, lint, and pet hair clog exhaust hoses over time, restricting airflow and causing overheating. Disconnect the hose and wash it with mild soap and water. Rinse thoroughly and let it dry completely before reattaching.
Inspect for cracks, soft spots, or warping during cleaning. Replace damaged hoses immediately to maintain proper venting.
Check for Blockages When Performance Drops
A sudden loss of cooling or increase in noise usually signals a blockage. Shine a flashlight inside the hose and connections. Clear debris with a vacuum or soft brush.
Clean your AC’s air filter monthly. A dirty filter restricts airflow and strains the compressor, shortening the unit’s lifespan.
Non-Venting Alternatives
Switch to an Evaporative Cooler in Dry Climates
When venting isn’t possible at all, evaporative coolers (swamp coolers) offer a viable alternative. These units cool air through water evaporation and require no exhaust hose.
They perform best in dry climates with humidity below 50%. In humid areas, they add moisture and make rooms feel stickier. Place the unit near an open door or window for airflow. Evaporative coolers use less energy than portable ACs but won’t cool as aggressively.
Use a Dehumidifier for Mild Cooling
Some advanced dehumidifiers provide a slight cooling effect by removing moisture from the air. While not a true AC replacement, they improve comfort in damp basements or mild temperatures.
In extreme heat, dehumidifiers won’t lower temperatures enough to serve as a primary cooling source.
Common Myths Debunked
“Venting Into Another Room Works”
Wrong. Sending hot air into a hallway, bathroom, or closet simply transfers heat. That heat eventually spreads back into your cooled room through walls, doors, and vents. You’re not eliminating heat. You’re redistributing it, which makes your AC work harder and cool less.
“Some Portable ACs Don’t Need Venting”
Only evaporative coolers and standard fans operate without venting. Every compressor-based portable AC must expel hot air outside. Units marketed as “no-vent” air conditioners are misleading or simply aren’t true ACs.
“The Hose Releases Mostly Moisture”
The exhaust hose primarily releases hot air, not water. While some moisture evaporates out, the main purpose is heat removal. Blocking this airflow defeats the entire cooling process.
Frequently Asked Questions About Venting a Portable AC Without a Window
Can a portable AC work without any venting?
No. Compressor-based portable ACs require external venting to expel hot air. Without it, the unit creates a net heat gain in the room and cannot cool effectively. Only evaporative coolers operate without venting.
Is it safe to vent a portable AC into another room?
No. Venting into an adjacent room transfers heat and humidity, raising temperatures in that space. The heat eventually migrates back to your cooled room, reducing efficiency and increasing energy costs.
How long can a portable AC hose be?
Keep the exhaust hose under 5 feet for optimal performance. Longer hoses increase backpressure, reduce airflow, and can cause the compressor to overheat. Use only manufacturer-approved extensions if more length is necessary.
Do I need landlord permission to install a portable AC vent?
Yes, for permanent modifications like wall vents. Non-permanent solutions like door vent kits and drop ceiling adapters typically don’t require approval, but always check your lease terms before installing anything.
Will venting through a dryer vent damage my AC?
No, when done correctly. Use a Y-connector with a damper to prevent backdrafting, seal all joints with aluminum foil tape, and never run the dryer and AC simultaneously. Clean the duct regularly to prevent lint blockages.
Can I vent my portable AC into the attic?
Only if the attic has active ventilation like ridge vents, soffit vents, or exhaust fans. Venting into a sealed attic traps heat, promotes mold growth, and can damage insulation. Monitor attic temperatures closely if you choose this method.
Key Takeaways for Venting Your Portable AC Without a Window
Venting a portable AC without a window is achievable with the right method. Door vent kits offer the easiest rental-friendly solution. Wall venting provides the best permanent performance. Drop ceiling, dryer vent, and chimney methods work when properly executed with adequate sealing.
Keep your exhaust hose short, straight, and clean for maximum efficiency. Inspect connections monthly and replace damaged hoses promptly. When venting truly isn’t possible, evaporative coolers serve as effective alternatives in dry climates.
Start by identifying which method matches your room layout and rental situation. Measure your door, wall, or ceiling space, gather the right kit, and seal every gap with aluminum foil tape or weatherstripping. Your windowless room can stay cool all summer with proper venting in place.



