

Drafts creeping in around your windows? Energy bills climbing every winter? If you’ve been searching for how to wrap a window, you’re not alone. Thousands of homeowners face the same problem every year, and most don’t realize that “window wrapping” actually refers to three completely different techniques. Each one solves a specific issue, from cutting heat loss to stopping wood rot permanently.
This guide breaks down all three methods in plain language. You’ll learn which approach fits your situation, what tools and materials to buy, and exactly how to execute each one without common mistakes. Whether you’re a renter wanting a quick winter fix or a homeowner ready for a permanent exterior upgrade, you’ll find a clear path forward.
Choose the Right Wrapping Method for Your Goal
Before buying any supplies, identify what problem you’re actually solving. The wrong choice wastes time and money, and in some cases can even cause damage.
Match the Method to Your Purpose
- Exterior cladding (permanent): Best if you have rotting wood frames or want to stop repainting every few years. Seals the entire window exterior with vinyl, aluminum, or fiberglass.
- Interior plastic film (seasonal): Ideal for renters or homeowners wanting to reduce winter heat loss without altering the structure. Adds an invisible insulating layer that comes off in spring.
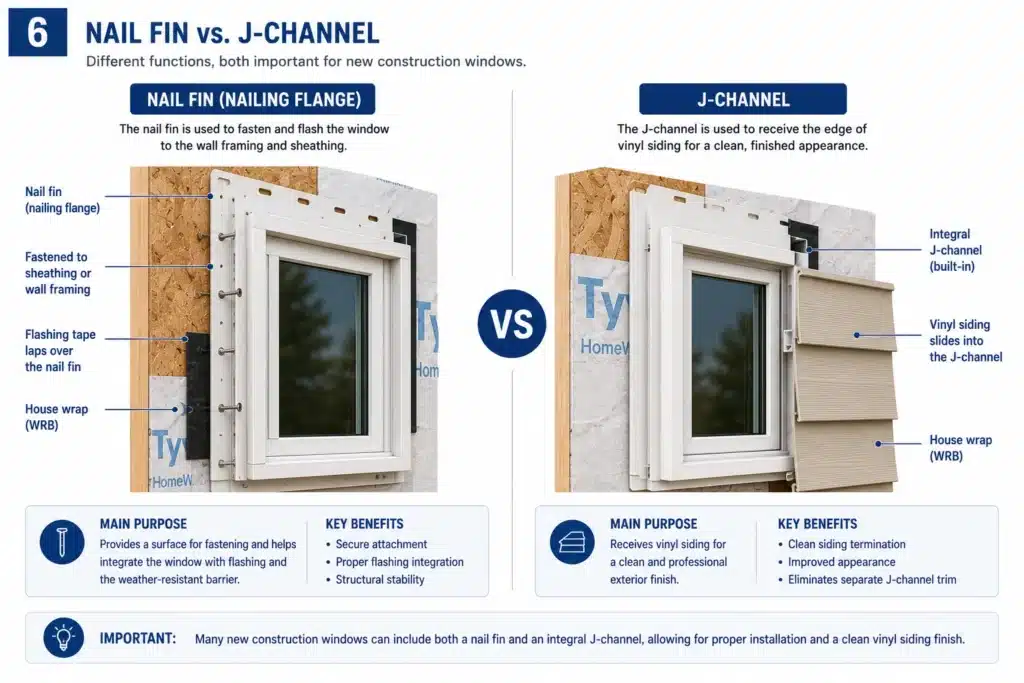
- Construction flashing (structural): Used only during window replacement or new builds. Prevents water intrusion behind walls using self-adhering membranes.
Compare Cost, Lifespan, and Skill Level
| Method | Lifespan | DIY-Friendly? | Average Cost Per Window |
|---|---|---|---|
| Exterior cladding | 10 to 20+ years | Intermediate | $75 to $200 |
| Interior film | 3 to 6 months | Beginner | $5 to $15 |
| Flashing membrane | Permanent | Professional | $10 to $30 (materials only) |
Pick interior film for fast seasonal savings, cladding for curb appeal and zero maintenance, and flashing only when rebuilding or replacing windows.
Prepare the Window Area Before Wrapping
Proper prep is what separates a wrap that lasts from one that fails in weeks. Skipping this step causes peeling, bubbling, and water leaks.
Clean Every Surface Thoroughly
Dirt, grease, and old paint prevent adhesion. This matters most for film and flashing installations.
- Wipe trim, glass, and frame edges with soapy water and a cloth.
- Scrape loose paint and sand rough spots before exterior cladding.
- Use rubbing alcohol on flashing surfaces during cold weather.
- Let everything dry completely before moving forward.
Measure Each Window Individually
Windows are rarely perfectly square, so guessing leads to gaps or wasted material.
- For interior film, add 1 inch to both height and width for overlap.
- For exterior cladding, measure each side of the frame separately.
- For flashing, cut sections no longer than 10 to 12 feet for easier handling.
Inspect for Hidden Damage
Wrapping over problems just hides them temporarily.
- Replace rotted wood before applying any cladding.
- Fill small cracks with exterior-grade caulk.
- Repair damaged sashes first, since wrapping won’t fix operational issues.
Install Interior Insulation Film for Winter
This is the easiest way to wrap a window and perfect for beginners wanting immediate energy savings.
Gather Your Tools
You will need:
- Clear plastic film kit (such as 3M)
- Double-sided tape
- Scissors
- Hair dryer
- Measuring tape
- Cleaning cloth
Bubble wrap works as a cheaper alternative, but it blocks natural light.
Apply the Double-Sided Tape
- Stick the tape to the outside edge of the window trim, never on the glass.
- Run it continuously around all four sides.
- Press firmly to ensure strong adhesion.
- Peel off the backing only when ready to apply the film.
Mount and Stretch the Film
- Cut the plastic to size with a 1-inch overlap on all sides.
- Start at the top center and press the film onto the tape.
- Work outward toward the corners, then down the sides.
- Keep it taut without overstretching, and reposition if needed.
Shrink the Film With a Hair Dryer
- Set the dryer to low heat.
- Hold it 6 to 8 inches from the film; never touch the nozzle to the plastic.
- Move in slow, circular motions to smooth out wrinkles.
- The film will tighten and turn nearly invisible.
- Trim excess material with scissors once it cools.
Pro Tip: Install before temperatures drop below 0°F for best results. Quality kits remove cleanly in spring without damaging paint.
Wrap Exterior Frames With Permanent Cladding

This long-term solution stops wood rot and eliminates maintenance for decades.
Select the Best Material for Your Climate
- Vinyl: Most popular option. Durable, affordable, and never needs painting.
- Fiberglass: Highest energy efficiency. Best for extreme climates with harsh temperature swings.
- Aluminum: Budget-friendly but tends to chalk and fade over time.
Avoid aluminum if you plan to stay in the home long-term.
Cut and Shape the Cladding Pieces
- Measure each jamb, head, and sill separately.
- Use metal shears for aluminum and a utility knife for vinyl coil.
- Score and snap vinyl for clean edges.
- Shape corners with a rubber mallet to avoid dents.
Install With Proper Overlapping Joints
- Start with the sill (bottom), then jambs (sides), then head (top).
- Overlap vertical joints so water runs away from the frame.
- Fasten with corrosion-resistant screws every 12 to 16 inches.
- Seal all seams and screw heads with exterior-grade silicone.
Visual Cue: A finished installation should look smooth and seamless, with no gaps or buckling anywhere along the edges.
Apply Construction Flashing During Window Installation

This professional method prevents water damage behind walls and is critical during window replacement.
Verify Temperature and Surface Conditions
- Temperatures must stay above 50°F for proper adhesion.
- Store membrane rolls in a warm area before use.
- Warm cold substrates with a heat gun if needed.
Prepare the Substrate
- Surfaces must be clean, dry, and smooth.
- Acceptable materials include OSB, plywood, metal, and masonry.
- Prime dusty or weathered wood with solvent-based primer.
- Test adhesion with a small patch before full application.
Follow Shingle-Style Layering
This sequence is critical: water must flow over each layer, never behind it.
- Install housewrap over the entire wall first.
- Cut an “X” in the wrap at the window opening.
- Fold the flaps into the rough opening and staple them.
- Insert the window with caulk applied to the back of each flange.
- Nail the top flange, then fold the housewrap back over it.
Flash in the Correct Order
- Bottom first: Apply flashing over the sill flange.
- Sides next: Cover both vertical flanges.
- Top last: Lift the housewrap flap, apply flashing to the top flange, then fold the housewrap back down.
- Seal the “X” cut with a final flashing piece across the header.
Why This Order Matters: It creates a true shingle effect, where each upper layer covers the one below. This directs water outward instead of letting it seep behind the barrier.
Seal and Inspect Every Edge

Sealing is what makes any wrap actually work. Skipping this step invites drafts and water damage.
Use the Right Sealant for Each Method
- Exterior cladding: 100% silicone or polyurethane caulk.
- Flashing: Self-seals around nails, but use butyl caulk on large laps if needed.
- Interior film: No sealant required; the tape is sufficient.
Check for Gaps and Bubbles
- Run your hand along seams to feel for openings.
- Look for light leaks at night to spot film gaps.
- Smooth out wrinkles in flashing that could trap moisture.
Test Adhesion Before Finishing
- Press firmly along all edges.
- Reapply or add mechanical fasteners if anything lifts.
- Use Plasti-Tackers for cold-weather flashing when adhesive fails.
Troubleshoot Common Wrapping Problems
Even careful installations sometimes go wrong. Here’s how to fix the most frequent issues.
Film Won’t Stick to the Trim
- Cause: Dust, grease, or cold surfaces.
- Fix: Clean with rubbing alcohol, warm the room, and reapply tape.
- Prevention: Always clean and dry surfaces before taping.
Wrinkles in Plastic or Membrane
- Interior film: Peel back and re-stretch, then use low heat to shrink.
- Flashing membrane: Smooth with a roller during installation; cut and patch large wrinkles.
- Cladding: Reshape with a rubber mallet instead of leaving dents.
Water Leaks After Installation
- Check lap direction: Side laps need 3 inches, head laps need 6 inches. Always install bottom to top.
- Verify flashing order: Top flashing must cover side and bottom layers.
- Inspect fasteners: Missing sealant or improper nailing creates entry points for water.
Maintain and Remove Seasonal Wraps
Proper care extends performance and prevents damage to your windows.
Clean Without Causing Damage
- Wipe interior film with a soft, dry cloth only.
- Avoid sprays and abrasive cleaners.
- Don’t press hard, since punctures are difficult to repair.
Remove Film Safely in Spring
- Peel slowly at a 45-degree angle.
- Use a hair dryer on low to loosen stubborn tape.
- Most quality kits remove cleanly without peeling paint.
Decide Whether to Reuse Materials
- Don’t reuse film; it loses elasticity and adhesion after one season.
- Save leftover flashing rolls in a cool, dark place away from sunlight.
Upgrade Your Results With Pro Tips
A few expert adjustments can dramatically improve performance.
Add Double Layers for Better Insulation
- Apply two layers of interior film with a small air gap between them.
- This increases R-value and reduces condensation.
- Use thicker film (at least 2 mil) for better durability.
Combine Wrapping With Weatherstripping
- Seal moving parts like sashes and sliders with V-strip or felt.
- This stops drafts that wrapping alone cannot fix.
- Test for air leaks with a candle or incense stick.
Schedule Annual Maintenance Checks
- Inspect exterior cladding each year for dents or sealant cracks.
- Re-caulk as needed to maintain the water barrier.
- Check flashing during any roof or siding work.
Frequently Asked Questions About Wrapping Windows
What Is the Best Way to Wrap a Window for Winter?
The best winter method is interior plastic film applied with double-sided tape and heat-shrunk with a hair dryer. It’s affordable, beginner-friendly, and can cut heat loss significantly. Windows can account for up to 30% of a home’s heat loss, so this simple upgrade pays for itself quickly.
Can I Wrap My Windows Myself?
Yes, interior film is highly DIY-friendly and requires only basic tools. Exterior cladding is intermediate and works well for handy homeowners. Construction flashing should be left to professionals since improper installation can cause serious water damage.
How Long Does Window Wrapping Last?
Interior film lasts one winter season (3 to 6 months). Exterior cladding lasts 10 to 20+ years depending on the material. Construction flashing lasts the life of the structure when installed correctly.
Will Window Wrap Damage My Paint or Trim?
Quality interior film kits are designed to remove without peeling paint or damaging woodwork. Exterior cladding actually protects trim from weather damage. Cheap tapes or improper installation are the most common causes of paint damage.
What Temperature Is Too Cold to Install Window Wrap?
Interior film works best when installed before temperatures drop below 0°F. Construction flashing requires temperatures above 50°F for proper adhesion. Exterior cladding can be installed in moderate weather but should avoid extreme cold or heat.
Is Bubble Wrap a Good Alternative to Window Film?
Bubble wrap works as a budget alternative for insulation, but it blocks visibility and natural light. Clear plastic film kits are only slightly more expensive and provide a much better result. Most homeowners prefer the nearly invisible finish of proper film kits.
Key Takeaways for Wrapping Windows Successfully
Learning how to wrap a window comes down to choosing the right method for your specific goal. Interior film delivers fast, affordable winter comfort for any skill level. Exterior cladding eliminates wood rot and repainting for decades. Construction flashing protects your home from water damage during major window work.
Start with a clear purpose, prep your surfaces thoroughly, and follow the layering sequences exactly. These three steps prevent 90% of common failures. Your next move depends on your situation: grab a film kit this weekend for immediate winter savings, or schedule a cladding consultation if you’re ready for a permanent upgrade.



