
Is your home drafty even with windows closed? You’re not alone. A significant portion of indoor air loss happens through poorly sealed windows, driving up energy costs and reducing comfort. Learning how to weatherstrip a window is a fast, affordable fix that blocks drafts, cuts noise, and keeps conditioned air inside. This guide walks you through proven techniques, from diagnosing leaks to choosing the right material and installing it like a pro. Whether you have double-hung, sliding, or casement windows, you’ll learn how to seal gaps effectively and extend the life of your home’s insulation.
Test for Air Leaks First

Before buying supplies, confirm where air is escaping. A proper diagnosis ensures you apply weatherstripping only where needed.
Use the Candle or Incense Test
Hold a lit candle or smoky incense stick near window edges while the window is closed. If the flame flickers or the smoke wavers, you’ve found a draft. Move slowly around the entire perimeter, covering the top, sides, and bottom.
Look for Light and Gaps
In daylight, stand inside and check for visible light seeping through cracks. At night, have someone shine a flashlight from outside. Any beam penetrating the frame marks a leak.
Feel for Drafts
Run your hand along the window frame. Cool spots or airflow, especially in winter, signal poor sealing. Pay attention to corners and meeting rails on double-hung windows.
Measure the Gap Size
Use a feeler gauge or stack of paper to estimate gap width. This determines the thickness of weatherstripping required:
– Under 1/8 inch: Foam tape or felt
– 1/8 to 1/4 inch: V-channel or rubber gasket
– Over 1/4 inch: Requires shimming or professional repair before sealing
Choose the Right Weatherstripping Type

Not all weatherstripping works for every window. Match the material to your window type and usage.
Foam Tape for Easy DIY Sealing
Best for: Top and bottom sashes, inoperable windows, casement window stops
– Self-adhesive, low-cost, simple to apply
– Cut to length with scissors and press into place
– Avoid in high-wind areas, as it compresses over time
Pro Tip: Use closed-cell foam tape for moisture resistance.
Felt Strips for Light-Duty Use
Best for: Interior window sashes, low-traffic rooms
– Affordable and easy to nail or glue in place
– Wears quickly and is susceptible to moisture damage
– Ideal for light-duty applications where reversibility matters
Not recommended for areas exposed to moisture.
V-Channel for Moving Windows
Best for: Double-hung, sliding, and side-hung windows
– Durable aluminum or vinyl in a “V” shape
– Slides into jamb channels and creates spring tension when closed
– Long-lasting and strong, though more difficult to install
Why it works: The V opens upward so the window sash compresses it tightly on closure.
Rubber or Vinyl Gaskets for Strong Seals
Best for: Exterior windows, high-draft zones, older or uneven frames
– Resists UV, moisture, and temperature swings
– Adhesive-backed gaskets conform to irregular surfaces
– Durable and highly effective at blocking air and water
Choose EPDM rubber for longest outdoor performance.
Magnetic Weatherstripping for Airtight Closures
Best for: Casement or awning windows requiring secure closure
– Contains a magnetic strip that bonds to a metal frame
– Provides strong compression sealing
– Higher cost but excellent for noise reduction
Prepare the Surface Properly
Skipping prep causes adhesive failure. A clean surface ensures long-lasting adhesion.
Remove Old Weatherstripping
Peel off foam or felt strips. For nailed-on V-channel or metal, use pliers or a staple remover. Knock out old nails flush with a nail set and fill any holes if necessary.
Clean with Soap and Water
Wash the jamb, sash, and stops with mild detergent and a sponge. Remove dust, grime, and cobwebs. Rinse with clean water and let dry completely.
Degrease Before Application
Wipe the area with rubbing alcohol using a lint-free cloth. This removes oils, wax, and sticky residue that prevent adhesion. Allow at least 30 minutes of drying time.
Never install weatherstripping on damp or dirty surfaces.
Install Weatherstripping by Window Type
Apply the right method for your window design to avoid binding or poor contact.
Double-Hung Windows: Use Combo Sealing
Double-hungs need multiple seal points due to vertical movement. A combination approach works best: V-channel for the sides and felt or foam for the sashes.
Apply Foam Tape to Sash Edges
Cut foam tape to fit the top and bottom of the lower sash. Press firmly into place. Avoid overlapping corners.
Install V-Channel in Side Jambs
- Cut V-channel 1 inch longer than the jamb height.
- Press into the track on both sides of the lower sash.
- Nail every 6 to 8 inches with 1/2-inch finishing nails.
- Ensure the “V” faces upward so the sash compresses it when closed.
Seal the Parting Stop
Add a thin foam or felt strip to the parting bead where the sashes meet. This blocks airflow between panes.
Raise and lower the sash to confirm it moves smoothly without catching.
Sliding Windows: Focus on Tracks and Edges
Sliders move horizontally, so sealing requires low-friction materials that accommodate movement.
Clean the Track First
Remove debris from the sill and track with a brush or vacuum. Wipe with alcohol.
Apply V-Strip Along the Frame
Cut V-channel to fit the stationary panel’s edge. Press or nail into place so the moving panel compresses it when closed.
Add Brush or Pile Weatherstripping to the Sash
Attach brush strips to the moving sash’s leading edge. They allow smooth gliding while blocking wind.
Seal the Bottom Track
Use a foam or rubber gasket along the inside of the track to prevent drafts from below.
Casement Windows: Seal the Stops
Casements swing open and press tightly when latched, making them ideal for adhesive-only sealing with foam tape applied to the stops.
Cut Foam Tape for All Three Sides
Measure and cut strips for the top, bottom, and side window stops where the sash presses against the frame.
Apply One Section at a Time
Peel backing gradually. Align the tape flush with the stop edge. Press firmly to bond.
Close the window. You should feel resistance and hear a soft “thud” as it seals.
Upgrade with Magnetic Strip (Optional)
For better performance, replace foam with magnetic weatherstripping. It bonds tightly to the metal frame when latched.
Seal Door Gaps Too

Don’t ignore doors. Entry doors often leak more than windows and benefit from similar treatments.
Install a Door Sweep
- Measure door width.
- Cut sweep to size with a hacksaw.
- Drill pilot holes.
- Position so the seal just touches the threshold.
- Screw into place.
Use an adjustable sweep if the floor is uneven.
Add Threshold Sealing
Apply rubber or vinyl gasket to the door threshold where the sweep contacts it. This cushions the seal and prevents wear.
Apply Side and Top Weatherstripping
Use V-channel or compression tubes on the hinge and latch sides. At the top, use adhesive foam or metal J-strip.
Use Felt Pads on Corners
Stick self-adhesive felt pads to the door frame’s bottom corners. They seal small gaps without affecting operation.
Test the Seal After Installation

Verify your work with simple tests that professionals use.
Perform the Dollar Bill Test
Close the window or door on a dollar bill. Try to pull it out. If it slides freely, the seal is weak. If it resists or tears slightly, the seal is good.
Repeat at multiple points along the frame.
Check for Smooth Operation
Open and close the window 5 to 10 times. It should:
– Move freely
– Latch securely
– Not stick or bind on nails or strips
If it catches, trim or reposition the weatherstripping.
Re-Test for Drafts
Repeat the incense test. No flickering smoke means success.
Maintain Weatherstripping Yearly
Even the best seal degrades. Prevent energy loss with annual upkeep, ideally in early spring.
Inspect Every Spring
Check all strips for:
– Cracks
– Warping
– Looseness
– Compression (especially foam)
Replace any damaged sections immediately. Weatherstripping generally requires replacement every few years.
Clean Without Damaging
Wipe down rubber and vinyl with mild soap and water. Avoid harsh chemicals that degrade materials.
Reapply Adhesive if Needed
If foam tape lifts, remove it, clean the area with alcohol, and reattach with superglue or construction adhesive.
Superglue works well on foam when standard adhesive fails.
Avoid Common Installation Mistakes
Even experienced DIYers make these errors. Don’t let them ruin your results.
Cutting Strips Too Short
Gaps form at joints. Always cut 1 inch longer and trim flush after fitting.
Skipping the Degreasing Step
Residual oils prevent adhesion. Alcohol wipe-down is non-negotiable.
Over-Nailing V-Channel
Too many nails cause warping. Space them 6 to 8 inches apart.
Installing V-Strip Upside Down
The “V” must open upward so the window compresses it when closed. Reverse installation creates a gap.
Over-Compressing Foam
Pressing too hard during installation reduces resilience. Let the material do the work.
Frequently Asked Questions About Weatherstripping Windows
What is the best weatherstripping for windows?
The best material depends on your window type. Foam tape works well for casement window stops and inoperable windows. V-channel is ideal for double-hung and sliding windows. Rubber or vinyl gaskets offer the best durability for exterior applications.
How do I know if my windows need weatherstripping?
Common signs include visible light around closed windows, drafts you can feel with your hand, flickering candle flames near the frame, and rising energy bills. Annual inspection in spring helps catch problems early.
Can I weatherstrip windows in winter?
Spring is the optimal time because mild weather allows windows to stay open during installation. However, you can weatherstrip any season if drafts are severe. Just ensure surfaces are dry before applying adhesive products.
How long does weatherstripping last?
Foam and felt typically last a few years before needing replacement. Metal V-channel and high-quality rubber or vinyl can last much longer, especially in protected applications. Annual inspection helps you spot degradation early.
What gap size requires professional repair?
Gaps over 1/4 inch usually need shimming or frame repair before weatherstripping can be effective. Attempting to seal oversized gaps with standard materials leads to poor adhesion and continued drafts.
Does weatherstripping reduce noise?
Yes. Rubber and vinyl stripping add density that dampens exterior noise. Magnetic weatherstripping offers some of the best noise reduction among DIY options.
Key Takeaways for Weatherstripping Windows Successfully
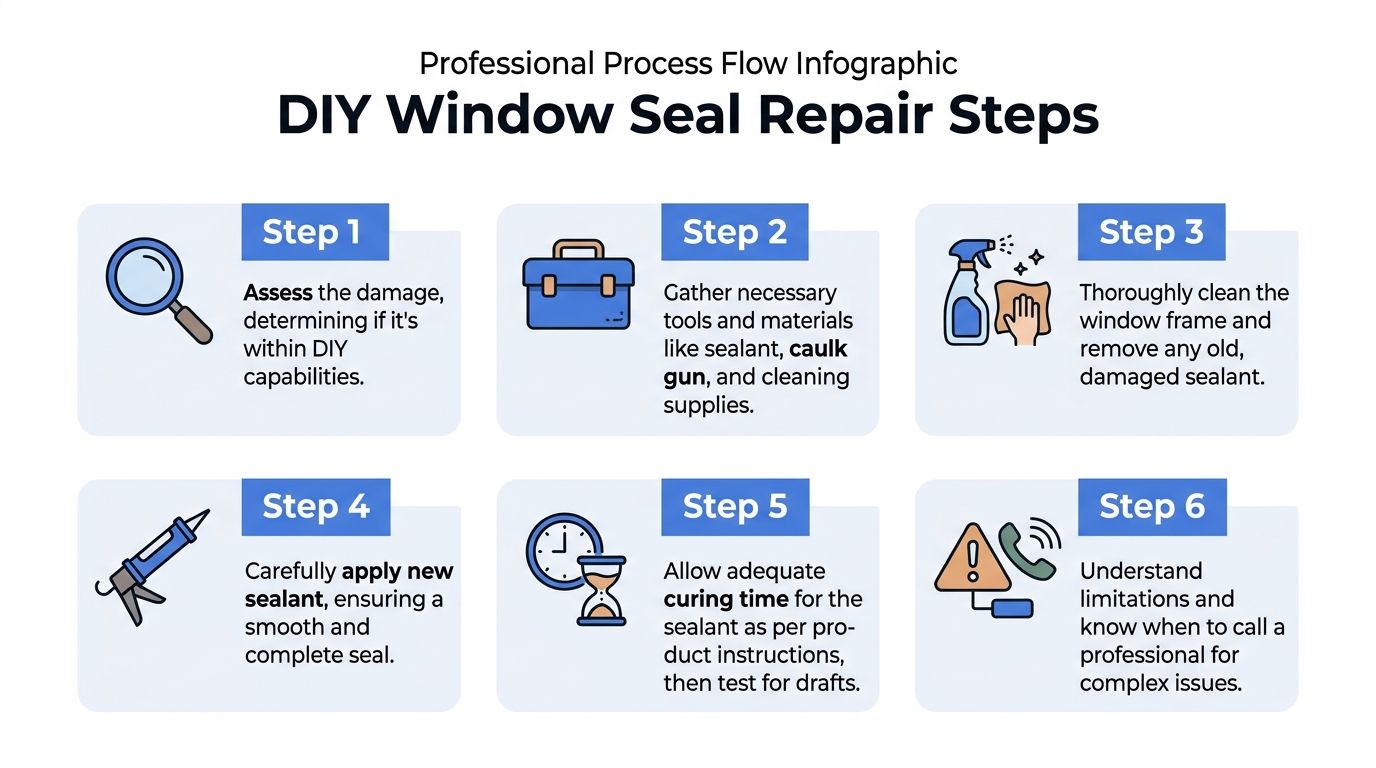
Start by testing for drafts with a candle or incense stick before choosing materials. Match your weatherstripping type to your window style: foam tape for casements, V-channel for double-hung and sliding windows, and rubber gaskets for exterior durability. Always clean and degrease surfaces with rubbing alcohol before applying adhesive products. Test your work with the dollar bill method and inspect seals every spring for cracks or compression. For your next step, pick one drafty window, gather the right materials, and complete the installation this weekend to start enjoying lower energy bills and a quieter, more comfortable home.



