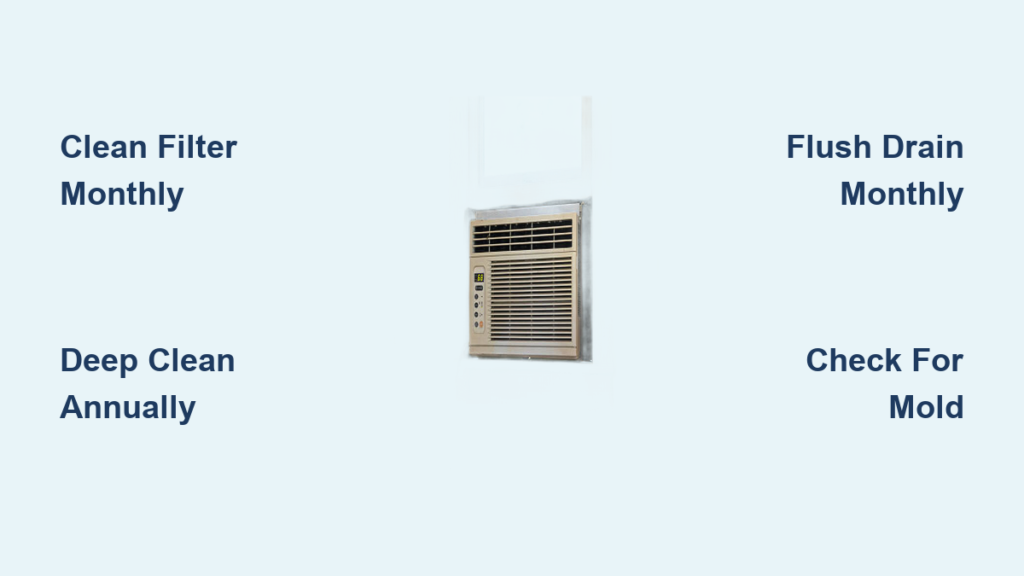
A dirty window air conditioner doesn’t just blow warm air; it can spike your energy bills, circulate mold spores, and fail mid-summer. The good news? Most of these problems are preventable with a smart cleaning schedule. Knowing how often to clean window AC unit components depends on usage, environment, and which part you’re maintaining. While the air filter needs monthly attention, internal components like coils and drain pans require seasonal or annual care.
Skipping maintenance leads to freezing, leaks, and musty odors, issues that could cost you hundreds in repairs. This guide breaks down exactly when and how to clean every part of your unit so you stay cool, save money, and breathe cleaner air all season long.
Air Filter Cleaning Schedule
Your AC’s air filter is the first line of defense against dust, pet dander, and allergens. Because it traps particles daily, it demands the most frequent cleaning to keep airflow strong and efficiency high.
Clean Filters Monthly During Active Use
Wash or replace the filter once a month while the unit runs regularly. A clogged filter forces the compressor to work harder, increasing energy use by up to 15%. To clean properly:
- Remove the front panel and slide out the filter
- Tap off loose debris or vacuum with a soft brush
- Wash with warm water and mild dish soap
- Rinse thoroughly and let dry completely before reinstalling
A wet filter breeds mold, so never skip the drying step.
Bi-Weekly Cleaning for High-Dust Homes
If you have pets, live in a dusty area, or run the AC constantly, clean the filter every two weeks. Homes with shedding animals or near construction sites see faster buildup that reduces cooling power within days. A quick visual check helps: if the filter looks gray or caked, clean it immediately rather than waiting for the calendar.
Respond Immediately to Filter Light Alerts
Many modern units have a “clean filter” indicator light. When it turns on, clean the filter right away rather than ignoring it. This alert is based on runtime, not guesswork, and signals that airflow has dropped to inefficient levels. Reset the light after cleaning according to your manual’s instructions.
Deep Cleaning: Annual Maintenance Timing
While filters need monthly care, a full internal cleaning should happen at least once a year. This deep clean restores efficiency, prevents mold, and extends the life of your unit.
Spring Cleaning Prepares for Summer
The best time for a full clean is in spring, right before installation. Winter storage leaves behind dust, rodent debris, and moisture, creating perfect conditions for mold. A pre-season cleaning ensures your first blast of cool air is clean and strong.
Steps include:
- Removing the outer case
- Cleaning evaporator coils and drain pan
- Clearing the fan blades
- Checking for winter damage
Doing this before mounting makes access easier and prevents mess indoors.
Fall Cleaning Prevents Mold in Storage
If you remove your unit for winter, clean it in the fall after summer use. Moisture from condensation lingers in the drain pan and coils. Left unchecked, this leads to mold growth during months of dormancy. A post-season deep clean removes organic buildup and keeps the unit fresh until next year.
Twice-Yearly Cleaning in Humid Climates
In high-humidity areas like coastal or southern regions, consider cleaning twice a year, once in spring and once in fall. Constant moisture promotes algae and mold in the drain system. Monthly vinegar flushes help, but seasonal deep cleans are essential for peak performance and air quality.
Coil and Fin Maintenance Frequency
The evaporator and condenser coils are critical for heat exchange. When coated in dust, they lose efficiency fast. Fins, which are thin aluminum blades around the coils, can bend easily and block airflow.
Clean Coils Once Per Season
While annual cleaning is standard, clean the coils once per season for best results. Dust buildup acts like insulation, making the unit work harder to cool. Use a foam-based coil cleaner or DIY solution:
- Spray on and wait 10–15 minutes
- Rinse gently from inside to outside
- Never use a pressure washer, as it destroys fins
Vacuum loose debris first with a soft brush attachment, always brushing in the direction of the fins to avoid damage.
Straighten Bent Fins Immediately
If fins are bent, visible as crushed or wavy metal, use a fin comb to straighten them. Even slight misalignment reduces airflow by up to 30%. Work gently along the fin rows to restore proper spacing. This simple fix can revive cooling power without any part replacement.
Drain Pan and Line Care

The drain pan collects condensation from the evaporator coil. If clogged, water backs up and leaks into your room, a common cause of indoor water damage and mold.
Flush Drain Monthly in Humid Weather
During peak humidity, treat the drain pan monthly. Pour ½ cup of white vinegar into the pan to kill algae and prevent clogs. Vinegar is safe, non-toxic, and dissolves organic buildup without damaging plastic parts.
For deeper cleaning:
- Spray the pan with 3% hydrogen peroxide
- Let sit 10 minutes, then rinse
- Tilt the unit slightly to drain all liquid
Clear Clogs with Vinegar or a Flush Tool
If water isn’t draining, the line may be blocked. Use a turkey baster or small funnel to force vinegar into the drain hole. Let it sit, then flush with water. For stubborn clogs, a pipe cleaner or wet/dry vac can help. Avoid wires that could puncture the pan.
Interior and Mold Prevention
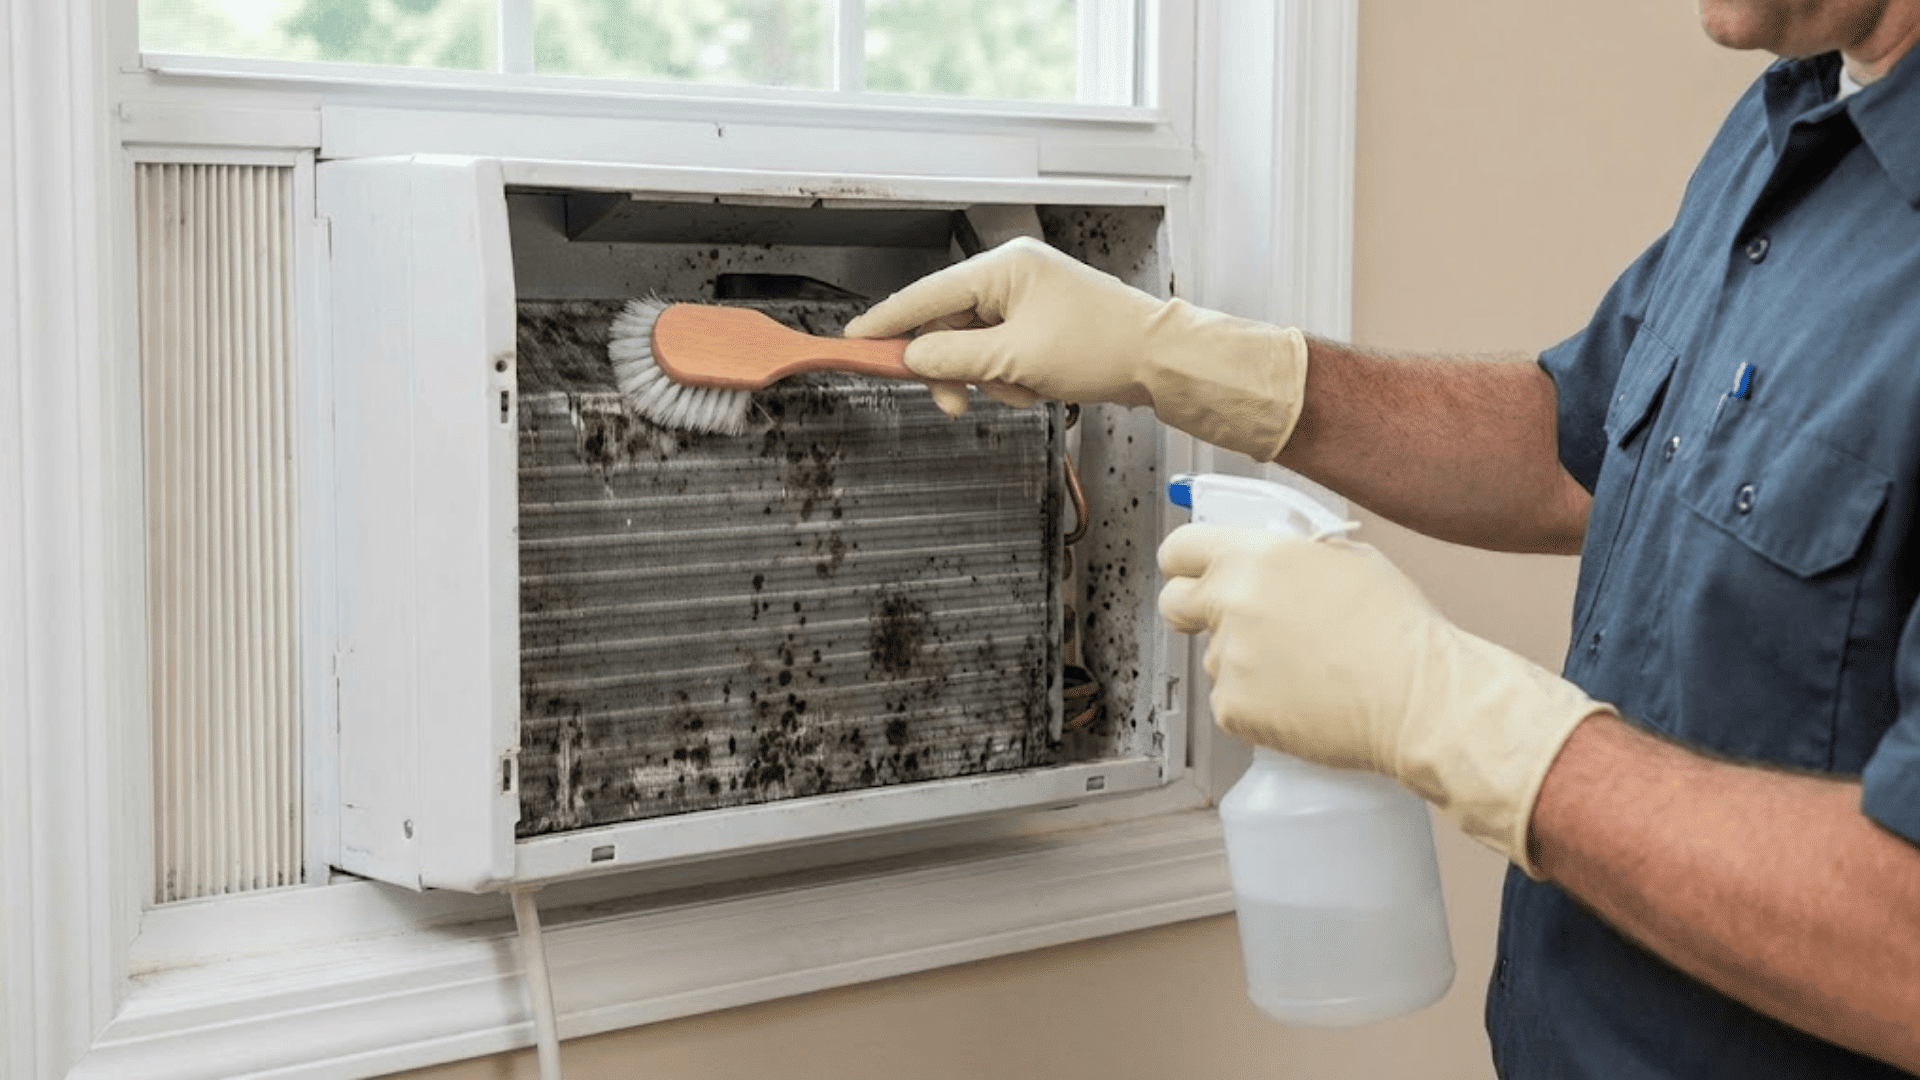
Mold thrives in dark, damp AC interiors, especially on fan blades and in the drain pan. It causes musty smells and can trigger allergies or asthma.
Clean Mold with Hydrogen Peroxide
For visible mold, spray 3% hydrogen peroxide on affected areas. It kills mold spores more effectively than bleach and breaks down into water and oxygen with no toxic residue. Let it sit 10–15 minutes, scrub with a soft brush, then rinse and dry completely.
Prevent Mold with Proper Tilt
Ensure the unit is tilted slightly outward (about ¼ inch) so condensation drains outside. A level or inward-tilted unit traps water, creating a breeding ground for mold. Check tilt during installation and after storms or strong winds.
Exterior and Case Cleaning
The outside of your AC collects dirt, pollen, and debris, especially if it’s at ground level. While less critical than internal parts, a clean exterior improves heat dissipation.
Wipe Down Annually or As Needed
Clean the exterior case and side curtains once a year with a damp cloth and mild detergent. For stuck-on grime, use a soft brush. Avoid harsh chemicals that can degrade plastic.
If accessible, clean rear condenser coils from the outside:
- Turn off power
- Use a garden hose on low pressure
- Spray from outside in to push debris away
Never spray upward into the unit, as water can seep into electrical parts.
Safety First: Power and Preparation
Cleaning a window AC involves water and electricity, a dangerous combination. Follow these safety steps to avoid shock or damage.
Unplug Before Any Work
Always unplug the unit before opening the case or applying cleaners. If the outlet is behind the unit, turn off the circuit breaker. Never assume “off” means safe, since residual power can remain.
Wait 5 Minutes After Unplugging
After disconnecting power, wait 5 minutes before touching internal parts. This allows capacitors, which are electrical components that store charge, to discharge safely. Touching them too soon can cause a painful shock.
Cover Electronics Before Spraying
Before using any liquid, cover the control panel, motor, and wiring with plastic bags or wrap. Even a small spray mist can cause a short circuit. Remove covers only after all cleaning and drying are complete.
Tools You’ll Need
You don’t need professional gear for most cleaning tasks. Here’s what to gather:
- Vacuum with brush attachment for dusting coils and interior
- Soft-bristled brushes, including one large brush and one old toothbrush for tight spots
- Spray bottles for vinegar, hydrogen peroxide, or coil cleaner
- Microfiber cloths for wiping and drying
- Foam coil cleaner that penetrates between fins better than sprays
- Fin comb to fix bent fins without damage
- White vinegar or 3% hydrogen peroxide as natural, effective cleaners
- Screwdriver for case removal
- Camera or phone to take photos during disassembly for easy reassembly
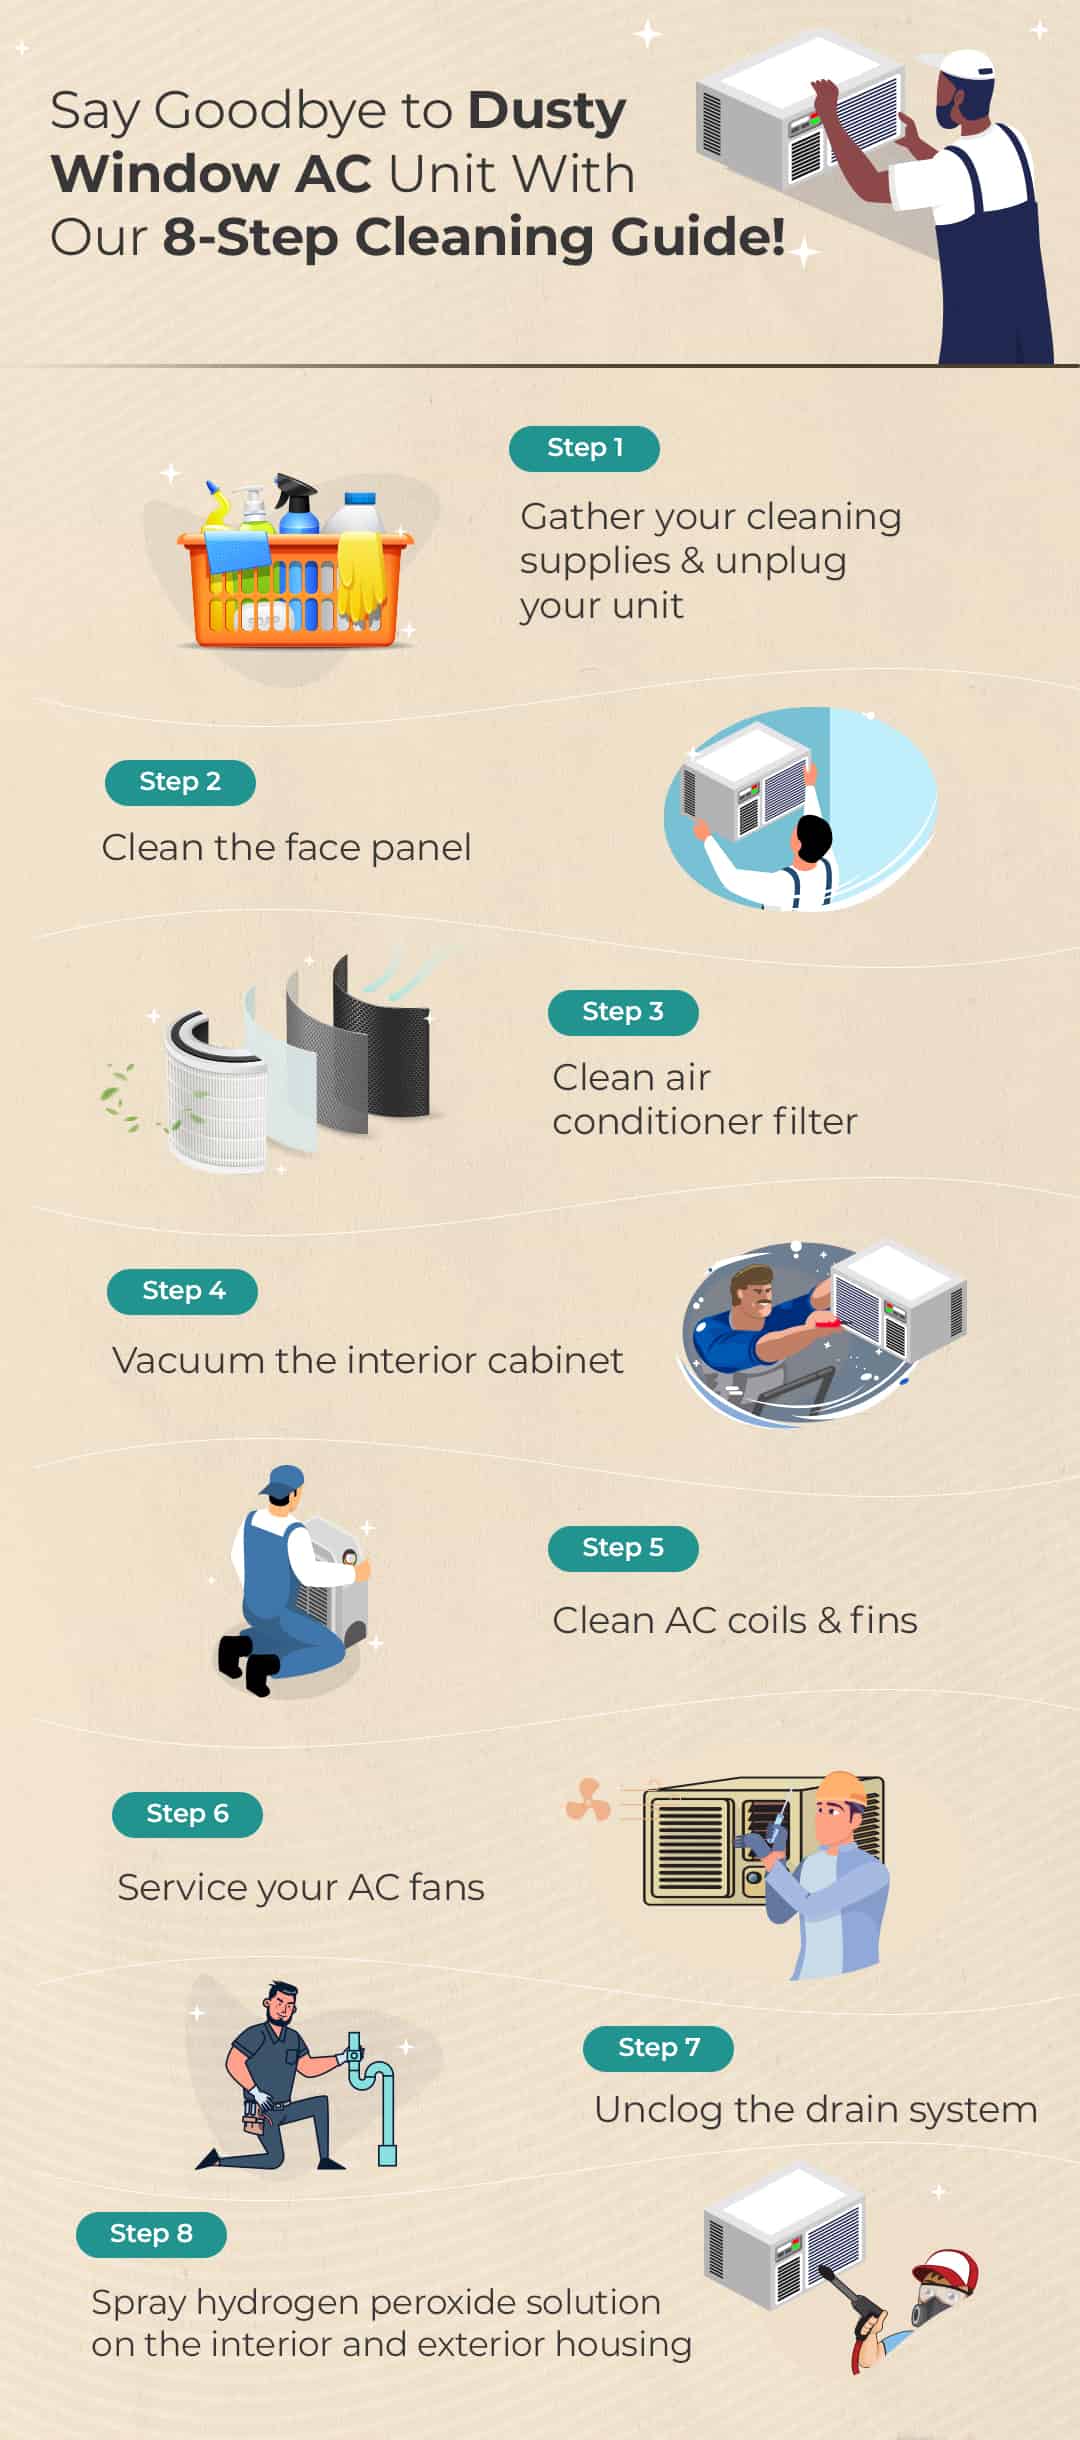
Step-by-Step Deep Clean

Follow this sequence for a full internal cleaning:
Remove the Case Safely
- Unplug the unit
- Take a photo of the front panel and screw locations
- Remove screws (usually along the bottom edge)
- Lift the case straight up and off
- Set aside screws and case carefully
Clean Coils and Fins
- Vacuum dust from coils using a soft brush
- Spray foam coil cleaner on evaporator (front) and condenser (back) coils
- Wait 10–15 minutes for grime to loosen
- Rinse lightly with a spray bottle or gentle hose
- Use a fin comb to straighten any bent fins
Treat Mold and Drain Pan
- Spray interior, fan blades, and pan with hydrogen peroxide
- Let sit 10–15 minutes
- Scrub with a brush
- Flush drain pan with vinegar
- Tilt unit to drain all liquid
Reassemble and Test
- Ensure all parts are fully dry
- Replace the case, aligning tabs and slots
- Reinsert screws and tighten evenly
- Plug in and turn on
- Run on high for 10–15 minutes to dry internal moisture and verify cooling
Listen for unusual noises. Grinding or rattling may indicate debris or fan issues.
When to Call a Professional
Some issues go beyond DIY. Hire a technician if:
- Mold is heavy or deep inside, since disturbing it can spread spores
- The fan is bent or noisy, which requires disassembly and balancing
- Unit won’t cool after cleaning, possibly indicating a refrigerant leak or capacitor failure
- You’re on a high floor, where removing heavy units is risky without help
- Musty smell persists, which may indicate hidden mold in ducting or housing
Professional service costs around $120 but can extend an 8+ year unit’s life and restore efficiency.
Renters: Check With Landlord First
If you’re renting, don’t disassemble the unit without permission. Some leases prohibit tenant repairs, and damage could lead to fees. Instead:
- Report odors, leaks, or poor cooling to your landlord
- Ask if building maintenance handles AC servicing
- Offer to clean the filter yourself, since most landlords allow this
Final Maintenance Tips
Keep your window AC running smoothly with these habits:
- Log cleaning dates to track filter changes and deep cleans
- Upgrade your filter to higher-efficiency reusable options that last longer
- Keep the outdoor side clear by trimming plants and removing leaves
- Run fan-only mode weekly to dry internal components and prevent mold
- Store properly in a dry, covered space if removed
Frequently Asked Questions About Window AC Cleaning
How often should you clean a window AC unit filter?
Clean the filter once a month during active use. In homes with pets, high dust, or constant operation, clean it every two weeks. Many units have a “clean filter” light that signals when attention is needed regardless of the calendar.
How often should you deep clean the inside of a window AC?
Perform a full deep clean at least once a year, ideally in spring before installation or fall before storage. In humid climates, consider cleaning twice a year to prevent mold and algae growth in the drain system.
What happens if you never clean your window AC?
A neglected unit loses efficiency, raises energy bills, and may freeze up due to restricted airflow. Mold and bacteria accumulate in the drain pan and on coils, circulating spores that trigger allergies and asthma. Eventually, the compressor can fail, requiring expensive repair or replacement.
Can you use bleach to clean mold inside a window AC?
Bleach works on mold but leaves toxic residue and harsh fumes. 3% hydrogen peroxide is a safer, equally effective alternative that breaks down into water and oxygen. White vinegar also works for light mold and drain pan maintenance.
How do you know if your window AC needs cleaning?
Watch for these warning signs: reduced cooling power, musty odors from the vents, visible dust on air outlets, water leaking indoors, or unusual rattling noises. A spike in your energy bill without other explanation also suggests the unit is working harder due to dirt buildup.
Is it worth hiring someone to clean a window AC?
Professional service costs around $120 and is worth it for extensive mold, mechanical issues like bent fan blades, or refrigerant concerns. For routine filter and coil cleaning, DIY is usually sufficient and saves money over the unit’s lifespan.
Key Takeaways for Window AC Cleaning Frequency
Maintaining a window air conditioner comes down to three core habits: clean the filter monthly, deep clean internal components once or twice a year, and address mold or clogs as soon as you notice them. These simple steps prevent the most common AC problems, including freezing, leaks, poor cooling, and musty smells.
Your next step is simple: check your filter today. If it’s been more than a month since your last cleaning, remove it, wash it with mild soap, and let it dry completely before reinstalling. Then mark your calendar for a full deep clean this spring or fall. Consistency is what keeps your unit running efficiently for years.