Sliding window tracks collect dirt, dust, and sticky grime over time, making windows hard to open, noisy, or even misaligned. If your sliding window drags, squeaks, or won’t close properly, the culprit is likely a clogged track. Knowing how to clean sliding window tracks properly can restore smooth operation, improve energy efficiency, and extend the life of your windows.
This guide covers the most effective methods, including steam cleaning, vinegar and baking soda reactions, and manual scrubbing, based on real performance data and user testing. You will learn which tools work best, avoid dangerous or ineffective techniques, and keep your tracks clean with minimal effort.
Use Steam for Deep Cleaning
Steam melts grime fast and sanitizes without chemicals, making it the top choice for heavily soiled tracks.
Apply Steam with Right Attachments
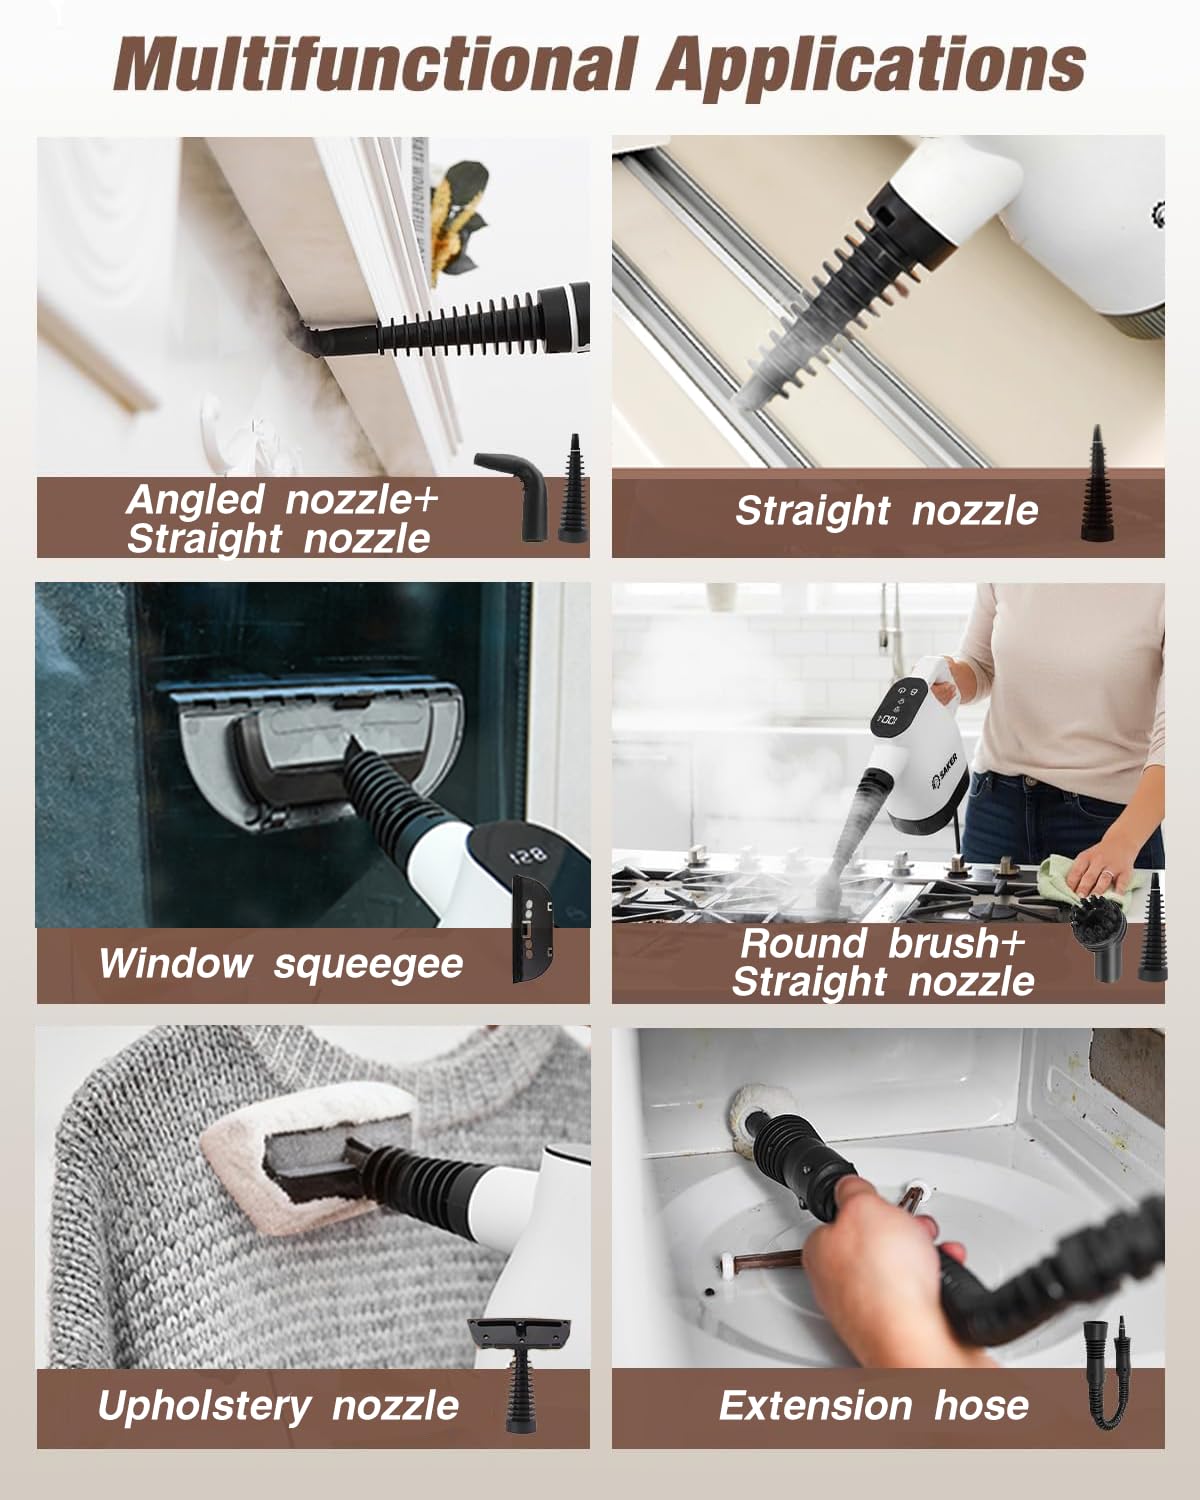
Use a handheld or garment steamer with an angled nozzle or grout brush attachment to reach tight corners. Start by filling the steamer and letting it heat fully. Test on a small area first if your frame is wood or has a polished finish. Never apply steam directly to cold glass, as thermal shock can crack panes.
Hold the nozzle close to the track and move slowly, letting high-temperature vapor loosen caked-on dirt. The heat breaks down sticky residue instantly, turning hardened grime into wet sludge you can wipe away.
Avoid Seal and Glass Damage
Don’t run the steam directly along the rubber seal touching the glass. Excessive heat may warp or degrade the seal over time. Focus on the track channel, especially corners where debris accumulates.
If using a basic nozzle with no brush, expect some spattering on thick buildup. Immediately wipe splattered dirt with a microfiber cloth to prevent re-drying.
Wipe and Detail After Steaming
After steaming, use a microfiber cloth to remove loosened debris and dirty water. Replace cloths often, because dirty rags redeposit grime. Once the bulk is gone, go over plastic or metal surfaces with a Magic Eraser to erase stubborn black marks left by rollers.
Finish by vacuuming any remaining dust with a crevice tool, then use a detail brush to sweep out hidden particles from deep grooves.
Try Vinegar and Baking Soda Reaction
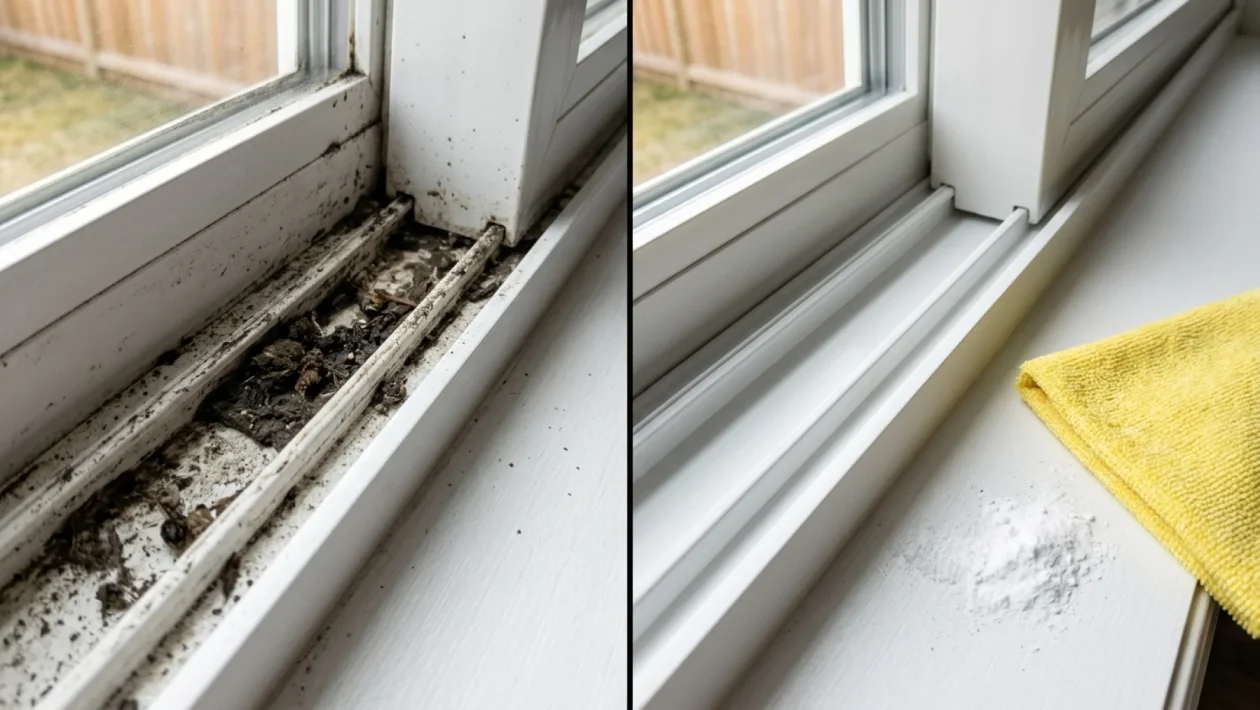
This natural method lifts dirt using a fizzing chemical reaction, making it ideal for eco-friendly cleaning.
Sprinkle Baking Soda Lightly
After vacuuming loose debris, lightly dust baking soda into the track. Do not pile it on. Too much causes an explosive fizz when vinegar hits it, creating a messy overflow. A thin, even layer is enough to activate the cleaning reaction.
Activate with Vinegar Mist
Fill a spray bottle with white vinegar and set it to mist mode. Lightly spritz the baking soda. You will see it bubble and foam, which helps lift embedded dirt from the track walls and base.
Let it sit for 30 seconds to one minute. No longer, or dried residue becomes harder to remove.
Scrub and Wipe Immediately
Use an old toothbrush or soft-bristled scrub brush to agitate the foaming mixture. Work in small sections, focusing on corners and sticky spots. Then, wipe clean with a fresh microfiber cloth.
Repeat the process as needed. Always switch to a clean cloth when it gets dirty to prevent re-soiling the track.
Clean with Soapy Water and Brush
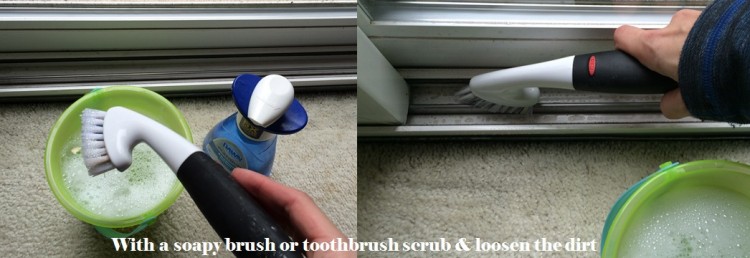
For routine maintenance, warm soapy water with scrubbing is simple, safe, and effective.
Mix Mild Cleaning Solution
Fill a bowl or bucket with warm water and add a few drops of dish soap. For tougher grime, mix equal parts white vinegar and water instead. Soak a soft brush or toothbrush in the solution before starting.
Scrub Track Thoroughly
Dip the brush into the solution and scrub the entire length of the track. Pay extra attention to areas where the rollers sit and corners where dirt piles up. Let the vinegar solution sit for 5 to 10 minutes on stubborn spots before scrubbing.
Use firm but gentle pressure. Avoid metal brushes that can scratch aluminum or plastic tracks.
Dry Completely to Prevent Mold
Wipe out soapy or vinegar water with a damp microfiber cloth, then follow with a dry cloth to remove all moisture. Leaving water in the track invites mold, mildew, and rust.
Use a rubber squeegee to pull excess water toward drain holes (weep holes) if present. These small openings allow water to escape, so make sure they are not blocked.
Skip the Cut Sponge Method
This DIY hack sounds clever but fails in practice, especially on dirty tracks.
Cutting Sponges Is Unsafe
Trying to notch a scrub sponge with a razor blade is risky due to the small size and slippery surface. The blade can slip and cut your hand. Using scissors is safer but results in jagged, uneven edges that don’t fit the track well.
Sponges Lack Power and Reach
Even when shaped, sponges often can’t reach the bottom of deep tracks. The abrasive side wears down quickly and doesn’t generate enough friction to remove goo or caked grime. Users report it is noisier and less effective than brushing.
Stick to brushes or steam. Save sponges for flat surfaces.
Vacuum Debris First Every Time
Skipping pre-cleaning leads to mud and wasted effort.
Remove Loose Dirt Before Wetting
Always use a vacuum with a crevice tool to suck out dust, sand, and crumbs before applying any liquid or steam. Dry debris turns into sludge when wet, making cleanup harder and potentially scratching the track.
Pass the vacuum slowly along the full length, especially in corners and behind rollers.
Prevent Recontamination
After vacuuming, avoid walking barefoot or in dusty socks nearby. Falling hair, lint, or tracked-in dirt can fall back into the clean track before you finish.
Prevent Stiff Windows with Lubrication
A clean track isn’t always enough. Sometimes it needs a little glide.
Apply Silicone Lubricant Sparingly
If the window still drags after cleaning, apply a small amount of silicone-based lubricant to the track. Do not use WD-40 or oil-based products, because they attract dust and worsen buildup over time.
Use a cloth or small brush to spread a thin layer. Slide the window open and closed several times to distribute evenly.
Test Window Movement
After cleaning and lubricating, test the window by opening and closing it slowly. It should move smoothly with minimal resistance. If not, repeat cleaning or check for misaligned rollers.
Maintain Tracks Every 3 to 6 Months

Regular upkeep prevents major clogs and extends window life.
Schedule Based on Environment
In dusty areas, homes with pets, or high-traffic rooms, clean tracks every 3 months. In cleaner environments, every 6 months is sufficient.
Set a reminder on your phone or pair it with HVAC filter changes for consistency.
Quick Wipe After Cleaning
Once per month, do a 30-second wipe with a dry microfiber cloth to remove surface dust. This simple habit keeps grime from hardening.
Avoid These Common Mistakes
Even with the right method, errors reduce effectiveness.
Don’t Use Harsh Chemicals
Bleach, ammonia, or abrasive cleaners can damage plastic tracks and corrode metal. Stick to vinegar, mild soap, or steam. They are strong enough without causing harm.
Never Skip Drying
Wet tracks breed mold and cause metal parts to rust. Always finish with a dry microfiber cloth. In humid climates, leave the window open slightly to air-dry after cleaning.
Don’t Over-Wet Wooden Frames
If your sliding window has a wood base, avoid soaking it. Use minimal moisture and dry immediately. Steam should never be used on finished or historical wood, as it can warp or blister the surface.
Frequently Asked Questions About Cleaning Sliding Window Tracks
What is the best way to clean sliding window tracks?
Steam cleaning is the most effective method for deep cleaning. It melts caked-on grime, sanitizes without chemicals, and reaches tight corners when you use angled or grout brush attachments.
Can I use vinegar and baking soda on window tracks?
Yes. Sprinkle a light layer of baking soda into the track, then mist it with white vinegar. The fizzing reaction lifts embedded dirt. Scrub with a toothbrush and wipe clean with a microfiber cloth.
How often should I clean my sliding window tracks?
Clean tracks every 3 to 6 months. In dusty environments or homes with pets, aim for every 3 months. In cleaner settings, every 6 months is enough.
Is it safe to use a steamer on window tracks?
Steamers are safe for most tracks, but avoid them on cold glass (thermal shock risk), finished wood, and the plastic seal right against the glass. Always spot test on delicate surfaces first.
Why is my sliding window still hard to open after cleaning?
Residual grime or lack of lubrication is the usual cause. Repeat the cleaning process or apply a small amount of silicone-based lubricant to the track. Avoid WD-40 or oil-based products.
Does the cut sponge trick actually work?
No. Cutting a sponge to fit the track is difficult and unsafe, and shaped sponges lack the depth and abrasion needed for caked-on grime. Brushes and steam perform far better.
Key Takeaways for Clean, Smooth-Sliding Windows
Steam cleaning delivers the deepest results, vinegar and baking soda offer a natural alternative, and soapy water handles routine maintenance well. Always vacuum loose debris first, dry the track thoroughly afterward, and use silicone lubricant if the window still sticks. With these proven steps, your sliding windows will glide like new and last longer without guesswork.