

Covering a window from the inside is a practical solution for homeowners seeking more wall space, improved privacy, or better light control without altering the exterior. Whether you are renovating a kitchen blocked by a window or aiming to match cedar paneling, internal window covering can work, but it must be done carefully. Done wrong, it risks moisture buildup, mold, and fire code violations. Done right, it seamlessly integrates into your home’s design while preserving curb appeal. This guide walks you through proven methods, safety considerations, and step-by-step strategies based on real-world renovations and expert insights. You will learn how to maintain energy efficiency, avoid hidden damage, and choose the best method for your needs.
Build a False Wall for Permanent Coverage

When you need solid backing for cabinets or appliances, a false wall offers the most durable and seamless solution. This method is ideal for brick homes where external modifications are impractical. It transforms the window into a full interior wall while keeping the exterior looking intact.
Install Particleboard Over the Window Frame
Start by cutting a 7/16″ thick particleboard to fit the window opening exactly. Use a circular saw with the blade depth adjusted so it only cuts through the board, not the window stops or frame. Older homes often have uneven openings, so test-fit and trim as needed. Once the fit is precise, screw the particleboard directly into the window stops. This creates a sturdy base for insulation and drywall. For exterior realism, paint the outer-facing side of the particleboard black to mimic the shadow depth of an actual window when viewed from outside.
Add Insulation Without Bulging
After securing the particleboard, install insulation to maintain thermal performance. In deep walls (like 15″ brick constructions), use full-thickness insulation batts. In standard walls, cut the insulation in half to prevent it from pushing outward and warping the final drywall. Press the insulation firmly against the particleboard, ensuring no gaps. Avoid compressing it too much, as this reduces its R-value. This sealed layer helps prevent heat loss and minimizes condensation risk by keeping the interior surface warmer.
Finish with Drywall and Paint
Cover the insulated surface with drywall, taping and mudding the seams to blend with the surrounding wall. Sand smooth and paint to match. The result is a flat, solid wall perfect for mounting heavy cabinetry or appliances like refrigerators. Because the drywall is applied over a secure structure, it supports full weight loads, unlike temporary solutions. This method is permanent but can be reversed if needed, provided the exterior window remains accessible.
Keep the Exterior Window Functional
Crucially, leave the exterior window intact and operational. Install a new matching window if necessary, and add a mini blind inside it. Keep it unlocked so it can be opened from outside for cleaning, maintenance, or emergency access. This setup preserves the home’s appearance, complies with egress codes in many areas, and allows future inspection of the glass and frame. Since the interior is sealed, regular exterior checks are essential to catch leaks early.
Use Matching Paneling for Aesthetic Blending
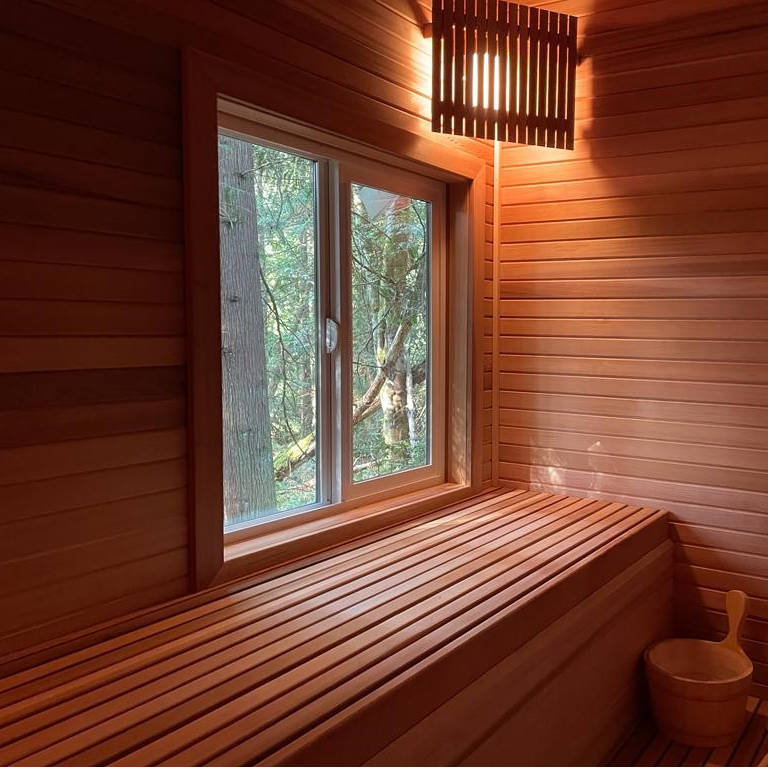
If your goal is visual continuity rather than structural support, covering the window with matching interior wood paneling is a simpler alternative. This works best in rooms with cedar or wood-paneled walls where the covered window should disappear into the design.
Cut and Attach Cedar Panels Flush
Measure the window opening and cut extra cedar panels to fit tightly within the frame. Attach them using finish nails or adhesive, ensuring a seamless transition with the surrounding wall. Because this method is for light-duty use like hanging photo frames, no heavy-duty backing is needed. The panel should sit flush with the wall surface to avoid visual disruption.
Insulate Behind the Paneling
Before sealing the panel, insert insulation between the glass and the new cedar surface. This improves thermal performance and reduces condensation. Use rigid foam boards or compressed batts that fit snugly without pushing against the glass. Avoid leaving air pockets, as they can trap moisture and lead to mold.
Paint the Glass from the Outside
To improve curb appeal, paint the exterior side of the glass with opaque, weather-resistant paint. Choose a color that matches the wall or trim to minimize contrast. This step is critical because unpainted glass will look like a dark hole, breaking the illusion. Since this window is often on a low-visibility side of the house, the painted glass blends in acceptably, though it will not pass as an open window like the false wall method.
Prevent Condensation and Mold Growth
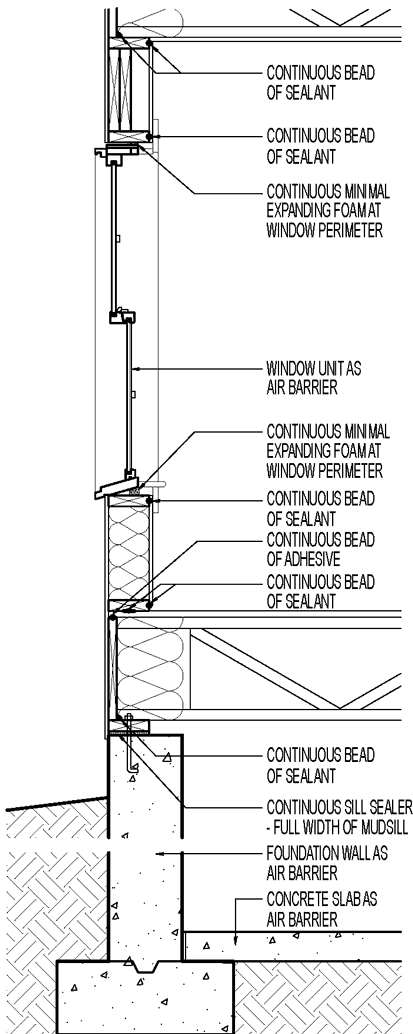
Any internal window cover creates a sealed cavity between the glass and the new wall. Without proper precautions, this space becomes a moisture trap, leading to mold, rot, and hidden damage.
Seal All Edges Tightly
Use acoustic sealant or backer rod to close gaps between the particleboard or paneling and the window frame. This prevents warm, moist indoor air from entering the cavity and condensing on cold glass during winter. A continuous seal is essential because small gaps can allow enough vapor to cause significant damage over time.
Monitor for Moisture Buildup
Even with insulation and sealing, temperature differences can cause condensation. Check the cavity annually by temporarily removing a vent or panel. Look for water droplets, damp insulation, or musty odors. If moisture is present, consider adding a small ventilation gap or switching to a vapor-permeable insulation type.
Avoid Trapped Air in Cold Climates
In regions with harsh winters, the risk of condensation is highest. Never use plastic sheeting or vapor barriers on the warm side of the assembly unless designed by a professional. This can trap moisture inside the wall. Instead, allow controlled drying toward the interior with breathable materials like mineral wool insulation.
Meet Fire and Egress Safety Codes
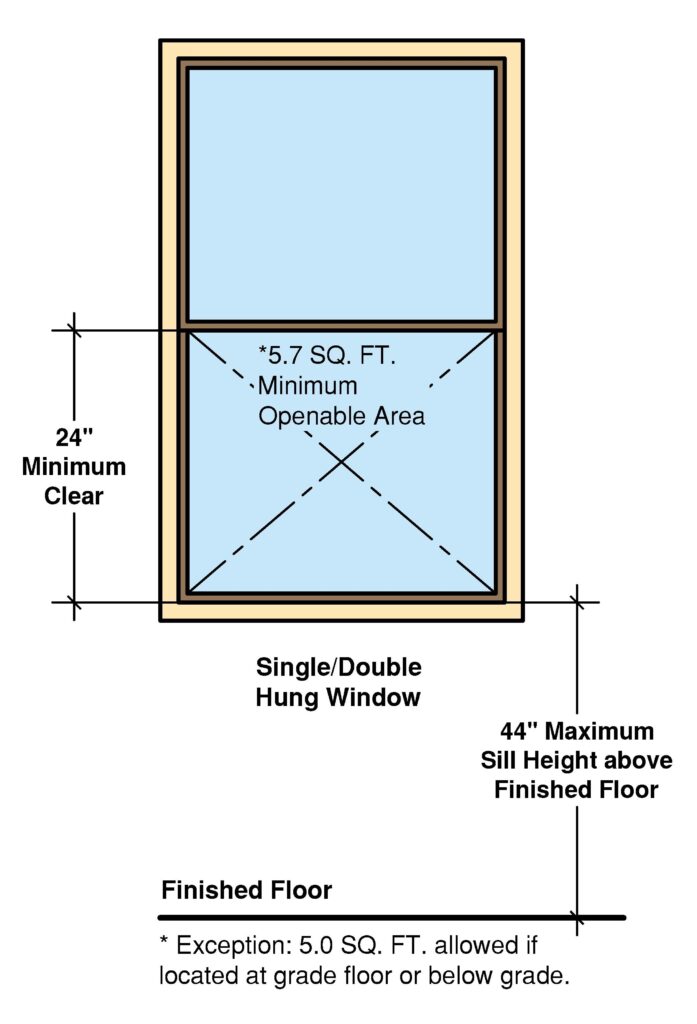
Blocking a window can violate fire safety regulations, especially in bedrooms where windows serve as emergency exits.
Verify Local Egress Requirements
Check with your local building department before covering any window. Most codes require at least one operable emergency exit per sleeping room, typically a window of minimum size (often 5.7 sq ft opening). Covering such a window, even from the inside, may not be permitted unless an alternative exit exists.
Maintain Access for Emergencies
In the false wall method, the exterior window remains functional, allowing access in emergencies. In the paneling method, access is lost. If you proceed with a permanent cover, ensure another egress point is available and code-compliant. Never cover a bedroom window unless you have a second exit like a door or another window.
Label Hidden Windows for Safety
If the interior wall is not easily removable, consider installing a discreet access panel or label indicating the location of the covered window. This helps firefighters identify potential entry points during an emergency.
Choose the Right Method for Your Needs

Not all window coverings are equal. Your choice depends on structural needs, light availability, and long-term plans.
False Wall vs. Paneling: Key Differences
| Feature | False Wall (Drywall) | Paneling (Cedar) |
|---|---|---|
| Best For | Cabinet support, full renovation | Aesthetic blending, light loads |
| Exterior Look | Realistic (functional window outside) | Acceptable (painted glass) |
| Insulation Quality | High (full cavity coverage) | Moderate (limited depth) |
| Maintenance Access | High (exterior window usable) | Low (permanent seal) |
| Risk Level | Moderate (with precautions) | High (moisture, mold) |
When to Use Each Method
- Use the false wall method if you need strong backing, live in a brick home, or want to preserve safety and access.
- Use paneling only if the window is non-essential, the room has abundant alternative light (like a 3100 mm window or bi-fold doors), and you accept the higher risk of moisture damage.
Avoid Common DIY Mistakes
Many homeowners underestimate the risks of internal window covering. Learning from others’ errors can save you costly repairs.
Don’t Skip the Exterior Window
Removing or permanently sealing the exterior window creates a code violation and makes future inspections impossible. Always keep it functional and unlocked.
Don’t Ignore Light Replacement
Covering a primary light source can make a room feel dark and uninviting. Only proceed if other large windows or skylights provide ample daylight.
Don’t Use Standard Blinds as a Cover
Hanging blinds or curtains does not “cover” a window structurally. If your goal is wall space, temporary solutions will not help. Reserve blinds for privacy-only needs.
Test for Suitability Before Committing

Before starting construction, evaluate whether covering the window makes sense for your home.
Assess Natural Light Levels
Spend a few days observing how much light the window contributes. If it is shaded by a garage or structure, its loss may be negligible. Use a light meter app to compare brightness before and after temporarily blocking the glass with cardboard.
Check Exterior Visibility
Walk around your property and view the window from the street. If it is on a side or rear wall with low visibility, a painted glass solution may be acceptable. If it is highly visible, only the false wall method preserves curb appeal.
Plan for Future Repairs
Assume that leaks or seal failures will happen. Design your cover with access in mind, either through the exterior window or a removable interior panel. “Out of sight, out of mind” leads to delayed repairs and expensive damage.
Frequently Asked Questions About Covering a Window from Inside
Is it legal to cover a window from the inside?
It depends on local building codes. Many jurisdictions require operable egress windows in bedrooms, so covering one may violate regulations. Always check with your local building department before starting any project.
Will covering a window from inside cause mold?
It can if the cavity is not properly sealed and insulated. Moisture from indoor air can condense on cold glass, creating ideal conditions for mold growth. Use proper insulation, seal all edges, and inspect the cavity annually.
Can I still use the window for light after covering it from inside?
No. Once sealed, the window no longer transmits natural light. Only proceed if the room has sufficient alternative light sources, such as large windows, skylights, or glass doors.
What is the best material to cover a window from inside?
For structural needs, 7/16″ particleboard covered with drywall is the most durable option. For aesthetic blending, matching cedar or wood paneling works well in low-risk applications with adequate alternative lighting.
How do I make a covered window look realistic from outside?
Paint the exterior-facing surface black to simulate the shadow depth of an open window. In the false wall method, install a functional exterior window with a mini blind for the most convincing appearance.
Can I cover a bedroom window from inside?
Generally, no, unless the room has another code-compliant emergency exit. Bedroom windows typically must remain operable to serve as egress points in case of fire.
Key Takeaways for Covering a Window from Inside
Covering a window from inside can be a smart renovation move when done with safety, insulation, and long-term maintenance in mind. The false wall method offers the most durable, code-compliant solution, especially for brick homes needing cabinet space. Aesthetic paneling works only in low-risk, well-lit rooms where the window loss is acceptable. Always prioritize egress safety, moisture control, and exterior appearance to avoid costly problems.
Your next step is to assess your specific window’s role in the home. Check local codes, evaluate available light, and decide whether you need structural support or just visual blending. With the right approach, you gain valuable wall space without sacrificing comfort or property value.



