

Installing a prehung door is one of the most satisfying DIY home improvement projects you can tackle. Whether you are replacing an old interior door or installing a new exterior entry, a prehung door comes already mounted in its frame with hinges and often a pre-drilled lockset, making installation faster and more accurate than building everything from scratch. This guide walks you through every critical step, from measuring the rough opening to trimming shims and sealing the threshold, so you can install a prehung door like a pro.
Prepare the Rough Opening for Your Prehung Door
Before buying your prehung door unit, you must measure the rough opening accurately. Measure the width at the top, middle, and bottom, and measure the height on both sides. A standard 32-inch door requires a 34-inch wide by 82.5-inch tall opening, which is 2 inches wider and 2.5 inches taller than the door unit. Confirm that the jamb depth matches your wall thickness: 4.5 inches for standard 2×4 walls and 6.5 inches for 2×6 walls. If the opening is oversized, install 1×2 furring strips to adjust the framing, but never compress the jamb to fit because this causes warping.
Remove the Old Door and Frame
Start by removing interior and exterior trim using a 5-in-1 tool. Take out the hinge pins and swing the old door out, then unscrew the strike plate. Cut through any fasteners holding the jamb with a reciprocating saw and pull out the old frame carefully to avoid damaging drywall or sheathing. Inspect the opening thoroughly and replace any rotted sill or header material, and sister any damaged studs. For exterior doors, ensure the subfloor is solid and level, especially under the threshold area.
Check for Level and Support
Use a 4-foot level to verify the subfloor beneath the threshold. If it is out of level by more than 1/8 inch, apply Fix All or a similar floor patch compound in thin layers, letting each layer dry completely before sanding. Never rely on caulk to support the threshold because it compresses under weight and fails over time. For exterior units, install flashing tape or a sill pan before setting the door, with self-adhering tape lapping up the sides at least 6 inches to prevent water intrusion.
Set the Door Unit in Place

With a helper, tilt the bottom of the prehung door into the opening first, then swing the top into position. Keep the door slab in the jamb during installation because removing it increases the risk of damaging the frame. Feed any doorbell wires through the pre-drilled jamb hole if applicable. Support the threshold on temporary shims or a door jack to hold the correct height. Do not remove the factory shipping braces until the unit is in place and ready to be secured because they keep the jamb square during transport.
Simulate Final Floor Height
If you are installing over new flooring, account for 1/2 inch of finished floor thickness. Use block shims under the threshold to simulate the final height and ensure proper clearance when the door swings. Misjudging this gap leads to doors dragging or not closing properly. For solid core doors weighing 70 to 100 pounds or more, consider using a Quick Door Hanger Kit, which is a clamping tool that supports the door during installation and enables single-person work with faster alignment.
Plumb the Hinge Side Jamb Correctly
Remove the door slab temporarily to reduce weight and allow precise adjustment. Place a 6-foot level along the hinge-side jamb stile. This side must be perfectly plumb because it is the foundation of the entire installation. If the level shows a gap, insert cedar or composite shims between the jamb and stud at hinge locations and the threshold. Drill pilot holes to prevent splitting, then drive 2.5-inch construction screws through the jamb into the framing. For solid core doors, use 3-inch coated deck screws in the top hinge to anchor into the header and prevent sagging.
Use Clamps for Stability
To maintain plumb while fastening, clamp a long level to the jamb using track saw clamps. This keeps the reference straight and frees both hands for shimming and screwing. Avoid over-tightening screws until all adjustments are complete because this allows fine-tuning. Once plumb, leave screws slightly loose to accommodate final alignment.
Adjust the Latch Side Using Door Reveal
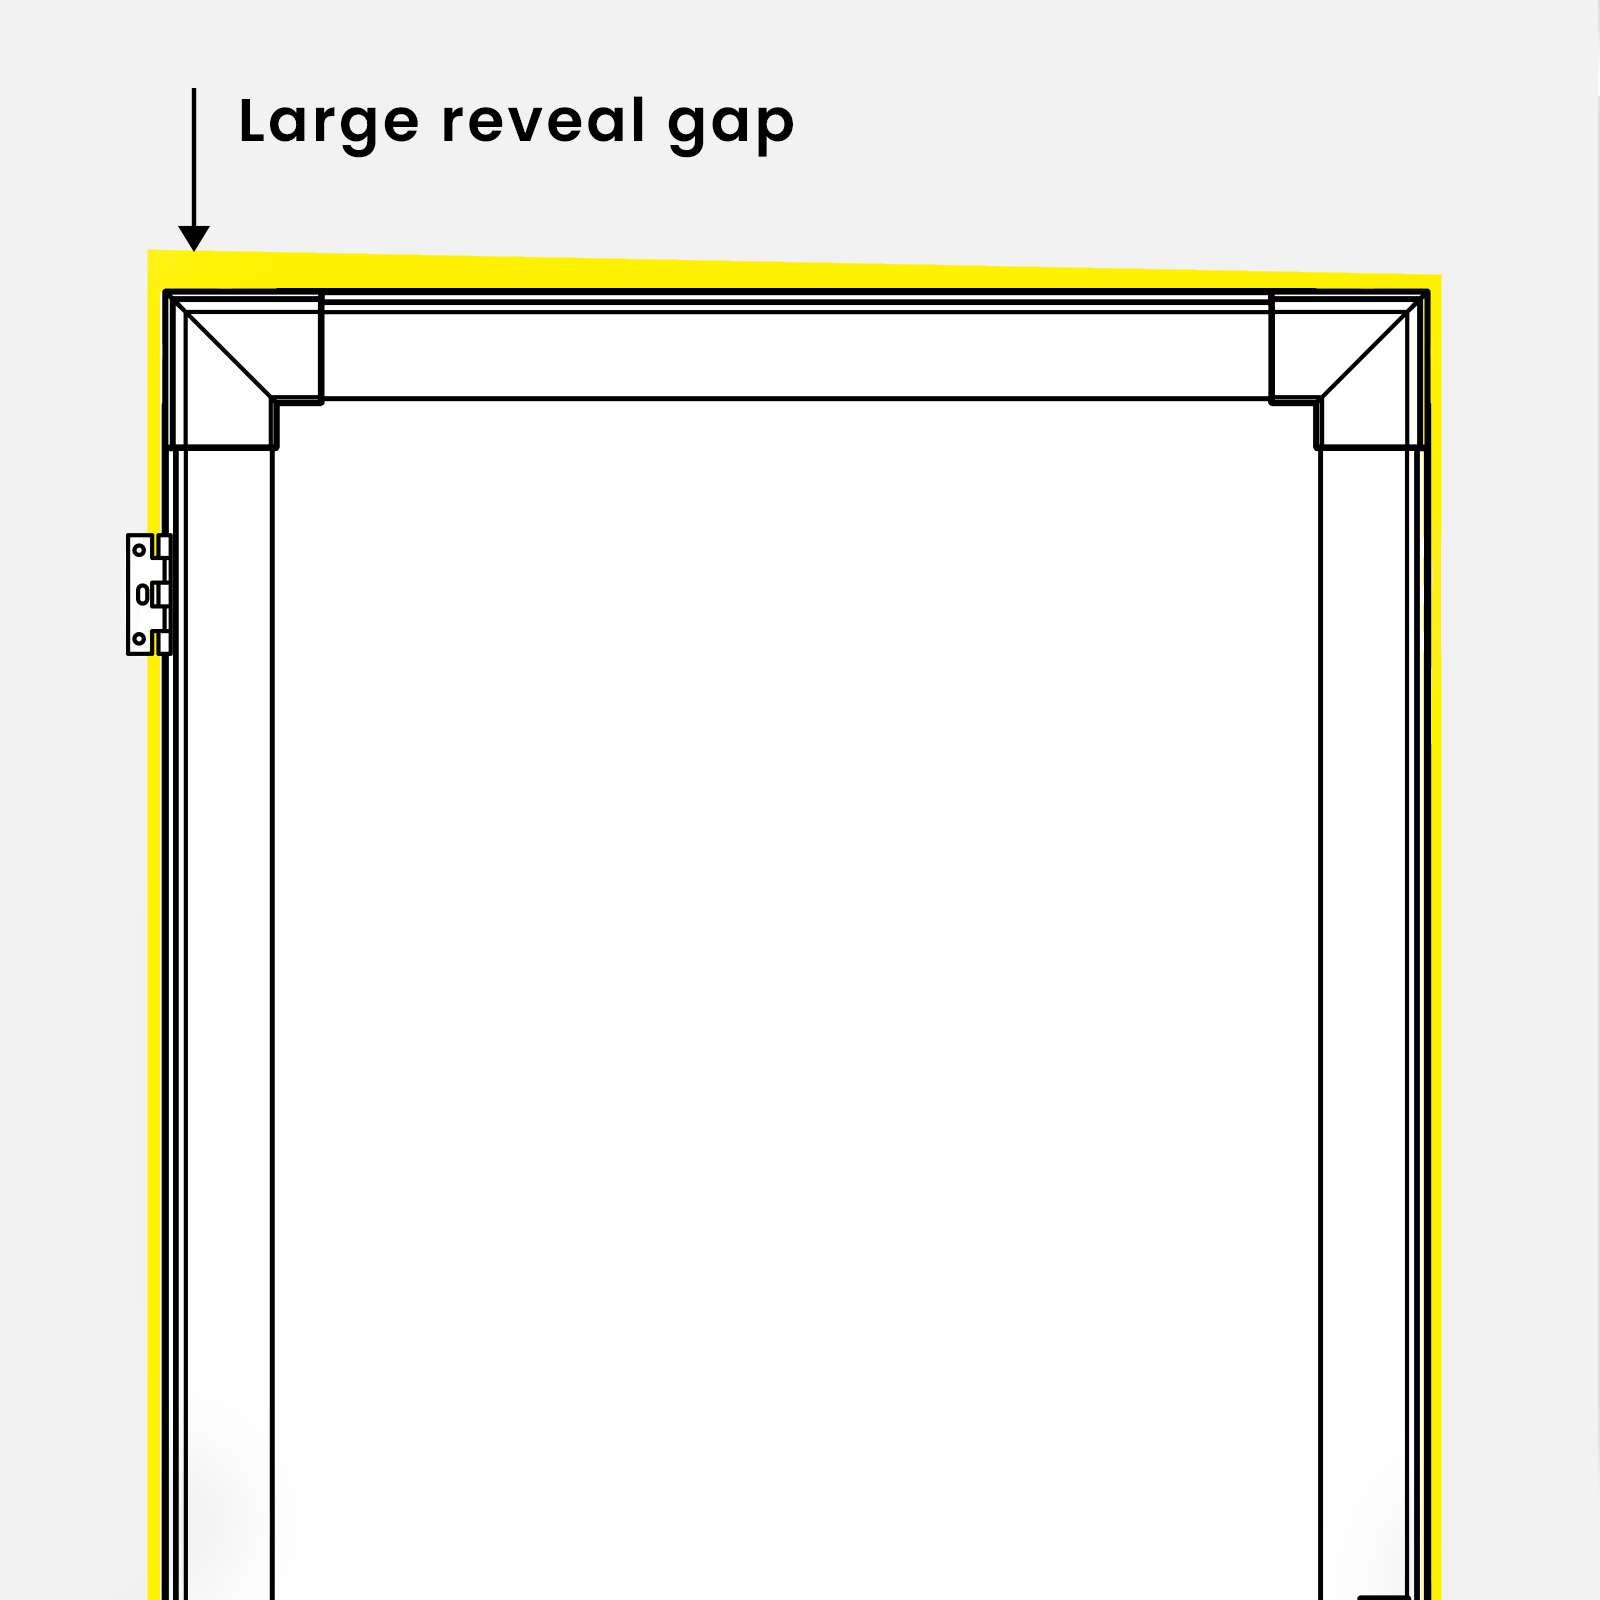
Rehang the door slab. The latch side does not need to be plumb, so adjust it based on reveal, which is the gap between the door edge and the jamb. Your goal is 1/8 inch on the hinge and latch sides and 1/4 inch at the top. Close the door and observe the gap. If it is wider at the top, push the jamb in at the top. If it is wider at the bottom, pull the jamb out at the top. Shim behind the latch-side jamb at the top, middle, and bottom, driving screws partially first.
Shim Behind the Strike Plate
A common cause of poor latching is a flexing jamb. Install a shim behind the strike plate before securing it to provide solid backing so the latch engages smoothly without forcing. Use 2.5-inch screws to attach the strike plate because short screws can pull out over time. Test the latch repeatedly during adjustment to ensure it clicks without resistance.
Square the Door Frame
Check for square by measuring from the top-left corner to the bottom-right corner and from the top-right corner to the bottom-left corner. Both diagonals must be equal. If they are not equal, adjust shims on the latch or head jamb until they match. A slightly out-of-square wall is acceptable, but the jamb itself must be square. Draw a level reference line on the wall before starting to guide alignment and improve accuracy.
Avoid Over-Shimming
Limit shims to two per location and stagger the stacks to prevent bulging. Over-shimming creates weak points and a bulging appearance. Trim all shims flush with an oscillating multi-tool after securing. Never rely on nails alone; use screws at hinge points and the header for long-term stability.
Secure the Head Jamb and Frame

Once the jamb is plumb, level, and square, secure the head jamb to the header. Drill pilot holes and drive 3-inch screws or 2.5-inch finish nails through the head jamb. Avoid over-tightening, which can twist the frame. Confirm the door still swings freely after fastening; if it binds, loosen the screws slightly and re-shim.
Anchor the Top Hinge
For any door over 80 pounds, especially solid core models, drive a 3-inch screw through the top hinge into the header. This prevents sagging, which is the most common failure in DIY installations. If the hinge mortise is too shallow, use a chisel to deepen it because proud hinges cause misalignment.
Insulate and Seal Gaps Properly
Fill gaps between the jamb and framing with low-expansion spray foam, such as Great Stuff Pro. Avoid overfilling because expanding foam can warp the jamb. Keep foam away from electrical wires and plumbing. For interior doors, batt insulation is sufficient. Never allow foam to fill the gap behind shims because this locks in misalignment.
Caulk the Exterior Base
On exterior doors, apply exterior-grade silicone or polyurethane caulk along the bottom edge where the jamb meets the threshold. This seals against air and water infiltration. Reinstall or replace brick mold or exterior trim, ensuring it overlaps the jamb for weather resistance.
Install Trim and Finish the Door
Install casing, such as 1/2-inch by 2-1/4-inch colonial, with 2-inch finish nails. Pre-stained or matching wood enhances aesthetics. Nail at 45-degree angles into the framing behind the drywall. Caulk joints between casing and wall for a clean, seamless look. Trim any exposed shims flush before installing trim.
Add Threshold Transition Molding
If the threshold sits higher than finished flooring, install 1/4-inch round edge, 1/2-inch by 1/2-inch square, or laminate end cap molding to bridge the gap. Secure it firmly to prevent tripping. This is especially important in high-traffic entries.
Paint or Stain Within Warranty Period
Many manufacturers require painting within 30 to 60 days of installation to maintain warranty. Use exterior-grade paint for outside doors. Apply while the door is on its hinges or lay it flat for even coverage. Sand lightly between coats for a smooth finish.
Fix Common Installation Problems
Sagging is almost always due to inadequate top-hinge support. Install a 3-inch screw through the top hinge into the header. If the mortise is too shallow, deepen it with a chisel. Re-shim the hinge side if the jamb has twisted. Users report this single fix resolves 90 percent of binding issues.
Threshold Flexes Underfoot
A flexing threshold means the subfloor is unsupported. Remove the door, level the subfloor with Fix All, and reinstall. Do not rely on caulk because it compresses and fails. Ensure the sill pan or flashing tape is properly sealed to prevent future rot.
Door Will Not Stay Open
If the door swings shut or opens on its own, it is unbalanced. Adjust shims until the door stays in place when left ajar. This often requires slight tweaking of the hinge-side plumb. In older homes, perfect alignment with the house is not necessary because smooth operation is the goal.
Latching Requires Force
Misaligned strike plates cause hard latching. Shim behind the strike-side jamb and reposition the plate if needed. File the strike hole slightly with a metal file for easier engagement. Ensure the door is not binding elsewhere first.
Use Pro Tools and Shortcuts
This specialized clamp system attaches to the header and holds the door at the correct height and reveal. It enables single-person installation and cuts time to under 10 minutes per door. The Quick Door Hanger Kit is highly recommended for solid core or exterior doors.
Pre-Set the Reveal on Sawhorses
Lay the prehung door on sawhorses. Adjust the latch-side gap to 1/8 inch and secure with painter’s tape. Install as a fixed unit to minimize on-site adjustment. Users in older, uneven homes report this method delivers perfect alignment on the first try.
Maintain Long-Term Performance
Check and tighten all hinge screws once a year, especially on heavy doors. Replace stripped holes with longer screws or toothpicks in wood glue. Lubricate hinges and latches with silicone spray or white lithium grease to prevent squeaking.
Re-Caulk Exterior Joints Every 2 to 3 Years
Weather exposure degrades caulk. Inspect trim joints annually and re-caulk as needed. Monitor for sticking during seasonal humidity changes because minor planing or shimming may be required.
Know When to Call a Pro
Hire a licensed carpenter if the rough opening is severely damaged or out of square, if you are installing a custom or oversized exterior door, if waterproofing is complex, or if previous attempts failed due to persistent sagging or binding.
Frequently Asked Questions About Installing Prehung Doors
What tools do I need to install a prehung door?
You will need a 4-foot or 6-foot level, tape measure, drill driver, carpenter’s square, utility knife, hammer or nail gun, reciprocating saw, oscillating multi-tool, chisel, shim stock, and a caulk gun. Recommended materials include construction screws, finish nails, batt insulation or low-expansion spray foam, and exterior-grade caulk for outdoor installations.
How do I know if my rough opening is the right size?
Measure the rough opening width at the top, middle, and bottom and the height on both sides. A standard 32-inch door requires a 34-inch wide by 82.5-inch tall opening, which is 2 inches wider and 2.5 inches taller than the door unit. The jamb depth must match your wall thickness: 4.5 inches for 2×4 walls and 6.5 inches for 2×6 walls.
Should I remove the door slab before installing the prehung unit?
Keep the door slab in the jamb during installation to reduce the risk of damaging the frame. Only remove the slab temporarily when you need to plumb the hinge side, then rehang it for final adjustments. Removing the door makes installation more difficult and increases the chance of frame damage.
Why does my door sag after installation?
Door sagging is almost always caused by inadequate top-hinge support. Install a 3-inch screw through the top hinge into the header to anchor it properly. For solid core doors weighing more than 80 pounds, this long screw is essential for preventing sag over time.
How do I fix a door that will not stay open?
Adjust the shims until the door stays in place when left partially opened. This indicates proper balance. If the door swings shut on its own, the hinge side is likely out of plumb. Make small adjustments to the hinge-side shims until the door hangs wherever you leave it.
Key Takeaways for Installing Your Prehung Door
A successfully installed prehung door does not need to be perfectly aligned with the house. Focus instead on three critical elements: a plumb hinge side, consistent reveals of 1/8 inch on the sides and 1/4 inch at the top, and solid anchoring with proper screws. The hinge side must be perfectly vertical because it is the foundation of the entire installation. Use 3-inch screws in the top hinge for solid core doors to prevent sagging, which is the most common DIY failure. Take your time with shimming and adjustment because rushing leads to binding, sticking, and poor latching. With patience and the right techniques, even a DIYer in a century-old home can achieve a smooth-swinging, long-lasting result.


