
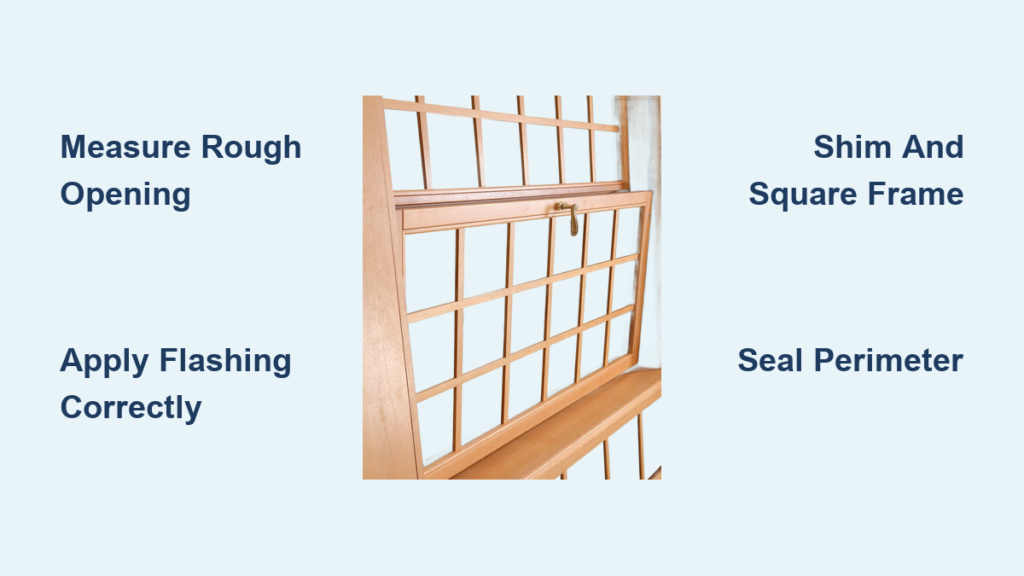
Installing a double hung window the right way transforms your home’s comfort, energy efficiency, and curb appeal. Most drafty rooms and rising utility bills trace back to old, poorly fitted windows that leak air and water around failing seals. This guide breaks down every step of how to install a double hung window, from measuring the rough opening to sealing the final perimeter. You will learn field-tested techniques for flashing, shimming, leveling, and insulating that prevent the most common installation failures. Follow along to achieve a professional-grade result that operates smoothly and lasts for decades.
Measure the Rough Opening Accurately

Take Multiple Measurements at Three Points
Measure the width of the rough opening at the top, middle, and bottom. Use the smallest of these three numbers to select your window size. For height, lift the old sash and measure from the sill to the header at both sides and the center. Use the shortest measurement to account for any sag or slope in the existing frame. Always measure inside the rough opening, not from the existing window itself.
Allow Proper Clearance for Shimming
The rough opening should be ¼ inch to ½ inch wider and taller than the window unit. This gap provides room for shimming and insulation without forcing the frame. In older homes with aluminum frames, you may need up to 1 inch of clearance for proper alignment. Never trim a stock window more than ¼ inch, or you risk voiding the warranty and weakening the structure.
Prepare the Window Unit for Safe Handling
Flip the Unit Upside Down Before Moving
Before carrying the new window to the opening, flip it upside down. This prevents the sash from falling out during transport. On units with side tabs or “ears,” pop these open to lock the sash in place. The side with gaskets must face outward once installed.
Keep Center Banding in Place Until Final Step
New double hung windows ship with center banding across the middle section. Leave this intact until the frame is fully secured and squared. Removing it too early allows the sash to shift, throwing off your alignment. Cut the banding only after all fasteners are in place and operation is verified.
Check and Repair Structural Framing
Replace Sagging Headers with LVL Lumber
If the existing header is sagging or damaged, install a level LVL (Laminated Veneer Lumber) header to support the load above the opening. For deeper wall cavities, add a drop header above the main header to maintain nailing depth for trim. Verify that jack studs and the sill are plumb and level before moving forward.
Clean Jambs and Strip Old Caulk
Use a flathead screwdriver, scraper, or oscillating multi-tool to remove all old caulk and paint from the jambs. A clean, smooth surface ensures the new window seals tightly. Pay close attention to corners and the sill, where debris tends to accumulate.
Insulate Weight Cavities in Older Homes

Access and Clear Pulley Systems
Homes built before the 1950s often have window weights and pulleys hidden inside side cavities. These cavities are major sources of air leakage. Remove the interior access panel, usually secured by two screws at the bottom, and extract all ropes, pulleys, and metal tracks.
Fill with Rigid Board or Spray Foam
Pack the cleared cavity with rigid foam board or low-expansion spray foam. Tuck the material deep to seal gaps around the frame. This step dramatically improves energy performance and reduces drafts. In full remodels, you can delay this step, but never skip it entirely.
Apply Bottom Flashing Correctly
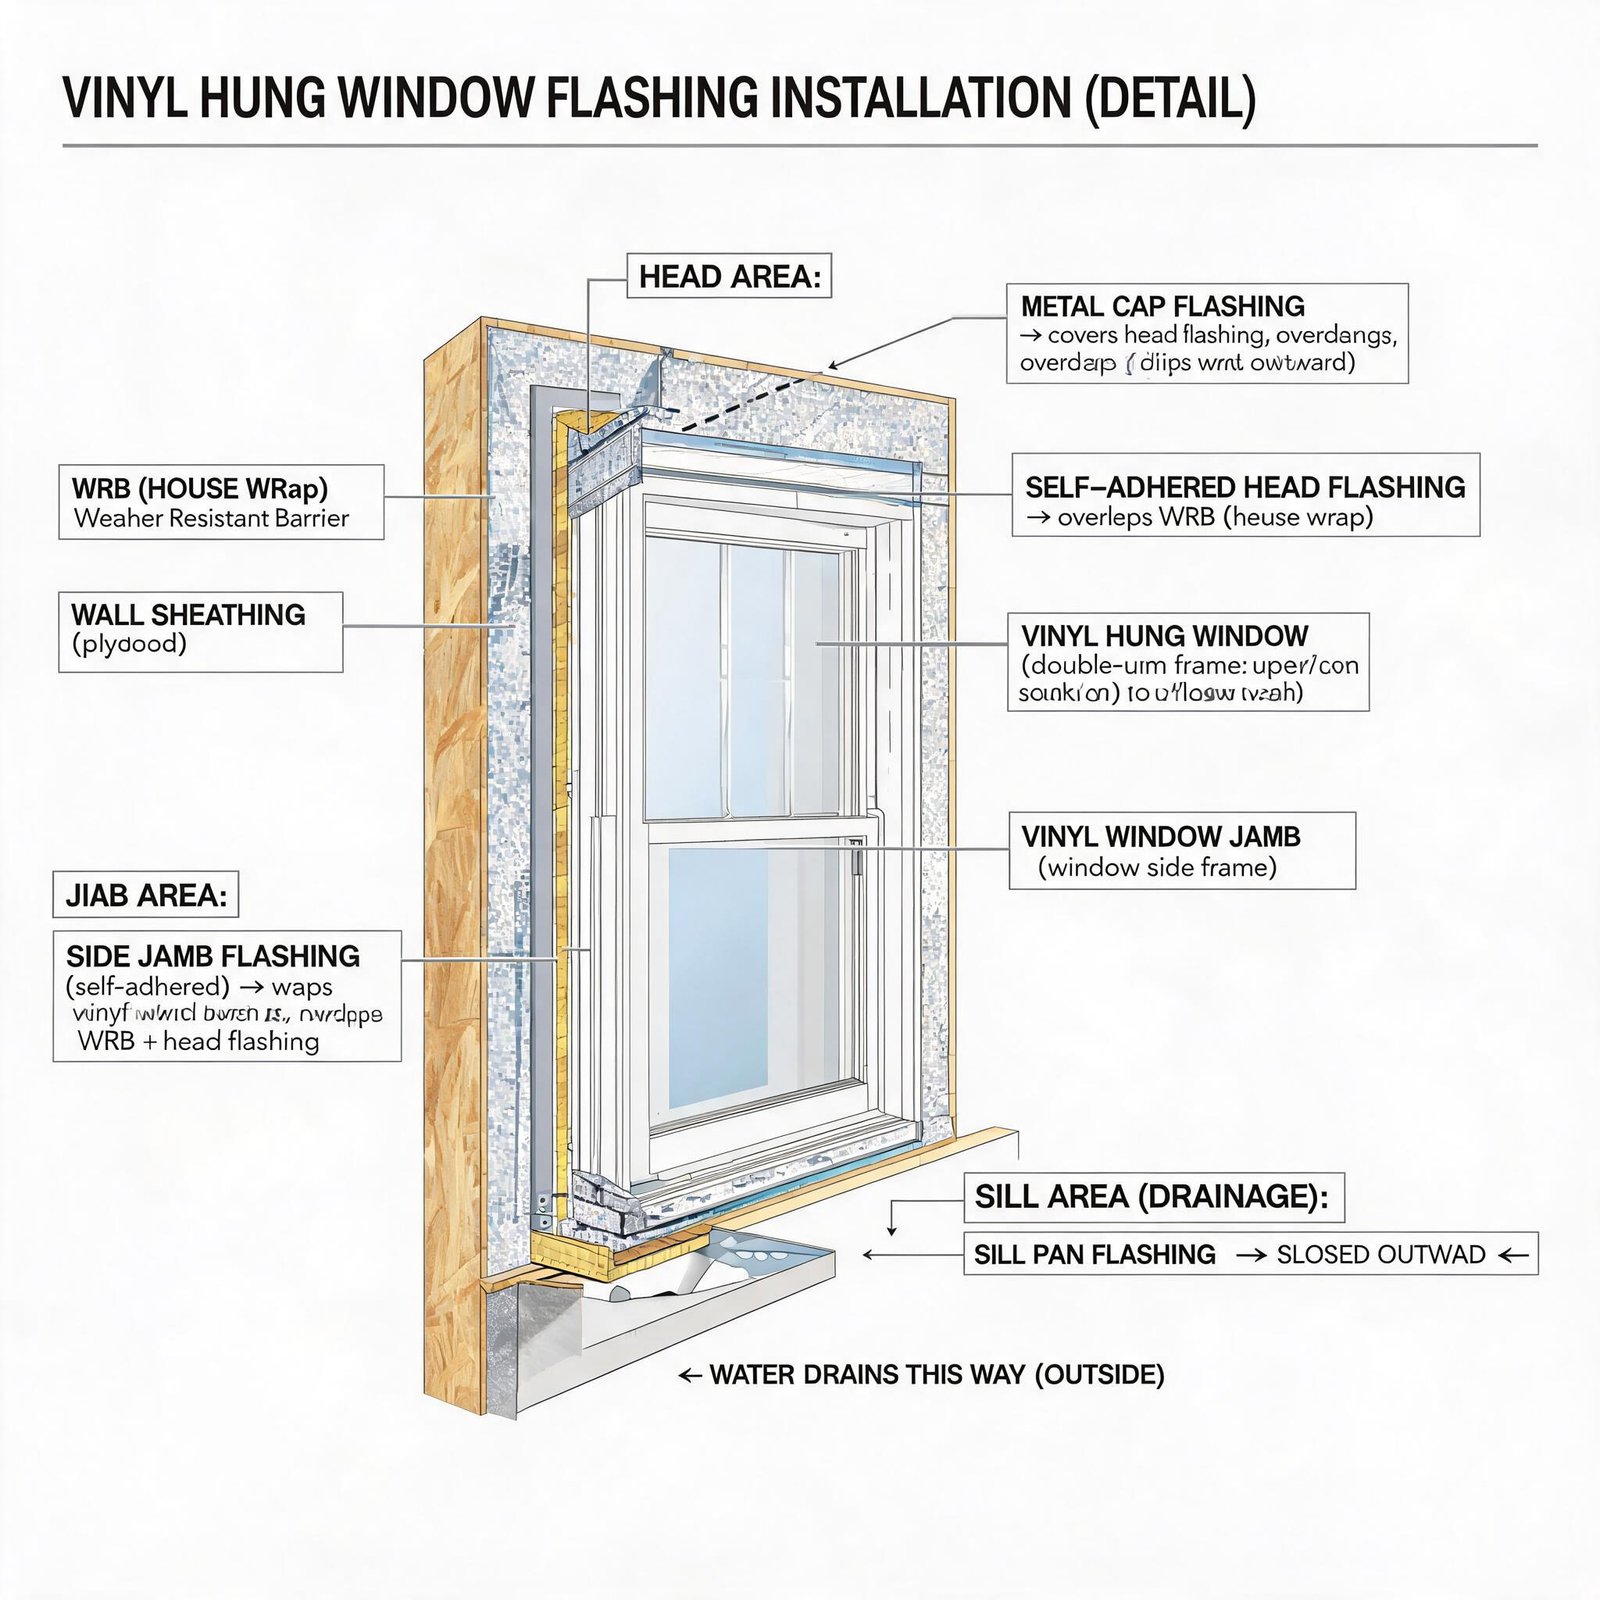
Install a Sloped Clapboard First
Place a clapboard over the rough opening with the thick edge facing inward. This creates a downward slope that directs any water under the window outward. Cover this with a wide strip of 15-pound felt paper, extending at least 6 inches beyond the window on all sides.
Add Self-Sealing Counter-Flashing
Use a self-sealing membrane for counter-flashing. Begin at the top of the clapboard, fold the flashing down over the felt, then cut and fold it outward on both sides. When siding is installed, the bottom edge of siding goes behind the flashing, while the top edge overlaps it, creating a shingle-like barrier.
Seal Top and Side Edges

Overlap Felt Paper at the Header
Install another piece of felt paper just above the window header, level with the jamb. Tack it in place with a slight downward drape at the bottom. This piece must overlap the soft flashing below to direct water away from the frame.
Tape Sides and Sill with Butyl Adhesive
Apply aluminum weatherproofing tape with butyl backing along the sides and across the sill. Peel off the backing and press firmly, smoothing by hand to eliminate bubbles. Also apply silicone sealant to the bottom corners of the sill, outside stop, and stoop before setting the window.
Position and Center the Window
Mark Sides to Find the True Center
Tilt the window into the opening and push it fully to one side. Mark the edge on the sill. Repeat on the opposite side. Measure between the marks and divide by two to find the center point. Align the window with this mark to ensure an even reveal on both sides.
Use a Sill Expander for Larger Gaps
If there is a gap of ½ inch to ¾ inch between the sill and the rough opening, install a sill expander on the outside. Tap it gently with a hammer (never force it). Trim any excess vinyl at the seams with scissors for a clean exterior line.
Shim and Square the Frame
Place Shims at Strategic Intervals
Start shimming at the bottom. Place shims 5 inches from each corner and every 16 inches along the sill and side jambs. The sill should sit 1/8 inch to 1/4 inch above the sill plate to allow for drainage. Never shim at the head of the frame during initial setup; that area is secured later.
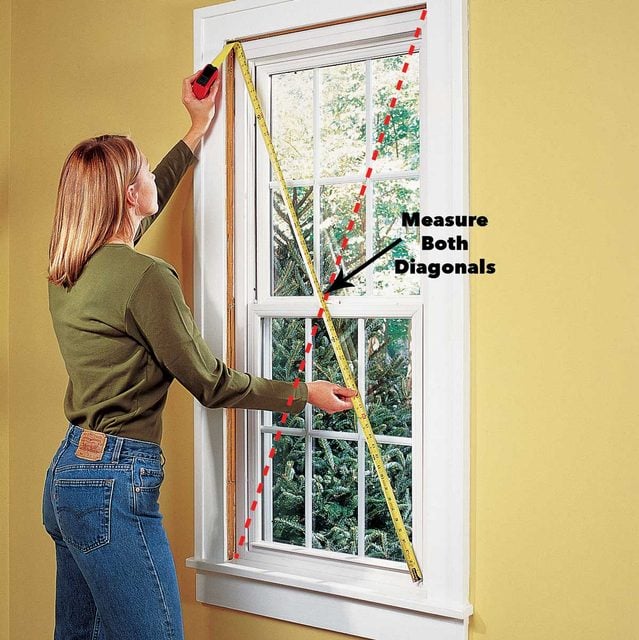
Check Level, Plumb, and Diagonal Measurements
Use a spirit level to verify the sill is level and the jambs are plumb. Then measure the diagonals from corner to corner. Both measurements must be exactly equal. If not, the window is out of square, and the sashes may not lock properly.
Secure the Window Frame
Fasten Through Flange or Frame
For nail flange units, use #8 x 2½-inch screws through the flange, driven lightly at first for adjustment. For no-flange or replacement units, drive screws through pre-drilled frame holes and into the shims and framing. Start with one screw per side to allow final alignment.
Anchor the Header and Seal Screw Heads
After the frame is square, install #8 x 2½-inch screws through the header into the structural framing. At every shim location on the sill, seal the screw head with silicone to prevent water and air infiltration.
Adjust the Sash and Finalize the Fit
Tighten the Expander Screw
Locate the metal expander screw on the back of the frame. Turn it with a hand screwdriver until it gently pushes the frame against the wall. This prevents future gaps and ensures long-term stability. Do not overtighten.
Install the Sash Without Blocking the Pivot
Raise the lower sash and tilt it in. Drive screws into the interior track between the pivot shoe and the bottom of the balance. Never place screws below where the sashes meet, as this can block the pivot shoe and cause sticking. Reinstall sash stops and tilt the sash back in.
Test Operation Before Finalizing
Verify Smooth Sliding and Locking
Open and close both sashes fully. They should move smoothly without binding. If they stick, check for over-expanded foam or misaligned pivot screws. Engage the lock on both sashes. If it does not catch, the frame is likely out of square and needs adjustment.
Cut Center Banding and Snap Covers
Once operation is confirmed, cut the center banding along the mid-section with scissors or a utility knife. Reinstall the head and sill snap covers to complete the interior finish.
Insulate and Seal All Gaps
Use Low-Expansion Foam Only
Fill voids between the frame and rough opening with low-expansion spray foam. Do not overfill, as excess foam can warp the frame. Allow it to cure completely (usually 24 hours), then trim excess and cut down shims flush with the frame.
Tuck Insulation into Cavities
In older homes, tuck fiberglass or rigid board insulation into the top, sides, and weight cavities. Use the window’s built-in foam gaskets to help seal minor gaps and stabilize the unit.
Apply Perimeter Silicone Seal
Use Foam Backer Rod for Clean Caulk
On the exterior, press a foam backer rod into the gap between the frame and house before applying caulk. This ensures proper seal depth and prevents three-sided adhesion failure. Apply a continuous bead of high-performance silicone around the entire perimeter.
Smooth with Release Liquid
Use a finger dipped in release liquid to smooth the caulk joint. This prevents sticking and creates a professional, even finish. White aluminum will naturally darken in 2 to 4 months, so focus on continuity rather than perfect color.
Finish with Trim and Screens
Install Interior and Exterior Trim
Replace or install sash stops on the interior. Add quarter-round trim in corners and a ¾-inch filler piece if needed to close small gaps. On the exterior, ensure siding overlaps top flashing and sits behind bottom flashing. Paint trim to match the home’s finish.
Upgrade to High-Transparency Screens
Consider installing high-transparency screens that allow 50 percent more light and 3 times more airflow than standard mesh. These screens enhance visibility and ventilation without sacrificing security.
Ensure Code Compliance
Leave the Inspection Sticker Intact
Do not remove the window’s inspection sticker. It verifies energy ratings and is often required for code compliance during inspections. Keep purchase documentation and photos for warranty claims.
Frequently Asked Questions About Double Hung Window Installation
What size rough opening do I need for a double hung window?
The rough opening should be ¼ inch to ½ inch wider and taller than the window unit itself. In older homes with aluminum frames, you may need up to 1 inch of clearance on all sides to allow for alignment adjustments.
Can I install a double hung window myself?
Yes, most homeowners with basic carpentry skills can complete this project. DIY installation costs around $150 per window for materials, making it a cost-effective alternative to hiring a contractor.
What type of insulation should I use around a new window?
Use low-expansion spray foam designed specifically for windows. In older homes, also tuck rigid foam board or fiberglass insulation into weight cavities on the sides to eliminate drafts.
Why is my double hung window not locking after installation?
The frame is likely out of square. Recheck your diagonal measurements from corner to corner. Adjust the shims until both diagonals are exactly equal, then test the lock again.
How do I prevent water from leaking around my new window?
Follow the proper flashing sequence. The bottom siding must go behind the flashing, while the top siding overlaps it. Ensure felt paper overlaps correctly and apply a continuous bead of silicone around the entire perimeter.
How long does it take to install a double hung window?
For a first-time DIYer, expect 3 to 5 hours per window including removal of the old unit, framing adjustments, flashing, and sealing. Experienced installers can often complete the job in under 2 hours.
Key Takeaways for Installing a Double Hung Window Successfully
Proper installation comes down to three critical phases: precise measurement, correct flashing, and careful shimming. Always measure the rough opening at three points and use the smallest dimension to size your window. Apply flashing in a shingle-like sequence so water always flows outward and downward. Finally, shim the frame until level, plumb, and square before driving any fasteners home.
Your next step is to gather your tools and materials, then dry-fit the window in the rough opening before applying any sealant. This quick test confirms your measurements and reveals any framing issues before you commit to foam and caulk. With attention to detail and the right sequencing, your new double hung window will operate smoothly, seal tightly, and perform efficiently for decades.



