
Want more natural light and a cozy nook in your home? Learning how to make a bay window can transform any room into a brighter, more functional space. This rewarding DIY project adds architectural charm while saving you hundreds compared to hiring a contractor.
In this guide, you’ll learn how to make a bay window from start to finish. We cover planning, structural support, framing, window installation, insulation, and finishing touches like a built-in bench seat.
Bay vs. Bow: Choose the Right Design
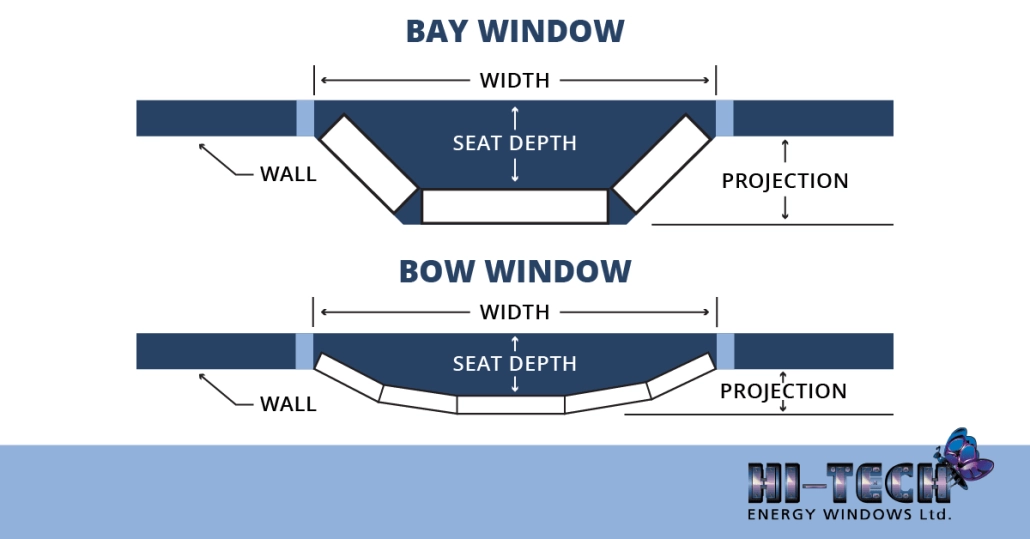
Before you start cutting lumber, understand the difference between bay and bow windows. Your choice affects framing, support needs, and how the interior space will function.
Bay Windows: Bold Projection, More Space
Bay windows extend 3 to 6 feet from the wall and typically feature three panes. A large center window sits between two side units angled at 30°, 45°, or 90°. This deep projection creates enough room for a window seat or reading nook. Due to the weight and reach, bays require serious external support like corbels or a foundation.
Bow Windows: Gentle Curve, Subtle Depth
Bow windows use four or more panes arranged in a soft arc. They project only 12 to 18 inches from the wall, making them easier to frame into existing structures. While elegant, they offer less interior space than bays and often don’t need heavy bracing.
Pro Tip: If you want a custom width (like 8 feet) or plan to add a bench, go with a site-built bay window. It’s more adaptable than any pre-fab unit.
Site-Built vs. Pre-Fab: Cost & Customization
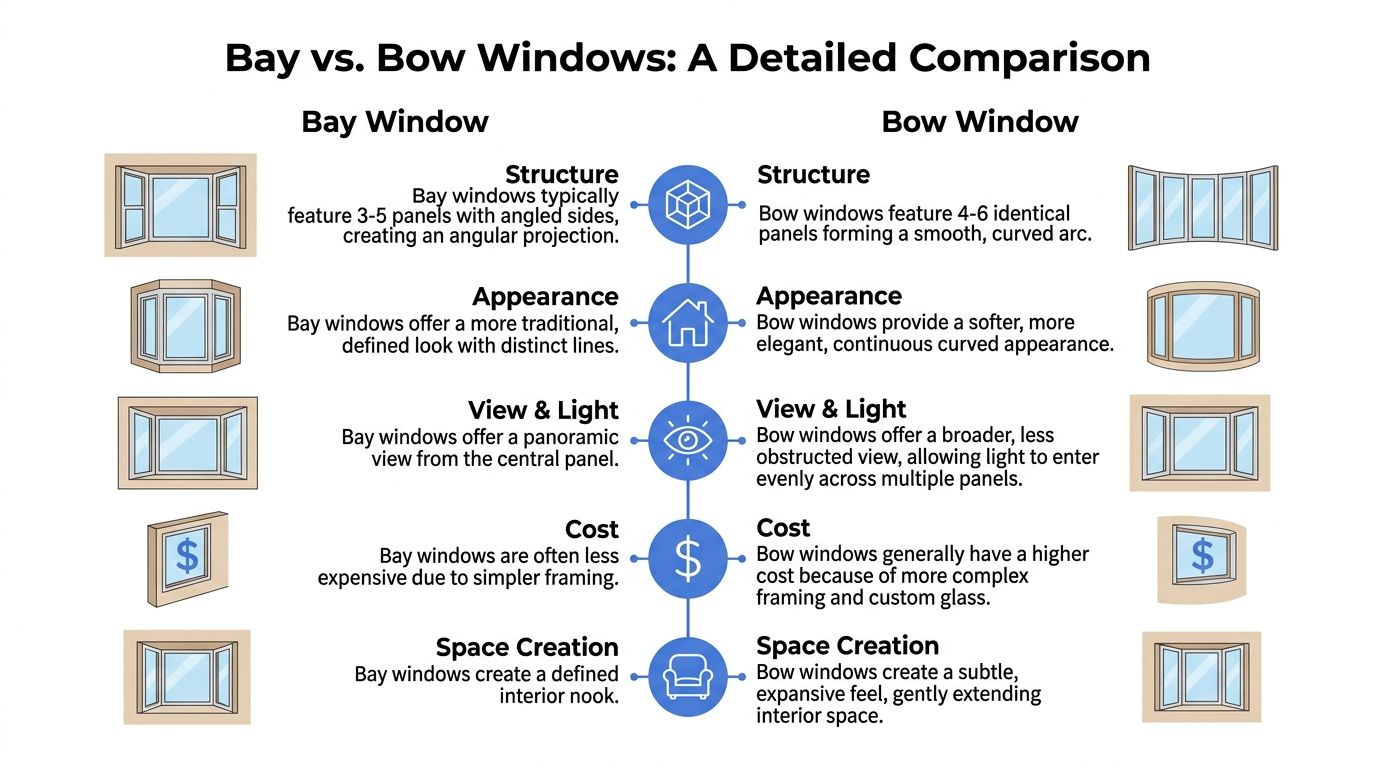
Your choice between building on-site or buying a factory-made unit impacts budget, labor, and design freedom. Here’s how to decide.
Site-Built Bay Windows: Build It Yourself
Constructing a bay from individual windows gives you full control over size, style, and cost.
Advantages:
– Mix and match window types (e.g., fixed center with operable sides)
– Fit non-standard openings wider than 6 feet
– Save over $1,000 compared to pre-fab units



