
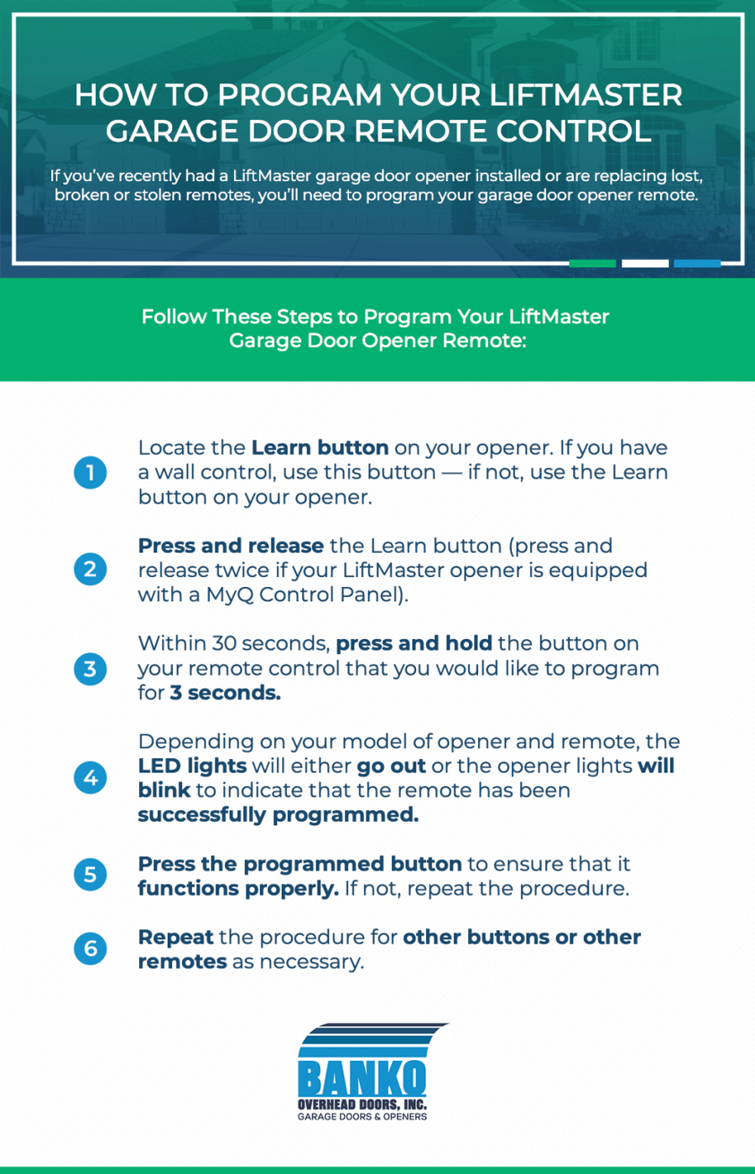
You’ve just installed a new garage door opener, or maybe you lost a remote and need to reprogram your system. Either way, knowing how to program a garage door opener saves time, boosts security, and ensures smooth daily operation. Most modern openers from brands like LiftMaster, Chamberlain, and Genie use a universal Learn button method, making the process fast and reliable. In just minutes, you can pair remotes, set up keypads, or reset your entire system.
This guide walks you through every step, from locating the Learn button to troubleshooting failed attempts, so you never get locked out again. Whether you’re programming a single remote or managing multiple doors, this step-by-step resource covers all common scenarios.
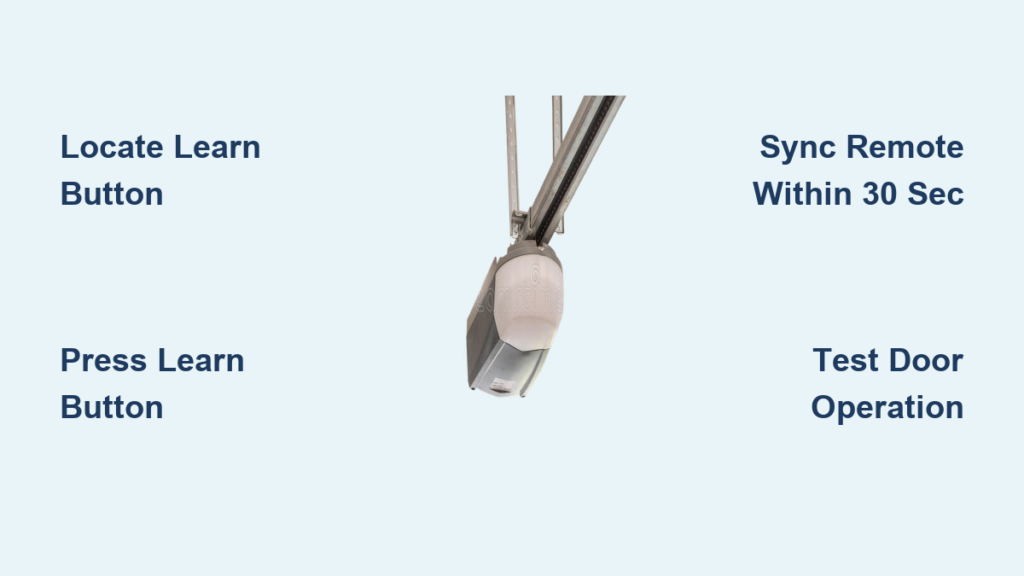
Locate the Learn Button
The Learn button is the key to programming any modern garage door opener. Without it, you cannot pair remotes or keypads.
Find the Button Location
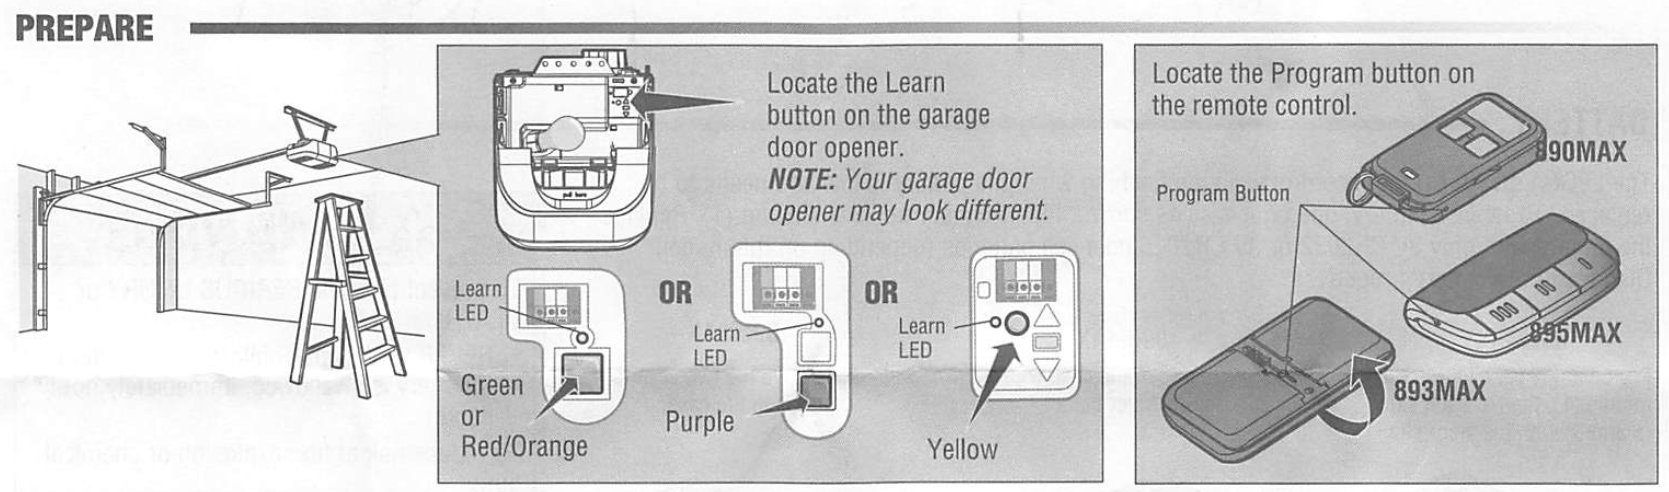
The Learn button is usually on the motor unit mounted to your garage ceiling. Look near the antenna wire hanging down or under a small light cover. On some models, it’s on the back or side panel. Use a ladder for safe access.
Identify Button Appearance
The button may be labeled “Learn” and colored yellow, purple, red, orange, or green. LiftMaster and Chamberlain models typically use yellow or purple. If you do not see a clearly marked button, check your owner’s manual. Some models hide it behind a removable cover.
Confirm Functionality
Press the button once. A nearby LED should light up or blink, signaling programming mode is active. If nothing happens, check power to the unit or inspect for damage.
Older models may use dip switches or remote combinations instead of a Learn button. Most openers made after 1993 use the Learn system. If the button is missing or broken, contact a technician.
Program a Remote Control
Programming a remote takes under a minute if you act fast and follow the steps correctly.
Activate Programming Mode
Press and release the Learn button on the motor unit. The LED will glow or flash, indicating the opener is ready. You now have 30 seconds to complete the next step.
Sync the Remote
Go to your remote. Press and hold the button you want to program, usually the top one. Keep holding until the motor unit’s LED blinks or turns off. This confirms pairing. Some models, like the R27 MLT 3B, require holding until you hear two audible clicks.
Handle Special Remotes
For certain remotes, remove the visor on the back. Underneath, press the small rubber button with your fingernail until the front LED stays lit. Then proceed with standard syncing.
Test Door Operation
Stand at least 6 feet away from the door. Press the programmed button. The door should open. Press again to close. If unresponsive, repeat the process. Batteries may be weak.
Set Up a Keypad Code
An external keypad lets you enter without a remote. This is perfect for guests or when you forget your remote.
Enter Programming Mode
Press the Learn button on the motor unit. Wait for the LED to illuminate.
Assign a 4-Digit PIN
Within 30 seconds, go to the keypad. Enter your chosen four-digit code. Then press Enter once. The keypad lights will blink to confirm the code was saved.
Verify Keypad Function
Press Enter a second time to activate the door. It should open or close smoothly. If not, reprogram with a fresh code.
Avoid obvious codes like 1234 or birth years. Change the PIN every 6 to 12 months for better security.
Pair Multiple Devices
You can program more than one remote or control multiple garage doors with a single remote.
Add Additional Remotes
To pair a second remote, follow these steps:
- Press the Learn button.
- Within 30 seconds, press and hold the desired button on the new remote.
- Wait for LED confirmation.
- Test immediately.
Repeat for each user. Most systems support up to 8 remotes and keypads.
Control Multiple Garage Doors
Use a multi-button remote, such as a 2-button or 3-button model. Press the Learn button on the first opener, then press Button 1 on the remote. Wait for confirmation. Repeat with Button 2 and the second opener. Label buttons clearly to prevent confusion.
A 3-button remote can manage three separate doors, ideal for large homes or shared garages.
Reprogram After Security Risks
If you lose a remote or suspect unauthorized access, reprogramming protects your home.
Clear All Stored Codes
Press and hold the Learn button for 6 to 10 seconds. The LED will turn off. This erases all remotes and keypads from the system.
All devices stop working after clearing. You must reprogram every remote and keypad from scratch.
Re-Pair Trusted Devices
After clearing the codes, press Learn once. Program each remote within 30 seconds. Re-enter keypad codes. This ensures only authorized users can access your garage.
Reprogram after moving into a new home or whenever you lose a remote.
Fix Common Programming Issues
Even with correct steps, problems can occur. Here is how to troubleshoot them.
Remote Will Not Sync
Check batteries first. Weak or dead batteries are the number one cause of sync failures. Ensure you are within 30 seconds of pressing Learn. Try a different button on multi-button remotes.
No LED Response
Verify the opener is plugged in and powered. Inspect the Learn button for physical damage. Try pressing it multiple times. Some units need two presses to activate programming mode.
Keypad Does Not Respond
Confirm the PIN is correctly entered and Enter was pressed. Replace keypad batteries if lights are dim. Reprogram if the unit is old or exposed to weather.
Signal Interference
Wi-Fi routers, baby monitors, or nearby electronics may disrupt pairing. Turn them off temporarily during programming.
Test one device at a time and keep others away to isolate issues.
Handle Power Outages and New Installations
Unexpected events can reset or disable your system, but recovery is simple.
After a Power Surge
Most modern openers retain memory after outages. If remotes fail, press the Learn button. Reprogram each remote. Re-enter keypad codes. Total time is under 10 minutes.
Install a New Opener
When setting up a fresh unit, press and hold Learn for 6 seconds to clear factory settings. Press Learn once. Program remotes and keypads as usual. Test all devices. Full setup takes 10 to 15 minutes.
Always register your opener for warranty coverage, which is typically 1 to 5 years.
Model-Specific Tips

Not all openers work exactly the same. Know your model’s quirks.
LiftMaster and Chamberlain
These brands dominate the market and use consistent yellow or purple Learn buttons. Programming is identical across most models made after 1993.
R27 MLT 3B Remote
This remote requires prep before syncing. Remove the visor. Press the hidden rubber button underneath. Hold until the LED stays on. Then press Learn and sync. Always refer to the included programming sheet for button-press sequences.
Older Models Without Learn Button
Some pre-1993 units use dip switches inside the remote and motor. Match the switch pattern exactly. No LED feedback is provided. Upgrade to a modern opener for better security and ease of use.
Maintain Your System Long-Term
A little maintenance keeps your opener responsive and secure.
Replace Remote Batteries Annually
Most remotes last 1 to 2 years on a single battery. Replace at the first sign of sluggish response.
Update Keypad Codes Regularly
Change your PIN every 6 to 12 months, especially if you have given access to contractors or tenants.
Label Devices Clearly
In multi-remote households, label each remote with the user’s name. In multi-door setups, mark which button controls which door.
Perform Quarterly Checks
Every three months, test all remotes and keypads. Clean the Learn button area. Ensure the antenna wire is hanging freely and not cut or tucked.
Keep your owner’s manual in a garage folder or save a digital copy for reference.
Buy Replacement Remotes
Lost or broken remotes are easy to replace.
Trusted Retailers
Purchase replacements from these trusted sources:
• Amazon
• Home Depot
• Lowe’s
• LiftMaster.com or Chamberlain.com
Search by model number for guaranteed compatibility.
Avoid Cheap Imitators
Aftermarket remotes may lack security features or fail to sync. Stick with OEM remotes when possible.
Buy a spare remote and store it indoors just in case.
Frequently Asked Questions About Programming Garage Door Openers
How long does it take to program a garage door opener?
Most remotes program in under 1 minute. Keypads take about 2 to 3 minutes. Full system setup, including multiple devices, takes 10 to 15 minutes.
What if my garage door opener has no Learn button?
Openers made before 1993 may use dip switches instead. Check your owner’s manual. If the Learn button is missing or broken on a modern unit, contact a professional technician.
Why does my remote not work after programming?
Weak or dead batteries are the most common cause. Replace the batteries first. If the problem persists, try reprogramming within 30 seconds of pressing the Learn button.
Can I program my garage door opener without a ladder?
No. You must access the motor unit on the ceiling to press the Learn button. Always use a sturdy ladder for safety.
How do I reset my garage door opener to factory settings?
Press and hold the Learn button for 6 to 10 seconds. The LED will turn off, indicating all codes have been cleared. You must reprogram all devices afterward.
Key Takeaways for Programming Your Garage Door Opener
Programming a garage door opener is a quick, DIY-friendly task that enhances convenience and home security. The Learn button is your central tool for pairing remotes and keypads. Always work within the 30-second programming window and replace remote batteries annually.
Test all devices after programming and reprogram immediately after losing a remote or moving into a new home. For complex issues or outdated systems without a Learn button, consult a professional for expert support.


