
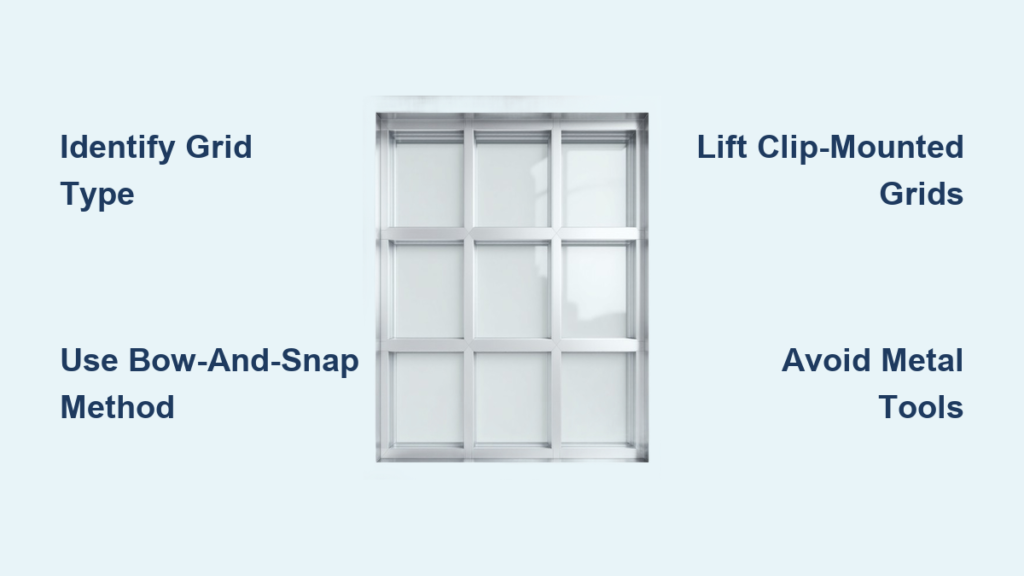
Window grids can turn a simple cleaning job into a stressful task if you don’t know what you’re dealing with. A single wrong move can crack brittle plastic, snap a wooden grille, or scratch your window frame. Many homeowners damage their grids simply because they pull instead of flex, or force a stuck grille that needed a different approach entirely.
This guide walks you through how to remove window grids step by step, from identifying your grid type to choosing the right removal method, reinstalling correctly, and knowing when it’s smarter to skip removal altogether. You’ll learn the exact techniques professionals use to avoid breakage and handle even aging, fragile grids with confidence.
Identify Your Window Grid Type Before Touching It

The removal method depends entirely on what kind of grid you have. Skipping this step is the number one reason grids break during removal.
Snap-In Plastic Grids
These are the most common type in homes built within the last 25 to 30 years, especially on Anderson windows. They are typically white plastic designed to mimic traditional divided panes. Instead of clips, they rely on small tabs or bumps that fit into notches in the window frame.
Visual cues to confirm:
– No visible metal clips along the edges
– Smooth grille ends with tiny protrusions
– Grille feels stiff when you gently tug it
Wooden Grids With Metal Clips
Older homes often feature real wood grilles secured by small metal clips attached to the window frame. These are intentionally designed to be removed and reinstalled for cleaning.
Signs of clip-mounted grilles:
– Visible metal clips spaced every 6 to 8 inches
– Grille lifts straight up from the glass
– Wood may show aging, yellowing, or slight warping
Assess Age and Fragility Before You Start
Homes over 25 years old often have grids weakened by sun exposure and time. Plastic becomes brittle, and wood can crack or split.
Warning signs of fragile grids:
– Yellowing, fading, or discoloration
– Cracks or chips at corners
– Resistance or cracking sounds when gently tested
If your grid shows any of these signs, consider using a no-contact cleaning method instead of forcing removal.
Remove Snap-In Plastic Grids Using the Bow-and-Snap Method
For tension-fit plastic grids without clips, the bow-and-snap technique is the safest approach. The goal is to flex the plastic just enough to disengage the tabs without cracking them.
Bow the Center Outward
Place both hands under the center of the grid, away from the edges. Gently pull the center outward, away from the glass, about 1 to 2 inches. This flexes the grille and loosens the tabs in the frame.
Pro Tip: Start with the top horizontal grille first. It gives you a reference point for how the others should feel during reinstallation.
Release One End at a Time
While holding the center bowed outward, use one hand to carefully bend and pull one end of the grille where it meets the frame. The tabs should pop free with a soft click.
- Work slowly to avoid cracking the plastic
- Apply extra flex near stubborn tabs to reduce stress on the frame
Free the Remaining Tabs
Once one end is loose, the rest usually follow with minimal effort. Often, bowing the center and pulling one side is enough to free the entire unit.
Use a Painter’s Tool for Tight Fits
If your fingers cannot grip the grille or the fit is extremely tight, a 5-in-1 painter’s tool can help.
- Slide the broad end between the grille and the frame.
- Gently pry to disengage the tabs.
- Distribute pressure across the wide edge to avoid snapping the plastic.
Warning: Never use a flathead screwdriver or your fingernail. These concentrate pressure and dramatically increase the risk of breakage.
Lift Off Clip-Mounted Wooden Grids
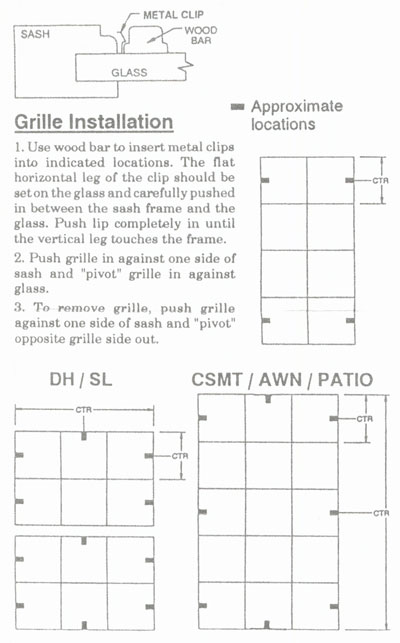
Clip-mounted grilles are designed for easy removal. The key is lifting, not pulling or twisting.
Find the Bottom Edge
Locate the edge of the grille closest to the glass. This is usually the lower side, which sits slightly recessed in the frame.
Lift Straight Up
Gently lift the grille upward and away from the glass. It should pop free from the clips with very little force.
Critical: Do not remove the metal clips from the window frame. They stay in place permanently and are what holds the grille when reinstalled.
Handle With Two Hands
Support the grille fully as you lift it out. Dropping it can warp the wood or crack joints, especially on older grilles.
Reinstall Window Grids the Right Way
Putting grids back incorrectly leads to gaps, stress cracks, or broken tabs. Follow a precise order to keep everything flush and secure.
Snap-In Grids: Use the Bottom-Up Method
This approach minimizes strain on the plastic and ensures proper alignment.
- Insert the bottom edge into the notches first. Press until it clicks.
- Bow the top outward slightly to create clearance.
- Push the top edge into the frame until the top tabs snap in.
- Secure the left side by pressing gently from top to bottom.
- Finish the right side by bowing the center again and seating the last tabs.
Check: The grille should sit flush against the glass with no visible gaps or wobble.
Wooden Grids: Press Back Into Clips
For clip-mounted grilles, reinstallation is simple.
- Align the grille with the existing clips on the frame.
- Press firmly along all edges until it snaps into place.
- Verify even pressure and confirm the grille does not shift.
Avoid These Common Window Grid Mistakes
Even experienced DIYers damage grids by making the same handful of errors. Knowing what to skip saves both time and money.
Don’t Force a Stuck Grid
If a grille will not budge, stop pulling. Forcing it can crack plastic or pull clips out of the frame.
Solution: Reassess the grid type. Try the bow-and-snap method again with more flex. Test on a less visible window first to build confidence.
Don’t Mix Up Grids Between Windows
Window frames settle over time. A grille from one window may not fit another, even if they look identical.
Rule: Always return grids to the exact window they came from.
Don’t Use Metal Tools on Plastic
Screwdrivers, putty knives, and utility blades can scratch frames and snap tabs.
Use only: Your fingers or a broad plastic tool like a 5-in-1 painter’s tool.
Clean Window Grids Without Removing Them

If your grids are too old or fragile to handle safely, skip removal and clean around them.
Try Aerosol Window Cleaner
This method avoids handling entirely and works for routine maintenance.
What you need:
– Aerosol window cleaner (available at Walmart, auto parts stores, or cleaning suppliers)
– Microfiber cloth
Steps:
1. Spray the cleaner directly onto the glass between grid bars.
2. Let it dwell 10 to 15 seconds to break down grime.
3. Buff gently with a microfiber towel, working around the bars.
This approach is fast, safe, and effective for most dirt levels.
Clean Each Pane Separately as a Last Resort
If aerosol cleaning is not enough, treat each section as a tiny window.
- Use a small squeegee or folded cloth
- Wipe in one direction to avoid streaks
Drawback: This method is time-consuming and messy. Use it only when grids cannot be removed.
Repair Broken Window Grids If Needed
Accidents happen. If a grille breaks during removal, repair may be possible depending on the material.
Fix Wood Grids With Glue
Most broken wooden grilles can be restored with simple adhesives.
- Use wood glue such as Elmer’s or Gorilla Glue.
- Clean the broken edges before applying.
- Clamp or tape the pieces together until dry (2 to 4 hours).
- Reinstall once fully set.
Result: Repairs are often invisible once the glue dries.
Replace Plastic Grids
Plastic does not glue well once cracked. Contact the window manufacturer or a specialty supplier for replacement parts.
Long-term tip: Consider switching to plastic if you currently have fragile wood grids. Plastic lasts longer and resists moisture damage better.
Stay Safe on High or Hard-to-Reach Windows
Working on upper floors adds risk. Follow these safety practices to avoid injury or damage.
Use a Stable Ladder With Proper Positioning
- Choose a sectional ladder with a protective bonnet.
- Lean it against the window frame below the glass, never on the pane itself.
- Use a ladder stabilizer to prevent wobbling.
Maintain Two-Handed Control
Always use both hands when removing or installing grids. This prevents drops and gives you better control over tension.
Test on a Hidden Window First
If you are unsure about the technique, practice on a garage, basement, or utility room window before tackling main living areas.
Know When Not to Remove Window Grids
Sometimes the safest choice is to leave grids in place. Forcing removal on fragile grids almost always ends in breakage.
Skip removal if you notice:
– Visible cracks or brittleness
– Yellowed or heavily faded plastic
– Previous repairs or loose tabs
– High-risk windows where breakage would be costly
Alternative: Use the aerosol cleaning method. Many homeowners find it sufficient and prefer avoiding the risk entirely.
Communicate Grid Risks and Pricing for Professional Service
If you are a cleaner or contractor, grid handling adds time and liability that should be reflected in your pricing.
Charge a Per-Grid Handling Fee
- Standard rate: $0.25 to $1.00 per grid
- High-risk or specialty work: Up to $2.00 per grid
This covers extra time, careful handling, and the risk of breakage due to aging materials. It is not a replacement guarantee.
Offer a Self-Removal Discount
Let customers remove grids themselves and save around $1.00 per grid.
Condition: Grids must be safely removed and stored before service begins.
Set Clear Expectations With Customers
Transparent communication prevents disputes.
- Inform customers that aging grids may be defective due to time and sun exposure.
- Assure them your team uses professional techniques to preserve the grids.
- Clarify that you are not responsible for grids that break due to pre-existing fragility.
Frequently Asked Questions About Removing Window Grids
How Do I Know What Type of Window Grid I Have?
Look for visible metal clips along the edges. If you see clips, your grid is clip-mounted and lifts straight up. If there are no clips but you see small tabs or bumps at the ends, you have a snap-in plastic grid that requires the bow-and-snap method.
Can I Remove Window Grids Without Breaking Them?
Yes, in most cases. The key is identifying the correct removal method and applying gentle, controlled flex rather than brute force. Older or sun-damaged grids are more likely to crack, so always test on a less visible window first.
What Tools Do I Need to Remove Window Grids?
For most jobs, your fingers are enough. For tight snap-in grids, a 5-in-1 painter’s tool with a broad edge works well. Avoid screwdrivers, putty knives, or utility blades, as these concentrate pressure and increase breakage risk.
Should I Remove Window Grids Before Cleaning?
It depends on the grid’s condition. If the grids are newer and sturdy, removal allows for a deeper clean. If they are old, brittle, or showing signs of damage, cleaning around them with aerosol cleaner and a microfiber cloth is safer.
How Do I Reinstall Window Grids Correctly?
For snap-in grids, use the bottom-up method. Insert the bottom edge first, bow the top outward, then press the top, left, and right sides into place. For clip-mounted grids, simply align the grille with the existing clips and press firmly until it snaps in.
What Should I Do If a Window Grid Breaks?
Wooden grids can usually be repaired with wood glue. Clamp or tape the pieces together and let them dry for 2 to 4 hours. Plastic grids do not glue well once cracked, so contact the window manufacturer for replacement parts.
Key Takeaways for Removing Window Grids Safely
Removing window grids successfully comes down to three essentials: identify the grid type, use the correct technique, and know when to stop. Snap-in plastic grids respond to the bow-and-snap method, while clip-mounted wooden grids lift straight up. Always return grids to the exact window they came from, and avoid metal tools on plastic to prevent scratches and cracks.
If your grids are aging or fragile, the smartest move is often to clean around them using aerosol cleaner and a microfiber cloth. This eliminates breakage risk while still delivering a clean, streak-free result. For your first attempt, practice on a hidden window to build confidence before tackling visible areas.
Ready to get started? Gather your painter’s tool, microfiber cloths, and a stable ladder, then begin with a low-risk window to test your technique.



