

A cracked or foggy window doesn’t mean you need to replace the entire unit. For many homeowners, learning how to replace glass in a vinyl window is a cost-effective way to restore energy efficiency, clarity, and curb appeal without the expense of full window replacement. Unlike wood or aluminum frames, vinyl windows are designed with removable glazing beads that make accessing the glass unit straightforward.
Whether your insulated glass unit (IGU) failed due to seal damage, thermal stress, or accidental impact, this guide walks you through every phase of the repair. From safely removing the sash to measuring for a precise replacement, you’ll learn the tools, techniques, and pro tips that ensure a secure, long-lasting fix.
Why Vinyl Window Glass Eventually Needs Replacement
Vinyl frames expand and contract with temperature changes more than wood or metal, placing unique stress on the glass seal. Over time, this movement can lead to seal failure and that foggy appearance between panes.
The most common reasons homeowners need glass replacement include:
- Impact damage from hail, stray baseballs, or flying debris during storms
- Seal failure that appears as condensation or fogging between the panes
- Thermal stress cracks from extreme temperature differences across the glass
- Accidental damage during cleaning or renovation work
Gather Your Tools and Materials
Having everything ready before you start makes the difference between a clean replacement and a frustrating afternoon. For most vinyl window glass replacement projects, you’ll need:
- Safety glasses and heavy-duty work gloves
- Putty knife
- Measuring tape
- Vacuum with narrow attachment
- Double-sided mounting tape or silicone sealant
- Replacement insulated glass unit (IGU)
- Painter’s tape
- Plastic shims (if needed)
Remove the Window Sash Safely
Before touching the glass, you must remove the sash from the frame. This gives you stable access and prevents accidental drops during disassembly.
Open and Tilt the Sash
For double-hung vinyl windows, press the tilt latches on both sides and gently pull the bottom of the sash inward. Tilt it at a 90-degree angle and lift it out of the track. Single-hung or casement windows may require removing hinge pins or screws, so refer to your manufacturer’s instructions if unsure.
Set on a Padded Surface
Place the sash on a flat, protected surface like cardboard or a moving blanket. This prevents scratches to the vinyl and reduces the risk of cracking undamaged glass during handling.
Remove the Glazing Beads
Glazing beads are thin vinyl strips that snap into the sash to hold the glass in place. Removing them correctly is essential to avoid breaking or warping.
Pry Beads with a Putty Knife
Insert the putty knife at a corner where two beads meet. Gently twist to lift the bead from its channel. Work slowly around the perimeter, as rushing can crack the bead, especially in older windows.
Label Each Bead
Use painter’s tape to mark each bead with its position: top, bottom, left, right. Most beads are cut to specific lengths and won’t fit interchangeably. Keeping them organized ensures a snug reinstallation.
Extract the Damaged Glass Unit
Once the beads are out, the IGU should slide free. If the glass is broken, take extra care.
Wear Protective Gear
Put on safety glasses and heavy-duty gloves. Carefully remove large glass fragments by hand, then use a vacuum with a narrow attachment to clean out small shards from the frame channel.
Note Shims and Spacers
Check for plastic shims or foam spacers around the glass edges. These maintain alignment and pressure balance. Save them for reuse in the same positions.
Clean the Frame Channel
Wipe the channel with a dry cloth and vacuum thoroughly. Any debris left behind can prevent a proper seal and lead to premature failure.
Measure the Frame Opening Precisely
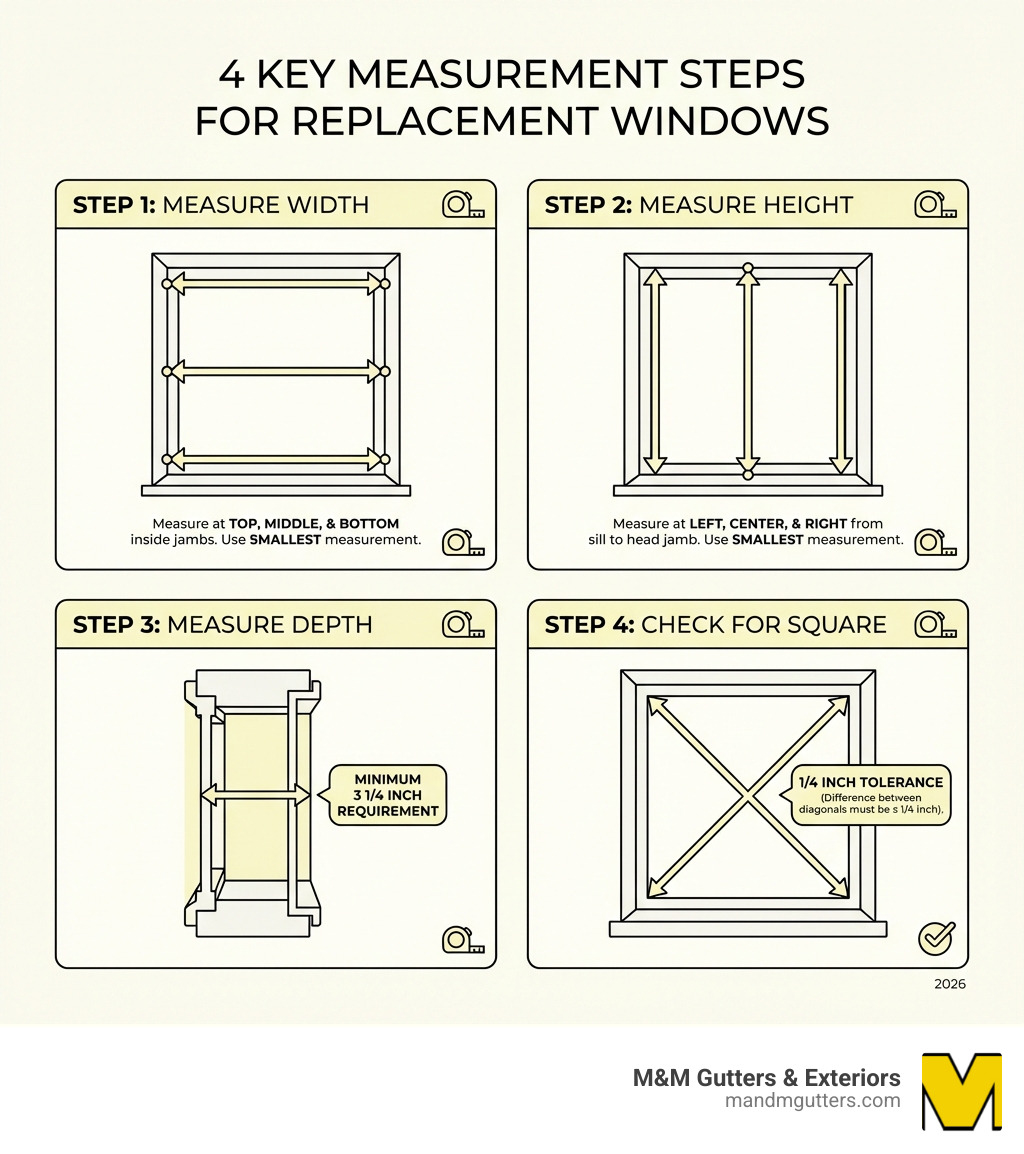
Accurate measurements are critical, as most glass suppliers won’t accept returns on custom-cut units.
Measure Width and Height at Three Points
Use a measuring tape to record the width at the top, middle, and bottom of the frame. Do the same for height on the left, center, and right. Always use the smallest measurement in each direction.
Check for Square
Measure diagonally from corner to corner. If the two numbers differ by more than 1/8 inch, the frame may be warped. This can affect sealing and operation, so address it before installing new glass.
Record Glass Thickness
Standard IGUs are 5/8 to 7/8 inch thick. Confirm the exact depth by measuring the old unit or checking manufacturer specs. Specify “vinyl window application” when ordering to ensure compatibility.
Pro Tip: If unsure, bring the old glass unit to a local glass shop for exact duplication.
Prepare the Frame for New Glass
Proper preparation ensures a tight, stable fit and extends the life of your new IGU.
Apply Mounting Tape or Sealant
Run double-sided mounting tape along the bottom and side channels. This cushions the glass and prevents movement. Some manufacturers use silicone instead, so match the original method if known.
Reinsert Shims if Needed
Place plastic shims back in their original positions. These help center the glass and absorb thermal expansion.
Install the New Insulated Glass Unit

Handle the new IGU by the edges only, as oils from your hands can degrade seals over time.
Lower Glass into the Channel
Carefully place the new unit into the frame, seating it evenly. Press down gently to engage the mounting tape. Avoid forcing it.
Verify Centering and Gaps
Check that the space between the glass edge and frame is consistent on all sides. Adjust if necessary before reinstalling the beads.
Reattach the Glazing Beads
Snap the beads back in place to lock the glass securely.
Start with the Top Bead
Begin at the center of the top edge and press outward toward the corners. This prevents bending or misalignment.
Work Clockwise: Top, Sides, Bottom
Install side beads next, then finish with the bottom. The bottom bead often fits more tightly, so apply firm, even pressure.
Secure Loose Beads with Silicone
If a bead feels unstable, run a thin line of clear silicone along its back edge before snapping it in. Wipe excess immediately.
Test and Reinstall the Sash
Final checks ensure smooth operation and long-term performance.
Press on the Glass
Apply light pressure to confirm the unit doesn’t shift. Any movement means the tape or sealant failed, so recheck installation.
Reinstall in the Window Frame
Tilt the sash back into the track and engage the tilt latches or hinge pins. Make sure it locks securely.
Operate the Window
Open and close it several times. Listen for resistance or scraping. The window should seal tightly with no air leaks.
When to Call a Professional
DIY glass replacement works well for standard windows, but some situations demand expert help.
Large or Shaped Windows
Picture windows, arches, or custom geometries require precise cutting and handling. Dropping heavy glass is dangerous and costly.
Upper-Story Windows
Working at height increases risk. Professionals have the tools and training to work safely.
Warranty Concerns
Most manufacturers void warranties if non-certified technicians perform repairs. Check your coverage before starting.
Signs of Frame Damage
If the vinyl is cracked, warped, or shows moisture damage, a full sash replacement may be more durable than glass-only repair.
Choose the Right Replacement Glass

Upgrading your IGU can improve comfort, efficiency, and durability.
Standard Double-Pane Glass
Basic insulated unit with air fill. Suitable for mild climates and low-traffic areas.
Low-E Coating
Reflects UV and infrared light, reducing fading and heating. Improves energy efficiency by up to 30 percent.
Gas-Filled Units (Argon or Krypton)
Better insulation than air-filled units. Ideal for extreme temperatures.
Laminated or Tempered Glass
Laminated glass resists shattering, making it great for noise reduction or storm zones. Tempered glass is required near doors, stairs, and bathrooms by building code.
Note: Always confirm local regulations before ordering.
Prevent Future Glass Damage
Protect your investment with simple maintenance and upgrades.
Install Impact-Resistant Film
Adds strength against hail and debris. Nearly invisible and easy to apply.
Trim Nearby Trees
Overhanging branches can scratch or break glass during windstorms.
Clean Frame Channels Annually
Debris traps moisture, accelerating seal failure. Vacuum and wipe channels once a year.
Lubricate Moving Parts
Apply silicone spray to tracks and hinges per manufacturer guidelines. This reduces stress on the glass during operation.
Frequently Asked Questions About Vinyl Window Glass Replacement
Can you replace just one pane of a double-pane window?
No practical field method exists. The seal is factory-applied, and partial repairs fail quickly. Always replace the entire IGU.
How much does it cost to replace glass in a vinyl window?
DIY replacement typically costs $50 to $150 for the IGU. Professional service ranges from $200 to $600, depending on size and glass type.
Why does new glass look wavy?
Minor optical distortion is normal in large insulated units. Excessive waviness may indicate a defect, so contact your supplier.
Can you replace glass without removing the sash?
Possible in rare designs with exterior access, but not recommended. Removing the sash ensures safety, cleanliness, and proper fit.
How long does replacement glass last?
Quality IGUs last 15 to 25 years. Proper installation and climate play major roles in longevity.
Key Takeaways for Replacing Glass in a Vinyl Window
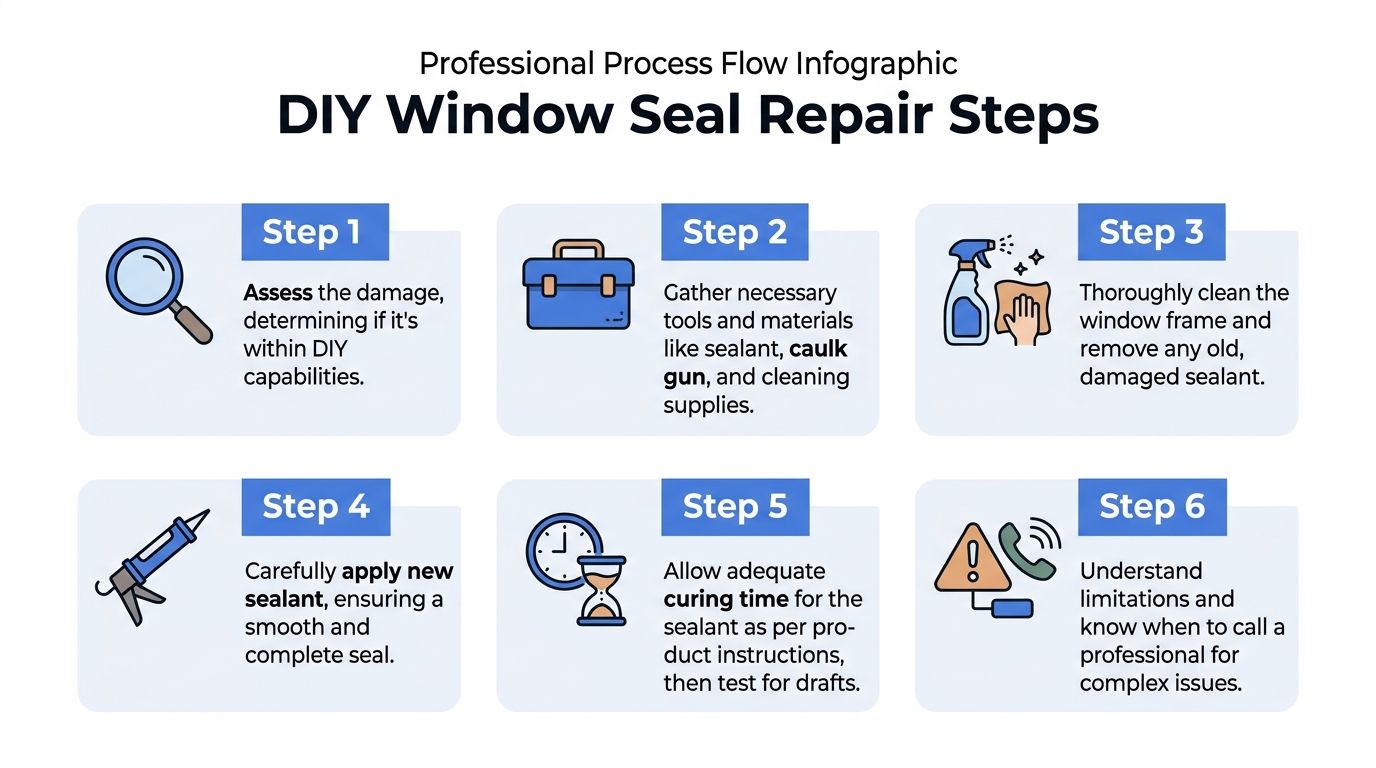
Replacing glass in a vinyl window is a manageable DIY project with the right tools and attention to detail. By following these steps, removing the sash, measuring accurately, and reinstalling securely, you can restore performance and save hundreds compared to full window replacement.
The most critical steps are accurate measurement, careful handling of the new IGU, and proper sealing of the glazing beads. When dealing with complex shapes, upper-story windows, or warranty-covered units, professional help ensures safety and lasting results. Start by assessing your window’s damage, gather your tools, and tackle the repair with confidence.



