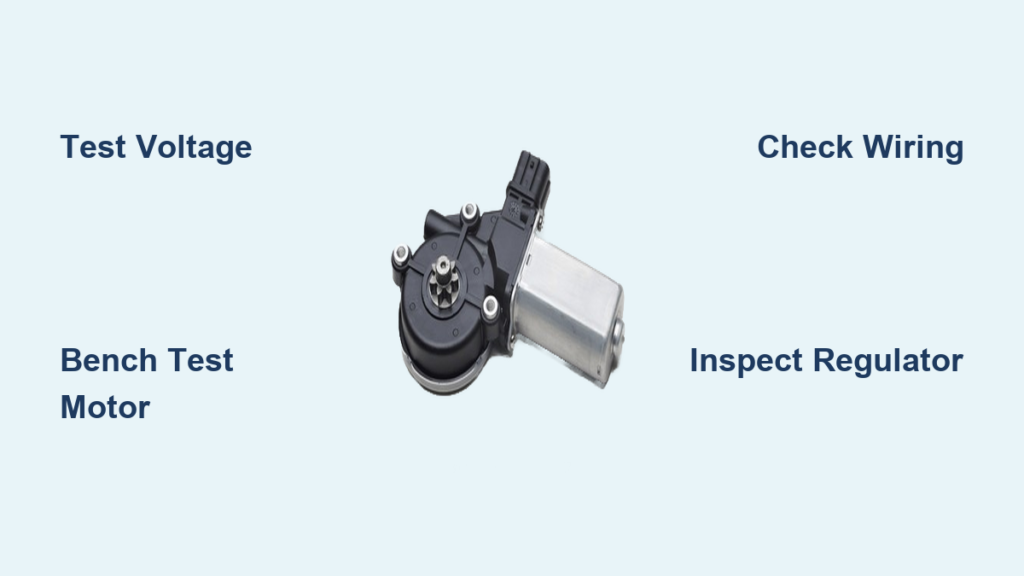
A car window that won’t budge can quickly turn a normal day into a frustrating one. Before you spend money on a replacement motor, you need to know whether the motor is actually the problem. A bad switch, broken wire, or seized regulator can mimic motor failure perfectly.
Understanding how to test a window motor saves you time and prevents wasted parts. This guide walks you through recognizing failure symptoms, using a multimeter and load tester, performing bench tests, and distinguishing motor problems from regulator issues. By the end, you’ll be able to pinpoint the exact cause and fix it right the first time.
Recognize the Warning Signs Before You Test

Listen for Grinding or Buzzing Noises
Strange sounds when you press the switch are early clues. A grinding noise usually means worn gears or disintegrating plastic pins inside the gearbox, especially common in older Ford models. A buzzing sound without movement means power is reaching the motor, but it cannot turn due to internal failure or mechanical binding.
Pro Tip: If the motor only buzzes while you hold the switch, it may be fighting a jammed regulator. Never hold the switch longer than 2 seconds, as this can burn out a working motor.
Identify Slow or Intermittent Operation
A sluggish window often points to worn carbon brushes losing contact inside the motor. This problem worsens with temperature changes or door movement, which can also indicate broken wires in the door harness.
If other windows work normally, the issue is isolated to that door’s motor or wiring. A slow window can also result from high circuit resistance or increased mechanical load from dry tracks.
Confirm Complete Silence and No Movement
When the switch produces nothing at all, the suspects include:
– Blown fuse
– Dead switch
– Open circuit in wiring
– Seized motor
Never assume the motor is bad without testing. Many people replace motors only to discover the real issue was a $2 fuse or a frayed wire in the door jamb.
Gather the Right Diagnostic Tools
Use a Multimeter for Voltage and Continuity
A digital multimeter is essential for this job. Set it to DC Volts (0–20V range) to check for 12V at the motor connector. Then switch to Ohms (Ω) to test continuity and resistance.
Expected Reading: A healthy window motor should show low resistance, usually under 10 ohms. Infinite resistance (OL) means an open circuit inside the motor.
Always backprobe connectors with pin probes instead of piercing wire insulation. This prevents moisture intrusion and future corrosion.
Choose a Pos/Neg LED Test Light
Avoid standard incandescent test lights because they draw minimal current and can give false readings. Instead, use a Pos/Neg LED test light like Circuit Sage. These show polarity with red for power and green for ground, making them safe for modern vehicles with sensitive electronics.
Perform Load Testing with a Light Bulb
Voltage readings alone can mislead you. A wire with internal damage may show 12V but collapse under actual load. To reveal this, load test the circuit using a 12V bulb:
- Use a 3057 tail-light bulb or 5A sealed-beam headlight
- Connect it directly to the motor harness terminals
- Activate the window switch
✅ Pass: Bulb lights brightly in both directions
❌ Fail: Dim or no light indicates poor current delivery, likely from a damaged harness or corroded connector
Why It Matters: The motor draws 5–10 amps under load. A test light draws only 0.25A, which is too little to expose real-world problems.
Test Power at the Motor Connector

Remove the Door Panel Safely
Start by disconnecting the negative battery terminal to prevent shorts. Use plastic trim tools to remove the interior door panel without damaging clips or finish.
Once removed, locate the window motor and unplug its electrical connector. You will test the harness side, not the motor itself.
Measure Voltage with the Ignition On
Set your multimeter to DC Volts and insert the probes into the two terminals of the unplugged harness connector. Have an assistant press the switch up and down while you watch the readings:
- One direction should read +12V
- The other should read –12V (reverse polarity)
This polarity flip is how the system reverses the motor. If you see 12V in both directions with reversed polarity, the switch and wiring are delivering voltage correctly.
⚠️ Warning: If you read less than 10V or no voltage at all, the fault is upstream in the switch, fuse, or wiring.
Inspect the Door Harness for Damage
The most common wiring failure occurs in the door jamb boot, the rubber sleeve between the door and frame. Repeated opening and closing flexes the wires until they break internally.
Look for:
– Frayed insulation
– Discolored or stiff wires
– Corrosion in connectors
Wiggle the harness while testing voltage. If the reading flickers, you have found a broken strand. Repair with solder and heat shrink, never electrical tape.
Conduct a Bench Test on the Motor
Remove the Window Motor
If voltage checks pass but the window still won’t move, remove the motor for bench testing.
Steps:
1. Disconnect the battery
2. Remove the door panel
3. Unplug the motor connector
4. Remove mounting screws (usually 2–3)
5. Extract the motor from the regulator
Some motors are integrated into the regulator and must be replaced as a unit.
Connect to a 12V Power Source
Use a standalone 12V battery or bench power supply. Attach alligator clips:
– Red (+) to one motor terminal
– Black (–) to the other
Apply power for 1–2 seconds only.
✅ Good Motor: Spins smoothly with audible torque
❌ Bad Motor: Fails to spin, jerks, or makes grinding noise
Reverse the leads and test again. The motor should spin in the opposite direction. If it only spins one way, internal windings or brushes are damaged.
Expert Note: If the motor spins freely but lacks power, internal wear has reduced torque. It may run unloaded but fail under real load.
Check Resistance with a Multimeter
Set your meter to Ohms (Ω) and touch the probes to both motor terminals.
- Normal: 3–10 ohms (exact value varies by model)
- Open Circuit: “OL” or infinite resistance means a dead motor
- Shorted Windings: Near-zero ohms means an internal short
This test confirms internal continuity but does not assess torque or brush condition, which is why bench testing is still required.
Differentiate Motor vs Regulator Failure

Motor Runs But Window Won’t Move
If the motor spins during bench testing but the window doesn’t move when installed, the issue is mechanical.
Common causes include:
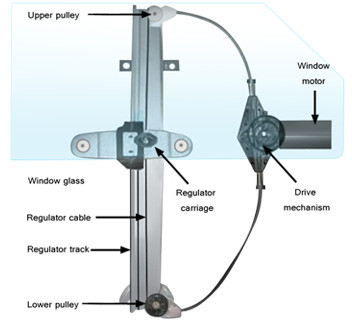
– Cable-driven regulator: Cable has snapped, frayed, or come off track
– Scissor-type regulator: Plastic rollers broken or track misaligned
– Binding mechanism: Dirt, ice, or misadjusted glass prevents movement
Quick Check: Manual lift test. If you can push the window up easily with hand pressure, the regulator has likely failed.
Inspect for Seized or Jammed Components
A seized regulator can mimic motor failure. The motor may hum but not turn, leading to burnout if activated repeatedly.
Remove the motor and try turning the regulator gear by hand using a screwdriver or pliers gently. If it won’t budge, the regulator is jammed. Lubricate tracks with white lithium grease and check for obstructions. If still stuck, replace the regulator.
Watch for Ford-Specific Gearbox Issues
In many Ford Taurus, Fusion, and Escape models, window motors use plastic drive pins in the gearbox. These pins frequently disintegrate, locking the gear train.
To inspect:
1. Remove the motor
2. Unscrew 3–4 bolts on the gearbox cover
3. Open the housing and examine the pins
If pins are missing or shattered, the motor must be replaced, even if it spins freely unloaded.
Reality Check: On these models, regulator failure is more common than motor failure. Always inspect both components before replacing.
Follow a Troubleshooting Decision Tree
No Power? Trace the Circuit
| Symptom | Test Result | Likely Cause |
|---|---|---|
| No light at switch input | No 12V | Blown fuse or broken feed wire |
| Power at input, no output | 0V when switch pressed | Faulty switch |
| Power at motor, no spin | Load test fails | Bad ground or frayed harness |
Always verify the ground path. A corroded ground in the door or body can kill the entire circuit.
Power Present? Isolate the Motor
| Symptom | Test Result | Conclusion |
|---|---|---|
| 12V at connector, load test passes | Motor fails bench test | Replace motor |
| Motor spins fine on bench | Window still stuck | Replace regulator |
| Intermittent operation | Voltage drops under load | Repair door harness wires |
Pro Tip: Use BBB Industries (bbbind.com) for free wiring diagrams. Enter your vehicle info to download exact wire colors and circuit paths.
Replace and Reinstall Correctly
Choose the Right Replacement Part
Window motors vary by design:
– Separate motor: Unbolts from regulator (cheaper, around $40–$120)
– Integrated assembly: Motor and regulator sold as one unit (around $150–$500)
Check your vehicle make, model, and regulator type before buying. Aftermarket kits often include both components.
Install with Care
- Disconnect the battery
- Bring the window to the top position if possible before removal
- Route the new motor into the door through the access hole
- Reconnect wiring and secure mounting screws
- Reconnect the battery and test operation
Test multiple cycles, up and down, before reinstalling the door panel. Ensure smooth motion and no noise.
Final Check: Torque mounting bolts to spec. Loose motors can vibrate and damage gears.
Prevent Future Failures
Lubricate Tracks Annually
Dry window channels increase motor strain. Apply silicone-based spray or white lithium grease to:
– Rubber seals
– Metal tracks
– Regulator pivot points
Do this every 12 months or after car washes.
Avoid Overuse in Extreme Temperatures
Cold weather thickens lubricants and increases load. Don’t hold the switch down for more than 3 seconds. If the window hesitates, wait and try again.
Never Slam the Door with the Window Down
This misaligns tracks and stresses the regulator. Always raise the window fully before closing the door.
Frequently Asked Questions About Window Motor Testing
How do I know if my window motor or regulator is bad?
If the motor spins during a bench test but the window doesn’t move, the regulator is likely bad. If the motor doesn’t spin at all when power is applied, the motor itself has failed. Listen for grinding noises, which often indicate worn gears in the motor, versus a cable that has snapped in the regulator.
Can a window motor be tested without removing it?
Yes. You can test voltage at the motor connector with the door panel removed but the motor still installed. Use a multimeter to check for 12V in both directions when the switch is pressed. For a complete test including torque and brush condition, the motor must be removed and bench tested.
What does it mean if my window goes down but not up?
This usually indicates a switch issue or a mechanical bind in one direction. Test the switch for proper continuity in both positions. If the switch is good, inspect the regulator for misalignment or a partial cable jam that only affects upward movement.
How many amps does a window motor draw?
A typical power window motor draws between 5 and 10 amps under load. This is why a standard test light drawing only 0.25A cannot accurately test the circuit. Use a 12V bulb that draws similar current to simulate real operating conditions.
Is it worth replacing just the motor or the whole regulator assembly?
On vehicles where the motor and regulator are separate components, replacing just the faulty part saves money. However, on many modern vehicles, especially Fords, the regulator fails more often than the motor. Inspect both before deciding. Integrated assemblies must be replaced as a unit.
Why does my window work intermittently?
Intermittent operation usually points to a broken wire in the door harness, particularly in the rubber boot between the door and frame. Worn carbon brushes in the motor can also cause intermittent contact. Wiggle the harness while testing to identify broken strands.
Key Takeaways for Testing Your Window Motor
Testing a window motor requires a systematic approach that goes beyond checking for power. Start by identifying symptoms like grinding noises or slow movement, then use a multimeter to verify voltage at the motor connector. Always perform a load test with a bulb to confirm the circuit can deliver sufficient current.
If electrical tests pass, bench test the motor with a 12V source to check for proper operation in both directions. Finally, inspect mechanical components like the regulator and gearbox, since these fail more often than the motor itself in many vehicles.
Your next step is to gather your multimeter, test light, and a 12V bulb, then begin testing at the motor connector. With the right tools and this diagnostic sequence, you can accurately identify the problem and avoid unnecessary parts replacement.