
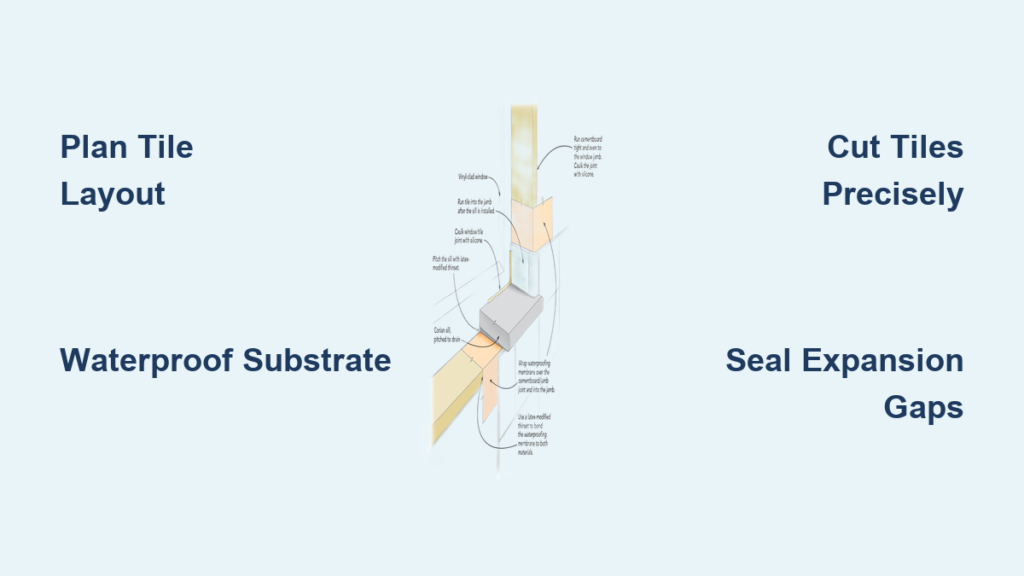
Tiling around a shower window is one of the most visually rewarding yet technically demanding tasks in any bathroom remodel. When done correctly, it transforms a simple opening into a stunning focal point that floods the space with natural light. When done poorly, it leads to water damage, cracked tiles, and unsightly gaps where glass meets grout. The challenge goes beyond cutting tiles to fit an opening. You must also maintain waterproof integrity, align grout lines with precision, and ensure the window remains both functional and beautiful for years to come.
This guide breaks down every phase of the project, from initial planning and material selection to waterproofing, cutting curves, and long-term maintenance. Whether you are preserving a vintage stained glass pane, installing a modern clerestory window, or working with a simulated tile “view,” you will learn how to integrate your window flawlessly into the surrounding tile field.
Plan Your Tile Layout Before Mixing Adhesive

A poorly planned layout can make even a perfectly cut window appear crooked. Taking time to map your design on the wall first prevents costly mistakes and ensures visual symmetry.
Start with a Centered Reference Point
Always begin tiling from the center of the wall and work outward. This ensures balanced reveals on both sides of the window opening. Use a laser level to project vertical and horizontal reference lines that intersect at the midpoint of the window. For round or arched windows, extend the centerline to match the highest point of the curve.
If the window is not centered on the wall, center the tile pattern on the window itself. This creates visual harmony and draws the eye toward the opening.
Dry-Fit Tiles to Test the Design
Lay full tiles around the window without adhesive to preview where cuts will fall. Avoid narrow slivers less than 2 inches wide, as these look unbalanced and are prone to cracking. If necessary, shift the entire tile field up or down so cut pieces on either side are more symmetrical.
Use spacers during this test fit to simulate real grout lines. This helps you anticipate how transitions between large field tiles and mosaic borders will flow near the frame.
Choose the Right Tile for Window Areas

Not all tiles perform equally well around moisture, curves, and changing light conditions. Select materials based on location, exposure, and design intent.
Use Mosaics for Curves and Frames
Round, arched, or irregular window shapes demand flexible materials. Mosaic sheets, especially glass or porcelain, conform to curves far better than large-format tiles. The Elida Ceramica Glass Mosaic Ocean, made from recycled glass, offers a luminous, water-themed look that reflects light beautifully from nearby windows.
Opt for Anti-Slip Tiles Near Wet Zones
Floors and shower benches adjacent to windows must prioritize safety. Use textured, anti-slip porcelain tiles even if you prefer a larger format. Glossy finishes become dangerously slippery when wet and should be avoided in these zones.
Match Field Tiles to Your Window Style
For traditional or vintage windows, 3×6 subway tiles like American Olean Profiles create a clean, timeless border. Pair them with black marble accents and crown molding to highlight stained glass features.
For modern builds, large-format glass tiles expand the perceived space and amplify natural light from skylights or clerestory windows. The reflective surfaces play with daylight to create a bright, airy atmosphere.
Waterproof the Substrate Before Setting Any Tile
Water intrusion around window openings is a leading cause of mold, rot, and structural failure. Never skip this critical phase.
Seal the Substrate Completely
Apply a liquid waterproofing membrane such as Laticrete Hydro Barrier or Schluter Kerdi to all walls, including the area immediately surrounding the window frame. Extend the membrane at least 3 inches beyond the window’s edge to create a continuous moisture barrier.
Flash the window opening with waterproof tape or a compatible flange system. This directs water away from the frame and safely into the shower pan below.
Ensure Airtight Construction in Cold Climates
If you are building new or replacing windows in extreme weather zones, choose fiberglass windows with high R-values. Seal all joints between Structural Insulated Panels (SIPs) and window frames meticulously. This prevents thermal bridging and condensation from forming behind your finished tiles.
Cut Tiles to Fit Window Edges with Precision
Clean, accurate cuts are essential when fitting tile around a window. Use the right tools for each type of edge.
Make Straight Cuts with a Wet Saw
For square or rectangular windows, measure the space between the window frame and the nearest full tile. Transfer that measurement to the tile, mark it clearly, and cut with a wet saw. Snap cutters often chip porcelain or glass, so a wet saw is the safer choice for clean results.
Cut Curves with the Proper Tools
For round or arched tops, match the tool to the curve size:
- Hole saws work well for small radius curves in ceramic or porcelain.
- Tile nippers allow gradual shaping of mosaic pieces to follow the contour naturally.
- Angle grinders with diamond blades are best for larger curves in stone or thick porcelain.
Test-fit every cut piece before applying adhesive. Gaps should be no wider than your intended grout line, typically 1/8 inch.
Tile Around Stained or Leaded Glass Windows
Preserving historic windows adds character and value, but requires careful framing to avoid damage.
Frame Without Applying Pressure
Never press tiles directly against old glass or leaded frames. Leave a 1/8 inch expansion gap around the entire perimeter, then seal it with mildew-resistant silicone caulk after tiling.
Use border tiles, such as Stone A La Mod insets or black marble strips, to create a defined picture frame effect. This draws the eye inward and protects the historic glass from accidental impact.
Pair stained glass with black trim and crown molding for a vintage European look. Sherwin Williams “Lobelia” 6809 paint enhances the contrast and makes white fixtures pop against the rich window details.
Install Glass Block as a Window Alternative

When privacy is essential but natural light retention matters, glass block offers a structural and stylish solution.
Build a Stable Mortar Bed
Glass blocks, such as those from Pacific Glass Block, are set in pre-mixed mortar or specialized polymer-modified adhesive. Start at the bottom corner and work upward in a running bond pattern.
Use plastic spacers to maintain even joints throughout the installation. Every third course, reinforce with metal wall ties anchored into the studs for structural stability.
Pair glass block windows with Starphire glass shower enclosures for maximum clarity and a seamless wet-room aesthetic.
Handle Clerestory and High-Placed Windows
Windows set high on the wall, known as clerestory windows, bring in abundant light without sacrificing privacy.
Tile Continuously Under the Window
Treat the wall as one continuous surface. Run tiles from floor to ceiling without breaks. This emphasizes verticality and makes the room feel larger and more open.
If the window interrupts a tile row, cut upper and lower tiles to create equal reveals above and below the frame. Symmetry is key to a polished look.
Add recessed wet-rated cans near the window to supplement natural light during evening hours. LED strips under floating vanities reflect off glass tiles and enhance the overall ambiance.
Finish with Proper Grouting and Sealing Techniques
Grouting is where many DIY projects falter, especially in corners and around window frames where cleanup is tricky.
Use the Correct Grout Type
For grout lines under 1/8 inch, use non-sanded grout. It is smoother and less likely to scratch glass tiles or window frames. For wider joints, common with mosaics, use sanded grout for added stability.
Clean Grout Immediately During Application
Grout haze hardens quickly and becomes extremely difficult to remove from textured or porous tiles. Wipe tiles with a damp sponge every 10 to 15 minutes during application and rinse the sponge frequently.
Never let grout dry completely on glass tiles. This can cause a permanent film that dulls the finish.
Seal Grout After Full Curing
Once grout has cured for at least 72 hours, apply a high-quality penetrating sealer. This prevents mildew and staining, especially in areas exposed to direct water spray near windows.
Maintain Your Tiled Window Area for Long-Term Beauty
Consistent care and inspection keep your tiled window area looking new for decades.
Inspect Silicone Joints Annually
Check the caulk where tile meets the window frame each year. Reapply mildew-resistant silicone if cracks or gaps appear. Always use 100 percent silicone rather than standard bathroom caulk for maximum durability.
Clean with pH-Neutral Products
Harsh cleaners erode grout and damage tile finishes over time. Use vinegar-free, pH-neutral solutions for routine cleaning to preserve both grout and glass surfaces.
Prevent Rust on Nearby Metal Fixtures
Polished nickel, Grohe Europlus, or Brizo Litze faucets near windows need regular wiping to prevent water spots and corrosion. Keeping metal fixtures dry extends their lifespan significantly.
Frequently Asked Questions About Tiling Around a Shower Window
What type of tile works best around a curved shower window?
Mosaic sheets, especially glass or porcelain mosaics, are ideal for curved or arched windows. They conform to contours more easily than large-format tiles and create a smoother visual flow around irregular shapes.
How do you waterproof a shower window before tiling?
Apply a liquid waterproofing membrane such as Laticrete Hydro Barrier or Schluter Kerdi to all walls, extending at least 3 inches beyond the window frame. Flash the opening with waterproof tape or a flange system to direct water away from the frame and into the shower pan.
Can you tile directly against a stained glass window?
No. Always leave a 1/8 inch expansion gap between tiles and stained or leaded glass. Pressing tiles against old glass can crack it. Seal the gap with mildew-resistant silicone caulk after tiling to allow for thermal movement.
What is the best way to cut tiles for a round window?
Use a hole saw for small radius curves, tile nippers for gradual mosaic shaping, or an angle grinder with a diamond blade for larger curves in stone or thick porcelain. Always test-fit pieces before applying adhesive.
How long should grout cure before sealing around a shower window?
Allow grout to cure for at least 72 hours before applying a penetrating sealer. Rushing this step can trap moisture and compromise the seal, leading to mildew growth and grout deterioration.
Should I use sanded or non-sanded grout around shower windows?
Use non-sanded grout for joints under 1/8 inch, especially around glass tiles or window frames where sanded grout could scratch surfaces. Use sanded grout for wider joints, such as those common with mosaic installations, where added strength is needed.
Key Takeaways for a Flawless Shower Window Tile Installation
Tiling around a shower window succeeds when you prioritize planning, waterproofing, and precision cutting. Always measure three times before cutting, use spacers to maintain consistent grout lines, and select tiles suited to each zone, such as mosaics for curves and anti-slip porcelain for floors. Waterproof the substrate thoroughly and flash the window frame to prevent moisture intrusion. Leave expansion gaps around glass and seal all perimeters with mildew-resistant silicone. With careful preparation and attention to detail at every edge, your windowed shower will become the brightest highlight of your bathroom for years to come.



