
Wooden window frames add timeless charm to any home, but over time, exposure to moisture and weather can lead to rot, paint failure, and operational issues. If your windows stick, leak air, or show soft, crumbling wood, especially around the sill or bottom corners, you likely need to fix wooden window frames before structural damage spreads. The good news? Most damage can be repaired without full replacement, saving hundreds of pounds and preserving your home’s character.
This guide walks you through diagnosing rot, choosing the right repair method, and completing a long-lasting fix using professional-grade techniques. You’ll learn how to test for hidden moisture, safely remove decayed wood, rebuild with flexible epoxy fillers, and seal everything properly with durable paint.
Diagnose Rot and Structural Damage in Window Frames
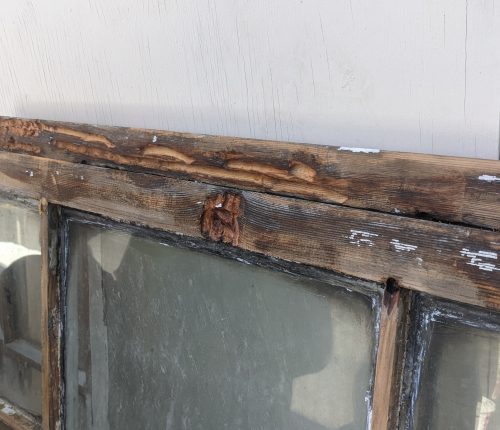
Before picking up tools, confirm whether your frame can be saved or needs replacement. Many window issues stem from moisture trapped in vulnerable zones.
Probe for Soft or Spongy Wood
Use a screwdriver or ice pick to press firmly into common problem areas: the bottom corners, window sill, and lower jamb strips. Healthy timber resists pressure and won’t dent. If the tool sinks in easily or the wood crumbles, that’s active rot. Pay special attention to joints where decorative mouldings meet the frame, as these often trap water.
Check Visual and Functional Warning Signs
Look for flaking paint, dark stains, or wet patches beneath the sill. While peeling paint alone doesn’t mean rot, it shows moisture has breached the surface. Also note functional issues: if the window sticks when opening or closing, it may have swollen from water absorption. Drafts and cold spots near the frame signal air leaks due to gaps caused by shrinkage or deterioration.
Use a Moisture Meter for Accurate Readings
Visual checks aren’t enough. Hidden moisture lingers inside wood even after surface drying. A wood moisture meter gives precise readings:
- 9%–14%: Normal range for exterior wood
- Over 17%: Too wet to paint, risk of trapped moisture
- Over 20%: Dry rot risk begins
- 40%–60%: Ideal for wet rot development
Test multiple spots, especially in shaded or north-facing frames. Readings above 20% mean you must identify and fix the moisture source before any repair.
Decide: Repair or Replace the Frame?
Not all frames can be saved. Consider replacing the entire unit if:
- More than 10% of the frame is damaged
- Multiple sections (sill, jambs, head) feel soft
- A probe penetrates deeply across a wide area
For localized rot, especially just on the sill or bottom rail, epoxy repair or splicing will restore strength and longevity.
Prepare Safely Before Starting Repairs
Proper preparation prevents health risks and ensures lasting results. Skipping safety steps or working in poor conditions leads to failed repairs.
Test for Lead Paint First
Homes built before 1978 likely have lead-based paint. Disturbing it during sanding or scraping releases toxic dust. Always test with an in-home lead test kit before starting. If positive, wear a P3 respirator, gloves, and goggles. Avoid dry sanding; use chemical strippers or wet methods instead, and contain debris with plastic sheeting.
Choose the Right Weather Window
Never repair or paint in autumn or winter. Cold, damp conditions cause wood to swell. Sanding or painting swollen timber creates gaps when it dries and shrinks in summer. Work only in dry, moderate weather when the wood is at stable moisture content (below 17%). This ensures accurate shaping and long-term paint adhesion.
Gather Essential Tools and Materials
Have everything ready before starting:
- Demolition: Die grinder with router bit, chisel, flathead screwdriver
- Surface prep: Electric sander (40, 120, 240 grit), mouse sander, vacuum, white spirit
- Safety: Respirator, gloves, goggles, painter’s tape
- Chemicals: Wood hardener, two-part epoxy filler, bonding agent, exterior primer and paint
- Testing: Wood moisture meter, lead test kit
Using the wrong tools, like builder’s bog instead of epoxy, leads to cracking and recurring rot.
Remove Rotten Wood Completely
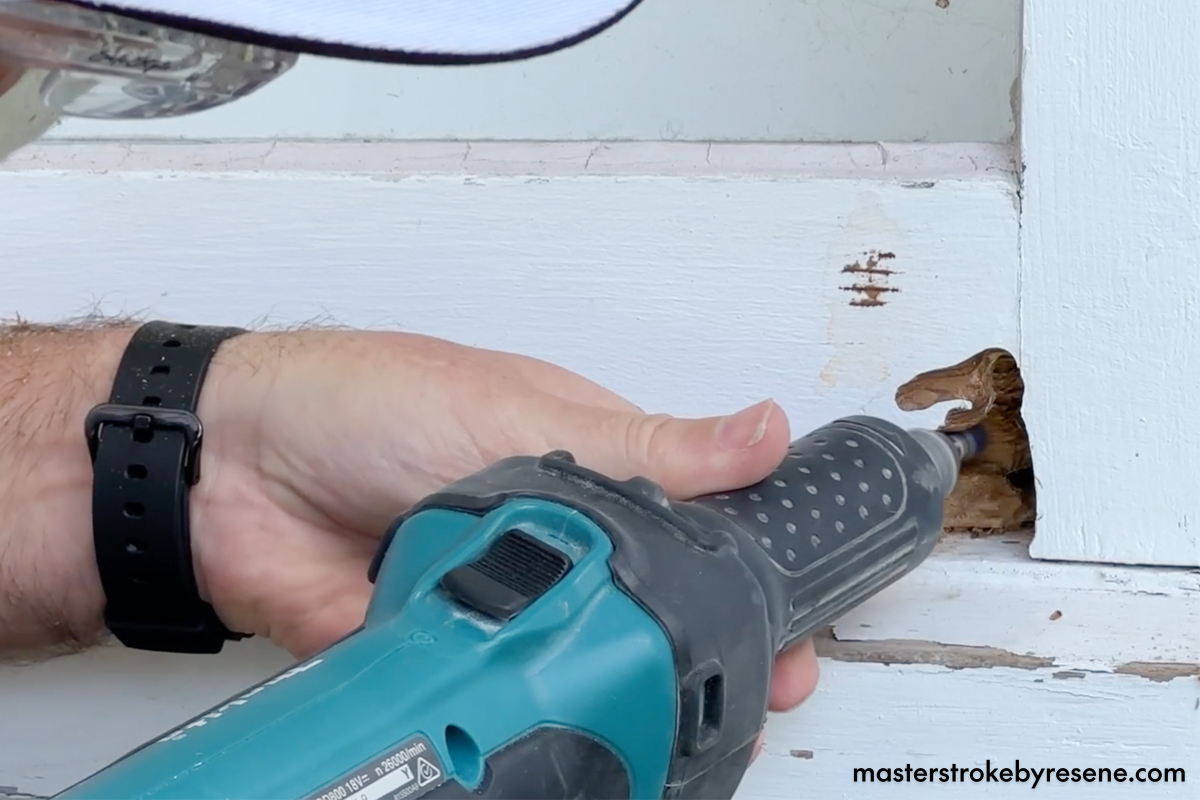
The success of any repair hinges on removing all decayed material. Leaving soft wood behind invites future fungal growth.
Excavate Until You Reach Solid Timber
Use a die grinder with a router bit or a drill attachment to carve out all spongy wood. Work slowly, following the grain. Stop only when the wood feels firm and dry. For deep cavities, drill ¼-inch pilot holes into surrounding healthy wood every 1 inch. These allow consolidant to penetrate and bond internally.
Clean the Cavity Thoroughly
Brush out dust and debris with a stiff wire brush. Wipe the area with a cloth dampened in white spirit to remove grease, oil, or residual paint. Any contaminants reduce epoxy adhesion.
Apply Bonding Agent and Wood Hardener
Before filling, treat the exposed wood with a liquid bonding agent or epoxy wood consolidant. This strengthens weakened fibers, kills residual fungus, and creates a strong base for the filler. Apply with a small brush, let it soak for 5–10 minutes, then add a second coat for maximum reinforcement.
Rebuild With Epoxy Filler for Lasting Results
Epoxy is superior to traditional wood fillers because it bonds chemically, moves with the wood, and resists water and rot.
Create a Mold for Bottom Rail Repairs
If rebuilding a sill or open edge, attach a piece of Perspex or plastic sheet underneath with tape or clamps. This forms a mold so the epoxy doesn’t sag or leak during curing.
Mix and Apply Two-Part Epoxy
Combine the resin and hardener thoroughly, following the manufacturer’s ratio. Knead or stir for at least 2 minutes to ensure full activation. Press the mixture into the cavity with a putty knife, eliminating air pockets. Overfill slightly to account for shrinkage, then scrape flat.
Allow Proper Curing Time
Curing times vary by product:
- Standard epoxy fillers: 24 hours
- Fast-cure products (e.g., Dry Flex 4): 4 hours
Do not rush. The filler should cure to a hard but flexible state, able to withstand expansion and contraction without cracking.
Replace Sections With New Timber for Severe Cases

When rot is too extensive for epoxy, splicing in new wood restores full structural integrity.
Cut Out the Damaged Section
Remove the entire rotted portion using a saw or chisel. Make clean, square cuts into sound wood. For best results, use a scarf joint (angled cut) to maximize glue surface and ensure a tight fit.
Fit and Treat Replacement Wood
Choose rot-resistant timber like Accoya or Tricoya MDF. Avoid sapwood and knots. Treat both the new piece and the existing frame with a fungicidal wood preservative before installation. Ensure the moisture content matches the original frame to prevent movement.
Secure and Seal the Joint
Glue the joint with exterior-grade polyurethane adhesive. Clamp until set, then reinforce with galvanized screws or nails. Shape the repair so water runs off rather than pools. Sand smooth once fully cured.
Strip Paint and Restore Surfaces Properly
Even structurally sound frames need surface restoration to prevent future moisture entry.
Remove Old Paint Safely
Use the right tool for each area:
- Heat gun: Effective on flat surfaces; keep moving to avoid scorching
- Chemical stripper: Best for intricate mouldings
- Paint shaver: Fast for large panels; not for curves
- Sanding: Final smoothing only
Always wear PPE, especially if lead paint is present.
Sand Gently to Preserve Fit
Start with 40-grit on heavy buildup, then move to 120-grit, and finish with 240-grit for a smooth surface. Use a mouse sander for tight corners. Never over-sand; removing too much wood alters the window’s fit, causing gaps and drafts.
Clean Before Painting
Vacuum all dust, then wipe with a cloth dampened in white spirit. This removes fine particles and oils, ensuring paint adheres properly.
Reglaze and Seal the Glass
If the putty is cracked or missing, resealing the glass prevents air and water leaks.
Remove Old Putty and Glazier’s Points
Carefully chip out old putty with a chisel. Use pliers to pull out glazier’s tacks (spaced about 15 cm apart). Clean the rebate (groove) with a scraper and wipe with white spirit.
Reinstall Glass and Apply New Putty
Place the glass back into the frame. Secure with new glazier’s points every 15 cm. Knead glazier’s putty until soft, then press firmly into the gap. Hold the putty knife at a 45° angle to create a clean, sloped finish. Do not paint until fully cured; allow 30 days minimum.
Prime, Paint, and Protect the Frame

The final coat isn’t just cosmetic; it’s your first line of defense against moisture.
Choose the Right Paint
Avoid cheap, rigid paints that crack. Use high-performance, elastic products that move with the wood:
- Rubbol BL Ventura Satin: Water-based, moisture-regulating, acts as primer and paint
- Resene Lustacryl: Durable semi-gloss finish
- Resene Quick Dry: Ideal primer/base coat
Apply Coats Correctly
- Apply a thin, even coat of primer or base paint
- Let dry completely
- Lightly sand with 240-grit paper
- Wipe clean
- Apply at least two top coats for full protection
Use a high-quality brush and apply in smooth up-and-down strokes. Tape glass edges for clean lines.
Maintain Your Repair to Prevent Future Damage
A proper repair lasts decades, but only with regular upkeep.
Repaint Every 7 Years
Even the best paint fails over time. Stick to a 7-year repaint cycle to keep moisture out. Inspect annually for early signs of cracking or peeling.
Clear Drainage Paths
Ensure the drip groove on the sill’s underside is unobstructed. This channels water away from the frame. Reshape flat sills to add a slope if needed.
Fix Moisture Sources
Repair roof leaks, clean gutters, and replace cracked caulking around the frame. Without solving the moisture source, rot will return no matter how well you repair.
Frequently Asked Questions About Fixing Wooden Window Frames
Can rot come back after repairing a wooden window frame?
Yes, if the underlying moisture problem isn’t solved. Roof leaks, poor drainage, or failed paint will cause rot to return regardless of repair quality. Always address the moisture source first.
How long does a wooden window frame repair last?
A properly done epoxy repair with quality paint can last several years to decades. The key factors are using flexible epoxy (not rigid filler), sealing all surfaces, and maintaining a 7-year repaint cycle.
Can I repair a rotted window frame myself?
Yes, for minor to moderate rot using epoxy filler and basic tools. Severe structural damage affecting more than 10% of the frame, or full sill replacement, may require professional joinery skills.
What should I do if my home has lead paint?
Stop work immediately and test with a lead test kit. If positive, wear a P3 respirator, gloves, and goggles. Avoid dry sanding; use chemical strippers or wet methods. For large areas, consider professional abatement.
Why do windows stick after being repaired?
Sticking usually results from over-sanding (making the frame too small) or painting during humid weather when wood is swollen. Always work in dry conditions and sand only to remove damaged material.
When should I replace instead of repair a window frame?
Replace the frame if more than 10% is damaged, multiple sections feel soft, or rot extends deep across a wide area. Localized rot on the sill or bottom rail is ideal for epoxy repair.
Key Takeaways for Fixing Wooden Window Frames Successfully

Fixing wooden window frames doesn’t require full replacement in most cases. Start by diagnosing rot with a probe test and moisture meter; readings above 20% signal serious risk. Use two-part epoxy filler instead of rigid products like builder’s bog, since epoxy moves with the wood and resists cracking. Always work in dry weather when moisture content is below 17%, and protect yourself from lead paint in older homes.
Your next step: inspect your windows today using the probe test described above. Identify any soft spots, test moisture levels, and gather the right materials before starting your repair.