
A loose, broken, or outdated door knob can compromise privacy, security, and the overall look of your home. Replacing it with a new one is a simple DIY project that most homeowners can complete in under an hour with the right tools and guidance. This guide walks you through every step of how to install a door knob correctly, from removing old hardware to testing the final fit.
You’ll learn how to prepare the door, align components precisely, and troubleshoot common issues like misaligned latches or wobbly knobs. With clear, actionable steps and expert-backed tips, this article gives you everything you need to achieve professional-looking results on standard interior or exterior doors.
Remove Old Door Knob
Locate and Loosen Set Screw
Start by removing the existing door knob. Most modern knobs have a set screw on the interior side that holds both halves together. Look for a small hex or flathead screw, often hidden under a decorative cap. Use a flathead screwdriver or Allen wrench to gently pry off the cap, then loosen the set screw counterclockwise. Don’t remove it completely, just enough to release tension.
Pull Knob Halves Apart
Once the set screw is loose, grasp both sides of the knob and pull them apart. The exterior and interior halves should separate easily, exposing the spindle. If the knob resists, wiggle it gently while pulling. Avoid using excessive force, which could damage the door or latch mechanism.
Unscrew and Remove Latch
With the knob removed, focus on the latch mechanism embedded in the edge of the door. Use a Phillips screwdriver to remove the two screws securing the latch plate. Carefully slide the entire latch assembly out of the edge bore hole. Inspect the hole and surrounding wood for damage, paint buildup, or wear.
Take Off Strike Plate
Next, remove the strike plate from the door frame. Unscrew the top and bottom screws holding it in place. If the door has been painted over multiple times, the plate may be stuck. Use a utility knife to slice through paint lines before prying it gently with a flathead screwdriver. Keep all screws and hardware in a labeled bag for reference.
Pro Tip: Take a photo of the old hardware in place. It helps when comparing dimensions or troubleshooting alignment with the new set.
Prepare the Door for New Knob
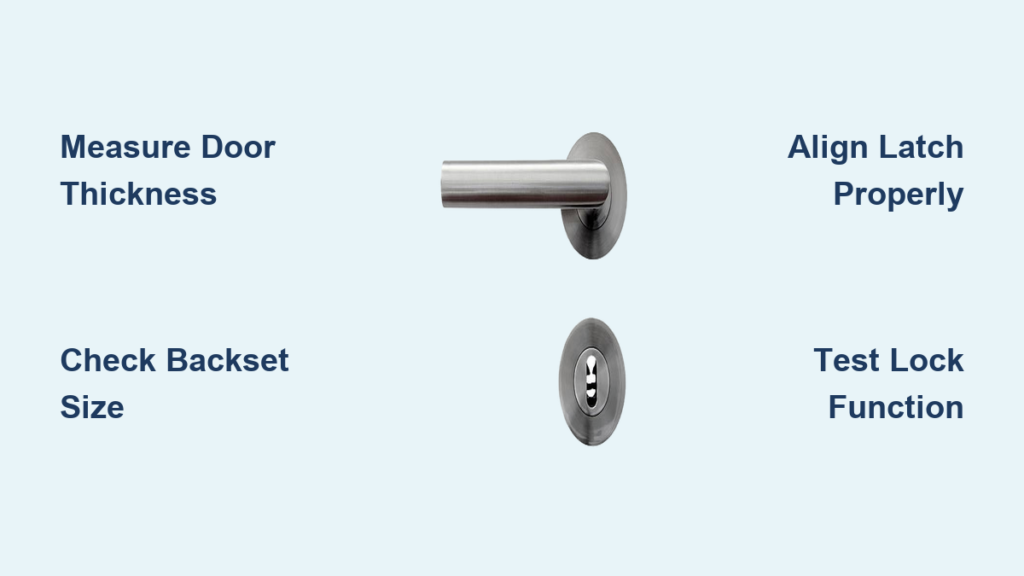
Confirm Door Thickness
Measure your door’s thickness using a tape measure. Standard residential doors are 1 3/8″ to 1 3/4″ thick. If your door is thinner, you’ll need a thin door adapter kit to ensure the new knob fits securely. Installing a standard knob on a thin door leads to misalignment and premature wear.
Check Backset Compatibility
The backset must match your new hardware. Most residential doors use either a 2 3/8″ or 2 3/4″ backset. Measure this distance from the edge of the door to the center of the knob hole before buying a new knob. If the new set doesn’t match, you may need to patch old holes and drill new ones.
Fill and Sand Old Screw Holes
If the new knob’s screw holes don’t align with existing ones, fill the old holes with wood putty or filler. Apply it smoothly, let it dry completely, then sand it flush with the door surface. This creates a solid base for new screws and prevents wobbling.
Mark Knob Height and Drill Holes
Standard knob height is 36 inches from the floor, which is ADA-compliant and comfortable for most users. Use a tape measure and pencil to mark the center point on the door face. If your door lacks a spindle hole, drill a 1-inch diameter hole through the door using a spade bit. For the latch, ensure the 2 1/8-inch bore hole in the edge is clean and properly sized.
Install the New Latch

Insert Latch with Correct Orientation
Take the new latch and insert it into the edge bore hole. The beveled flat side of the latch bolt must face the door jamb. This allows the bolt to retract automatically when the door closes. If installed backward, the door won’t latch properly.
Secure Latch Plate with Screws
Align the latch plate flush with the door edge. Use the two provided screws, never old or mismatched ones, and drive them into the top and bottom holes. Tighten firmly but avoid over-torquing, which can warp the plate or crack the wood.
Tap Latch Into Place if Needed
If the latch doesn’t sit fully recessed, place a wood block against it and tap gently with a hammer. This protects the metal finish while ensuring the latch is seated securely. A flush fit prevents stress on the knob and spindle during operation.
Attach Interior and Exterior Knobs
Insert Spindle Through Door
One half of the new knob, usually the exterior side, has a square spindle extending from the back. Insert this through the spindle hole so it engages with the latch mechanism inside the door edge. Push it all the way through until it protrudes on the other side.
Align and Join Knob Halves
Place the interior knob half over the exposed spindle. Align the screw holes on both sides. Press the halves together firmly through the door. If they don’t meet flush, adjust the position until both sides sit evenly against the door surface.
Fasten with Provided Screws
Use the two screws included with the knob set to secure the halves. Start both screws by hand to avoid cross-threading, then tighten them alternately, top then bottom, to ensure even pressure. Do not fully tighten yet. Leave them slightly loose until you test the knob’s operation.
Warning: Using longer or thicker screws can damage the internal mechanism or strip the holes. Always use manufacturer-supplied hardware.
Install and Align Strike Plate
Position Strike Plate on Frame
Close the door gently and observe where the latch bolt strikes the frame. Mark the center of contact with a pencil. Hold the new strike plate in place so the latch fits smoothly into its opening. Ensure the plate sits flush with the jamb surface.
Mark and Drill Pilot Holes
Mark the screw locations on the frame. For hardwood doors or jambs, drill pilot holes with a small bit to prevent splitting. This also makes installation easier and ensures screws go in straight.
Secure Strike Plate
Drive the screws into the pilot holes to attach the strike plate. Don’t overtighten, as this can warp the plate and misalign the latch.
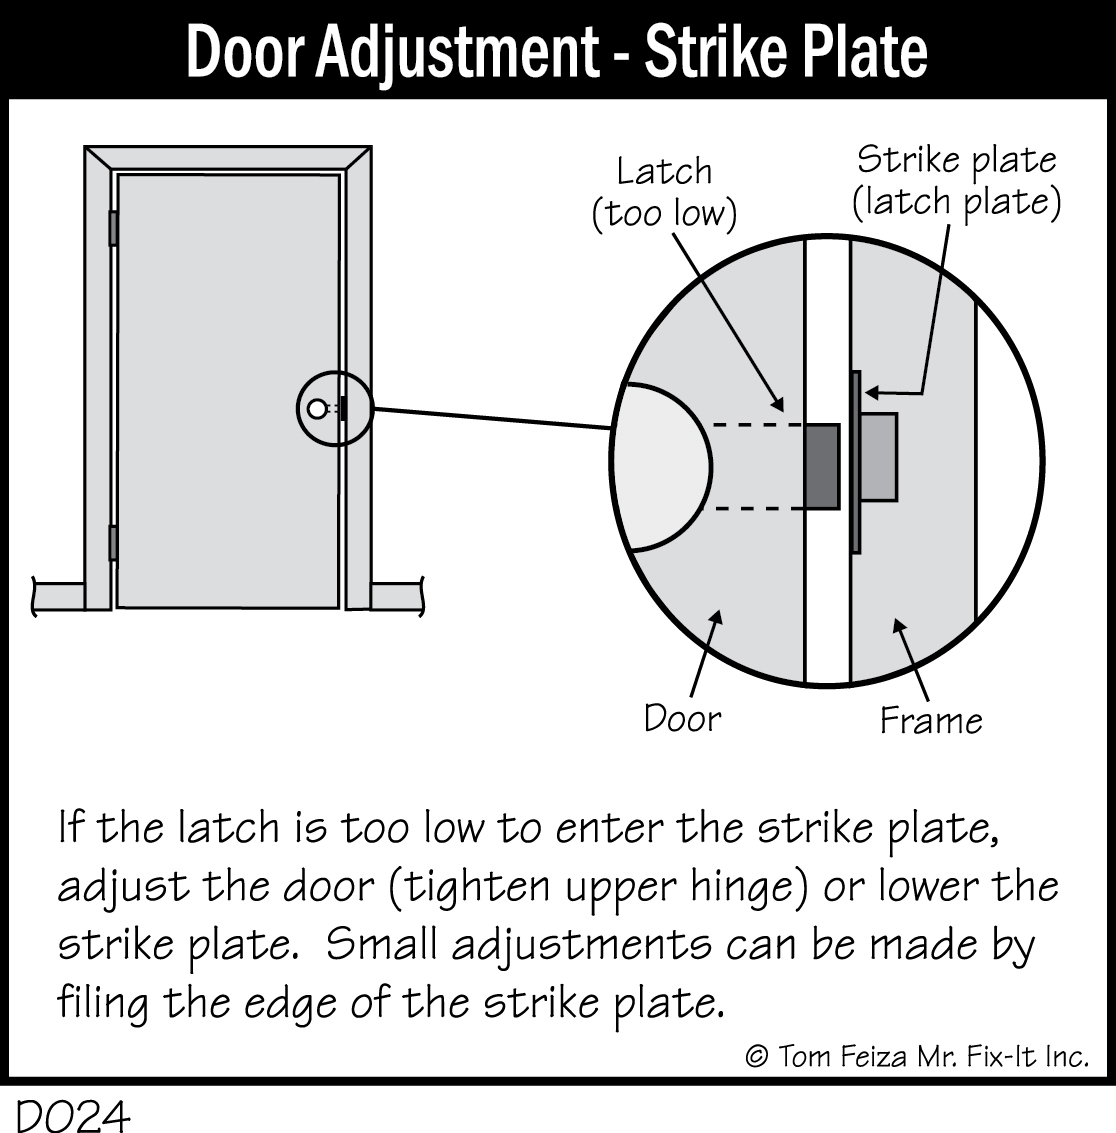
Test Latch Engagement
Open and close the door several times. The latch should slide into the strike plate without binding. If it hits the top or bottom, adjust the strike plate position by chiseling the mortise slightly higher, lower, or deeper. For precision, use the lipstick trick. Coat the latch bolt with lipstick, close the door, and check where it marks the strike plate. This shows exactly where to adjust.
Test and Fine-Tune Operation
Operate Knob and Lock Multiple Times
Turn the knob back and forth to ensure smooth motion. If it sticks or feels stiff, check for spindle binding or misaligned halves. Loosen the screws slightly, realign, and retighten.
Verify Lock Function
For privacy or entry locks, test the locking mechanism. A bedroom knob should lock and unlock with a push button or turn piece. A keyed entry knob should operate smoothly from both sides. If the lock jams, disassemble slightly and inspect for obstructions.
Tighten Screws and Check for Wobble
Once operation is smooth, fully tighten the knob screws. Grasp the knob and gently wiggle it. If it moves, the screws may be loose or the holes stripped. If stripped, fill with wood putty, let dry, redrill pilot holes at a slight angle, and reinstall.
Lubricate if Latch Sticks
If the latch doesn’t retract easily, apply dry graphite powder into the mechanism. Avoid oil-based lubricants, as they attract dust and gum up over time. A light spray of silicone lubricant is also acceptable for hinges and moving parts.
Fix Common Installation Problems
Latch Won’t Catch in Strike Plate
This usually means misalignment. First, check if the strike plate is too high, low, or shallow. Use a chisel to deepen or shift the mortise. If the door sags, tighten hinge screws or add a shim behind the hinge. For minor gaps, bend the strike plate tab slightly with pliers.
Knob Feels Loose or Wobbly
Loose knobs are often caused by stripped screw holes. Fill them with wood putty or toothpicks dipped in wood glue, let dry, then redrill. Alternatively, use longer screws that reach into the door’s internal structure, but only if the manufacturer allows it.
Knob Doesn’t Turn Smoothly
Check that both halves are aligned and the spindle engages the latch correctly. If the latch is over-tightened, it can bind. Loosen the latch screws slightly and retest. Also, verify that the door isn’t binding against the jamb, which increases resistance.
Screw Holes Don’t Line Up
If the new knob’s screw pattern doesn’t match, you’ll need to patch and redrill. Fill old holes with wood filler, sand smooth, and use the manufacturer’s template to mark new locations. Always measure twice before drilling.
Handle Special Installation Cases
Install on Thin Doors
Standard knobs won’t fit securely on thin doors like closet or cabinet doors. Use a thin door adapter kit, which includes extended screws and spacers to bridge the gap. Some brands offer low-profile knobs specifically designed for thinner doors.
Add a Deadbolt for Security
For exterior doors, install a deadbolt above the doorknob, typically 6 to 12 inches higher. Use the manufacturer’s template to drill a 2 1/8″ hole through the door and a smaller hole in the jamb. Ensure both locks operate independently and don’t interfere with each other.
Work With Mortise Locks
Mortise locks require a pocket cut into the door edge and are common in older or commercial buildings. Installation is more complex and may require a professional. If replacing, match the existing pocket size and backset, or hire a locksmith for retrofitting.
Maintain Your Door Knob Long-Term
Monthly: Tighten Loose Screws
Vibration and daily use loosen screws over time. Every month, check both the knob and strike plate screws and tighten as needed. This simple step prevents wobble and extends hardware life.
Annually: Clean and Lubricate
Once a year, remove the knob and clean the spindle and latch with a dry cloth. Wipe away dirt and grime. Apply graphite lubricant to the latch mechanism and lock cylinder. Reassemble and test.
Replace Worn Parts Promptly
If the knob feels gritty, the lock sticks, or screws won’t hold, replace worn components. Most major brands offer lifetime warranties on mechanical parts and finish defects.
Repaint or Refinish as Needed
If paint chips or the finish dulls, lightly sand the area and apply matching paint or clear coat. For metal knobs, use a polish appropriate for the finish.
Frequently Asked Questions About Installing a Door Knob
What tools do I need to install a door knob?
You will need a screwdriver, drill with bits, chisel, hammer, tape measure, pencil, and level. Most door knob kits include the necessary hardware, but having these tools on hand ensures a smooth installation process.
How long does it take to install a door knob?
For an experienced DIYer, the job takes 30 minutes to one hour. Beginners should budget 1.5 to 2 hours, including time for adjustments and troubleshooting.
Can I install a door knob on a thin door?
Yes, but standard knobs won’t fit. You need a thin door adapter kit or a knob specifically designed for doors thinner than 1 3/8 inches.
Why won’t my door latch catch the strike plate?
This is usually a misalignment issue. The strike plate may be too high, low, or shallow. Use a chisel to adjust the mortise, or add a shim behind the door hinges if the door has sagged.
How do I know if my door knob is installed correctly?
The knob should turn smoothly without resistance, the latch should engage the strike plate firmly, and the lock should function properly. Test opening and closing the door multiple times to verify everything works smoothly.
Key Takeaways for Installing Your Door Knob
Installing a door knob is a straightforward DIY task that boosts security, function, and style in your home. By following these steps systematically, removing old hardware, preparing the door, aligning the latch and strike plate, and testing thoroughly, you’ll achieve a secure and smooth-operating installation.
The most critical factors for success are measuring door thickness and backset before purchasing your new knob, using manufacturer-provided screws to avoid damaging the mechanism, and testing operation before fully tightening everything. Taking time to get the alignment right prevents common problems like loose knobs or latches that won’t catch.
With proper maintenance, including monthly screw checks and annual lubrication, your new door knob can last a decade or more. Whether you’re upgrading a bedroom privacy knob or installing a secure entry set on your front door, attention to detail makes all the difference in achieving professional-quality results.


