
Is your door rubbing against the frame, scraping the floor, or refusing to latch properly? You are likely dealing with an uneven gap, a common issue where the space between the door and its frame varies around the edges. This misalignment, technically known as an uneven reveal, not only affects functionality but can also damage hinges, weatherstripping, and flooring over time. The good news: in most cases, you can fix uneven gaps yourself by adjusting the door hinges. With the right tools and a methodical approach, you will restore smooth operation and even gaps in under an hour.
This guide walks you through diagnosing the root cause of an uneven gap and applying proven hinge adjustment methods based on real-world practices from residential and commercial installations. Whether it is a sagging front door or a stubborn interior bedroom door, you will learn exactly how to fix it step by step.
Diagnose the Misalignment First
Before making any adjustments, identify what is causing the uneven gap. Jumping straight to repairs without diagnosis can make the problem worse and waste your time on the wrong fixes.
Check for Loose Hinge Screws
Loose screws are the most common culprit behind uneven gaps. Use a screwdriver to test each hinge screw on both the door and frame side. If they spin freely or wobble, the pilot holes may be stripped, especially in soft wood jambs. Even slightly loose screws allow the door to sag over time, creating wider gaps at the top hinge side and tighter ones at the bottom strike side.
Measure the Door Reveal
An ideal gap is 1/8″ to 1/4″ on all sides. Use a tape measure or feeler gauge to record distances at the top left and right, mid-hinge and mid-strike sides, and bottom corners. A difference of more than 1/16″ between any two points indicates misalignment that needs correction.
Test for Plumb, Level, and Square
Place a 24″ or 48″ level vertically on the hinge jamb to check plumb. If the bubble is not centered, the frame is tilted. Then check the head jamb horizontally for level. Finally, measure diagonals from corner to corner. If they differ by more than 1/8″, the frame is out of square, which may require professional correction.
Tighten or Upgrade Hinge Screws
:max_bytes(150000):strip_icc()/288-screw-fundamentals-6-2000-9be4ee8349e746d9a27afa12c1887283.jpg)
Start with the simplest fix: securing loose hinges. Often, this alone resolves minor sagging and uneven gaps without any additional work.
Replace Short Screws with Longer Ones
Standard 3/4″ to 1″ hinge screws often only anchor into the door jamb, not the wall stud behind. Replace the top and bottom hinge screws with 1½” to 4″ structural wood screws. These reach into the stud, pulling the jamb tight and lifting the door slightly to eliminate sagging.
Repair Stripped Screw Holes
If screws will not tighten, reinforce the holes using one of these methods. The wood glue and matchsticks technique involves inserting PVA glue into the hole, packing with wooden matchsticks or toothpicks, snapping them flush, letting it dry for 2 hours, then redrilling a pilot hole and reinstalling the screw. Rawl plugs work well in drywall or soft wood for improved grip. Apply thread lock adhesive to screw threads before reinserting if vibration causes loosening.
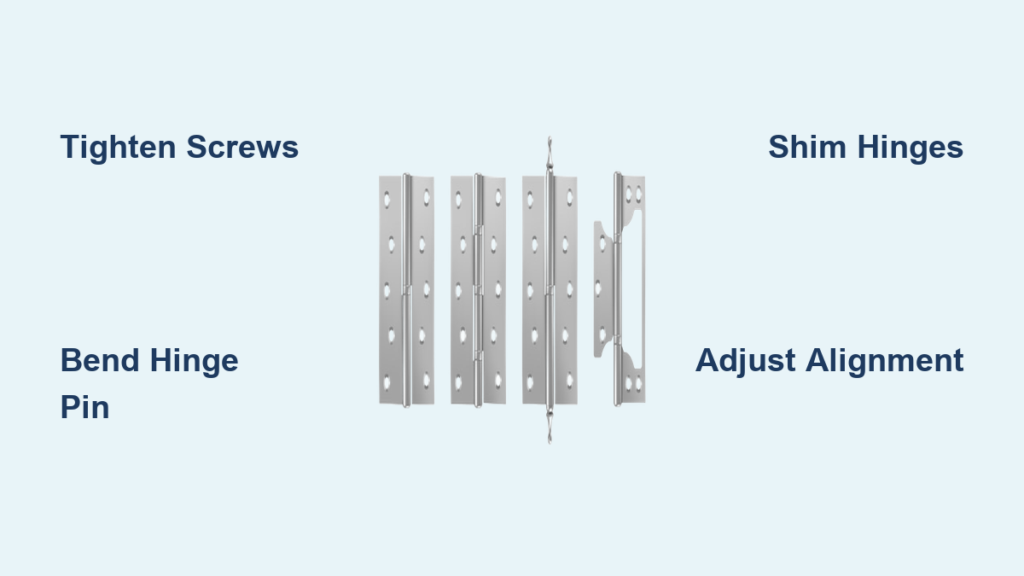
Bend Hinges for Minor Alignment Shifts
When screw tightening is not enough, bending the hinge can fine-tune the door position. This technique alters the hinge geometry to lift, lower, or shift the door slightly without removing anything.
Remove the Hinge Pin
Partially close the door to reduce stress on the hinge. Place a flathead screwdriver under the pin base and tap upward with a hammer. Use pliers if the pin resists. Work on one hinge at a time to avoid losing track of parts.
Bend the Knuckles with a Screwdriver
Insert the screwdriver between the hinge knuckles, which are the interlocking barrels. The direction and location of the bend determine the correction you achieve.
For a sagging door, bend outward on the door-side knuckles of the top hinge to lift the door. This shifts the entire door up and away from the strike-side bottom corner. For a door rubbing the frame, bend inward on the frame-side knuckles to pull the door away from the jamb. For a door that will not latch, bend outward on the door side of the top hinge to bring the latch closer to the strike plate. For floor scraping, bend outward on the door-side knuckles of the bottom hinge to lift the door edge.
Shim Hinges to Reposition the Door

Shimming inserts thin material between the hinge leaf and the door or frame, effectively moving the door in any direction. It is one of the most precise and reliable methods for correcting uneven gaps in older installations.
Support the Door First
Open the door fully and place a wooden block or wedge under the bottom edge to relieve pressure on the hinges before removing any screws.
Insert Shims Behind Hinge Leaves
Use plastic, cardboard, or metal shims that are 0.015″ to 0.030″ thick. Cut them to fit the hinge shape and cover the screw holes for a clean installation. Strategic placement determines the correction. For a tight top lock side, shim the bottom and middle hinges between the leaf and door to lift the top of the door. For a tight bottom lock side, shim the top and middle hinges to lower the bottom of the door. For a door shifted toward the hinge side, shim all hinges to move the door toward the lock side.
Deepen or Reposition Hinge Mortises
When the door sits too far from the jamb, modifying the mortise, which is the recess where the hinge sits, can pull it closer without additional hardware.
Deepen the Mortise Slightly
Support the door, remove the hinge from both door and frame, and use a sharp chisel or utility knife to deepen the mortise in the door edge or jamb by 1 to 2 mm. Reinstall the hinge carefully to avoid overtightening, which can crack the wood.
Throw the Hinge (Reposition in Frame)
For doors that bind due to twist or frame distortion, remove the top hinge from the frame only while leaving it attached to the door. Fill old screw holes with glue and matchsticks, then reposition the hinge 1 to 2 mm away from the door stop. Re-screw into solid wood to shift the top of the door slightly forward, improving alignment with the strike jamb.
Use Adjustable Concealed Hinges (If Applicable)
Modern pre-hung doors and cabinets often use adjustable concealed hinges, which allow micro-corrections without shimming or chiseling. These are increasingly common in newer construction.
Make Vertical Adjustments
Loosen the mounting screws slightly, shift the hinge up or down, then retighten. This corrects uneven height at the top or bottom of the door.
Adjust Horizontal Position
Use the center grub screw to make horizontal corrections. Turn it inward to move the door away from the hinge side, or turn it outward to move the door closer to the hinge side.
Control Depth (In/Out)
Adjust the depth screw to change how far the door sits from the frame. This is ideal for fine-tuning the reveal around all edges.
Fix Common Door Problems Fast
Door Rubs at Top and Bottom Corners (Strike Side)
The cause is sagging due to loose top hinge. Install a 2″ screw in the top hinge jamb to lift the door, then shim the lower hinge between the jamb and hinge leaf. Confirm the door pocket is no more than ¼” wider than the slab.
Door Swings Open or Closed on Its Own
The cause is the frame being out of plumb. For a temporary fix, bend the hinge pin slightly to increase friction. For a permanent solution, reposition the bottom hinge inward on the frame side to stop self-closing.
Bi-Fold Doors with Uneven Gaps
The cause is misaligned pivot brackets. Adjust floor pivots using the multiple slots available. Move the pivot forward or backward to shift the top or bottom of the door, and ensure both doors meet evenly in the center.
Strike Plate Misaligned After Adjustment
If the door lines up but will not latch, close the door and mark where the latch hits the plate. Chisel the mortise deeper up or down if misaligned vertically, or move the plate outward if too tight. Fill old screw holes with glue and matchsticks before re-screwing.
Maintain Even Gaps Long-Term
Prevent future misalignment with regular maintenance and smart installation practices.
Inspect and Lubricate Hinges
Check all hinge screws every 6 to 12 months, especially on exterior or high-traffic doors. Lubricate hinge pins annually with silicone spray or white lithium grease to prevent creaking and wear.
Use Structural Screws on Heavy Doors
Install 1½” to 4″ screws in the top and bottom hinges of entry and solid-core doors to anchor into wall studs for lasting stability. This prevents the most common cause of door sag.
Control Humidity for Wood Doors
Wood expands with moisture, causing seasonal binding. Use dehumidifiers or humidifiers to maintain stable indoor conditions and allow 3/8″ minimum clearance at the bottom for expansion.
Avoid Mixing Hinge Types
Using heavy-duty and standard hinges together causes uneven load distribution and premature wear. Always match hinge size and weight rating across all positions.
Frequently Asked Questions About Adjusting Door Hinges
How do I know if my door gap is uneven?
Measure the gap around all four sides of a closed door using a tape measure or feeler gauge. The gap should be 1/8″ to 1/4″ consistently. If any measurement differs by more than 1/16″, you have an uneven gap that needs correction.
Can I fix a sagging door without removing it?
Yes. Start by replacing the top hinge screw with a longer 2″ screw that reaches the wall stud. This often lifts a sagging door enough to eliminate rubbing at the bottom corner without removing the door from its hinges.
What causes doors to develop uneven gaps over time?
The most common causes are loose or stripped hinge screws, structural settling of the building, humidity changes causing wood to expand or contract, and normal wear on hinges. Regular maintenance prevents most of these issues.
Should I bend hinges or use shims to fix alignment?
Bending hinges works well for minor adjustments on steel or brass hinges. Shimming provides more precise control and works for all types of misalignment. Start with the simplest method (tightening screws), then progress to bending or shimming as needed.
When should I call a professional instead of adjusting hinges myself?
Call a professional if the frame is severely warped, the door or frame is damaged, the frame is out of square or not plumb, multiple adjustments have failed to resolve the issue, or the door is fire-rated or security-rated.
Key Takeaways for Fixing Uneven Door Gaps
A properly adjusted door should have a consistent 1/8″ to 1/4″ gap on all sides, close smoothly without binding, latch securely without forcing, and stay open at 90 degrees when positioned there. Start with the simplest fixes first: tighten all hinge screws, then upgrade to longer structural screws that reach the wall studs. Use hinge bending for minor corrections on steel or brass hinges, and use shimming for precise adjustments. Test the door 10 or more times after making adjustments to ensure consistent operation. If problems persist, especially with warped frames, structural settling, or fire-rated doors, consult a professional carpenter. With these proven hinge adjustment techniques, you will keep doors functioning flawlessly for years.


